Table of Contents
Advertisement
Quick Links
HN FR Service Manual
Pro Gear's Hendrickson HN FR Service Manual to assist in identifying your Hendrickson unit.
If you need any assistance identifying the correct transfer case unit for your truck and
equipment, contact your Hendrickson replacement part specialists at Pro Gear and
Transmission.
Pro Gear Transmission has same day shipping and 1000's of products in stock and ready to
ship internationally for your next project.
For parts or service contact the Hendrickson specialists at Pro Gear & Transmission, Inc.
1 (877) 776-4600
(407) 872-1901
parts@eprogear.com
Pro Gear and Transmission • 906 W. Gore St. Orlando, FL 32805 • 1 (877) 776-4600 / (407) 872-1901 • parts@eprogear.com
Advertisement
Table of Contents

Summary of Contents for ProGear Hendrickson HN FR Series
- Page 1 HN FR Service Manual Pro Gear's Hendrickson HN FR Service Manual to assist in identifying your Hendrickson unit. If you need any assistance identifying the correct transfer case unit for your truck and equipment, contact your Hendrickson replacement part specialists at Pro Gear and Transmission.
-
Page 2: Table Of Contents
® FR Series Rear Suspension SUBJECT: Service Instructions LIT NO: 17730-285 DATE: December 2012 REVISION: A TABLE OF CONTENTS Section 1 Introduction Section 7 Alignment & Adjustments ......2 . -
Page 3: Introduction
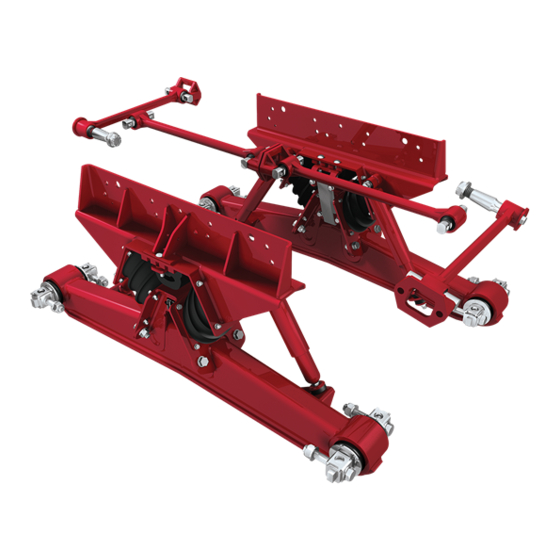
® FR Series SECTION 1 Introduction This publication is intended to acquaint and assist maintenance personnel in the preventive maintenance, service, repair and rebuild of the HN ® FR Series suspension system for Fire/ Rescue vehicles. NOTE Use only Hendrickson parts for servicing this suspension system. It is important to read and understand the entire Technical Procedure publication prior to performing any maintenance, service, repair, or rebuild of this product. - Page 4 ® FR Series Subsequently, the HN FR Series suspension reduces scheduled maintenance, which helps lower operating costs. VariRate Spring System — Delivers a combination of superior stability, articulation and ■ ® ride. System can be tailored to meet the specific needs of unique vehicle applications Rubber bolster springs —...
-
Page 5: Important Safety Notice
® FR Series SECTION 3 Important Safety Notice Proper maintenance, service and repair is important to the reliable operation of the suspension. The procedures recommended by Hendrickson and described in this technical publication are methods of performing such maintenance, service and repair. The warnings and cautions should be read carefully to help prevent personal injury and to assure that proper methods are used. - Page 6 ® FR Series ■ SAFETY PRECAUTIONS FASTENERS DISCARD USED FASTENERS. ALWAYS USE NEW FASTENERS TO COMPLETE A REPAIR. FAILURE TO DO SO COULD RESULT IN FAILURE OF THE PART, OR MATING COMPONENTS, LOSS OF VEHICLE CONTROL, PERSONAL INJURY, OR PROPERTY DAMAGE. LOOSE OR OVER TORQUED FASTENERS CAN CAUSE COMPONENT DAMAGE, LOSS OF VEHICLE CONTROL, PROPERTY DAMAGE, OR SEVERE PERSONAL INJURY.
- Page 7 ® FR Series TRANSVERSE TORQUE RODS HN FR SUSPENSIONS INCORPORATE TRANSVERSE RODS FOR VEHICLE STABILITY. IF THESE COMPONENTS ARE DISCONNECTED OR ARE NON-FUNCTIONAL, THE VEHICLE SHOULD NOT BE OPERATED. FAILURE TO DO SO CAN RESULT IN ADVERSE VEHICLE HANDLING, LOSS OF VEHICLE CONTROL, POSSIBLE TIRE CONTACT WITH THE FRAME, PREMATURE COMPONENT DAMAGE, OR SEVERE PERSONAL INJURY.
-
Page 8: Special Tools
® FR Series SECTION 4 Special Tools BAR PIN ADAPTER SET INSTALLATION TOOL OTC Tool No. 1757 Servicing bar pin end bushings used on HN FR equalizing beam suspensions requires the use of special tooling. OTC’s No. 1757 adapter set is used with the beam removed from the truck, and in conjunction with OTC No. -
Page 9: Parts Lists
SECTION 5 Parts Lists ■ HN FR Series Torque Rod Assembly ® ® ™ ULTRA ROD ULTRA ROD PLUS 34b,37c 33a,37a 33b,37b 33a,37a 33b,37b 34b,37c Location of Auxiliary Spring Part Number 25 24 25 24 13,14 Parts Lists 17730-285 Pro Gear and Transmission • 906 W. Gore St. Orlando, FL 32805 • 1 (877) 776-4600 / (407) 872-1901 • parts@eprogear.com... - Page 10 ® FR Series KEY NO. PART NO. DESCRIPTION NO.REQ. KEY NO. PART NO. DESCRIPTION NO.REQ. HN FR Saddle Assembly, See Figure 1 below Bar Pin End Bushing Service Kit, One Wheel End, Includes Key Nos. 2-18 Includes Key Nos. 28-32 60686-0XX 16½", 17½", 18½"...
- Page 11 ® FR Series ■ SELECTION GUIDE ONE PIECE TORQUE ROD ASSEMBLY Longitudinal Torque Rod Transverse Torque Rod Key No. 37a Key No. 37b Key No. 37c ULTRA ROD ULTRA ROD PLUS ULTRA ROD PLUS Straddle/Straddle Assembly Straddle/Straddle Assembly Straddle/Taper Assembly Length Part No.
-
Page 12: Preventive Maintenance
® FR Series SECTION 6 Preventive Maintenance Hendrickson recommends that preventive maintenance be performed on a regular basis to help ensure all components function to their highest efficiency. Proper preventive maintenance programs can also help control repair costs and eliminate downtime. All new equipment should undergo an initial pre-service inspection, and be inspected at the following intervals. -
Page 13: Component Inspection
® FR Series SAFETY REMINDER All applicable warnings and cautions should be read carefully to help prevent personal injury and to assure that proper methods are used. Improper maintenance, service or repair may damage the vehicle, cause personal injury, render the vehicle unsafe in operation, or void manufacturer’s warranty. -
Page 14: Equalizing Beam End Connection
® FR Series EQUALIZING BEAM END CONNECTION FIGURE 6-1 Axle Bracket The equalizing beam end connection Supplied by vehicle for the HN FR is bar pin style with a manufacturer rubber bushing and alignment shims 1" Bolt as shown in Figure 6-1. An inspection Tightening Torque of the equalizing beam end connec- 500-650 ft. -
Page 15: Axle Brackets
® FR Series 3. If bar pin movement or looseness is detected in the equalizing beam end hub, DO NOT operate vehicle. Replace the equalizing beam end bushings and all connecting parts. Refer to the Component Replacement Section of this publication. 4. -
Page 16: Bar Pin End Bushing
® FR Series BAR PIN END BUSHING FIGURE 6-5 Rubber An indication that the bar pin end bushing requires Bar Pin Mount replacement is when one or more of the following conditions apply: Visual inspection of contact area (the flat face ■... -
Page 17: Auxiliary Spring Assembly
® FR Series ■ Minor oil and grease contamination in the rubber due to vehicle operation is accept- able. A slight change in shape of the rubber due to permanent set should not be mistaken for oil and grease contamination. Certain softening of the rubber surface is acceptable. -
Page 18: Rebound Strap
® FR Series REBOUND STRAP Periodic inspection of the rebound strap, see Figure 6-8, is required every six (6) months. If the rebound strap is torn, frayed, or not intact replace as outlined in the Components Replacement Section of this publication. LONGITUDINAL AND TRANSVERSE TORQUE RODS HN FR SUSPENSIONS INCORPORATE TRANSVERSE RODS FOR VEHICLE STABILITY. -
Page 19: Alignment & Adjustments
® FR Series SECTION 7 Alignment & Adjustments DRIVE AXLE ALIGNMENT INSPECTION PROCEDURE Proper alignment is essential for maximum ride quality, performance, and tire service life. The following recommended alignment procedure as described below, should be performed if excessive or irregular tire wear is observed. NOTE Proper vehicle alignment can only be achieved when all axles are aligned to the vehicle’s centerline and the steering axle’s caster, camber and toe-in settings are within specifications. -
Page 20: Bar Pin Alignment
® FR Series 11. Using a trammel bar, measure the distance from the spindle center of the front drive axle to the spindle center of the rear drive axle on both sides of the vehicle; see Figure 7-1, C and D. 12. - Page 21 ® FR Series FIGURE 7-3 Nominal Axle Moves Axle Moves Axle Axle Axle Bracket Bracket Bracket Equalizing Equalizing Equalizing Beam Beam Beam Center Center Center 3 16 3 16 3 16 " (4.8 mm) " (4.8 mm) " (4.8 mm) Alignment Shim Alignment Shim Alignment Shim...
-
Page 22: Bar Pin Alignment Shims
® FR Series BAR PIN ALIGNMENT SHIMS The following service notes will help when performing Hendrickson equalizing beam bar pin alignment ■ The standard alignment shims supplied with each sus- ■ Shim thickness of ⁄ " increases 0.10° of thrust angle. pension (P/N 50130-000) have two ⁄... -
Page 23: Auxiliary Spring Shim Evaluation
® FR Series AUXILIARY SPRING SHIM EVALUATION The HN FR suspension uses a dual spring design to achieve a good empty ride while maintain- ing a stable ride when loaded. When empty, the vehicle rides on the bolster springs and there is an air gap between the auxiliary springs and the Vee bracket. -
Page 24: Component Replacement
® FR Series SECTION 8 Component Replacement FASTENERS When servicing a vehicle Hendrickson recommends replacing all removed fasteners with new equivalent fasteners. Maintain correct torque values at all times. Check torque values as specified. See Hendrickson’s Torque Specifications Section of this publication. If non-Hendrickson fasteners are used follow torque specifications listed in the vehicle manufacturer’s service manual. - Page 25 ® FR Series FIGURE 8-2 Saddle Assembly 7 16 / " Upper Bolster Spring Locknut Tightening Torque 33-45 ft. lbs. Bolster Spring Bolster Spring Stud Vee Bracket Equalizing Beam ¾" Vee Bracket Locknut Tightening Torque 220-300 ft. lbs. / " Lower Bolster Spring Locknut 7 16 Tightening Torque 33-45 ft.
-
Page 26: Auxiliary Spring
® FR Series 6. Tighten all sixteen (16) bolster spring fasteners to 33-45 foot pounds torque, see Figure 8-2. 7. Install the auxiliary spring components to the saddle, see Figure 8-1. a. Install the inboard fasteners through the saddle. Install the auxiliary spring shim(s), auxiliary spring mounting plate, and auxiliary spring mounting plate shim onto the inboard fasteners. -
Page 27: Rebound Strap
® FR Series FIGURE 8-4 REBOUND STRAP DISASSEMBLY SERVICE HINT Vehicle may need to be in the loaded condition for the rebound strap to be slack enough for removal. FIGURE 8-5 1. Chock the front wheels. 2. From the inboard side of the saddle remove the ½" locknuts and ½"... -
Page 28: Bolster Springs
® FR Series BOLSTER SPRINGS NOTE Replacement of bolster springs is possible from under the vehicle without the removal of the tires, rims or wheels. Hendrickson recommends that both bolster springs on one side of vehicle be replaced even if only one shows wear. FIGURE 8-6 DISASSEMBLY 1. -
Page 29: Vee Bracket
® FR Series VEE BRACKET DISASSEMBLY 1. Chock the wheels. SERVICE HINT Access to the lower anchor plate assembly fasteners can be gained from the outboard side of the equalizing beam. 2. Remove the lower anchor plate assembly from the inboard side of the equalizing beam. Access to the fasteners can be gained from the outboard side of the equalizing beam. -
Page 30: Shock Absorbers
® FR Series FIGURE 8-8 7 16 / " Bolster Spring Saddle Upper Locknuts Auxiliary Spring Tightening Torque Assembly 33-45 ft. lbs. ¾" Vee Bracket Locknuts Bolster Spring Tighening Torque 220-300 ft. lbs. / " Bolster Spring Lower Locknuts Tighening Torque 33-45 ft. -
Page 31: Equalizing Beam
® FR Series FIGURE 8-10 FIGURE 8-11 EQUALIZING BEAM DISASSEMBLY IF THE VEE BRACKET LOCATED BETWEEN THE EQUALIZING BEAM AND THE BOLSTER SPRINGS IS DAMAGED, IT MUST BE REPLACED. FAILURE TO DO SO CAN CAUSE DAMAGE TO MATING COMPONENTS. IF REPLACEMENT IS NEEDED, REFER TO VEE BRACKET REPLACEMENT IN THIS SECTION. 1. - Page 32 ® FR Series FIGURE 8-13 Axle Bracket Supplied by vehicle NOTE Prior to disassembly of the equalizing manufacturer beam bar pin fasteners, note the orientation of the bar pin alignment 1" Bolt shims, see Figure 8-13. It is required Tightening Torque that the bar pin alignment shims are 500-650 ft.
- Page 33 ® FR Series FIGURE 8-14 A BA R P I N S H I M M U S T B E I N S TA L L E D AT E AC H B O LT LOCATION. THE SAME PART NUMBER SHIM IN THE SAME Lower Pinion ORIENTATION MUST BE USED...
- Page 34 ® FR Series FIGURE 8-16 13. Mount the equalizing beam into the REAR Front Axle Bracket drive axle brackets. DO NOT install the bar pin Bar Pin alignment shims at this time. Raise or lower the rear of 14. Slide a ¾" bolt through the equalizing beam until all rear axle bracket the front bar pin and axle...
-
Page 35: Bar Pin End Bushings
® FR Series FIGURE 8-17 Bolster Spring with Vee Bracket Assembly Equalizing Beam Aligning Pins ¾" Hex Head Bolt ¾" Vee Bracket Locknut Equalizing Beam Tightening Torque 220-300 ft. lbs. 28. Install the lower anchor plate assembly through the rebound strap and attach it to the equalizing beam, see Figure 8-18. - Page 36 ® FR Series WHEN REMOVING AND INSTALLING BUSHINGS IN THE EQUALIZING BEAMS, FOLLOW THE PROCEDURES OUTLINED IN THIS PUBLICATION. DO NOT USE A CUTTING TORCH TO REMOVE THE BUSHING OUTER METALS PRESSED IN THE EQUALIZING BEAM BORES. WELDING, TORCHING OR ATTACHING MATERIAL TO THE EQUALIZING BEAM MUST NEVER BE PERFORMED.
- Page 37 ® FR Series FIGURE 8-20 1. Clean the end hub bores with emery cloth or hone, removing any nicks or metal buildup from bushing removal. 2. Measure the equalizing beam end hub bore inner diameter and the bushing outer diameter. The Hendrickson speci- fication for the equalizing beam end hub bore diameter of equalizing beam is 4.369"...
- Page 38 ® FR Series FIGURE 8-22 NOTE The end bushing must be square with the equalizing beam end hub before pressing the end bushing into the equalizing beam. End bushings pressed in at an angle will damage the end bushing and the equalizing beam. 5.
-
Page 39: Torque Specifications
SECTION 9 Torque Specifications Hendrickson Recommended Torque Rod Assembly ® ® ™ ULTRA ROD ULTRA ROD PLUS Torque Values Provided in Foot Pounds and Newton Meters 33-45 (45-61 Nm) 33-45 (45-61 Nm) 90-105 (122-142 Nm) 70-90 90-105 (95-122 Nm) (122-142 Nm) 33-45 (45-61 Nm) 70-90... - Page 40 ® FR Series ® FR Series HENDRICKSON RECOMMENDED TORQUE SPECIFICATIONS TORQUE VALUE HENDRICKSON DESCRIPTION QTY. THREAD/GRADE FOOT POUNDS Frame fasteners are furnished and installed by the vehicle manufacturer. Vehicle manufacturer may use an equivalent HUCK fastener at frame mount. Bolster Spring Bolt Locknut ⁄...
-
Page 41: Section 10 Troubleshooting Guide
® FR Series SECTION 10 Troubleshooting Guide FR SERIES ® CONDITION POSSIBLE CAUSE CORRECTION Adjust auxiliary spring to proper setting. See Auxiliary Spring Incorrect auxiliary spring adjustment Adjustment in the Preventative Maintenance Section of this publication. Suspension has harsh or bumpy ride Damaged auxiliary spring assembly Replace auxiliary spring assembly.
Need help?
Do you have a question about the Hendrickson HN FR Series and is the answer not in the manual?
Questions and answers