Table of Contents
Advertisement
Advertisement
Table of Contents

Related Manuals for HP ProDisplay P222c


Summary of Contents for HP ProDisplay P222c
- Page 1 User Guide...
- Page 2 The information contained herein is subject to change without notice. The only warranties for HP products and services are set forth in the express warranty statements accompanying such products and services. Nothing herein should be construed as constituting an additional warranty.
- Page 3 About This Guide This guide provides information on monitor features, setting up the monitor, and technical specifications. WARNING! Text set off in this manner indicates that failure to follow directions could result in bodily harm or loss of life. CAUTION: Text set off in this manner indicates that failure to follow directions could result in damage to equipment or loss of information.
- Page 4 About This Guide...
-
Page 5: Table Of Contents
Downloading from the Web........................15 Using the HP Display Assistant ........................... 15 Using HP MyRoom ............................... 16 Installing HP MyRoom from the media disc ....................16 Downloading HP MyRoom from the Internet ..................... 16 Creating a HP MyRoom Account ......................... 16 Using the On-Screen Display (OSD) menu ........................ - Page 6 Entering user modes ..............................22 Energy saver feature ..............................22 Appendix B Support and troubleshooting ......................23 Solving common problems ............................23 Using the Auto-Adjustment Function (Analog Input) ....................24 Optimizing Image Performance (Analog Input) ......................25 Button lockouts ................................26 Product support ................................
-
Page 7: Product Features
Supports an optional HP ProDisplay Companion Stand • Supports an optional HP Quick Release to enable mounting to an optional HP monitor arm or attaching an optional HP Chromebox, HP Thin Client (select models), or HP Desktop Mini Business PC... -
Page 8: Safety And Maintenance Guidelines
Use a power strip whose manufacturer offers a Damage Replacement Policy so you can replace the equipment, if surge protection fails. Use the appropriate and correctly sized furniture designed to properly support your HP LCD monitor. WARNING! LCD monitors that are inappropriately situated on dressers, bookcases, shelves, desks, speakers, chests, or carts may fall over and cause personal injury. -
Page 9: Maintenance Guidelines
NOTE: Monitors with a “burned-in image” are not covered under the HP warranty. • Slots and openings in the cabinet are provided for ventilation. These openings must not be blocked or covered. -
Page 10: Setting Up The Monitor
Setting up the monitor To set up the monitor, ensure that the power is turned off to the monitor, computer system, and other attached devices, then follow the instructions below. Use caution when setting up the monitor To prevent damage to the monitor, do not touch the surface of the LCD panel. Pressure on the panel may cause non-uniformity of color or disorientation of the liquid crystals. -
Page 11: Attaching The Stand Base
Attaching the stand base CAUTION: Do not touch the surface of the LCD panel. Pressure on the panel may cause non-uniformity of color or disorientation of the liquid crystals. If this occurs the screen will not recover to its normal condition. Remove the stand/base assembly, and then lift the monitor from the box and place it face down on a flat surface. -
Page 12: Identifying Rear Components
Identifying rear components Component Function AC Power Connector Connects the AC power cord to the monitor. DisplayPort Connects the DisplayPort cable from the source device to the monitor. Connects the VGA cable from the source device to the monitor. Audio Connector Connects the Audio cable from the source device to the monitor. -
Page 13: Connecting The Cables
Connecting the cables NOTE: The monitor ships with select cables. Not all cables shown in this section are included with the monitor. Place the monitor in a convenient, well-ventilated location near the computer or source device. Connect a VGA signal cable or DisplayPort signal cable. NOTE: The monitor is capable of supporting either analog or digital input. - Page 14 Connect one end of audio cable to the audio connector on the monitor and connect the other end of the cable to an audio output connector on the rear panel of the computer (cable not provided). Connect the USB upstream cable’s Type B connector to the USB upstream port on the rear of the monitor and the cable’s Type A connector to the USB downstream port on the source device.
-
Page 15: Identifying Front Panel Controls
Offers video stream for end user to preview/record motion image through USB 2.0 interface. NOTE: To view an OSD menu simulator, visit the HP Customer Self Repair Services Media Library at http://www. hp.com/go/sml. Identifying front panel controls... -
Page 16: Adjusting The Monitor
Image retention is a condition that may occur on all LCD screens. Monitors with a “burned-in image” are not covered under the HP warranty. * A prolonged period of time is 2 consecutive hours of a static image. -
Page 17: Connecting Usb Devices
Connecting USB devices USB ports are used to connect devices such as a digital camera, USB keyboard, or USB mouse. There are two downstream USB ports on the rear of monitor. NOTE: You must connect the USB upstream cable from the computer to the monitor to enable the USB downstream ports on the monitor. -
Page 18: Mounting The Monitor
Mounting the Monitor The monitor panel can be attached to a wall, swing arm, or other mounting fixture. NOTE: This apparatus is intended to be supported by UL or CSA or GS Listed wall mount bracket. CAUTION: This monitor supports the VESA industry standard 100 mm mounting holes. To attach a thirdparty mounting solution to the monitor, four 4mm diameter, 0.7 pitch, and 10 mm long screws (M4 x 10mm screws) are required. -
Page 19: Locating The Serial Number And Product Number
The Rating label (1) and Safety label (2) are located on the rear of the monitor. The serial number and product number are located on a Rating label. You may need these numbers when contacting HP about the monitor model. -
Page 20: Operating The Monitor
You may need to install the digitally signed monitor .INF and .ICM files manually from the disc in the event of an installation error. Refer to the HP Monitor Software Information file on the disc. Chapter 4 Operating the monitor... -
Page 21: Downloading From The Web
The HP display software has two modes of operation: Wizard and OSD mode. The preferred method of use is Wizard mode, which takes you through a step-by-step process to accurately calibrate the monitor. This method relies on a sequence of steps that will obtain the best display results when completed. -
Page 22: Using Hp Myroom
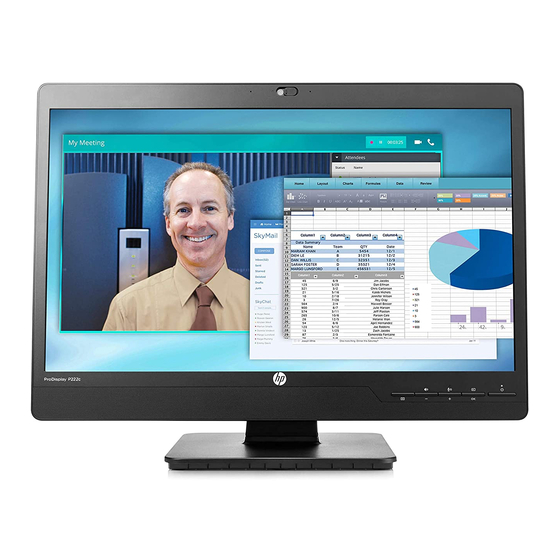
Using HP MyRoom HP MyRoom is your online meeting room. Connect with business colleagues “face to face” and collaborate with useful tools. Installing HP MyRoom from the media disc To install HP MyRoom: Insert the media disc that came with your monitor into the computer optical drive. -
Page 23: Using The On-Screen Display (Osd) Menu
Using the On-Screen Display (OSD) menu Use the On-Screen Display (OSD) menu to adjust the monitor settings screen image based on your preferences. You can access and make adjustments in the OSD using the buttons on the monitor's front panel. To access the OSD and make adjustments, do the following: If the monitor is not already on, press the power button to turn on the monitor. -
Page 24: Using The Microsoft Skype For Business
In the Skype for Business main window, click the Options button, and then select Video Device. In the Select the webcam you want to use for video calls list, select HP Hign Definition 1MP Webcam. Chapter 4 Operating the monitor... - Page 25 Access the Microsoft Skype for Business with front panel buttons: • Mute Press and hold the Minus button for 3 seconds to mute the audio or turn off the mute. When the mute icon appears, press the Minus button to switch the audio between mute and un-mute. •...
-
Page 26: Appendix A Technical Specifications
Technical specifications NOTE: All specifications represent the typical specifications provided by HP's component manufacturers; actual performance may vary either higher or lower. For the latest specifications or additional specifications on this product, go to http://www.hp.com/go/quickspecs and search for your specific display model to find the model-specific QuickSpecs. -
Page 27: Speaker Specifications
Speaker specifications Component Specifications Speaker Rated Power 2 W * 2 Frequency 350 Hz ~ 20 kHz Speaker specifications... -
Page 28: Recognizing Preset Display Resolutions
Recognizing preset display resolutions The display resolutions listed below are the most commonly used modes and are set as factory defaults. This monitor automatically recognizes these preset modes and they will appear properly sized and centered on the screen. Preset Pixel Format Horz Freq (kHz) Vert Freq (Hz) -
Page 29: Appendix B Support And Troubleshooting
Support and troubleshooting Solving common problems The following table lists possible problems, the possible cause of each problem, and the recommended solutions. Problem Possible Cause Solution Screen is blank or video is Power cord is disconnected. Connect the power cord. flashing. -
Page 30: Using The Auto-Adjustment Function (Analog Input)
Press the key or any other key on the keyboard to exit the test pattern. NOTE: The auto-adjustment test pattern utility can be downloaded from http://www.hp.com/support. Appendix B Support and troubleshooting... -
Page 31: Optimizing Image Performance (Analog Input)
Optimizing Image Performance (Analog Input) Two controls in the on-screen display can be adjusted to improve image performance: Clock and Phase (available in the main menu). NOTE: The Clock and Phase controls are adjustable only when using an analog (VGA) input. These controls are not adjustable for digital inputs. -
Page 32: Button Lockouts
OSD is not active. Product support For additional information on using your monitor, go to http://www.hp.com/support. Select your country or region, select Troubleshooting, and then enter your model in the search window and click the Go button. -
Page 33: Appendix Clcd Monitor Quality And Pixel Policy
Nevertheless, the display may have cosmetic imperfections that appear as small bright or dark spots. This is common to all LCD displays used in products supplied by all vendors and is not specific to the HP LCD. These imperfections are caused by one or more defective pixels or sub-pixels. -
Page 34: Appendix D Accessibility
Accessibility HP designs, produces, and markets products and services that can be used by everyone, including people with disabilities, either on a stand-alone basis or with appropriate assistive devices. Supported assistive technologies HP products support a wide variety of operating system assistive technologies and can be configured to work with additional assistive technologies.
Need help?
Do you have a question about the ProDisplay P222c and is the answer not in the manual?
Questions and answers