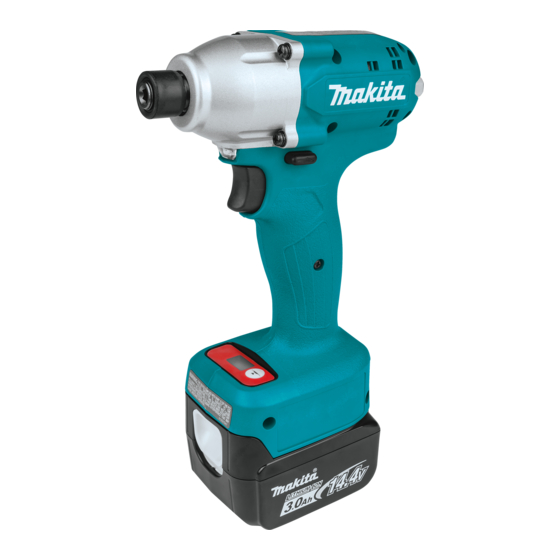
Makita DTDA040 Series Instruction Manual

Makita DTDA040 Series Instruction Manual

Hide thumbs Also See for DTDA040 Series:

Advertisement

INSTRUCTION MANUAL
Cordless Impact Driver
DTDA040
DTDA070
DTDA100
DTDA140
Read before use.

Advertisement

Table of Contents
loading

Summary of Contents for Makita DTDA040 Series

  • Page 1 INSTRUCTION MANUAL Cordless Impact Driver DTDA040 DTDA070 DTDA100 DTDA140 Read before use.
  • Page 2: Specifications

    SPECIFICATIONS Model: DTDA040 DTDA070 DTDA100 DTDA140 Fastening capacities Standard bolt M5 - M10 M5 - M12 M6 - M16 High tensile bolt M5 - M8 M5 - M10 M6- M12 Maximum fastening torque 35 N•m 65 N•m 95 N•m 140 N•m Torque range Approx.
  • Page 3: Ec Declaration Of Conformity

    SAFETY WARNINGS WARNING: Wear ear protection. WARNING: The noise emission during actual use of the power tool can differ from the declared General power tool safety warnings value(s) depending on the ways in which the tool is used especially what kind of workpiece is WARNING: processed.
  • Page 4 Use personal protective equipment. Always Disconnect the plug from the power source wear eye protection. Protective equipment such and/or remove the battery pack, if detachable, as a dust mask, non-skid safety shoes, hard hat or from the power tool before making any adjust- hearing protection used for appropriate conditions ments, changing accessories, or storing power will reduce personal injuries.
  • Page 5 CAUTION: product. Only use genuine Makita batteries. Use of non-genuine Makita batteries, or batteries that MISUSE or failure to follow the safety rules stated have been altered, may result in the battery bursting in this instruction manual may cause serious causing fires, personal injury and damage. It will...
  • Page 6: Functional Description

    Checking the remaining battery FUNCTIONAL capacity (BL1460A) DESCRIPTION 70%-100% CAUTION: Always be sure that the tool is switched off and the battery cartridge is removed before adjusting or checking function on the tool. 50%-70% Installing or removing battery 35%-50% cartridge 20%-35% CAUTION: Always switch off the tool before...
  • Page 7: Overheat Protection

    Changing the parameter setting on ing the switch trigger for about 3 minutes. the computer Reversing switch action You can configure detailed setting of the tool with the application software "Makita Industry Tool Settings". CAUTION: Always check the direction of rotation Install the application software on the computer and before operation. connect the tool to the computer with a USB cable.
  • Page 8 NOTE: Use preset number as a guideline. To keep the fastening torque, number of impacts changes automatically according to remaining battery capacity. NOTE: For the application software, please contact Makita sales representative. Changing the parameter setting on the tool (Field Setting mode) NOTICE: This function is available by default. If you have disabled the Field Setting mode on the computer, enable this function beforehand. Refer to the instruction manual of "Makita Industry Tool Settings" for how to configure.
  • Page 9 Changing the torque level Changing the shortest workable time range When changing the torque level from 23 to 34 When changing the shortest workable time range from 2.5 to 3.6 Press the setting button several times until the indicator shows 2-digit number which stands for Press the setting button several times until the indicator the current setting of the torque level.
  • Page 10 Measuring an actual operation (Self-diagnosis) NOTICE: This function is available by default. If you have disabled the Field Setting mode on the computer, enable this function beforehand. Refer to the instruction manual of "Makita Industry Tool Settings" for how to configure. You can measure the torque level and operating time of an actual operation by operating the tool. Measured torque level and time can be used for such as; • Reproducing a torque control technic of a well-skilled worker and;...
  • Page 11 Blinks in red and A series of long Remove the cause loaded and stopped. green alternatively. beeps of overload, and then restart the tool. Ask your local Makita Service Center for repair. Overheat protection Tool's controller Blinks in red quickly. A series of long Remove the battery heated up abnor- beeps...
  • Page 12 Alarm No. Function Status of the tool Status of the LED indicator/beeper Action to be taken LED indicator Beeper Alarm for insufficient The preset fas- Lights up in red for A long beep Retighten the fastening tening torque has approximately one fastener. not been achieved second.
  • Page 13: Installing Hook

    To install the driver bit/socket bit, pull the sleeve in the direc- tion of the arrow and insert the bit-piece and driver bit/socket bit into the sleeve as far as it will go. The bit-piece should be inserted into the sleeve with its pointed end facing in. Then release the sleeve to secure the driver bit/socket bit.
  • Page 14 Fastening torque and torque level NOTE: This reference value is measured by the measurement conditions specified by Makita. NOTE: The actual value may differ according to circumstances of the fasteners, materials, and fastening method. Perform a test drive before actual work. (kgf cm) (918) (816) DTDA140 (M14) (714) DTDA100 (612) (M12) (510) DTDA140 (M10) DTDA100 (M10) (408) DTDA070 (M10) (306) DTDA140 DTDA100 (M8) (M8) DTDA070 (M8) DTDA040...
  • Page 15: Maintenance

    To maintain product SAFETY and RELIABILITY, repairs, any other maintenance or adjustment should be performed by Makita Authorized or Factory Service Centers, always using Makita replacement parts. OPTIONAL ACCESSORIES CAUTION: These accessories or attachments are recommended for use with your Makita tool specified in this manual. The use of any other accessories or attachments might present a risk of injury to persons. Only use accessory or attachment for its stated purpose. If you need any assistance for more details regard- ing these accessories, ask your local Makita Service Center.
  • Page 16 Makita Europe N.V. Jan-Baptist Vinkstraat 2, 3070 Kortenberg, Belgium Makita Corporation 3-11-8, Sumiyoshi-cho, Anjo, Aichi 446-8502 Japan 885712-220 www.makita.com 20190625...

This manual is also suitable for:

Dtda070 seriesDtda140 seriesDtda100Dtda040zDtda070zDtda140z ... Show all

Table of Contents