
Related Manuals for Hoover Steamy Wonder


Summary of Contents for Hoover Steamy Wonder
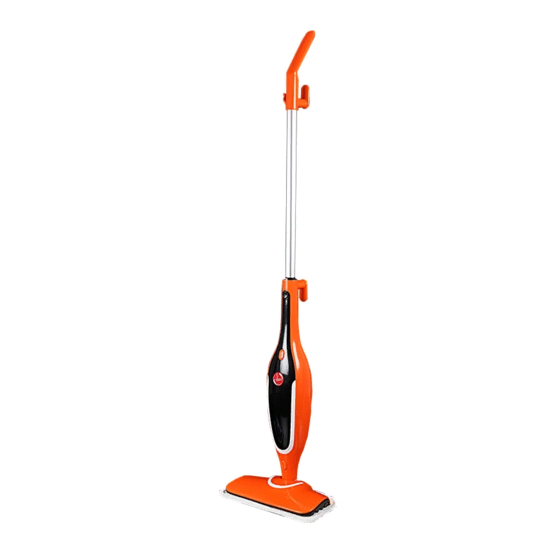
- Page 1 The Colourful Mop to Brighten Your Floors steamy wonder Lightweight and Easy to Manoeuvre Convenient Cord Hook...
- Page 3 3630 Steamy Wonder Congratulations on the purchase of your new HOOVER steam mop. There are many useful features built into your cleaner and we recommend that you carefully read this instruction manual so that you may take best advantage of them.
-
Page 4: Before You Begin
Before you Begin This cleaner must be operated in accordance with these instructions and used only for domestic household cleaning. This cleaner is not fit to be used as an industrial cleaner hence will void the manufacturer’s warranty if used inappropriately. Please read these instructions thoroughly This will ensure you obtain full benefit from your new cleaner. -
Page 5: Safety Precautions And Warnings
Safety Precautions & Warnings IMPORTANT! The power and the heat of the steam may have adverse consequences for certain materials. Always check before putting the appliance into operation, whether the surface or material is actually suitable for treatment with steam. Do this by executing a test on a hidden surface of the material you wish to treat. - Page 6 Safety Precautions & Warnings 18. Never attempt to steam clean clothes. 19. Ensure that the appliance does not operate on an empty tank. 20. Do not apply steam directly to very cold glass surfaces. 21. Do not use without water tank cap in place. Check that the water tank cap is completely screwed down before use.
- Page 7 Assembly WARNING! Always remove the plug from the power socket before assembly. Attaching the Mop Pad Set the mop pad on the floor with microfibre side facing down. Align the self adhesive strips on the mop pad with the steam mop head. Place unit on top of mop pad and apply pressure to assure hold.
- Page 8 Instructions for Use WARNING! Do not plug the steam mop into an electrical outlet during assembly. WARNING! Do not use hot or boiling water to fill clean water tank. WARNING! Do not add any cleaning solution, detergent, vinegar or bleach into the water tank.
- Page 9 Twist the quick release cable wrap clockwise to un-wrap the power cable completely. Hang the power cable on the cord hook for better use of the steam mop when moving and cleaning. NOTE: It is recommended that another high wattage appliance is not operated on the same circuit to avoid a circuit overload.
- Page 10 Instructions for Use (continued) NOTE: It is not recommended to operate the machine in high gear mode in winter due to the low temperature and condensate water, which will produce a great amount of steam and leave the floor wetted. NOTE: Low gear mode produces less steam with high steam temperature and shows good effect of sterilization.
-
Page 11: Maintenance
Maintenance IMPORTANT! Allow the steam mop to fully cool down before performing any maintenance or troubleshooting checks. Remove the water tank located on the rear of the steam mop. Twist the cap counter-clockwise to remove. Empty any excess water into the sink, allow to air dry and replace water cap and return to the steam mop. - Page 12 Maintenance (continued) Storage After cleaning, press the ON/OFF button to shut Empty any excess water in the water tank down the steam mop and the indicator light will into the sink, allow to air dry return to the turn off. Unplug the machine from mains supply, steam mop.
-
Page 13: Troubleshooting
Service problems that appear to be major can often be solved easily. You can be your own troubleshooter by reviewing this guide. All other servicing should be done by an authorized Hoover service agent or qualified technician. Fault Cause... - Page 14 - Pipeline may be blocked by water scale. - Install a voltage stabilizer. - Voltage may be too low. - If unit is still not working, call Hoover Floorcare 1300 360 845. Steam mop is leaking - Mop pad not properly installed. Mop pad –...
-
Page 15: Customer Care
Customer Care Please contact Hoover Customer Care: 1300 360 845 to find your local spare parts provider. Part Part Number Water Tank... - Page 16 Brighten Your Floors Conditions of Warranty Your Hoover steam mop, in the case of domestic use, has a one year If any part is no longer available or manufactured, Hoover Floorcare parts and labour warranty against product defects and failures when will replace it with a genuine functional replacement part.
Need help?
Do you have a question about the Steamy Wonder and is the answer not in the manual?
Questions and answers
I enjoy using my Hoover Steamy Wonder with good results but the cap at the bottom of the water tank has somehow gone missing. Is there any way I could purchase a replacement? I would really appreciate your help. Thank you.