
Related Manuals for Javes HDX-520


Summary of Contents for Javes HDX-520
- Page 1 JAVES HDX-520 Projector USER MANUAL Javes Projector Address: Room 207, Block B, Seaview Estate, Watson Road, North Point, Hong Kong Tel:(852) 2887-5151 e-mail: jng@javesprojector.com Web-site: www.javesprojector.com...
- Page 2 FCC Notice This equipment has been tested and found to comply with the limits for a Class B digital device, pursuant to part 15 of the FCC Rules. These limits are designed to provide reasonable protection against harmful interference in residential installation. This equipment generates, uses and can radiate radio frequency energy and if not installed and used in accordance with the instructions, may cause harmful interference to radio communications.
- Page 3 Safety Instructions Read all of these instructions before you operate your projector and save for future reference. Read instructions All the safety and operating instructions should be read before the appliance is operated. Notes and warnings All notes and warnings in the operating instructions should be adhered to. Cleaning Unplug the projector from the wall socket before cleaning.
- Page 4 Notes on the AC Power Cord AC Power Cord must meet the requirement of countries where you use this projector. Please confirm your AC plug type with the graphics below and ensure that the proper AC Power Cord is used. If the supplied AC Power Cord does not match your AC outlet, please contact your sales dealer.
-
Page 5: Table Of Contents
CONTENTS Introduction ......................5 Projector Features ....................... 5 Package Contents ....................... 6 Projector Overview ...................... 7 Using the Product ..................9 Control Panel ......................9 Connection Ports ....................... 10 Remote Control ......................11 Replacing the Battery ....................12 Remote Control Operation ..................13 Installation ......................14 Connecting the Projector ................... -
Page 6: Introduction
Introduction Projector Features The projector integrates high-performance optical engine projection and a user - friendly design to deliver high reliability and ease of use. The projector offers the following features: ® Single chip 0.55" Texas Instruments DLP technology XGA (1024 x 768 pixels) Auto image re-sizing (Auto-Sync.) to 1024 x 768 full screen with scaling compression compatibility for VGA, SVGA, XGA and SXGA* ®... -
Page 7: Package Contents
Package Contents When you unpack the projector, make sure you have all these components: Projector with Lens AC Power Cord VGA Cable (D-SUB Composite Video to D-SUB) Cable S-Video Cable Remote Control (IR) User’s Manual Quick Start Guide Save the original shipping carton and packing material; they will comein handy if you ever to ship your unit. -
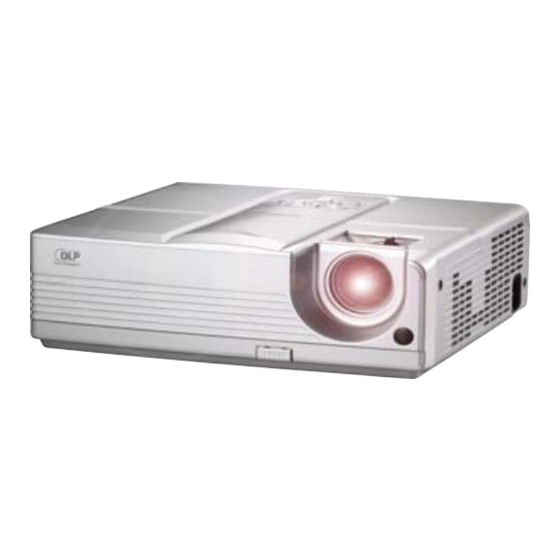
Page 8: Projector Overview
Projector Overview Front View Lens cap AC power socket Elevator button Zoom ring Lens cap strap Focus ring Front IR remote control sensor Control panel Projection lens Lamp cover Ventilation holes EN-7... - Page 9 Rear View Connection ports Kensington lock Rear IR remote control sensor Ventilation holes Bottom View Elevator foot Ceiling mount (3-M4*6) Tilt-adjustment foot This projector can be used with a ceiling mount for support. The ceiling mount is not included in the package. EN-8...
-
Page 10: Using The Product
Using the Product Control Panel Lamp (Lamp LED indicator) Refer to “LED Indicator Messages”. Temp (Temperature LED indicator) Refer to “LED Indicator Messages”. Button Function Four directional buttons Use four directional buttons to select items or make adjustments to your selection. Enter Enter to sub-menu and confirm the menu selection. -
Page 11: Connection Ports
Connection Ports VGA OUT Connect to a computer display, etc. VGA IN-1 Connect image input signal (analog RGB or component) to this jack. VGA IN-2 Connect image input signal (analog RGB or component) to this jack. RS232 When operating the projector via a computer, connect this to the controlling computer’s RS-232C port. -
Page 12: Remote Control
Remote Control SOURCE Manually select an input source. RESYNC Resynchronize the projector to the input signal from a computer. BLANK Hide the screen. Press again to cancel the BLANK function. FREEZE Press “FREEZE” to pause the screen image. Press again to cancel the FREEZE function. VOLUME + / - Adjust the volume level. -
Page 13: Replacing The Battery
Replacing the Battery For the first time use: Remove the transparent insulation tape by pulling it before use. For battery change: Remove the battery holder. Remove the old Lithium coin cell and install new one (CR2025). Ensure that the side with the mark "+" is up. Push the battery holder back into the remote control until you feel a click. -
Page 14: Remote Control Operation
Remote Control Operation Point the remote control at the infrared remote sensor and press a button. Operating the projector from the front Operating the projector from the rear The remote control may not operate when there is sunlight or other strong light such as a fluorescent lamp shining on the remote sensor. -
Page 15: Installation
Installation Connecting the Projector VGA Cable (D-Sub to D-Sub) VGA (D-SUB) to HDTV (RCA) Cable RS-232 Cable S-Video Cable USB Cable Composite Video Cable Laptop type Desktop type When connecting cable, power cords of both a projector and external equipment should be disconnected from AC outlet. -
Page 16: Powering On/Off The Projector
Powering On/Off the Projector Powering On the Projector: Remove the projector lens cap. Complete the AC power cord and peripheral signal cable(s) connections. Press button to turn on the projector. The projector takes a minute or so to warm up. Turn on your source (computer, notebook, DVD, etc.). -
Page 17: Adjusting The Projector
Adjusting the Projector Adjusting the Projector Height Tilt-adjustment foot Elevator foot Elevator button The projector is equipped with an elevator foot to adjust the image height. To raise or lower the image: To raise or lower the image, press the elevator button and raise or lower the front of the projector. - Page 18 Adjusting Projection Image Size Refer to the graphic and table below to determine the screen size and projection distance. 1.2m (Min.) 2.0m 3.0m 5.0m 10.8m (Max.) Projection Distance Screen Size (for 4:3 aspect ratio diagonal length) (meters) Wide (inches) Tele (inches) 10.8 Position the projector in a horizontal position;...
-
Page 19: Menu Operation
Menu Operation The projector has multilingual on-screen display menus that allow you to make image adjustments and change a variety of settings. Picture Brightness 0 - 100 0 - 100 Contrast Red, Green, Blue Color Setting -20-+20 Keystone 1:1, 4:3, 16:9 Aspect Ratio Image PC, Movie, sRGB, User... - Page 20 How to operate Press the Menu button on the control panel or the MENU button on the remote control to open the OSD menu. When OSD is displayed, use to select any feature in the main menu. After selecting the desired main menu feature, press to enter sub-menu for feature setting.
- Page 21 Image There are many factory presets optimized for various types of images. : For computer or notebook. Movie : For home theater. sRGB : For PC standard color. User : Memorize user’s settings. White Intensity Increase the brightness of white areas. Gamma Effect the represent of dark scenery.
- Page 22 Signal Type Specify the source to the VGA-IN1/VGA-IN2 terminal that you wish to project. YPbPr : For component 480p,576p,720p,1080i signals : For VGA signal YCbCr : For component 480i,576i signals Lamp Counter Display the lamp’s elapsed operating time (in hours). Lamp Counter Reset Reset the lamp counter to 0 hours.
-
Page 23: Maintenance
Maintenance The projector needs proper maintenance. You should keep the lens clean as dust, dirt or spots will project on the screen and diminish image quality. If any other parts need replacing, contact your dealer or qualified service personnel. When cleaning any part of the projector, always switch off and unplug the projector first. -
Page 24: Replacing The Lamp
Replacing the Lamp As the projector operates over time, the brightness of the projector lamp gradually decreases and the lamp becomes more susceptible to breakage. We recommend replacing the lamp if a warning message is displayed. Do not attempt to replace the lamp yourself. - Page 25 Turn off the projector. If the projector is installed in a ceiling mount, remove it from the mount. Unplug the power cord. Loosen the screw in the side of the lamp cover and remove the cover. Remove the screws from the lamp module, raise the handle, and lift out the module.
-
Page 26: Specifications
Specifications Display Type Single 0.55" DLP panel Resolution (Pixels) XGA (1024 x 768) Lens Manual Zoom (1.2x) Contrast Ratio 2000:1 Screen Size 33" - 300" 180 W Lamp Input / Output Source D-Sub 15 pin, S-video, composite video, USB, RS232 Video Compatibility NTSC 3.58, NTSC4.43 PAL-60, M, N... -
Page 27: Appendix
Appendix LED Indicator Messages LED Type Color Status Meaning LAMP LED Green Flash The projector is in standby mode. TEMP LED LAMP LED Green Solid The projector system has some problems with TEMP LED Green Flash its fan, so the projector cannot start up. LAMP LED Green Solid... -
Page 28: Compatibility Modes
Compatibility Modes Computer: Compatibility Resolution H-Sync [KHz] V-Sync [Hz] 640 x 480 31.5 59.9 37.9 72.8 37.5 75.0 43.3 85.0 SVGA 800 x 600 35.2 56.3 37.9 60.3 48.1 72.2 46.9 75.0 53.7 85.1 1024 x 768 48.4 60.0 56.5 70.1 60.0 75.0... -
Page 29: Troubleshooting
Troubleshooting Refer to the symptoms and measures listed below before sending the projector forrepairs. If the problem persists, contact your local reseller or service center. Please refer to "Indicator Messages" as well. Start-up problems If no lights turn on: Be sure that the power cord is securely connected to the projector and the other end is plugged into an outlet with power.
Need help?
Do you have a question about the HDX-520 and is the answer not in the manual?
Questions and answers