Table of Contents
Advertisement
Available languages
Available languages
INDELWEBASTOMARINE SRL
Via dei Ronchi n.11
47866 S. Agata Feltria (RN) ITALY
Tel.: +39 0541 848 030 - Fax: +39 0541 848 563
www.indelwebastomarine.com
info@indelwebastomarine.com
T B 3 1 T B 4 1 T B 5 1
ISTRUZIONI PER L'USO
INSTRUCTIONS FOR USE
INSTRUCCIONES DE USO
INSTRUCTIONS D'UTILISATION
BEDIENUNGSANLEITUNG
MANUAL DE INSTRUÇÕES
BRUKSANVISNING
ИНСТРУКЦИЯ ПОЛЬЗОВАТЕЛЯ
Advertisement
Table of Contents

Related Manuals for Indel Webasto Marine Isotherm TB31


Summary of Contents for Indel Webasto Marine Isotherm TB31
- Page 1 INDELWEBASTOMARINE SRL Via dei Ronchi n.11 47866 S. Agata Feltria (RN) ITALY Tel.: +39 0541 848 030 - Fax: +39 0541 848 563 www.indelwebastomarine.com info@indelwebastomarine.com T B 3 1 T B 4 1 T B 5 1 ISTRUZIONI PER L’USO INSTRUCTIONS FOR USE INSTRUCCIONES DE USO INSTRUCTIONS D'UTILISATION...
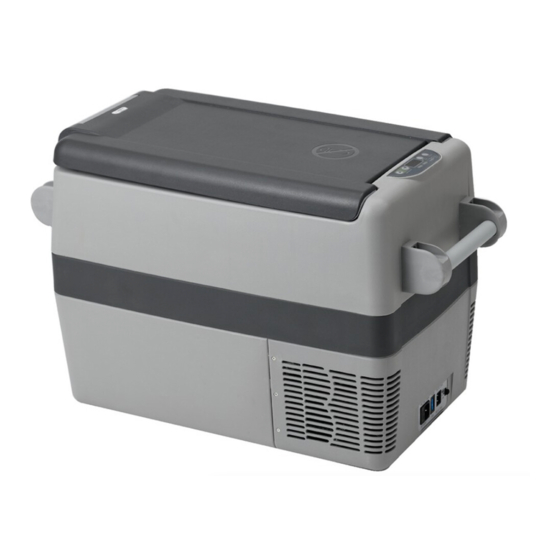
- Page 3 TB 31-41-51 ITALIANO Leggere attentamente queste istruzioni e la sezione di sicurezza prima di usare il frigorifero. TB31 585mm 350mm TB41 585mm 350mm TB51 585mm 350mm 189A0469 189A0470 CAVO DI COLLEGAMENTO IN AC CAVO DI COLLEGAMENTO IN DC...
-
Page 4: Dati Tecnici
TB 31-41-51 ITALIANO ITALIANO DATI TECNICI Dimensioni MODELLO Peso Classe di HxLxP Alimentazione netto prodotto refrigerante (mm) DC 12/24V & TB31 380 x 585 x 350 16 Kg 29 L R134a AC 110-240V DC 12/24V & TB41 445 x 585 x 350 17 Kg 37 L R134a... -
Page 5: Installazione
TB 31-41-51 ITALIANO ITALIANO INSTALLAZIONE - Porre il frigorifero su una superficie asciutta, protetta e lontana da spigoli. Non usare il frigorifero in zone scoperte, all’aperto o esposto ad agenti atmosferici. - Il frigorifero necessita di una buona ventilazione. Lasciare uno spazio di almeno 15 cm su tutti i lati. - Evitare di porre il frigorifero vicino a una fonte di calore quale ad esempio un fornello, un radiatore o sotto la luce diretta del sole. -
Page 6: Impianto Elettrico
TB 31-41-51 ITALIANO ITALIANO ALLACCIAMENTO DEL FRIGORIFERO ALLA RETE ELETTRICA (110V - 240V) - Questo modello può essere alimentato sia a 12/24V che con l’alimentazione di rete (110V - 240V AC). - È dotato di due prese cui collegare i cavi di alimentazione diversi per DC e AC. - Il frigorifero è... - Page 7 TB 31-41-51 ITALIANO ITALIANO INSTALLAZIONE MANIGLIA (OPTIONAL) TB31-41-51 Kit maniglia Il kit installazione maniglia è composto da: 1 - rosetta n°4 pz 2 - rosetta elastica spaccata n°4 pz 3 - componente tubolare tondo n°1 pz 4 - supporto n°2 pz Montaggio kit montare i supporti (4) sul componente circolare (3) Installazione maniglia...
-
Page 8: Manutenzione
TB 31-41-51 ITALIANO ITALIANO USO DEL PANNELLO DI CONTROLLO - Collegare l’alimentazione in AC o in DC. Premere il pulsante `ON/OFF` per avviare il frigorifero. Il LED del pannello di controllo si accende e viene visualizzata la temperatura interna. - Premere il pulsante e per regolare la temperatura. Premere il pulsante per aumentare la tem- peratura e il pulsante ... -
Page 9: Consigli Utili
TB 31-41-51 ITALIANO ITALIANO PULIZIA • Pulire regolarmente l’interno del frigorifero utilizzando esclusivamente acqua tiepida e detergente neutro. • Dopo il lavaggio risciacquare con acqua pulita e asciugare accuratamente con un panno morbido. • Non utilizzare: prodotti specifici per vetri e specchi; detergenti liquidi; in polvere, o spray; solventi; alcool; ammoniaca o prodotti abrasivi. - Page 10 TB 31-41-51 ENGLISH ENGLISH Please read these instructions and the Safety section carefully before using your refrigerator. TB31-TB31A 585mm 350mm TB41-TB41A 585mm 350mm TB51-TB51A 585mm 350mm 189A0469 189A0470 AC CONNECTION CABLE DC CONNECTION CABLE...
-
Page 11: Technical Features
TB 31-41-51 ENGLISH ENGLISH TECHNICAL FEATURES Dimensions MODEL Product HxLxP Voltage Cooling gas weight class (mm) DC 12/24V & TB31 380 x 585 x 350 16 Kg 29 L R134a AC 110-240V DC 12/24V & TB41 445 x 585 x 350 17 Kg 37 L R134a... -
Page 12: Installation
TB 31-41-51 ENGLISH ENGLISH INSTALLATION - Place the refrigerator on a dry, sheltered, flat surface and away from any edges. The refrigerator must not be used unsheltered, in the open air. - Your refrigerator requires good ventilation, especially around the back of the refrigerator, allow a gap of at least 15 cm around the sides, back and top. -
Page 13: Electronic Control
TB 31-41-51 ENGLISH ENGLISH USING THE REFRIGERATOR TO THE ELECTRICAL NETWORK (110V - 240V) - This model can be fed equally using 12/24V or mains power (110V - 240V AC). - It is equipped with 2 sockets to connect the two different cables for DC respectively AC. - The refrigerator is provided with automatic switch over from one kind of feeding to the other. -
Page 14: Handle Installation (Optional)
TB 31-41-51 ENGLISH HANDLE INSTALLATION (OPTIONAL) TB31-TB41-TB51 Handle kit The handle installation kit consists of: 1 - washer No. 4 pcs 2 - split spring washer No. 4 pcs 3 - round tubular component No. 1 pc 4 - stand No. 2 pcs Kit mounting mount the stands (4) on the circular component (3) Handle Installation... -
Page 15: Useful Advice
TB 31-41-51 ENGLISH - Plug in the DC or AC power. Press the button `ON/OFF` to run the refrigerator. The LED display on the control panel would be lighted and the interior temperature would be displayed. - Press the button Δ and ∇ to adjust the temperature. Press the button Δ to increase while the button ∇ to decrease the temperature. -
Page 16: Maintenance
The power supply cable must be replaced only by qualified technical personnel and in any case by an after sales service authorised by the Manufacturer.. Indel Webasto Marine is not liable in any way if you do not comply strictly with all the previsions in this manual. - Page 17 TB 31-41-51 ESPAÑOL Se ruega leer con atención estas instrucciones y la sección de Seguridad antes de usar la nevera. TB31 585mm 350mm TB41 585mm 350mm TB51 585mm 350mm 189A0469 189A0470 CABLE DE CONEXIÓN CC CABLE DE CONEXIÓN CA...
-
Page 18: Características Técnicas
TB 31-41-51 ESPAÑOL ESPAÑOL CARACTERÍSTICAS TÉCNICAS Dimensiones MODELO Peso Clase de AlxAnxF Tensión neto producto refrigerante (mm) DC 12/24V & TB31 380 x 585 x 350 16 Kg 29 L R134a AC 110-240V DC 12/24V & TB41 445 x 585 x 350 17 Kg 37 L R134a... -
Page 19: Instalación
TB 31-41-51 ESPAÑOL ESPAÑOL INSTALACIÓN - Coloque la nevera en una superficie seca, protegida y lejos de bordes. La nevera no debe usarse sin protección al aire libre o expuesta a salpicaduras o lluvia. - La nevera requiere buena ventilación, especialmente en la parte posterior, deje un hueco de, al menos, 15 cm alrededor de los lados, parte posterior y superior. -
Page 20: Control Electrónico
TB 31-41-51 ESPAÑOL ESPAÑOL USO DE LA NEVERA A LA RED ELÉCTRICA (110V - 240V) - La alimentación de este modelo puede ser bien 12/24V o suministro de red (110V - 240V CA). - Está equipado con 2 tomas para conectar los dos cables distintos para CC y CA respectivamente. - La nevera está... - Page 21 TB 31-41-51 ESPAÑOL ESPAÑOL INSTALACIÓN DEL TIRADOR (OPCIONAL) TB31-TB41-TB51 Kit del tirador El kit de instalación del tirador está integrado por: 1 – arandelas, cantidad: 4 unidades 2 – arandelas de resorte partidas, cantidad: 4 unidades 3 – componente tubular redondo, cantidad: 1 pieza 4 –...
-
Page 22: Consejos Útiles
TB 31-41-51 ESPAÑOL ESPAÑOL - Enchufe en la corriente CC o CA. Pulse el botón `ENCENDIDO/APAGADO` para poner en marcha la nevera. La pantalla LED del panel de control se iluminará y se mostrará la temperatura interior. - Pulse el botón Δ y ∇ para ajustar la temperatura. Pulse el botón Δ para incrementar, mientras que el botón ∇... -
Page 23: Mantenimiento
El cable de suministro únicamente lo puede reemplazar el personal técnico cualificado y en todo caso el servicio de posventa autorizado por el fabricante. Indel Webasto Marine no se responsabiliza de ningún modo si no cumple estrictamente todas las disposiciones de este manual. - Page 24 TB 31-41-51 FRANÇAIS FRANÇAIS Merci de lire attentivement ces instructions et le paragraphe sur la sécurité avant d’utiliser votre réfrigérateur. TB31 585mm 350mm TB41 585mm 350mm TB51 585mm 350mm 189A0469 189A0470 CABLE DE CONNEXION CC CABLE DE CONNEXION CA...
- Page 25 TB 31-41-51 FRANÇAIS FRANÇAIS TECHNICAL FEATURES Dimensions MODELE Poids Classe HxLxP Tension produit réfrigérant (mm) DC 12/24V & TB31 380 x 585 x 350 16 Kg 29 L R134a AC 110-240V DC 12/24V & TB41 445 x 585 x 350 17 Kg 37 L R134a...
-
Page 26: Installation
TB 31-41-51 FRANÇAIS FRANÇAIS INSTALLATION - Placez le réfrigérateur sur une surface plane, sèche, abritée et éloignée de tout bord. Le réfrigérateur ne doit pas être utilisé non protégé, en plein air ou exposé à des éclaboussures ou à la pluie. - Votre réfrigérateur nécessite une bonne ventilation, en particulier à... - Page 27 TB 31-41-51 FRANÇAIS FRANÇAIS UTILISATION DU REFRIGERATEUR AVEC LE RÉSEAU ÉLECTRIQUE (110V-240V) - Ce modèle peut être alimenté aussi bien en utilisant une tension de 12/24V qu’ une alimentation secteur (110V - 240V CA). - Il est équipé de 2 prises pour connecter respectivement les deux différents câbles CC et CA. - Le réfrigérateur est fourni avec un commutateur automatique d’un type d’alimentation à...
- Page 28 TB 31-41-51 FRANÇAIS FRANÇAIS INSTALLATION DE LA POIGNÉE (FACULTATIVE) TB31-TB41-TB51 Kit poignée Le kit d’installation de la poignée comprend : 1 – 4 rondelles 2 – 4 rondelles de ressort en élastique 3 – 1 élément tubulaire rond 4 – 2 supports Kit de montage Fixez les supports (4) à...
- Page 29 TB 31-41-51 FRANÇAIS FRANÇAIS UTILISATION - Brancher au courant d’alimentation continu (CC) ou alternatif (CA). Appuyer sur le bouton `MARCHE/ ARRET` pour mettre en marche le réfrigérateur. L’affichage à LED sur le panneau de contrôle sera allumé et la température intérieure sera affichée. - Appuyer sur le bouton Δ...
-
Page 30: Entretien
Le câble d’alimentation doit être remplacé uniquement par un personnel technique qualifié et dans tous les cas par un service après-vente agréé par le fabricant. Indel Webasto Marine n’est responsable en aucune façon si vous ne vous conformez pas strictement à toutes les instructions de ce manuel. - Page 31 TB 31-41-51 DEUTSCH DEUTSCH Bitte lesen Sie die Anleitungen und Sicherheitshinweise vor Inbetriebnahme des Kühlschranks aufmerksam durch. TB31 585mm 350mm TB41 585mm 350mm TB51 585mm 350mm 189A0469 189A0470 NETZKABEL FAHRZEUGADAPTERKABEL...
-
Page 32: Technische Spezifikationen
TB 31-41-51 DEUTSCH DEUTSCH TECHNISCHE SPEZIFIKATIONEN Abmessungen Span- MODELL Gewicht HxBxT Kühlvolumen nungsversor- Kühlmittel (netto) (mm) gung DC 12/24V & TB31 380 x 585 x 350 16 Kg 29 L R134a AC 110-240V DC 12/24V & TB41 445 x 585 x 350 17 Kg 37 L R134a... - Page 33 TB 31-41-51 DEUTSCH DEUTSCH INSTALLATION - Stellen Sie den Kühlschrank auf einer flachen und geschützten Fläche, von Kanten entfernt, auf. Der Kühlschrank darf nicht ungeschützt im Freien stehen oder Spritz- und Tropfwasser ausgesetzt sein. - Der Kühlschrank muss gut belüftet aufgestellt werden, insbesondere die Rückseite benötigt gute Ven- tilation.
-
Page 34: Elektronische Steuerung
TB 31-41-51 DEUTSCH DEUTSCH BENUTZUNG DES KÜHLSCHRANKS ZU HAUSE (110V - 240V) - Dieses Modell kann mit 12-24 V oder Netzspannung (110V – 240 V AC) versorgt werden. - Es ist mit 2 Eingängen für die beiden unterschiedlichen Kabel ausgestattet. - Der Kühlschrank ist mit einem automatischen Umschalter für die Spannungsversorgung ausgestattet. - Page 35 TB 31-41-51 DEUTSCH DEUTSCH GRIFF INSTALLIEREN (OPTIONAL) TB31-TB41-TB51 Griffset Der Griff-Montagesatz enthält: 1 - Beilagscheibe Nr. 4 Stck 2 – geschlitzter Federring Nr. 4 Stck 3 – rundes rohrförmiges Zubehörteil Nr. 1 Stck 4 - Untersatz Nr. 2 Stck Set montieren Die Untersätze (4) am runden Zubehörteil (3) befestigen Griffmontage Die Schrauben (5) vom Gehäuse abschrauben.
- Page 36 TB 31-41-51 DEUTSCH DEUTSCH DEUTSCH BEDIENUNGSHINWEISE - Schließen Sie das DC- oder Netzkabel an. Drücken Sie ON/OFF, um den Kühlschrank einzuschalten. Die LED im Bedienfeld leuchtet auf und die Innenraumtemperatur wird angezeigt. - Mit Δ und ∇ stellen Sie die Temperatur ein. Mit Δ erhöhen Sie die Temperatureinstellung, mit ∇ verringern Sie die Temperatureinstellung.
-
Page 37: Wartung
Luftgitter sind nicht abgedeckt; e) Kühlschrank steht nicht dicht an Wärmequellen; f) Sicherung ist nicht durchgebrannt. Ein beschädigtes Netzkabel darf nur durch einen autorisierten Kundendienst ausgetauscht werden. Indel Webasto Marine übernimmt bei Missachtung dieser Bedienungsanleitung keine Haftung. STÖRUNGEN Anzahl Fehlertyp... - Page 38 TB 31-41-51 PORTUGUÊS PORTUGUÊS Leia estas instruções, assim como a secção de Segurança, com atenção, antes de usar o frigorífico. TB31 585mm 350mm TB41 585mm 350mm TB51 585mm 350mm 189A0469 189A0470 CABO DE ALIMENTAÇÃO CA CABO DE ALIMENTAÇÃO CC...
- Page 39 TB 31-41-51 PORTUGUÊS PORTUGUÊS CARACTERÍSTICAS TÉCNICAS Dimensões Classe MODELO Peso A x L x P Tensão Tipo de Gás líquido (mm) equipamento DC 12/24V & TB31 380 x 585 x 350 16 Kg 29 L R134a AC 110-240V DC 12/24V & TB41 445 x 585 x 350 17 Kg...
- Page 40 TB 31-41-51 PORTUGUÊS PORTUGUÊS INSTALAÇÃO - Instale o frigorífico numa superfície seca, protegida e afastado de bordas. O frigorífico não deve ser utilizado ao ar livre, exposto a salpicos ou à chuva sem protecção. - O frigorífico precisa de uma boa ventilação, especialmente no lado superior. Deixe um espaço livre de, pelo menos, 15 cm à...
- Page 41 TB 31-41-51 PORTUGUÊS PORTUGUÊS UTILIZAÇÃO DO FRIGORÍFICO EM CASA (110V - 240V) - A alimentação deste modelo tanto pode ser através de 12/24 V como através da corrente eléctrica (110 V-240 V CA). - Está equipado com duas tomadas para ligar os diferentes cabos, para CC e CA, respectivamente. - O frigorífico dispõe de um interruptor automático de um tipo de alimentação para o outro.
- Page 42 TB 31-41-51 PORTUGUÊS PORTUGUÊS INSTALAÇÃO DA PEGA (OPCIONAL) TB31-TB41-TB51 Kit da pega O kit de instalação da pega é composto por: 1 – anilha, quantidade: 4 unidades 2 – anilha de mola, quantidade: 4 unidades 3 – componente tubular redonda, quantidade: 1 peça 4 –...
- Page 43 TB 31-41-51 PORTUGUÊS PORTUGUÊS UTILIZAÇÃO - Ligue o frigorífico à corrente CC ou CA. Prima o botão “ON/OFF” para ligar o equipamento. O ecrã LED do painel de controlo ilumina-se indicando a temperatura interior. - Prima o botão e para ajustar a temperatura. Prima o botão para aumentar ou o botão para diminuir a temperatura.
- Page 44 O cabo de alimentação só pode ser substituído por pessoal técnico qualificado e, sempre, pelo serviço de pós-venda autorizado pelo fabricante. A Indel Webasto Marine não pode ser responsabilizada de nenhuma forma caso não cumprir estri- tamente todas as disposições deste manual.
- Page 45 TB 31-41-51 SVENSKA Läs dessa anvisningar och säkerhetsinstruktioner innan kylboxen tas i bruk TB31 585mm 350mm TB41 585mm 350mm TB51 585mm 350mm 189A0469 189A0470 Anslutningssladd för AC 230 volt Anslutningssladd för DC 12/24 volt...
-
Page 46: Tekniska Data
TB 31-41-51 SVENSKA TEKNISKA DATA Mått MODELL Netto HxLxD Volym El-anslutning Kylgas vikt (mm) TB31 380 x 585 x 350 16 Kg 30 L DC 12/24V DC R134a TB41 445 x 585 x 350 17 Kg 40 L DC 12/24V DC R134a TB51 530 x 585 x 350... - Page 47 TB 31-41-51 SVENSKA SVENSKA INSTALLATION - Placera kylboxen på en torr skyddad och plan plats på avstånd från skarpa kanter som kan skada kyl- boxen. Den får inte användas utomhus oskyddad och t.ex. utsättas för regn eller stänkvatten. - Kylboxen kräver god ventilation, särskilt kring den ände där kompressorn är placerad. Se till att det finns en luftspalt runt om på...
- Page 48 TB 31-41-51 SVENSKA ANSLUTNING AV KYLBOXEN TILL VÄXELSTRÖMSNÄTET, 110 – 220 V. - Kylboxen kan matas med både likström 12-24 volt och växelström 110 - 240 volt - Den är försedd med två olika intag för anslutning av matarkablarna, figuren visar anslutning av nätspän- ningssladden, 110-240 volt.
-
Page 49: Montering Av Handtag
TB 31-41-51 SVENSKA MONTERING AV HANDTAG TB31-41-51 Kylboxen levereras med 2 monteringssatser för handtag som vardera består av: 4 st. brickor 4 st. delade brickor 1 st. metalrör 2 st. hållare Montering av delarna i satsen. Montera hållarna (4) på röret (3) Installering av handtaget. - Page 50 TB 31-41-51 SVENSKA ANVÄNDNING AV KONTROLLPANELEN ▲▲ Anslut till 115 eller 230 volt växelström eller 12 eller 24 volt likström. Tryck på knappen ON/OFF för att starta kylboxen. Ett LED som anger temperaturen innuti boxen tänds då på kontrollpanelen. Tryck på ▲ knappen för att öka temperaturen i boxen eller tryck på ▲knappen för att minksa temperaturen i boxen.
- Page 51 TB 31-41-51 SVENSKA AVFROSTNING Avfrosta kylboxen då frostlagret på insidan är ca. 4 mm eller mer. Stäng av kylboxen och låt frosten smälta. Skarpa föremål för att skrapa bort frost eller is får inte användas. Vänta tills all frost smält undan, rengör och torka ur boxen innan den startas på...
- Page 52 Indel Webasto Marine Srl Indel Webasto Marine USA Via dei Ronchi n.11 3391 SW 42nd Street 47866 - Sant'Agata Feltria (RN) - ITALY Hollywood, FL 33312 Tel. +39 0541 848030 - Fax +39 0541 848 563 Phone (954) 984 8448 - Fax (954) 979 2533 e-mail: info@indelwebastomarine.com...
Need help?
Do you have a question about the Isotherm TB31 and is the answer not in the manual?
Questions and answers