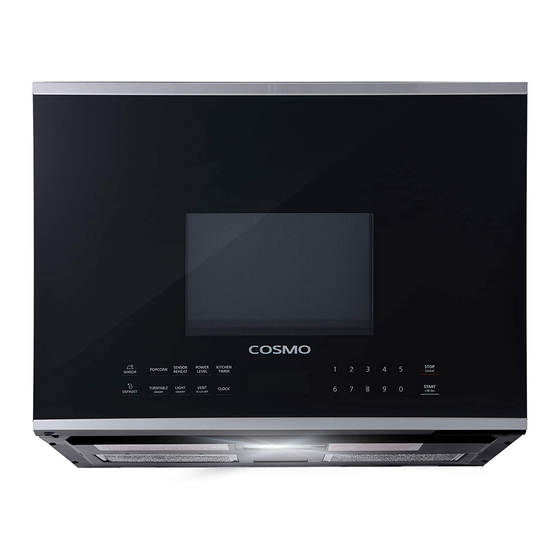
Cosmo COS-2413ORM1SS Install Manual
Over the range microwave
Hide thumbs
Also See for COS-2413ORM1SS:
- User manual (9 pages) ,
- User manual ,
- Quick start manual (1 page)
Table of Contents
Advertisement
Quick Links
Advertisement
Table of Contents

Summary of Contents for Cosmo COS-2413ORM1SS
- Page 1 I N S P I R I N G T H E W O R L D ’ S K I T C H E N OVER THE RANGE MICROWAVE COS-2413ORM1SS IMPORTANT SAFETY INSTRUCTIONS Carefully read the following Important information regarding installation safety and maintenance.
-
Page 2: Table Of Contents
Check Blower Plate ......Tools You Will Need ..........5 Mount the Microwave Oven ..21– COSMO appliances are designed according to the strictest safety and performance Mounting Space ............5 Installing or Change the standard for the North American market. We follow the most advanced Charcoal Filter ........22... -
Page 3: Important Safety Instructions
Installation Instructions Installation Instructions IMPORTANT SAFETY INSTRUCTIONS DAMAGE—SHIPMENT/ PARTS INCLUDED This product requires a three-prong grounded outlet. You should have the wall receptacle and circuit checked INSTALLATION (CONT.) The installer must perform a ground continuity check by a qualified electrician to make sure the receptacle is ADDITIONAL PARTS on the power outlet box before beginning the properly grounded. -
Page 4: Tools You Will Need
Installation Instructions TOOLS YOU WILL NEED Ruler or tape measure and straight edge Pencil Carpenter square # 1 Phillips screwdriver (optional) Tin snips (for cutting damper, if required) Scissors “ “ “ Electric drill with ⁄ ⁄ ⁄ (to cut template, if necessary) drill bits Filler blocks or scrap wood pieces, if needed... -
Page 5: Finding The Wall Studs
Installation Instructions Installation Instructions DETERMINING WALL PLATE LOCATION UNDER YOUR CABINET ALIGNING THE WALL PLATE Plate position -beneath flat bottom Plate position -beneath framed recessed cabinet bottom cabinet NOTE: READ IT IS VERY IN THE BEFORE AND FOLLOW INSTALLATIO IMPORTANT THE DIRECTIONS REAR WALL... -
Page 6: Installation Types
Installation Instructions Installation Instructions INSTALLATION INSTRUCTIONS FOR EXTERNAL EXHAUST DUCTING INSTALLATION TYPES (Choose A, B or C) Maximum duct length: NOTE: If you need to install ducts, note that the total duct length of 3 ⁄ ” x 10” (8.2 x 25.4 cm) rectangular or For satisfactory air movement, the total duct length of 5”... - Page 7 Installation Instructions Installation Instructions EXTERNAL EXHAUST DUCTING OUTSIDE TOP EXHAUST (Vertical Duct) OUTSIDE TOP EXHAUST (EXAMPLE ONLY) INSTALLATION OVERVIEW The following chart describes an example of one possible ductwork installation. A1. Attach Mounting Plate to Wall A2. Prepare Top Cabinet EQUIVALENT NUMBER EQUIVALENT...
-
Page 8: Adapting Microwave Blower For Outside Top Exhaust
USE TOP CABINET TEMPLATE Carefully pull out the blower unit. The wires MOUNT THE MICROWAVE FOR PREPARATION OF TOP ADAPTING MICROWAVE will extend far enough to allow you to adjust OVEN the blower unit. CABINET BLOWER FOR OUTSIDE End B TOP EXHAUST You need to drill holes for the top support screws, a hole large enough for the power cord to fit through,... - Page 9 3/8" TO EDGE Trim the rear wall template along the dotted line. 12" NOTE: IT IS VERY IMPORTANT READ AND FOLLOW THE DIRECTIONS IN THE INSTALLATION INSTRUCTIONS WITH THIS REAR WALL TEMPLATE. BEFORE PROCEEDING This Rear Wall Template serves to position the bottom 4"...
-
Page 10: Adapting Microwave Blower For Outside Back Exhaust
ATTACH THE MOUNTING ADAPTING MICROWAVE Place the blower unit back into the opening. PLATE TO THE WALL BLOWER FOR OUTSIDE AFTER: Fan Blade Openings Facing Back BACK EXHAUST (cont.) End A Rotate blower unit counterclockwise 180°. Before Rotation After Rotation End B •... -
Page 11: Mount The Microwave Oven
RECIRCULATING Cabinet Front (Non-Vented Ductless) MOUNT THE MICROWAVE Cabinet Bottom Shelf OVEN Filler Block INSTALLATION OVERVIEW Equivalent C1. Attach Mounting Plate to Wall to Depth C2. Prepare Top Cabinet of Cabinet C3. Check Blower Plate 3/8" TO EDGE along the dotted line. Recess Trim the rear wall template 12"... -
Page 12: Preparation Of Top Cabinet
MOUNT THE MICROWAVE OVEN USE TOP CABINET TEMPLATE MOUNT THE MICROWAVE Open the microwave door and remove the two FOR PREPARATION OF TOP OVEN (cont.) vent mounting screws ; l ocated on top of the CABINET microwave using a #1 Phillips screwdriver. You need to drill holes for the top support screws and Insert 2 self-aligning screws a hole large enough for the power cord to fit through. - Page 13 Reinstall the vent by sliding the bottom of the vent into place. Push the vent top into position and slide right into place. Replace the two vent mounting screws located on top of the microwave using a #1 Phillips screwdriver. Close the microwave door.
- Page 14 10-23/64 10-23/64 NOT E: IT READ AND IN THE VER Y IMPORTA FOLLO W THE DIRECTION I NST ALLATION NT TO BEFORE REAR WAL This R ear m ounti ng out l et. 1. Use a l evel accur ately 2.
- Page 15 Ne pas Réexpédier ce Produit au Magasin Pour tout problème concernant ce produit, veuillez contacter For full warranty details on this product please visit: le service des consommateurs Cosmo Customer Support au http://www.cosmoappliances.com/warranty +1(888) 784-3108 TO RECEIVE WARRANTY SERVICE, YOUR UNE PREUVE D’...
- Page 16 Cosmo is constantly making efforts to improve the quality and performance of our products, so we may make changes to our appliances without updating this manual. Electronic version of this manual is available at: www.cosmoappliances.com...


Need help?
Do you have a question about the COS-2413ORM1SS and is the answer not in the manual?
Questions and answers