Table of Contents
Advertisement
Quick Links
MICROWAVE OVEN
COS-3012ORLP1SS
OVER THE RANGE LOW PROFILE
MICROWAVE OVEN
USER MANUAL
IMPORTANT:
READ AND SAVE THESE INSTRUCTIONS.
FOR RESIDENTIAL USE ONLY.
INSTALLER:
PLEASE LEAVE THESE INSTRUCTIONS WITH THIS UNIT FOR
THE OWNER.
OWNER:
PLEASE RETAIN THESE INSTRUCTIONS FOR FUTURE
REFERENCE.
Rev. 22.10
Advertisement
Table of Contents

Related Manuals for Cosmo COS-3012ORLP1SS


Summary of Contents for Cosmo COS-3012ORLP1SS
- Page 1 MICROWAVE OVEN COS-3012ORLP1SS OVER THE RANGE LOW PROFILE MICROWAVE OVEN USER MANUAL IMPORTANT: READ AND SAVE THESE INSTRUCTIONS. FOR RESIDENTIAL USE ONLY. INSTALLER: PLEASE LEAVE THESE INSTRUCTIONS WITH THIS UNIT FOR THE OWNER. OWNER: PLEASE RETAIN THESE INSTRUCTIONS FOR FUTURE REFERENCE.
- Page 3 COSMO Appliances are designed according to the strictest safety and performance standard for the North American market. We follow the most advanced manufacturing philosophy.
-
Page 4: Table Of Contents
TABLE OF CONTENTS MICROWAVE OVEN SAFETY................4 Important Safety Instructions ................. 5 PRODUCT OVERVIEW ..................9 Control Panel ......................10 Display ......................... 11 FEATURES ......................12 Clock ........................... 12 Timer ........................... 12 Settings (User Preferences) ..................13 Turntable ........................14 USING THE MICROWAVE OVEN ................ - Page 5 MICROWAVE OVEN CARE ................29 General Cleaning ....................29 Installing/Replacing Filters and Lights ..............30 Grease Filters....................... 30 Charcoal Filters ....................31 Cooktop Lights ....................32 Cavity Light ......................33 TROUBLESHOOTING ..................34 LIMITED WARRANTY ..................36...
-
Page 6: Microwave Oven Safety
MICROWAVE OVEN SAFETY READ ALL INSTRUCTIONS BEFORE USING THE APPLIANCE READ ALL INSTRUCTIONS BEFORE USING THE APPLIANCE Your safety and the safety of others are very important. We have provided many important safety messages in this manual and on your appliance. Always read and obey all safety messages. This is the safety alert symbol. -
Page 7: Important Safety Instructions
IMPORTANT SAFETY INSTRUCTIONS WARNING: To reduce the risk of burns, electric shock, fire, injury to persons, or exposure to excessive microwave energy: • Read all instructions before using • As with any appliance, close the microwave oven. supervision is necessary when used by children. - Page 8 IMPORTANT SAFETY INSTRUCTIONS • • To reduce the risk of fire in the Liquids, such as water, coffee, or oven cavity: tea are able to be overheated beyond the boiling point without - Do not overcook food. appearing to be boiling. Visible Carefully attend the bubbling or boiling when the microwave oven when paper,...
- Page 9 PRECAUTIONS TO AVOID POSSIBLE EXPOSURE TO EXCESSIVE MICROWAVE ENERGY • • Do not attempt to operate this Do not operate the oven if it is oven with the door open since damaged. It is particularly open-door operation can result important that the oven door in harmful exposure to close properly and that there is microwave energy.
- Page 10 ELECTRICAL REQUIREMENTS WARNING ELECTRIC SHOCK HAZARD • Plug into a grounded 3 prong outlet. • Do not remove ground prong. • Do not use an adapter. • Do not use an extension cord. • Failure to following these instructions can result in death, fire, or electrical shock.
-
Page 11: Product Overview
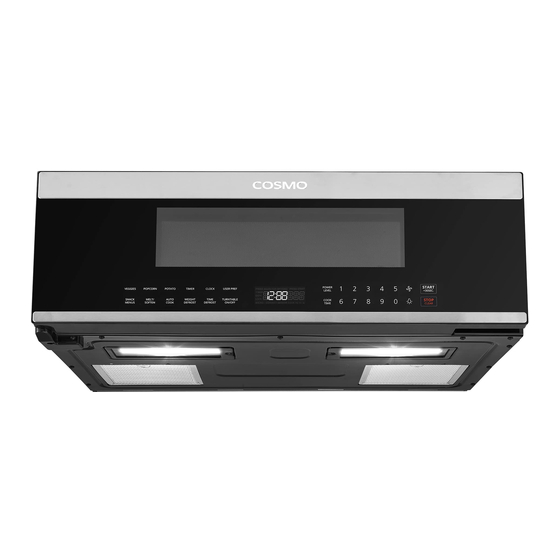
PRODUCT OVERVIEW EXTERIOR 1. Microwave Door 2. Microwave Door Handle (Recessed) 3. Cooktop Light 4. Vent Fan... -
Page 12: Control Panel
CONTROL PANEL START POWER SENSOR SENSOR TIMER/ USER POPCORN POTATO REHEAT COOK CLOCK PREF LEVEL +30 SEC. SMART SENSOR SNACK MELT/ AUTO WEIGHT TIME TURNTABLE STOP COOK MENUS SOFTEN COOK DEFROST DEFROST ON/OFF TIME CLEAR POPCORN TIME DEFROST POTATO TURNTABLE ON/OFF SENSOR REHEAT DISPLAY SENSOR COOK... -
Page 13: Display
DISPLAY Indicator Icon Description Press the same button again to toggle and PRESS AGAIN FOR OPTIONS select more options. PRESS START Press START to begin cycle or accept the change/input. TIMER Timer is running. DEFR. Defrost mode is running. LOCK Control lock is activated. -
Page 14: Features
FEATURES CLOCK The clock is a 12-hour clock. It can be disabled with the STOP/CLEAR keypad when the microwave oven is reconnected to the power. Setting the Clock 1. Press TIMER/CLOCK twice. The default time 12:00 is shown in the display. 2. -
Page 15: Settings (User Preferences)
SETTINGS (USER PREFERENCES) The microwave oven has additional settings which can be accessed using the USER PREF keypad. These additional settings can only be adjusted while the microwave oven is not running or the display is showing the time of day. They will restore to default after reconnecting power or a power failure. -
Page 16: Turntable
Setting the Demo Mode 1. Press USER PREF 4 times, and wait for demo mode options to show in the display. 2. Press USER PREF to toggle and select On or Off. 3. Press START to confirm. TURNTABLE For best cooking results, do not operate the microwave oven without having the turntable in place. -
Page 17: Cookware And Dinnerware
COOKWARE AND DINNERWARE Microwave-Safe • Browning dish (Follow manufacturer recommendations) • Ceramic glass, glass • Earthenware (Follow manufacturer recommendations) • Melamine (Follow manufacturer recommendations) • Paper towels, paper plates, napkins (Use non-recycled paper) • Plastic wraps, bags, covers, dinnerware, containers (Follow manufacturer recommendations) •... -
Page 18: Manual Cook (Cook Time)
MANUAL COOK (COOK TIME) The microwave oven can accept cooking time up to 99 minutes and 99 seconds (99:99). Always enter the seconds even if they are both zeros. 1. Press COOK TIME after placing food and closing the door. 2. -
Page 19: Express Cook
EXPRESS COOK Press one of the numbers from 1 to 9 once will start the microwave oven in 2 seconds at 100% power level directly for the minutes entered. For example, to set a 6-minute cooking at 100% power level directly: 1. -
Page 20: Potato
POTATO Cooks 1-4 potatoes, 4-10 oz (113-283 g) each, in similar size. Pierce each potato several times with a fork. Place on paper towel, around turntable edges, at least 1" (2.5 cm) apart. Place single potato to the side of the turntable. Let stand 5 minutes after cooking. -
Page 21: Sensor Cook
SENSOR COOK Touch SENSOR COOK Sensor Cook Options Preset Portion Size 1 time Bacon Select: 1-3 slices 2 times Frozen Dinner 10-20 oz 3 times Rice 1-2 cups 4 times Frozen Breakfast 8-12 oz 5 times Fresh Veggies 1-4 cups 6 times Frozen Veggies 1-4 cups... -
Page 22: Melt/Soften
MELT/SOFTEN Touch MELT/SOFTEN Melt/Soften Options Preset Portion Size 1 time Melt Butter Select: 1 or 2 sticks 2 oz 2 times Melt Chocolate Select: 4 oz 8 oz 1 Pint 3 times Soften Ice Cream Select: 1.5 Quarts 3 oz 4 times Soften Cream Cheese Select:... -
Page 23: Auto Cook Recipes
To Use Auto Cook Program: 1. Place food and close the door. 2. Press AUTO COOK to toggle and select different auto cook options. 3. (For Scrambled Eggs only) Press START and enter the number within the range allowed to select the best matching portion size. (e.g. Enter 2 for 2 eggs.) 4. - Page 24 Garlic Shrimp Ingredients • 1/4 cup butter • 1 tablespoon chili pepper paste • • 6 garlic cloves (crushed/minced) Salt to taste • • 2 tablespoons fresh chives 1 pound large shrimp (raw, (chopped) peeled, and deveined) • 2 tablespoons lemon juice Method 1.
- Page 25 Stuffed Mushrooms Ingredients • 1 pound whole baby bella • 2 tablespoons bread crumbs mushrooms • 1 teaspoon lemon juice • 2 tablespoons butter (melted) • 1/4 teaspoon garlic pepper • 1 bunch green onion (chopped) • Crushed red pepper to taste •...
- Page 26 Asiago Red Potatoes Ingredients • 1 1/4 pounds red potatoes • 1 1/4 cups milk (peeled and thinly sliced) • 1 tablespoon butter (melted) • 2 tablespoons all-purpose flour • 5oz shredded Asiago cheese • 1/2 teaspoon salt Method 1. Add potatoes, flour, and salt in a microwave-safe casserole dish. 2.
- Page 27 Lemon Shrimp Risotto Ingredients • 2 tablespoons butter • 2 cups Arborio rice (Italian short-grain rice) or medium- • 2 teaspoons olive oil grain rice • 1 onion (chopped) • 1 pound medium shrimp • 1 medium shallot (minced) (shelled and deveined) •...
-
Page 28: Time Defrost
TIME DEFROST Uses reduced power to defrost food without cooking it, and allows thawing frozen food quicker than in the fridge. To Use Time Defrost Program: 1. Press TIME DEFROST after placing food and closing the door. 2. Press the numbers to enter the length of defrost time. 3. -
Page 29: Weight Defrost
WEIGHT DEFROST Automatically sets the defrosting times and power levels to give even defrosting results for meats, poultry and fish up to 6 pounds in weight. To Use Weight Defrost Program: 1. Press WEIGHT DEFROST after placing food and closing the door. 2. -
Page 30: Vent Fan
VENT FAN Press Vent Fan keypad once for High fan setting. You may press this keypad again to select Low fan setting. This microwave oven hood has 2 available speeds HIGH → LOW → OFF. NOTE: • The vent fans may automatically come on at Low fan setting when the temperature of the built-in temperature sensor near the fans is over 158°F (70°C). -
Page 31: Microwave Oven Care
MICROWAVE OVEN CARE GENERAL CLEANING IMPORTANT: Before cleaning, make sure all controls are OFF and the microwave oven is cool. Always follow label instructions on cleaning products. To avoid damage to the microwave oven caused by arcing due to soil buildup, keep cavity, microwave inlet cover, cooking rack supports, and area where the door touches the frame clean. -
Page 32: Installing/Replacing Filters And Lights
INSTALLING/REPLACING FILTERS AND LIGHT BULBS To purchase replacement filters or light bulbs • Visit www.cosmoappliances.com or reference the contact information at the end of this manual. GREASE FILTERS Grease filters are located on the underside of the microwave oven. The grease filters should be removed and cleaned at least once a month. -
Page 33: Charcoal Filters
CHARCOAL FILTER Charcoal filters are located at the top venting of the microwave oven. The charcoal filter cannot be cleaned and should be replaced about every 6 months. NOTE: For recirculation, do not operate the microwave oven without the filters in place. -
Page 34: Cooktop Lights
COOKTOP LIGHTS The cooktop lights are located on the underside of the microwave oven and are replaceable. To replac e the cooktop light: 1. Using a Phillips screwdriver, remove the glass cover screw at the bottom of the microwave oven. 2. -
Page 35: Cavity Light
CAVITY LIGHT The cavity light is located at the top left of the microwave oven near the front. To replace the cavity light: 1. Using a Phillips screwdriver, remove the metal cover screw from the top left of the microwave oven and remove the metal cover. 2. -
Page 36: Troubleshooting
TROUBLESHOOTING First try the solutions suggested here. If you need further assistance or more recommendations that may help you avoid a service call, refer to the warranty page in this manual. If you experience Recommended Solutions Microwave oven Check the following: will not operate •... - Page 37 If you experience Recommended Solutions Fan running • This is normal. The microwave oven's cooling fan, during cooktop which is separate from the vent fan, automatically usage comes on during microwave oven operation to cool the microwave oven. It may also automatically come on and cycle on and off to cool the microwave oven's controls while the cooktop below is being used.
-
Page 38: Limited Warranty
LIMITED WARRANTY WARRANTY AND SERVICE TO RECEIVE WARRANTY SERVICE, YOUR PRODUCT MUST BE REGISTERED. TO REGISTER AND REVIEW FULL WARRANTY DETAILS, VISIT: WWW.COSMOAPPLIANCES.COM/WARRANTY SCAN TO REGISTER CUSTOMER SUPPORT TO CHAT WITH US LIVE FOR ASSISTANCE, VISIT: WWW.COSMOAPPLIANCES.COM/CHAT SCAN TO CHAT... - Page 39 IMPORTANT Do Not Return This Product To The Store If you have a problem with this product, please contact COSMO Customer Support at +1 (888) 784-3108 DATED PROOF OF PURCHASE, MODEL #, AND SERIAL # REQUIRED FOR WARRANTY SERVICE. IMPORTANT Ne pas Réexpédier ce Produit au Magasin...
- Page 40 MEMO...
- Page 42 APPLIANCES Cosmo is constantly making efforts to improve the quality and performance of our products, so we may make changes to our appliances without updating this manual. Electronic version of this manual is available at: www.cosmoappliances.com...
Need help?
Do you have a question about the COS-3012ORLP1SS and is the answer not in the manual?
Questions and answers