Table of Contents
Advertisement
Advertisement
Table of Contents

Subscribe to Our Youtube Channel
Related Manuals for Superlift SDO-5 DC FS 1000


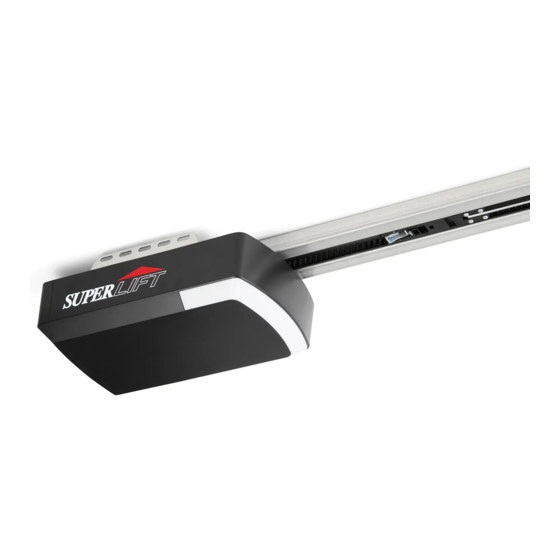
Summary of Contents for Superlift SDO-5 DC FS 1000
-
Page 3: Table Of Contents
CONTENTS Important Safety Recommendations ………………….………………………. Warranty Exclusions ……………………….……………………………………………………………. Technical Specifications …………………..............Assembly Instructions …………................. Assembling Drive Rail to Power Head ……………………………………………………………. Drive Rail Hanger Options …….…………………………………………………………………… Drive Belt Tensioning ………………………………………………………………………………… Installation Instructions ………………..............Identifying Garage Door Type ………………………………………………………………. 7 Mounting Header and Door Bracket …………………………………………………………….. -
Page 4: Important Safety Recommendations
IMPORTANT SAFETY RECOMMENDATIONS FAILURE TO COMPLY WITH THE FOLLOWING SAFETY RECOMMENDATIONS MAY RESULT IN SERIOUS PERSONAL INJURY, DEATH AND/OR PROPERTY DAMAGE. READ AND FOLLOW ALL SAFETY AND INSTALLATION INSTRUCTIONS CAREFULLY. The installation of your new Automatic Garage Door Opener (herein after referred to as “AGDO”) must be carried out by a technically qualified or licensed person. -
Page 5: Warranty Exclusions
IMPORTANT SAFETY RECOMMENDATIONS Never use the AGDO unless the Garage Door is in full view and free from objects such as cars, children and/or adults. Never allow children to operate the AGDO. Never operate the AGDO when children/persons are under or near the path of the door. Children must always be supervised when near the Garage Door and when the AGDO is in use. -
Page 6: Technical Specifications
TECHNICAL SPECIFACTIONS FS 1000 FS 1200 Input Voltage 220 - 240V / 110 - 127V, 50–60 Hz Maximum Lift Force 1000 N 1200 N Maximum Door Area 15.0 ㎡ 18.0 ㎡ Maximum Door Weight 100 kg 130kg Maximum Door Height 3500mm 3500mm Drive Rail... -
Page 7: Assembly Instructions
ASSEMBLY INSTRUCTIONS 1. Assembling Drive Rail to Power Head 1.1 On a clean, smooth surface, unpack the Drive Rail, Power Head and two “U” type brackets with Nyloc Nuts as shown in (Fig.1) 1.2 Align and insert the rail onto drive shaft. 1.3 Attach the two “U”... -
Page 8: Installation Instructions
INSTALLATION INSTRUCTIONS 4 Identifying Garage Door Type 4.1 From the diagrams depicted in Fig.3 select the type of installation that is suited to your Garage Door type. Installation to track-type fittings Installation to jamb-type fittings Installation to jamb-type fittings Mount door bracket approx. Door Bracket 1/3 Of the way down from the Use straight door arm only... -
Page 9: Attaching Drive Rail To Header Bracket
INSTALLATION INSTRUCTIONS 6. Attaching Drive Rail to Header Bracket 6.1 Lay the assembled AGDO on the floor in line with the centerline of the Garage Door so that the Power Head is furthest from the Garage Door. 6.2 Lift the Drive Rail up to the Header Bracket so that the Terminal Bracket sits in between the ears of the Header Bracket (Fig.5) 6.3 Align the mounting holes and fully insert the Long Clevis Pin provided 6.4 Secure the Clevis Pin with the Spring Clip provided. -
Page 10: Mounting Connecting Arms To Carriage And Door
INSTALLATION INSTRUCTIONS 8. Mounting Connecting Arms to Carriage and Door 8.1 Close the Garage Door with the Carriage disengaged. 8.2 Attach the Bent Connecting Arm to the Door Mounting Bracket using the Clevis Pin provided. (Fig.7) 8.3 Bring the Straight and Bent Connecting Arms together and align the 2 closest sets of holes. -
Page 11: Settings And Adjustments (Programming The Operator)
SETTINGS & ADJUSTMENTS Fig. 9 Programming the Operator 11. Preparation 11.1 Make sure the carriage is locked into automatic mode. Lift and lower the door by hand to confirm the carriage is locked onto the belt connector. 11.2 Connect the AGDO to a properly earthed power supply using the power chord provided. Make sure that no excess chord hangs below the AGDO when it is plugged in. -
Page 12: Setting Door Travel
SETTINGS & ADJUSTMENTS 13. Setting Door Travel 13.1 Press and hold the “Set” button until “1” is displayed on the LED screen. (Fig.11) 13.2 Momentarily press the “Set” button. “n” will be displayed on the LED screen. (Fig.12) Press and hold the “Up” button. The door will begin to travel in the open direction. -
Page 13: Auto Close Settings
SETTINGS & ADJUSTMENTS 16. Auto Close Mode 16.1 In Auto Close Mode the AGDO will automatically close at a preset time after it reaches the fully open position. 16.2 To enable the Auto Close function press and hold down the “Set” button until “1” is displayed on the LED screen. -
Page 14: Auto Reverse Height Setting
SETTINGS & ADJUSTMENTS 19. Auto Reverse Height Setting 19.1 Auto Reverse Height Setting allows the AGDO to Auto Reverse to a preset height. 19.2 To change the Auto Reverse Height Setting press and hold down the “Set” button until “1” is displayed on the LED screen. (Fig.11) 19.3 Momentarily press the “Up”... -
Page 15: Transmitter Quantity Setting
SETTINGS & ADJUSTMENTS 22. Transmitter Quantity Setting 22.1 In Transmitter Quantity Mode the AGDO can be programmed to accept from 5 to 50 transmitters. 22.2 To enable the Transmitter Quantity Setting press and hold down the “Set” button until “1” is displayed on the LED screen. (Fig.11) 22.3 Momentarily press the “Up”... -
Page 16: Installation, Enabling And Testing Safety Beam Function
25.13 If the Garage Door does not commence to close at all, check that the Safety Beams are aligned correctly. 25.14 Important Note: The AGDO will only support the fitment of Superlift Brand 4 wire Safety Beams. 25.15 Note: If safety beams are not fitted, ensure that “0” is displayed and safety beam... -
Page 17: Maintenance Alarm Setting
SETTINGS & ADJUSTMENTS 26. Maintenance Alarm Setting 26.1 In Maintenance Alarm Mode the AGDO LED Courtesy Light will automatically start flashing once a preset number of open/close cycles is reached. 26.2 To enable the Maintenance Alarm function press and hold down the “Set” button until “1”... -
Page 18: Output Terminals
OUTPUT TERMINALS 31. Output Terminals 31.1 There are 5 main functions supported by the output terminals of the AGDO. (Fig.29) 31.2 Pedestrian Door Switch. This ensures the garage door will not open if the pedestrian door is not in a locked position. 31.3 PE Beam function works when Photo Electric Safety Beams are fitted. -
Page 19: Parts List
SPARE PARTS Item Description Item Description Item Description Sprocket Assembly Straight Arm L.E.D Cover U Hanging Bracket Belt Connection Control Panel Cover-1 Twist on Bracket Caution Card Control Panel Cover-2 C rail – Steel Release Handle Main Cover Mounting Bracket Transmitter L.E.D Light Belt Adjuster Wheel... -
Page 20: Trouble Shooting Guide
TROUBLE SHOOTING GUIDE Symptom Possible Cause Remedy Opener not working Mains power not turned on Turn on mains power LED lights are dim Garage door obstructed Check for obstruction Door stops during open cycle before Garage door may be obstructed Disengage opener and check door is running freely reaching the fully open position Garage door springs may have lost tension... -
Page 21: Notes
NOTES...
Need help?
Do you have a question about the SDO-5 DC FS 1000 and is the answer not in the manual?
Questions and answers