Table of Contents
Advertisement
Advertisement
Table of Contents

Related Manuals for Superlift RDO-1BP


Summary of Contents for Superlift RDO-1BP
- Page 1 801-001-03...
-
Page 2: Important Safety Recommendations
IMPORTANT SAFETY RECOMMENDATIONS FAILURE TO COMPLY WITH THE FOLLOWING SAFETY RECOMMENDATIONS MAY RESULT IN SERIOUS PERSONAL INJURY, DEATH AND/OR PROPERTY DAMAGE. READ AND FOLLOW ALL SAFETY AND INSTALLATION INSTRUCTIONS CAREFULLY. The installation of your new Automatic Garage Door Opener (herein after referred to as “AGDO”) must be carried out by a technically qualified or licensed person. -
Page 3: Warranty Exclusions
IMPORTANT SAFETY RECOMMENDATIONS 16. Never allow children to operate the AGDO. 17. Never operate the AGDO when children/persons are under or near the path of the door. Children must be supervised at all times when near the Garage Door and when the AGDO is in use. 18. -
Page 4: Operating Controls
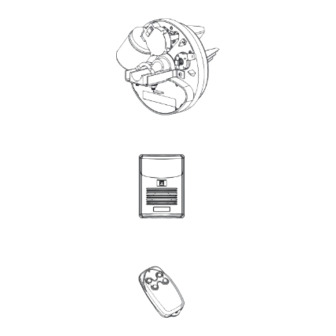
OPERATING CONTROLS Fig 1 Fig 1A Fig 2 Fig 2A Fig 3 Fig 3A - 4 - RDO1BP B... - Page 5 OPERATING CONTROLS PHOTO BEAM ENABLE DIP SWITCH. (refer Sec.18 ) AUTO CLOSE ENABLE DIP SWITCH. (refer Sec.21) AUTO CLOSE DELAY DIP SWITCHES are used to adjust the time to auto close. (refer Sec.21) SAME AS ABOVE CODE BUTTON used for storing or erasing transmitter security code (refer Sec.15) CLOSE DIRECTION SAFETY OBSTRUCTION FORCE ADJUSTMENT SCREW is used to adjust the Safety Obstruction Force value in the Open Direction (refer Sec.11 &...
-
Page 6: Requirements Prior To Installation
REQUIREMENTS PRIOR TO INSTALLATION A. Forward Your AGDO is comprised of 2 major individual components being, Drive Unit (Fig.2) and Control Box (Fig 3). This section of the manual deals with the basic fitting requirements which should be met before you attempt to install your opener. - Page 7 REQUIREMENTS PRIOR TO INSTALLATION F. Converting For Right Hand Installation Locate the red and black motor wires. (Fig.6) The standard connection (Black to Black and Red to Red) must be reversed. Unplug the wires at the connectors and reverse them so that they are connected Red to Black and Black to Red.
-
Page 8: Installation Instructions
INSTALLATION INSTRUCTIONS Mounting The Control Box Establish a location at approximately chest height on the same wall face as that of the Door Mounting Bracket to which Drive Unit will be secured. Make sure that the cable running from the Control Box is long enough to reach up to the Drive Unit for the location that has been selected. - Page 9 INSTALLATION INSTRUCTIONS Remove the U-bolt from the end of the garage door to which the Drive Unit will be fitted. Having ensured that the prop is stable and firmly in position, remove the garage door mounting bracket from the wall. If not already disengaged then disengage the AGDO Drive Unit by pulling once on the release lever (Fig.11) - the forked drive gear should now rotate freely Orientate the Drive Unit as per Fig.9...
- Page 10 INSTALLATION INSTRUCTIONS Engaging And Disengaging The Drive Unit To disengage the Drive Unit from the garage door pull down on the Red Release Chord. (Fig.11) To engage the Drive Unit to the garage door pull down once more on the Red Release Chord. Important Note: Always disengage the Drive Unit with the garage door in the fully closed position.
-
Page 11: Settings And Adjustments
SETTINGS AND ADJUSTMENTS Door Travel Adjustment – Open Direction With the Drive Unit in disengaged mode move the door up by hand to the fully open position. Remove the limit cover to expose the Limit Adjust Cams. (Fig.2) Slightly loosen the 3 cam locking screws (to the extent that you can rotate the cam by hand with a firm push) Rotate the Open Limit (Lower) Cam (Fig.2) by hand, in the direction of the Open Limit (Lower) Switch, until you hear the Switch “click”. - Page 12 SETTINGS AND ADJUSTMENTS 12. Safety Obstruction Force Adjustment – Open Direction 12.1 Locate the Open direction Safety Obstruction Force “SOFA” adjustment thumb screw and turn it to the maximum setting in a clockwise direction. (Upper of 2 screws Fig.4) 12.2 With the garage door in the fully CLOSED position - press the red button located on the face of the Control Box. As the garage door commences to OPEN, slowly begin to turn the “SOFA”...
-
Page 13: Wall Switch Installation
SETTINGS AND ADJUSTMENTS 14. Safety Obstruction Force Testing – Open Direction 14.1 With the garage door in the fully closed position – press the red button located on the front face of the Control Box to open the door. 14.2 As the garage door is opening push down firmly on the bottom rail of the door (middle of the door from the inside) 14.3 The garage door should stop without having to exert excessive force. - Page 14 (Fig.1, Item 12) of the AGDO must be positioned so that the middle and right hand pins are connected. 18.11 Important Note: The AGDO will only support the fitment of genuine Superlift Brand 2 wire Safety Beams. 19. Safety Beams - Alignment 19.1 Align the 2 Safety Beams (by turning the mounting bracket) so that their lenses are aimed directly at each other.
-
Page 15: Troubleshooting Guide
TROUBLE SHOOTING GUIDE SYMPTOM POSSIBLE CAUSES REMEDY Mains power not turned on Turn on mains power Door will not operate Door is obstructed Remove obstruction Door is locked or motor Unlock door Mechanical door lock has been engaged Inspect door and remove jam jammed Door will not reverse on Safety Obstruction Force setting is too high... - Page 16 CONTROL BOX MOUNTING TEMPLATE - 16 - RDO1BP B...
Need help?
Do you have a question about the RDO-1BP and is the answer not in the manual?
Questions and answers