Advertisement
Table of Contents
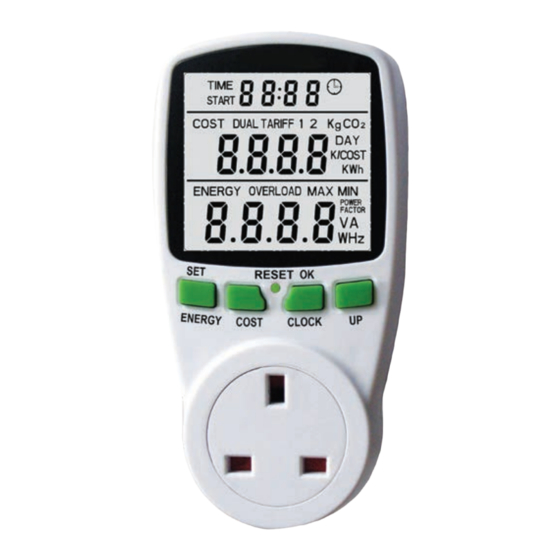
DISPLAY
The display is split into 3 rows:
The display will remain active while the power meter is plugged into a powered
socket. On removing power from the meter the display will become inactive after
approx. 10 seconds however any button press will reactivate the display until there
has been 10 seconds of inactivity.
BUTTONS
• CLOCK: Pressing the clock button in normal use will cause the display row to
toggle between the time of day and the accumulated time for which energy has
been recorded.
• COST: Pressing the cost button will cause the display row to cycle through values of
accumulated cost » accumulated energy » accumulated carbon footprint » energy
price setting 1 » energy price setting 2 (only appears if you have chosen dual tari ).
• ENERGY: Pressing the energy button will cause the display row to cycle through
instantaneous values of power » voltage » frequency » current » power factor »
max power » min power » overload power
• UP: This button is used to change the values of the digits during the setting-up process.
• RESET: The unit can be reset using a pointed implement to press the reset button.
This will clear all accumulated data and return the unit to its factory settings.
• SET: This button can be used to move between digits during the setting-up
process. It will also allow the user to cycle through both the energy and cost screens
simultaneously in normal use.
• OK: (Use during setup) This button is used to con rm settings during the
setting-up process.
Row 1: Display either the time of day
OR the accumulated time for which
energy use has been recorded.
Row 2. Cycle through the display to
show accumulated energy and cost
information.
Row 3. Energy screen to show instanta-
neous metered readings. (Cycle
through with the energy button.)
SET-UP
• Setting the currency and price for kWh:
Single Tari
1. Press and hold the cost button for 3 seconds.
2. Press the ok button to select single tari .
3. Use the UP button to cycle through the digits and use the set button to move
to the next digit.
4. Press the cost button to exit.
Dual Tari
1. Press and hold the cost button for 3 seconds.
2. Use the up button to toggle from single tari to dual tari setup and press the ok
button to enter Tari 1 setup.
3. Use the up button to cycle through the digits and use the set button to move to
the next digit.
4. Press the ok button after you have nished setting the cost for tari 1. You can
now set the start time for tari 1.
5. Set the start time using the up button to cycle through the digits and the set
button to move between digits.
6. Press ok button to move into tari 2 setup, and repeat the steps above for setting
cost and start time of tari 2.
7. Exit the setup by pressing the cost button.
• Setting the Clock:
Press and hold the clock button for 3 seconds. The time screen will appear on the
display. Use the up button to cycle through the digits. Use the set button to move
between the digits. Press the ok button to nish the setting procedure.
• Setting the Overload Power (Optional):
Press and hold the energy button for 3 seconds. The overload screen will appear on
the display. Use the set button to select the digit to change. Use the up button to
cycle through the digits. Press the ok button to nish the setting procedure. The
default factory setting is 3680W.
Advertisement
Table of Contents

Related Manuals for Energenie ENER007


Summary of Contents for Energenie ENER007
- Page 1 DISPLAY The display is split into 3 rows: Row 1: Display either the time of day SET-UP OR the accumulated time for which energy use has been recorded. • Setting the currency and price for kWh: Row 2. Cycle through the display to show accumulated energy and cost Single Tari information.
- Page 2 Model: ENER007 supplier for commercial customers. Energenie is a trading name of Sandal plc, Claremont House, Deans Court, Bicester, UK, OX26 6BW If you have questions, please visit us at CAT II www.energenie4u.co.uk...
Need help?
Do you have a question about the ENER007 and is the answer not in the manual?
Questions and answers