Chapters
Table of Contents

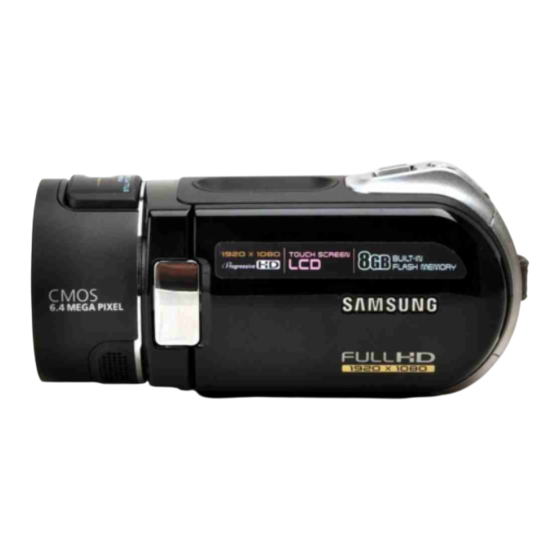
Related Manuals for Samsung VP-HMX20C


Summary of Contents for Samsung VP-HMX20C
-
Page 1: User Manual
High Definition Digital Camcorder user manual imagine the possibilities Thank you for purchasing this Samsung product. To receive a more complete service, please register your product at www.samsung.com/global/register VP-HMX20C... - Page 2 key features of your HD camcorder The HD camcorder is capable of recording and playing back both Full HD (high definition: 1920x1080) and Standard Definition (SD) image quality. Select the recording image quality, Full HD (high definition) or SD (standard definition), before recording.
- Page 3 • This HD camcorder supports Anynet+. Anynet+ is an AV network system that enables you to control all connected Samsung AV devices with an Anynet+ supported Samsung TV remote control. Refer to the corresponding TV’s user manual for more details.
-
Page 4: Safety Warnings
safety warnings What the icons and signs in this user manual mean; Means that death or serious personal injury is a risk. WARNING Means that there is a potential risk for personal injury or material damage. CAUTION To reduce the risk of fire, explosion, electric shock, or personal injury when using your HD camcorder, follow these basic safety precautions: CAUTION Means hints or referential pages that may be helpful when operating the HD camcorder. -
Page 5: Important Information On Use
Play back your trial recording to make sure the video and audio have been recorded properly. • The recorded contents cannot be compensated for: - Samsung cannot compensate for any damage caused when a recording cannot be played back because of a defect in the HD camcorder or memory card. - Page 6 • All the trade names and registered trademarks mentioned in this manual or other documentation provided with your Samsung product are trademarks or registered trademarks of their respective holders. • Windows® is registered trademark or trademark of Microsoft Corporation, registered in the United States and other countries.
-
Page 7: Precautions When Using
precautions when using IMPORTANT NOTE • Handle the liquid crystal display (LCD) with care: The LCD is a very delicate display device: Do not press its surface with force, hit it or prick it with a sharp object. If you push the LCD surface, unevenness in display may occur. If unevenness does not disappear, turn the camcorder off, wait for a few moments, and then turn it on again. - Page 8 precautions when using • Do not point directly at the sun: - If direct sunlight strikes the lens, the HD camcorder could malfunction or a fire could occur. - Do not leave the HD camcorder with the LCD screen exposed to direct sunlight: This could cause a malfunction.
-
Page 9: Table Of Contents
contents INTRODUCTION TO BASIC FEATURES GETTING TO KNOW YOUR HD CAMCORDER PREPARATION BEFORE RECORDING What’s included with your HD camcorder Front & left view Right & top view Rear & bottom view Using the remote control Installing the button type battery Using the cradle Holding the HD camcorder Charging the battery pack... - Page 10 contents RECORDING PLAYBACK CONNECTION 02_ English Recording movie images Taking photo images Recording with ease for beginners (EASY Q mode) Capturing still images in movie record mode (dual recording) Capturing still images during movie images playback Using the external microphone Zooming Self record using the remote control Using the built-in flash...
- Page 11 USING THE MENU ITEMS EDITING MOVIE IMAGES IMAGE MANAGEMENT PRINTING PHOTO IMAGES Handling menus and quick menus Menu items Quick menu items Recording menu items Playback menu items Setting menu items Deleting a section of a movie image Dividing a movie image Combining two movie images Playlist Protection from accidental erasure...
- Page 12 contents CONNECTING TO A PC MAINTENANCE & ADDITIONAL INFORMATION TROUBLESHOOTING SPECIFICATIONS WARRANTY 04_ English System requirements Installing the Cyberlink DVD Suite Connecting the USB cable Viewing the contents of storage media 100 Transferring files from the HD camcorder to your PC 101 Playing back the video files on your PC 103 Maintenance 104 Additional information...
-
Page 13: Introduction To Basic Features
introduction to basic features This chapter introduces you to the basic features of your HD camcorder. See the reference pages below for more information. Step 1 Preparation • Charging the battery pack page 13 • Setting the date/time and the OSD language.pages 24-25 •... -
Page 14: Getting To Know Your Hd Camcorder
HD camcorder WHAT’S INCLUDED WITH YOUR HD CAMCORDER Your new HD camcorder comes with the following accessories. If any of these items is missing from your box, call Samsung’ s Customer Care Centre. ✪ The exact appearance of each item may vary by model. -
Page 15: Front & Left View
FRONT & LEFT VIEW Recording indicator Lens Built-in speaker Display ( ) / iCHECK button Flash ( ) button EASY Q button Jack cover When using the remote control, open the LCD screen and point directly at the remote sensor. CAUTION The HDMI jack is on the Cradle. -
Page 16: Right & Top View
getting to know your HD camcorder RIGHT & TOP VIEW PHOTO button Zoom (W/T) lever Swivel handle 08_ English Built-in flash Grip belt hook Grip belt... -
Page 17: Rear & Bottom View
REAR & BOTTOM VIEW ⓐ ⓑ ⓒ MODE button/Mode indicator (Movie ( ) / Photo ( ) / Play ( OPEN switch Recording start/stop button POWER switch CHG (charging) indicator MIC (external microphone) jack DC IN jack Battery pack/Memory card cover ⓐ... -
Page 18: Using The Remote Control
preparation This section provides information on using this HD camcorder; such as how to use the provided accessories, how to charge the battery, how to setup the operation mode and initial setup. USING THE REMOTE CONTROL 10_ English REC button Display ( ) button Skip (... -
Page 19: Installing The Button Type Battery
INSTALLING THE BUTTON TYPE BATTERY Installing the button type battery in the remote control 1. Turn the battery holder counterclockwise (as indicated with () mark) using your fingernail or a coin to open it. The battery holder opens. 2. Insert the battery into the battery holder with the positive (+) terminal facing down and press it firmly until you hear a locking sound. -
Page 20: Holding The Hd Camcorder
preparation HOLDING THE HD CAMCORDER Attaching the grip belt Insert your right hand from the bottom of the HD camcorder up to the base of your thumb. Put your hand in a position where you can easily operate the Recording start/stop button, PHOTO button, and the Zoom lever. -
Page 21: Charging The Battery Pack
2. Insert the battery pack into the battery pack slot until it softly clicks. • Make sure that word mark (SAMSUNG) is facing left while the camcorder is placed as shown in the figure. 3. Close the battery pack cover. -
Page 22: Charging Indicator
Charging time Recording format • The time is only for reference. Figures shown above are measured under Samsung’s test environment, and may differ from your actual use. • The recording time shortens dramatically in a cold environment. The continuous recording times in the operating instructions are measured using a fully charged battery pack at 25 °C (77 °F). - Page 23 • Gently slide the Battery pack release switch in the direction as shown in the figure. 3. Close the battery pack cover. • Additional battery packs are available at your local Samsung dealer. • If the HD camcorder will not be in use for a while, remove the battery pack from the HD camcorder.
-
Page 24: Maintaining The Battery Pack
The recording time is affected by temperature and environmental conditions. • We recommend only using the original battery pack that is available from your Samsung retailer. When the battery reaches the end of its life, please contact your local dealer. -
Page 25: Basic Hd Camcorder Operation
BASIC HD CAMCORDER OPERATION Set the appropriate operation mode according to your preference using the POWER switch and MODE button. Turning the HD camcorder on and off You can turn the camcorder on or off by sliding the POWER switch downward. The lens opens automatically with HD camcorder on. -
Page 26: Screen Indicators
preparation SCREEN INDICATORS STBY 00:00:00 [70Min] Memory Full 1/50 01/JAN/2008 00:00 • The OSD indicators are based on memory capacity of 8GB (built-in memory). • The above screen is an example for explanation: It is different from the actual display. •... -
Page 27: Movie Play Mode
00:00:20 / 00:10:00 100-0001 01/JAN/2008 Memory Full The play related tabs disappear on the screen a few seconds (about 3 seconds) after the image plays back. They reappear when you touch any point on the screen. Movie play mode Movie play mode Operating status (Play/Pause)/Highlight view File name (file number) Time code (elapsed time / recorded time) -
Page 28: Photo Record Mode
preparation 3958 Memory Full 1/50 01/JAN/2008 00:00 ( ) The maximum number of recordable images displayed is 99,999 even though the actual number of recordable images may exceed 99,999. 20_ English Photo record mode Photo record mode Self timer* Face detect Warning indicators and messages Image counter ( ... -
Page 29: Photo Play Mode
1 / 12 100-0001 01/JAN/2008 00:00 X 1.1 Photo play mode Photo play mode Music slide show / Playback zoom File name (file number) Image counter (current image / total number of recorded images) Storage media (built-in memory or memory card) Battery info. -
Page 30: Switching The Information Display Mode
preparation USING THE DISPLAY ( )/iCHECK BUTTON Switching the information display mode You can switch between the on-screen information display modes: Press the Display ( )/iCHECK button. The full and minimum display modes will alternate. • Full display mode: All information will appear. •... -
Page 31: Using The Lcd Screen
USING THE LCD SCREEN Adjusting the LCD screen 1. Open up the LCD screen 90 degrees with your finger. 2. Rotate it to the best angle to record or play. Do not lift the HD camcorder by holding the LCD screen. WARNING •... -
Page 32: Initial Setting: Osd Language & Date And Time
preparation INITIAL SETTING: OSD LANGUAGE & DATE AND TIME To read the menus or messages in your desired language, set the OSD language. To store the date and time during recording, set the date/time. Selecting the OSD language You can select the desired language to display the menu screen and the messages. 1. -
Page 33: Setting The Date And Time
Setting the date and time Set the date and time when using this HD camcorder for the first time. 1. Touch Menu ( ) tab. 2. Touch Settings ( ) tab. 3. Touch up ( )/down ( ) tab until “Date/Time Set” is displayed. 4. -
Page 34: Before Recording
before recording SELECTING THE STORAGE MEDIA • You can record movie and photo images on the built-in memory or a memory card, so you should select the desired storage media before starting recording or playback. • You can use SDHC and MMCplus cards on your HD camcorder. (Some cards are not compatible depending on the memory card manufacturer and memory card type.) •... -
Page 35: Inserting/Ejecting A Memory Card
INSERTING/EJECTING A MEMORY CARD Inserting a memory card 1. Open the memory card cover by sliding the OPEN switch upward as shown in the figure. 2. Insert the memory card into the slot until it softly clicks. • Make sure that the terminal portion is facing left and the camcorder is placed as shown in the figure. -
Page 36: Recordable Time And Number Of Images
Approx. 1802 640x480 Approx. 5106 • The above figures are measured under Samsung’s standard recording test conditions and may differ depending on actual use. • The higher the resolution and quality settings, the more memory is used. • The compression rate increases when choosing lower resolution and quality settings. The higher the compression rate is, the longer the recording time will be. -
Page 37: Selecting A Suitable Memory Card
SELECTING A SUITABLE MEMORY CARD • You can use a SDHC memory card and MMCplus cards. You can also use a SD memory card, but it is recommended that you use a SDHC memory card and MMCplus with your HD camcorder. (SD card supports upto 2GB.) •... - Page 38 • Be careful to keep memory card out of the reach of children, who might swallow it. Note on use • Samsung is not responsible for data loss due to misuse. • We recommend using a memory card case to avoid losing data from moving and static electricity.
-
Page 39: Recording Movie Images
recording Basic procedures to record a movie or photo image are described below and on the following pages. RECORDING MOVIE IMAGES • You can record movie images in Movie mode only. page 17 • This HD camcorder provides two Recording start/stop buttons. One is on the rear side of the camcorder and the other is on the LCD panel. - Page 40 recording • Movie images are compressed in H.264 (MPEG-4.AVC) format. • Eject the battery pack when you have finished recording to prevent unnecessary battery power consumption. • For on-screen information display, see page 18. • For approximate recording time, see page 28. •...
-
Page 41: Taking Photo Images
TAKING PHOTO IMAGES You can take photo images in Photo mode only. page 17 1. Slide the POWER switch downward to turn on the power and press the MODE button to set Photo ( ). page 17 • The lens opens automatically with HD camcorder on. •... -
Page 42: Recording With Ease For Beginners (Easy Q Mode
recording RECORDING WITH EASE FOR BEGINNERS (EASY Q MODE) • The EASY Q function is only available with the Movie and Photo modes. page 17 • With the EASY Q function, most of the HD camcorder settings are automatically adjusted, which frees you from making detailed adjustments. 1. -
Page 43: Dual Recording
CAPTURING STILL IMAGES IN MOVIE RECORD MODE (DUAL RECORDING) • This function works only in Movie mode. page 17 • Your HD camcorder allows the choice to capture digital still images without interrupting video capture; even in STBY mode. • You can record still images on the storage media during recording movie image. 1. -
Page 44: Capturing Still Images During Movie Images Playback
recording CAPTURING STILL IMAGES DURING MOVIE IMAGES PLAYBACK • This function works only in Play mode. page 17 • If you press the PHOTO button during playback, the camcorder stops playing and saves one image of the current movie scene that is paused. •... -
Page 45: Using The External Microphone
USING THE EXTERNAL MICROPHONE Connect external microphone (optional-user provided) to the external microphone jack of this HD camcorder for clearer audio recordings. Turn on the switch on microphone and start recording. • This HD camcorder cannot use a plug-in power type microphone (power supplied from camcorder). -
Page 46: Self Record Using The Remote Control
recording SELF RECORD USING THE REMOTE CONTROL • The SELF TIMER function works only in Movie and Photo modes. page 17 • When you use the SELF TIMER function on the remote control, recording begins automatically in 10 seconds. 1. Press the SELF TIMER button. •... -
Page 47: Using The Built-In Flash
USING THE BUILT-IN FLASH • This function works only in Photo mode. page 17 • You can take natural looking flash photo images with appropriate illumination using the built-in flash, whether they are night scenes, indoors or in other dark places. Press the Flash ( ) button. -
Page 48: Changing The Playback Mode
playback You can view recorded movie and photo images in thumbnail index view and play them in various ways. CHANGING THE PLAYBACK MODE • You can set the movie recording, the photo recording and the play mode in turn with the MODE button. •... -
Page 49: Playing Movie Images
PLAYING MOVIE IMAGES • This function works only in Play mode. page 17 • You can find a desired movie image quickly using thumbnail index views. • You can also use the playback related buttons on the remote control. page 42 1. -
Page 50: Various Playback Operations
playback Various playback operations Playback / Pause / Stop • Play and Pause functions alternate when you touch Playback ( during playback. Touch Return ( • You can perform the same operation by using the remote control. ( Search playback •... -
Page 51: Viewing Photo Images
VIEWING PHOTO IMAGES • This function works only in Play mode. page 17 • You can play back and view photo images recorded on the storage media. 1. Slide the POWER switch downward to turn on the power and press the MODE button to set Play ( •... -
Page 52: Zooming During Playback
playback • Music slide show is available also in the quick menu. page 54 • HD camcorder provides background music files from its built-in memory as a basic offer on your purchase. When you display saved photos from the built-in memory as Music Slide Show, the saved background music files (SONG0001.M4A) will be played automatically. -
Page 53: Connecting To A High Definition Tv
The HDMI jack on your HD camcorder is for output use only. • You can use the Anynet+ function by connecting the HD camcorder to a Samsung Anynet+ supported TV with the HDMI cable. Refer to the corresponding TV user manual for more details. - Page 54 connection Connecting to a normal TV (16:9/4:3) • This connection type is used when downconverting recorded HD images to SD for playback. • When playing back HD-quality (1920x1080) movie images on a SDTV, the images are down-converted to 720x576. • The multi-AV cable does not support HD-quality images so it down-converts them to SD-quality images. •...
-
Page 55: Viewing On Tv Screen
Viewing on TV screen 1. Slide the POWER switch downward to turn on the power and press the MODE button to set Play ( page 17 2. Turn on the TV and set the input source on the TV to the input connection the HD camcorder is connected to. •... - Page 56 connection • Adjust the sound volume on the TV. • The remote control is useful when operating the HD camcorder while viewing an image on a TV screen. • Information that the HD camcorder is recording will appear on the TV screen: You can switch between the on-screen information display modes.
-
Page 57: Handling Menus And Quick Menus
using the menu items You can operate the HD camcorder more usefully by setting menus related to recording, playback and setting. HANDLING MENUS AND QUICK MENUS • You can change the menu settings to customise your HD camcorder. Access the desired menu screen by following the steps below and change the various settings. - Page 58 using the menu items ✪ Follow the instruction below to use each of the menu items listed after this page. For example: setting the White Balance in movie mode When using Menu ( ) tab: 1. Touch Menu ( ) tab. 2.
-
Page 59: Menu Items
MENU ITEMS • Accessible items in menu vary depending on the operation mode. • For operation details, see the corresponding page. Recording menu items ( Operating mode Movie ( Scene Mode (AE) White Balance Exposure Super C.Nite ... - Page 60 using the menu items Playback menu items ( Operating mode Play Option Highlight Playlist Delete Protect Copy Partial Delete Edit Divide Combine Cont. Capture File Info Music Slide Show Slide Show Interval Resize Print Mark (DPOF) (memory card only) Setting menu items ( Operating mode Date/Time Set Date/Time...
-
Page 61: Setting Menu Items
Setting menu items ( Operating mode Format Beep Sound Shutter Sound Auto Power Off REC Lamp Remote USB Connect TV Type Component Out TV Display Default Set Language Demo Anynet+ (HDMI-CEC) • Some items will not appear depending on the storage media type. •... -
Page 62: Quick Menu Items
using the menu items QUICK MENU ITEMS • Accessible items in quick menu vary depending on the operation mode. • For operation details, see the corresponding page. Recording menu items Operating mode Movie ( Storage Resolution Focus ... -
Page 63: Recording Menu Items
RECORDING MENU ITEMS You can setup the menu items for movie and photo images recording. Scene Mode (AE) This HD camcorder automatically sets the shutter speed and aperture according to the subject brightness for optimum recording. You can also specify one of six modes depending on subject conditions, recording environment or purpose of filming. -
Page 64: White Balance
using the menu items White Balance This HD camcorder automatically adjusts the colour of subject. Change the white balance setting depending on the recording conditions. Settings Auto This option is generally used to control the white balance automatically. This controls the white balance according to the outdoor ambience, especially for Daylight close up and when the subject is of one dominant colour. - Page 65 Exposure The HD camcorder usually adjusts the exposure automatically. You can also manually adjust the exposure depending on the recording conditions. Settings This option automatically adjusts image brightness according to the environmental Auto light conditions. You can adjust the brightness of an image manually. Adjust the brightness when the Manual subject is too bright or too dark.
-
Page 66: Anti-Shake (Eis: Electronic Image Stabilizer)
using the menu items Super C.Nite You can make the subject recorded appear to be in slow motion by controlling the shutter speed, or a brighter image in dark places without a compromise in colours. Settings Disables the function. Record a brighter image. Normal Super Record a brighter image even in a dark location. -
Page 67: Digital Effect
Digital Effect The digital effect enables you to give a creative look to your recording. Select the appropriate digital effect for the type of picture that you wish to record and the effect you wish to create. There are 5 different digital effect options. Settings Disables the function. - Page 68 using the menu items Focussing manually during recording This HD camcorder automatically focuses a subject from close-up to infinity. However, the correct focus may not be obtained depending on the recording condition. In this case, use the manual focus mode. 1.
- Page 69 Shutter The HD camcorder automatically sets the shutter speed depending on the subject brightness. You can also manually adjust the shutter speed according to the scene conditions. Settings Auto The HD camcorder automatically sets the appropriate aperture value. - In movie record mode, shutter speed can be set to 1/25, 1/50, 1/120, 1/250, 1/500, 1/1000, 1/2000, 1/4000, or 1/10000.
-
Page 70: Tele Macro
using the menu items • The image may not seem smooth when a high shutter speed is set. • This function will be set to “Auto” in the EASY Q mode. • When recording with a shutter speed of 1/1000 or higher, make sure the sun is not directly shining into the lens. - Page 71 Resolution (Movie images) • You can select the resolution of movie image to be recorded. • Regarding detailed image capacity, see page 28. Settings [HD] 1080/25p Records in the HD (1920x1080 25p) format. [HD] 1080/50i Records in the Full HD (1920x1080 50i) format. [SD] 576/50p Records in the SD (720x576 50p) format.
-
Page 72: Wind Cut
using the menu items Quality • You can select the quality of a movie to be recorded. • Regarding detailed image capacity, see page 28. Settings Super Fine Records in the highest quality. Records in the high quality. Fine Normal Records in the normal quality. -
Page 73: Self Timer
Self Timer • When you use the self timer function, recording begins automatically in 10 seconds. • You can do the same operation by using the remote control. page 38 Settings Disable the function. Recording begins automatically in 10 seconds by pressing the Recording start/stop 10 Sec or PHOTO button. -
Page 74: Face Detect
using the menu items Fader You can give your recording a professional look by using special effects such as fade in at the beginning of a sequence or fade out at the end of a sequence. Settings Disables the function. Fader is executed. -
Page 75: Digital Zoom
Guideline • Guideline displays certain patterns on the LCD screen so that you can easily set the image composition when recording movie or photo images. • The HD camcorder provides 3 types of guidelines. Settings Disable the function. Enables you to center the subject for proper recording. Enables you to place the subject within a safety zone which prevents it being cut when editing in 4:3 for left and right and 2.35:1 for top and bottom. - Page 76 using the menu items Sharpness This function allows the user to obtain sharper photo images by processing the image after it is shot. Settings Normal The photo images appear with sharp edges and are suitable for printing. Soft Smoothes the edges of photo images. Sharp Enhances to sharpen the edges of photo images.
-
Page 77: Play Option
• ISO sensitivity is a measure of how rapidly the HD camcorder reacts to a light source. The higher the sensitivity, the brighter the image is under the same exposure condition. Settings Auto Automatically sets the ISO to compensate for various lighting conditions (up to 3200). This mode is recommended for bright lighting conditions. -
Page 78: Cont. Capture
using the menu items Highlight Shows a section of recorded movie images at random according to the total play time and number of files. Settings Shows a section of a movie image(s) that was created within 24 hours of the Recent most recent one. -
Page 79: Slide Show Interval
Slide Show Interval You can set the slide show interval between 1 second and 3 seconds. Settings Photo images play back in 1 second intervals. 1Sec 3Sec Photo images play back in 3 second intervals. • Loading time may vary depending on the photo image size. •... -
Page 80: Date/Time Set
using the menu items SETTING MENU ITEMS You can setup the date/time, OSD language, video output, and display settings of the HD camcorder. Date/Time Set Set the current date and time so they can be recorded correctly. page 25 Date/Time You can set the date and time to display on the LCD screen. -
Page 81: Lcd Enhancer
File No. File numbers are assigned to images in the order they were recorded. Settings Assigns file numbers in sequence even if the memory card is replaced with Series another one or after formatting or deleting all files. The file number is reset when a new folder is created. Resets the file number to 0001 even after formatting or deleting all files or Reset inserting a new memory card. -
Page 82: Storage Info
using the menu items Storage Type You can record movie and photo images on the built-in memory or a memory card, so you should select the desired storage media before starting recording or playback. Settings Records or play backs images in built-in memory. Memory Card Records or play backs images in memory card. -
Page 83: Shutter Sound
Beep Sound You can turn the beep sound on or off. Settings Cancels the beep sound. When on, a beep will sound every time a button is pressed. • The beep sound is off when recording movie. • When beep sound is set to off, the power on/off sound is off. Shutter Sound You can turn the shutter sound on or off. -
Page 84: Usb Connect
using the menu items REC Lamp You can turn the recording indicator on the front of the camcorder on or off during movie or photo recording. Settings Recording indicator is off. Recording indicator is on during recording. Remote This function allows you to enable or disable the remote control for use with the HD camcorder. Settings Disable the function. -
Page 85: Component Out
TV Type You can select the aspect ratio during playback on TV. Settings 16:9 Select 16:9 to use the wide screen TV mode. Select to use the standard 4:3 display aspect ratio. This function is available when the HD camcorder is connected to a TV. •... -
Page 86: Default Set
using the menu items TV Display You can select the output path of the OSD (On-Screen Display). This allows you to set the OSD for viewing on the TV. Settings The OSD appears in the LCD screen only. The OSD appears in the LCD screen and a TV. Default Set You can restore menu settings to default (initial settings at the factory) pages 51-54 Initializing the HD camcorder settings to factory defaults does not affect recorded images. -
Page 87: Anynet+ (Hdmi-Cec)
Demo function. If you execute Demo function, release the Auto Power Off function. page 75 Anynet+ (HDMI-CEC) Anynet+ is an AV network system that enables you to control all connected Samsung AV devices with an Anynet+ supported Samsung TV’s remote control. You can use the Anynet+ function by connecting the HD camcorder to an Anynet+ supported TV with an HDMI cable and by setting “Anynet+ (HDMI-CEC)”... -
Page 88: Deleting A Section Of A Movie Image
editing movie images You can edit recorded movie images in various ways. Movie image editing cannot be performed when the battery is low. DELETING A SECTION OF A MOVIE IMAGE • This function works only in Play mode. page 17 •... -
Page 89: Dividing A Movie Image
• You can not delete the protected images. You must first release the protect function to delete it. page 88 • A deleted part of the movie image can not be recovered. • If you want to edit from the first, touch Return ( •... - Page 90 editing movie images 4. Search the point of division by touching playback related ( • You can jump directly to the division point by touching the desired point on the progress bar. 5. Touch pause ( ) tab at the point of division, then touch Cutting ( •...
- Page 91 Example: You can divide a movie image into two in order to delete a section you no longer need. 1. Before dividing 0~60 seconds 2. After image is divided at 30 second point. 0~30 seconds • The movie image is divided into two movie images. 3.
-
Page 92: Combining Two Movie Images
editing movie images COMBINING TWO MOVIE IMAGES • This function works only in Play mode. page 17 • You can combine two different movie images. 1. Touch HD Movie ( HD) tab or SD Movie ( SD) tab. • The thumbnail index view appears accordingly. 2. - Page 93 PLAYLIST What’s the “Playlist?” The playlist is created by gathering your favorite recorded movie images. Since the playlist is not created by copying data, it will consume little of the storage capacity. When creating or deleting a playlist, the original movie image will not be erased.
-
Page 94: Creating The Playlist
editing movie images Creating the playlist • This function works only in Play mode. page 17 • You can create a playlist on this HD camcorder by gathering your favorites from the recorded movie images. Since the playlist is not created by copying data, you will consume less storage capacity. -
Page 95: Arranging The Order Of Movie Images Within A Playlist
Arranging the order of movie images within a playlist You can arrange movie images within a playlist by moving them to the desired positions. 1. Touch “Playlist” “1080/25P,” “1080/50i,” “576/50P,” or “Slow Motion” (arranging playlist according to movie resolution) Menu ( 2. -
Page 96: Protection From Accidental Erasure
image management This chapter describes information about movie or photo file management tools such as protection, deletion, and copy. Image management cannot be performed when the battery is low. PROTECTION FROM ACCIDENTAL ERASURE • This function works only in Play mode. page 17 •... -
Page 97: Deleting Images
DELETING IMAGES • This function works only in Play mode. page 17 • You can erase the images recorded on the storage media. • An image that has been deleted cannot be recovered. 1. Touch HD Movie ( HD) tab, SD Movie ( SD) tab, or Photo ( 2. -
Page 98: Copying Images
image management COPYING IMAGES • This function works only in Play mode. page 17 • You can copy images between the built-in memory and a memory card. • Images are copied to the destination storage while leaving original images in the source storage. -
Page 99: Dpof Print Setting
printing photo images You can print photo images by inserting the DPOF setting card to a DPOF-compatible printer or connecting the HD camcorder to the PictBridge printer. DPOF PRINT SETTING • Print Mark (DPOF) can be set only on photo images stored in the memory card. •... -
Page 100: Direct Printing With A Pictbridge Printer
printing photo images DIRECT PRINTING WITH A PICTBRIDGE PRINTER If your printer is compatible with PictBridge, photo images can be printed easily by connecting the camcorder with the USB cable directly to the printer. DPOF setting can also be used. page 91 NOTICE: After selecting “PictBridge”... -
Page 101: Pictbridge Menu
PictBridge menu Setting the date/time imprint option Touch Menu ( ) tab “Date/Time” “Off,” “Date,” “Time,” or “Date & Time” Return ) tab. To print using the DPOF setting If the printer is compatible with DPOF, you can use the DPOF setting. page 91 •... -
Page 102: System Requirements
connecting to a PC This chapter explains how to connect the camcorder to a PC using the USB cable for various functions. ✪ When connecting a USB cable to a PC, refer to the software installation instructions and PC specifications below. SYSTEM REQUIREMENTS CyberLink DVD Suite The following requirements must be satisfied to use CyberLink DVD Suite. -
Page 103: Installing The Cyberlink Dvd Suite
INSTALLING THE CyberLink DVD Suite DVD Suite is software for easily editing MPEG, AVI, and other video files, still images, and other contents for creating a movie. Before you begin: Quit any other software you are using. (Check that there are no other application icons on the status bar.) 1. - Page 104 5. “Customer Information” screen appears. • Click “Next.” 6. “Choose Destination Location” screen appears. • Choose the destination location which you want to install. • Click “Next.” 7. “Setup status” screen appears. • The installation progresses in order as follows “Power Starter” “Power DVD” “Power Director”...
-
Page 105: Disconnecting The Usb Cable
CONNECTING THE USB CABLE To copy the movie files and photo files to your PC, connect your HD camcorder to the PC with a USB cable. 1. Set the “USB Connect” to “Mass Storage.” page 76 2. Connect the HD camcorder to the PC with a USB cable. •... -
Page 106: Viewing The Contents Of Storage Media
(If you want to record on a memory card, insert the memory card.) 2. Connect the HD camcorder to the PC with a USB cable. page 97 • The “Removable Disk” or “Samsung” window appears on the PC’s screen after a moment. - Page 107 Structure of folders and files on the storage media • The folder and file structure for storage media is as follows: • Don’t arbitrarily change or remove the folder or file name. It may not be playable. • The file naming follows DCF (Design rule for Camera File System). Image configuration file ...
-
Page 108: Transferring Files From The Hd Camcorder To Your Pc
connecting to a PC Image format Movie image • Movie images are compressed in H.264 format. The file extension is “.MP4.” • The image size is 1920X1080(HD), 720x576(SD) or 448x336(SD). page 63 • Movie images set with [SD] 576/50p resolution and Normal image quality is supported by the 640x576, 25p (VGA) ratio of 4:3. Photo image •... -
Page 109: Playing Back The Video Files On Your Pc
PLAYING BACK THE VIDEO FILES ON YOUR PC Installing the CyberLink DVD Suite (pages 95-96) allows your PC to simply back up and playback your video files. Enjoy the high quality of graphics and sound of the videos on your PC screen. Programs in the DVD Suite Package You can playback, edit, and burn a DVD by using the following programs in the DVD Suite software: •... - Page 110 connecting to a PC Drag & Drop for easy playback Drag and drop a video file directly onto the PowerDVD main screen and the program will play the file right away! You can play all video files with a file format supported by the PowerDVD and playlist. 1.
-
Page 111: Cautions When Storing
maintenance & additional information MAINTENANCE Your HD camcorder is a product of superior design and craftsmanship and should be treated with care. The suggestions below will help you fulfill any warranty obligations and allow you to enjoy this product for many years. •... -
Page 112: Lcd Screen
- Do not touch the metal parts. • Copy the recorded files to your PC. Samsung shall not be responsible for any lost data. (It is recommended that you copy the data from your PC to other media for storage.) •... -
Page 113: Battery Packs
Remove from charger or powered unit when not in use, as these components may use current even when switched off. • It is recommended that only genuine Samsung batteries are used in this camcorder. Using generic non-Samsung batteries can cause damage to the internal charging circuitry. •... -
Page 114: Using Your Hd Camcorder Abroad
maintenance & additional information USING YOUR HD CAMCORDER ABROAD • Each country or region has its own electric and colour systems. • Before using your HD camcorder abroad, check the following items. • Power sources The provided AC adaptor features automatic voltage selection in the AC range from 100 V to 240 V. You can use your camcorder in any countries/regions using the AC power adaptor supplied with your camcorder within the AC 100 V to 240 V, 50/60 Hz range. -
Page 115: Warning Indicators And Messages
TROUBLESHOOTING Before contacting a Samsung authorized service centre, perform the following simple checks. They may save you the time and expense of an unnecessary call. Warning indicators and messages Battery pack Message Icon Low Battery Low Battery Connect AC adaptor and... - Page 116 troubleshooting Message Icon Card Locked Unknown Card Error Not Formatted Not Supported Format Not Supported Card Low Speed Card. Please record a Lower quality. Recording Message Icon Write Error Release the EASY Q 108_ English Informs that... The write protection tab on an SD or SDHC card has been set to lock.
- Page 117 Message Icon Activate remote control. Number of video files is full. Cannot record video. Number of photo files is full. Cannot take a photo. Playback Message Icon Not enough free space in Memory. Not enough free space in Card. Different format Read Error Message Icon...
- Page 118 Note before sending your camcorder for repair. • If these instructions do not solve your problem, contact your nearest Samsung authorized service centre. • Depending on the problem, the built-in memory may need to be initialized or replaced and the data will be deleted.
-
Page 119: Symptoms And Solutions
✪ If these instructions do not solve your problem, contact your nearest Samsung authorized service centre. Symptoms and solutions Power Symptom The HD camcorder does not turn on. The power turns off automatically. Power cannot be turned off. The battery pack is quickly discharged. - Page 120 troubleshooting Displays Symptom The TV screen or LCD display has distorted images or has stripes at the top/ bottom or on the left/right. Unknown image appears on the LCD screen. Unknown indicator appears on the screen. The afterimage remains on the LCD screen.
- Page 121 Symptom The recording stops automatically. When recording a subject illuminated by bright light, a vertical line appears. When the screen is exposed to direct sunlight during recording, the screen becomes red or black for an instant. During recording, the date/time does not display.
- Page 122 troubleshooting Storage Media Symptom Memory card functions are not operable. Image cannot be deleted. You cannot format the memory card. The data file name is not indicated correctly. 114_ English Explanation/Solution • Insert a memory card into your camcorder properly. page 27 •...
- Page 123 Adjusting the image during recording Symptom Focus does not adjust automatically. The image appears too bright or flickering, or changes in colour. Image’s colour balance is not natural. The subject passing by the frame very quickly appears Playback on your HD camcorder Symptom Using the playback (Play/Pause) function would not start playing.
- Page 124 troubleshooting Symptom Photo images stored on a storage media are not displayed in the actual size. Playback is interrupted unexpectedly. Playback on other devices (TV, etc) Symptom You cannot view the image or hear the sound from the connected device. 116_ English Explanation/Solution •...
- Page 125 Symptom The image appears distorted on a You cannot view the image or hear the sound from a TV connected using the HDMI cable. Connecting/Dubbing with other devices (Recorder, PC, Printer, etc) Symptom You cannot dub correctly using the HDMI cable. You cannot dub correctly using the Multi-AV cable.
- Page 126 troubleshooting Connecting to a computer Symptom The computer does not recognise your HD camcorder. Cannot play a movie file properly on a PC. Cannot use the provided software (DVD Suite) on a Macintosh computer. DVD Suite does not function properly. The image or sound on your camcorder is not played on your computer properly.
- Page 127 Overall operations Symptom The date and time are incorrect. The camcorder does not turn on, or does not operate by pressing any button. Lens cover is not closed even when the power is off. Menu Symptom Menu items are grayed out. Explanation/Solution •...
- Page 128 Menu Symptom Menu items are grayed out. 120_ English Explanation/Solution Cannot use “Exposure” “Anti-Shake(EIS)” “Focus: Touch Point” “Shutter” “Face Detect” “Quality” “Fader” “Cont. Shot” “ISO” “Digital Effect: Cinema Tone” Because of the following settings “ Shutter: Manual,” “Super C.Nite,” “ISO,” Built-in Flash “Resolution: [SD]Slow Motion,”...
-
Page 129: Specifications
specifications Model name: VP-HMX20C System Video signal H.264 (MPEG-4.AVC) Picture compression format AAC (Advanced Audio Coding) Audio compression format Image device 1/1.8” CMOS (Complementary Metal-Oxide Semiconductor) (Max: 6.4M pixels/Effective: 4M pixels) Lens F1.8 10x (Optical), 10x (Digital) Electronic zoom lens Focal length 6.3 ~ 63mm Filter diameter... -
Page 130: Power Sources (United Kingdom Only)
The mains lead on the power adapter is supplied with a moulded plug incorporating a fuse. The value of the fuse is indicated on the pin face of the plug and, if it requires replacing, a fuse approved to BS1362 of the same rating must be used. -
Page 131: Contact Samsung Worldwide
If you have any questions or comments relating to Samsung products, please contact the SAMSUNG customer care centre. Region Country CANADA North America MEXICO U.S.A ARGENTINE BRAZIL CHILE NICARAGUA HONDURAS COSTA RICA ECUADOR EL SALVADOR Latin America GUATEMALA JAMAICA PANAMA PUERTO RICO REP. - Page 132 RoHS compliant Our product complies with “The Restriction Of the use of certain Hazardous Substances in electrical and electronic equipment”, and we do not use the 6 hazardous materials- Cadmium(Cd), Lead (Pb), Mercury (Hg), Hexavalent Chromium (Cr +6), Poly Brominated Biphenyls (PBBs), Poly Brominated Diphenyl Ethers(PBDEs)- in our products.
Need help?
Do you have a question about the VP-HMX20C and is the answer not in the manual?
Questions and answers