Epson SC-F3000 Series User Manual
Hide thumbs
Also See for SC-F3000 Series:
- User manual (154 pages) ,
- Setup manual (30 pages) ,
- Manual (28 pages)
Table of Contents
Advertisement
Quick Links
Advertisement
Table of Contents

Related Manuals for Epson SC-F3000 Series


Summary of Contents for Epson SC-F3000 Series
- Page 1 User's Guide (Excerpt) CMP0232-02 EN...
- Page 2 (excluding the U.S.) failure to strictly comply with Seiko Epson Corporation’s operating and maintenance instructions. Seiko Epson Corporation shall not be liable for any damages or problems arising from the use of any options or any consumable products other than those designated as Original Epson Products or Epson Approved Products by Seiko Epson Corporation.
-
Page 3: Users
SC-F3000 Series User's Guide (Excerpt) Copyrights and Trademarks Note for North American and Latin American Users IMPORTANT: Before using this product, make sure you read the safety instructions in the online Notices. -
Page 4: Table Of Contents
Starting and Canceling Printing....61 Using Epson Edge Dashboard....27 Starting......61 Canceling. - Page 5 System Requirements..... . 94 Epson Edge Dashboard....94 Garment Creator for SC-F3000 Series.
-
Page 6: Meaning Of Symbols
SC-F3000 Series User's Guide (Excerpt) Viewing the Manuals Manual Organization Viewing the Manuals North America Meaning of Symbols To view user manuals, visit: ❏ https://www.epson.com/support/f3070 (U.S.) Warning: Warnings must be followed ❏ http://www.epson.ca/support/f3070 (Canada) to avoid serious bodily injury. Latin America... -
Page 7: Viewing Video Manuals
This section uses the Adobe Acrobat Reader as an example to explain the basic operations for viewing the Click Epson Video Manuals from the top page of PDF in Adobe Acrobat Reader DC. Online Manual, or click the following blue text to view the manuals. - Page 8 SC-F3000 Series User's Guide (Excerpt) Viewing the Manuals You can input and search for keywords, such as the names of items you want to confirm. For Windows Right click on a page in the PDF manual and select Find in the menu that is displayed to open the search toolbar.
-
Page 9: Introduction
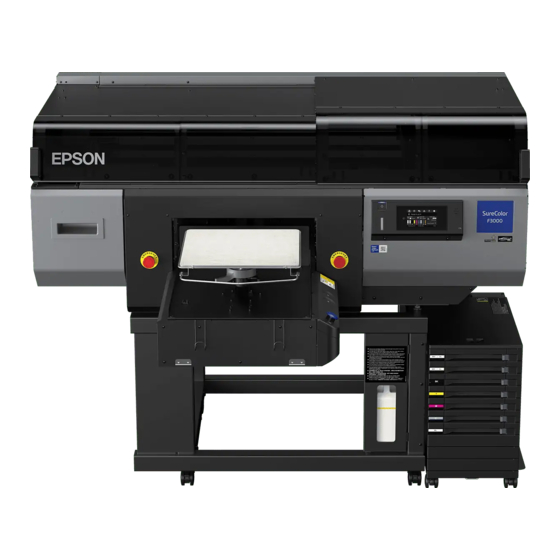
SC-F3000 Series User's Guide (Excerpt) Introduction Introduction Printer Parts Front Section Printer Cover (left)/(right) Open when replacing consumables and cleaning the suction caps. Normally closed when using the printer. Note: Items can be placed on top of the printer covers. (The right side and left side can each support up to 5 kg.) There is a risk of damage or injury if anything falls off, so do not open or close the covers while anything is on top of them. - Page 10 SC-F3000 Series User's Guide (Excerpt) Introduction Platen A plate for loading T-shirts. As well as the platen supplied with the printer, there are five optional platens available to suit the size and purpose of the print job. “Options and Consumable Products” on page 87 Platen Gap Lever Use to adjust the platen’s position.
- Page 11 North American and Latin American users: Contact your dealer for product installation. The product must be installed by an authorized dealer. Damage to the product from unauthorized installation will not be covered by your Epson warranty. Other regions: U Setup Guide (booklet) Waste Ink Bottle A bottle for collecting waste ink.
-
Page 12: Rear Section
SC-F3000 Series User's Guide (Excerpt) Introduction Rear Section Vent Allows air to flow into the printer. The vents are on both the left and right sides. Do not block the vents. Connector Cover Do not open and close this after the ink unit’s connector is connected to the printer during setup. - Page 13 SC-F3000 Series User's Guide (Excerpt) Introduction Data Light Indicates the network connection status and data reception by lighting or flashing. Connected. Flashing Connected. Receiving data. Status Light Indicates the network transmission speed by the color of the light. 100Base-TX Green...
-
Page 14: Interior
SC-F3000 Series User's Guide (Excerpt) Introduction Interior Dirt on any of the following parts may reduce print quality. Regularly clean and replace these parts as described in the reference pages shown for the following items. Sensor Cover (2 places, left and right) They protect the sensors, which are on the left and right sides of the opening and detect the position of the platen, so they do not get dirty. - Page 15 SC-F3000 Series User's Guide (Excerpt) Introduction Anti-Drying Caps Caps that close the print head nozzles to prevent them from drying while not printing. There are two anti-drying caps, one for white and one for colors. Anti-drying caps are consumables. Replace them if a message is displayed.
-
Page 16: Ink Unit
SC-F3000 Series User's Guide (Excerpt) Introduction Ink Unit Ink Unit The ink unit supplies ink to the printer. Insert ink supply units into all the ink supply unit trays. Security Cable Bracket Pass a commercially available security cable through the upper and lower mounting parts to prevent the ink supply unit from being stolen. - Page 17 SC-F3000 Series User's Guide (Excerpt) Introduction LED Light The LED lamp indicates, by lighting or flashing, the status of the ink unit and the ink supply units inserted into their trays, as shown below. Lit blue Ink is being supplied to the printer. Do not pull out the tray.
-
Page 18: Control Panel
SC-F3000 Series User's Guide (Excerpt) Introduction Control Panel Plight (Power light) Indicates the printer's operational status by lighting or flashing. The power is on. Flashing The printer is operating such as receiving data, shutting down, or moving the movable base. -
Page 19: Understanding And Operating The Display
SC-F3000 Series User's Guide (Excerpt) Introduction Understanding and Operating the Display Screen View The section describes the three states of the display; the home screen, receiving print jobs, and printing. Home screen You can do settings and check the status of the printer. - Page 20 SC-F3000 Series User's Guide (Excerpt) Introduction Status of Ink Supply Unit/Cleaning Ink Supply Unit Displays the approximate level of ink/cleaning liquid remaining. The bar goes lower as the remaining ink runs low. The letters under the bar are abbreviations of the colors. The relation of the abbreviations and the ink colors is shown below.
- Page 21 SC-F3000 Series User's Guide (Excerpt) Introduction The left side shows the temperature and humidity around the printer, and the right side shows the current time and a guide to buttons that can be operated. icon is displayed when the temperature around the printer exceeds approximately 30˚C. If you continue to...
- Page 22 SC-F3000 Series User's Guide (Excerpt) Introduction The status of wired LAN network connections is shown by the following icons. Connection on: Connection off: Press this area while either of the above icons is displayed to open the Network Settings setup screen. When the icon looks like , it is disabled.
-
Page 23: Operating Procedure
SC-F3000 Series User's Guide (Excerpt) Introduction While printing Starting printing by pressing the x button switches to the following screen. This section explains only the differences from other screens. Status display area ❏ The color gradually changes from the left edge to the right edge of the area to show the progress of printing. - Page 24 SC-F3000 Series User's Guide (Excerpt) Introduction Operation areas do operations when pressed. As shown below, when a scroll bar is displayed, you can scroll the screen by moving (sliding) your finger up and down on the screen. You can also scroll by pressing on the up and down icons on the scroll bar.
-
Page 25: Introducing The Supplied Software
For information about the software, see the manual for the application or the Network Guide (Online Manual). Note: Printer drivers are not provided. To print, you need software for the printer; Garment Creator for SC-F3000 Series or software RIP. The Epson Web site provides plug-ins for the printer. -
Page 26: Built-In Software In The Printer
EPSON Software Updater The software checks if new software or update information is available on the Internet and installs it if it is available. It can also update the printer’s manuals, Garment Creator for SC-F3000 Series, and Epson Edge Dashboard. -
Page 27: Using Epson Edge Dashboard
This section explains the following basic operating Register your printer manually from the Printer procedures. Registration screen. This screen is displayed upon starting up Epson Edge Dashboard for the first time. ❏ Checking and Managing the Printer's Status ❏ Copying media settings Manual registration procedure Check the printers displayed on the printer list. -
Page 28: Checking And Managing The Printer's Status
SC-F3000 Series User's Guide (Excerpt) Introduction Checking and Managing the Printer's Status Follow the next steps on the Printer Operation screen to check and manage the printer's status. In the Home screen, click the area surrounding the printer that you want to check. - Page 29 SC-F3000 Series User's Guide (Excerpt) Introduction When multiple printers are registered with this software, you can switch the printer being monitored in the registered printers list (B).
-
Page 30: Copying Media Settings Of Other Printers
SC-F3000 Series User's Guide (Excerpt) Introduction Copying media settings of other printers In the Media Settings tab, you can check a list of media settings that are registered to the printer from which you want to copy them, and then you can copy them as a batch or select only the ones you need. -
Page 31: Exiting Procedure
SC-F3000 Series User's Guide (Excerpt) Introduction Exiting procedure Close the Web browser. -
Page 32: Using Epson Software Updater
❏ https://www.epson.com/support/f3070 (U.S.) updated using EPSON Software Updater. Check for the ❏ http://www.epson.ca/support/f3070 (Canada) latest versions of the software from the Epson Web site. Latin American users: https://www.epson.com To check for software updates, visit: ❏ http://www.latin.epson.com/support/f3070 Receiving update notifications (Caribbean) ❏... -
Page 33: Function Summary
Example: running. IPv4: http://192.168.100.201/ IPv6: http://[2001:db8::1000:1]/ Windows This section describes how to uninstall Epson Edge Function Summary Dashboard and the Epson communications drivers using them as an example. This section introduces the main functions of Web Turn off the printer, and disconnect the cable Config. - Page 34 When the delete confirmation message appears, click Yes. If you are reinstalling the Epson communications drivers, restart the computer. The following describes how to remove Epson Edge Dashboard. Quit Epson Edge Dashboard. Double-click Applications - Epson Software - Epson Edge Dashboard - Epson Edge Dashboard Uninstaller.
-
Page 35: Basic Printing
SC-F3000 Series User's Guide (Excerpt) Basic Printing Hard roller (optional item or commercially available) Basic Printing This is used to press the fibers flat on the print surface of the T-shirt before printing. When using commercially available products, make Preparation sure you prepare a separate hard roller and pre-treatment liquid roller. -
Page 36: Items For Use In Pre-Treatment
SC-F3000 Series User's Guide (Excerpt) Basic Printing Sprayer (commercially available) Items for Use in Pre-treatment This is used to apply pre-treatment liquid to the Prepare the following items for pre-treatment when T-shirts. printing using White ink on cotton T-shirts, or when printing on polyester T-shirts. -
Page 37: Overview
This section explains the basic workflow from preparing a T-shirt before printing to fixing the ink after printing. The following shows the procedure for sending a job from the Garment Creator for SC-F3000 Series, which is provided, to the printer and then printing it on a T-shirt. -
Page 38: Before Printing
SC-F3000 Series User's Guide (Excerpt) Basic Printing Before Printing Pre-treatment To maintain good print quality, perform the following Apply pre-treatment liquid to the T-shirt when printing inspection before starting printing operations each day. using White ink on cotton T-shirts, or when printing on polyester T-shirts. -
Page 39: Cautions When Operating
Read the safety data sheet ❏ Only prepare as much liquid as necessary for before operating. You can download the safety data sheet from the Epson Web site. the current job. If you prepare more than required and leave it, it may harden. -
Page 40: Opening The Pre-Treatment Liquid
SC-F3000 Series User's Guide (Excerpt) Basic Printing Turn it to the right five times. Turn the box so that the section where the tap comes out is at the top. Rotate at a speed of about one turn every two seconds. -
Page 41: Filtering The Cotton Pre-Treatment Liquid (Only When Coagulation Occurs)
SC-F3000 Series User's Guide (Excerpt) Basic Printing Pouring Remove the cap. Remove the cap from the tap, and then turn the lever until the hole is facing down. Remove the tap from the bag and check that the hole is visible. - Page 42 SC-F3000 Series User's Guide (Excerpt) Basic Printing This is a result of coagulation of the fixing component in Filtering the pre-treatment liquid. If you use the pre-treatment liquid with coagulation as it is, the print results will be Place the pre-treatment liquid on the top edge of uneven.
- Page 43 SC-F3000 Series User's Guide (Excerpt) Basic Printing If there is only a small amount of pre-treatment Insert the funnel into the mouth of the bottle. liquid remaining, tilt the cardboard container to pour it in. After pouring one liter, close the lever to stop the liquid from flowing, and then replace the spout cap.
-
Page 44: Diluting The Pre-Treatment Liquid
SC-F3000 Series User's Guide (Excerpt) Basic Printing ❏ Standing fibers cannot be adequately flattened Always dispose of used filters, do not re-use them. resulting in uneven print results. “Disposal of used consumables” on page 86 If this issue occurs, adjust the dilution ratio within the following range while checking the ink fixing results. - Page 45 SC-F3000 Series User's Guide (Excerpt) Basic Printing Applying with a sprayer Note: Depending on the properties of the material, traces of the pre-treatment liquid may be visible after performing ink Important: fixing when you apply pre-treatment liquid by using a Depending on the type of sprayer, it may create a roller.
-
Page 46: Fixing The Pre-Treatment Liquid
SC-F3000 Series User's Guide (Excerpt) Basic Printing The optimum conditions vary depending on the Note: type of heat press such as the manual adjustment You can apply the liquid evenly if you run the roller type. Be sure to test the ink fixing result in advance over the area after spraying. -
Page 47: Creating And Sending Jobs
Send jobs to the printer through the specialized application Garment Creator for SC-F3000 Series to print them. Workflow for Creating and Sending Jobs The following shows the basic work procedure for using Garment Creator for SC-F3000 Series, which is provided, to create and print a job. - Page 48 SC-F3000 Series User's Guide (Excerpt) Basic Printing Print (operate with printer) Start printing Load a T-shirt on the platen, and then print. “Load the T-shirt (media)” on page 58...
-
Page 49: Overview Of Garment Creator For Sc-F3000 Series
The application can be launched using the following methods. Windows ❏ Click Start - All Programs (or Programs) - Epson Software - Garment Creator for SC-F3000 Series, in this order. ❏ Double click the Garment Creator for SC-F3000 Series icon on the desktop. - Page 50 SC-F3000 Series User's Guide (Excerpt) Basic Printing This section explains the items used to create and send jobs. Names of parts Functions Preview area You can decide the arrangement, size, direction, etc., of the image while checking it in this preview area.
-
Page 51: Selecting The Base Color (T-Shirt Type)
SC-F3000 Series User's Guide (Excerpt) Basic Printing Example of printing on a Example of printing on a Selecting the base color (T-shirt black T-shirt pink T-shirt type) Overview of T-shirt types In order to be able to make the best use of the base color... -
Page 52: Image Arrangement
SC-F3000 Series User's Guide (Excerpt) Basic Printing Example of printing on a Example of printing on a Select the type of T-shirt that matches the T-shirt black T-shirt pink T-shirt on which you are printing in your Presets. In the colored parts (including black (R,G,B = 0,0,0)), the white under-base is automatically created using a density that matches the color being used. -
Page 53: Sending And Printing Jobs
SC-F3000 Series User's Guide (Excerpt) Basic Printing Changing positions Select Layout Settings on the settings tab. The settings area switches to Layout Settings. Enlarging and reducing Determine the platen size. Usually, it is set to M size. If you are printing using a different size of the platen, change the type of platen in Platen in the settings area. -
Page 54: Notes On Receiving Jobs
SC-F3000 Series User's Guide (Excerpt) Basic Printing When the printer has finished receiving a job, the Preparing the Platen preview display opens on the printer’s screen and the x button lights. This section explains how to prepare the L, M, S, and XS See the following, and load a T-shirt (media) and size hanger platens. -
Page 55: Attaching/Removing A Grip Pad
SC-F3000 Series User's Guide (Excerpt) Basic Printing Gently press on the section from which the back Attaching/Removing a Grip Pad has been peeled off the grip pad to stick the grip pad onto the platen. Grip pads are consumable items. If it gets dirty, purchase a new pad and replace it. -
Page 56: Replacing Platens
SC-F3000 Series User's Guide (Excerpt) Basic Printing Removing the Sheet Note: Pads that have been stuck to the platen for a long time may be hard to peel off. In this case, use a Important: commercially available spatula for peeling off ❏... -
Page 57: How To Change The Platen Position
SC-F3000 Series User's Guide (Excerpt) Basic Printing Moving the lever in the counterclockwise How to change the platen direction increases the numbers, which lowers position the platen position. Moving the lever in the clockwise direction Loosen the fixing lever. decreases the numbers, which raises the platen position. -
Page 58: Load The T-Shirt (Media)
SC-F3000 Series User's Guide (Excerpt) Basic Printing On the printer's screen, confirm that the platen Load the T-shirt (media) position is “P”. This section explains the procedure for L, M, and S size hanger platens on which grip pads cover the platens. - Page 59 SC-F3000 Series User's Guide (Excerpt) Basic Printing The line inside the frame in the illustration Remove any lint from the printing surface, and indicates the center of the platen. press the fibers flat. There may be lint on the T-shirt if you have not applied pre-treatment liquid.
- Page 60 SC-F3000 Series User's Guide (Excerpt) Basic Printing Remove any slack or creases from the printing Press the T-shirt lightly with the grip pad tool and surface and make it flat. move it vertically and horizontally from the edges as shown in the following illustration.
-
Page 61: Starting And Canceling Printing
SC-F3000 Series User's Guide (Excerpt) Basic Printing Tuck in the T-shirt so that it does not drape over Starting and Canceling the movable base. Printing Starting When a job is finished being received, the preview display opens on the screen and the x button lights. -
Page 62: Fixing The Ink
SC-F3000 Series User's Guide (Excerpt) Basic Printing Press the button on the printer or (pause) Fixing the Ink on the right edge of the status display area on the screen. After printing, the T-shirt is processed in a heat press or Select Cancel. - Page 63 SC-F3000 Series User's Guide (Excerpt) Basic Printing Heat press For cotton T-shirts ❏ When using White ink Heat press Temperature Time Pressure Temperature Time Pressure 130 ˚C (266 ˚F) 90 seconds 3.0 N/cm 170 ˚C (338 ˚F) 45 seconds 4.2 N/cm ❏...
-
Page 64: Maintenance
SC-F3000 Series User's Guide (Excerpt) Maintenance Maintenance When to Perform Various Maintenance Operations To maintain the print quality of the printer, you need to perform cleaning and replace consumables. If maintenance is not performed, print quality may decline, the printer's service life may be reduced, or you may be liable for the cost of any repairs. -
Page 65: Locations Of Consumables And Replacement Timing
You can check the procedure in a video on YouTube. printing surface of the T-shirt Epson Video Manuals * If this message is displayed frequently, contact your dealer or Epson support. Locations of Consumables and Replacement Timing When to perform... -
Page 66: Other Maintenance
SC-F3000 Series User's Guide (Excerpt) Maintenance When to perform Component to be replaced Ink Supply Unit When You need to replace Ink Supply Unit. appears on the control panel screen. “Shaking and Replacing Ink Supply Units” on page 76 Other maintenance... -
Page 67: Preparation
SC-F3000 Series User's Guide (Excerpt) Maintenance Metal or plastic tray (commercially available) Preparation Use this to hold used cleaning sticks, removed parts, or to prevent ink from soiling the printer when cleaning Ready the following items before beginning cleaning around the print head. - Page 68 SC-F3000 Series User's Guide (Excerpt) Maintenance ❏ Do not touch the tip of the cleaning stick with your hand. Oils on your hand may compromise the cleaning ability. ❏ Mixing ink with water or organic solvents causes it to harden, which causes malfunctions.
-
Page 69: Cleaning
SC-F3000 Series User's Guide (Excerpt) Maintenance Pour an appropriate amount of ink cleaner into Cleaning the cup supplied with the maintenance kit. To clean the Sensor Cover, pour about 5 ml (about halfway to the bottom line). Using ink cleaner The ink cleaner is used to clean the following parts. - Page 70 SC-F3000 Series User's Guide (Excerpt) Maintenance Check the messages that appear on the printer's Put your hand into the opening and use the screen, and then press Cleaning. clean-room wiper, which was soaked in water, to dampen the area shown in the illustration.
-
Page 71: Clean Around The Print Head And The Edges Of The Metal
SC-F3000 Series User's Guide (Excerpt) Maintenance After cleaning If The Sensor Cover cannot be recognized. appears If this message appears immediately after you finish cleaning, then cleaning was insufficient. Do the cleaning again. Clean around the print head and the edges of the metal... - Page 72 SC-F3000 Series User's Guide (Excerpt) Maintenance Soak a soft cloth in water and wring it out Close the left side of the printer cover. thoroughly, wipe the edges of the metal, and then wipe them dry. Wipe off any ink, lint, or dust that is stuck to the parts indicated in the diagram below.
-
Page 73: Cleaning The Suction Cap
SC-F3000 Series User's Guide (Excerpt) Maintenance Look into the print head, and wipe off any ink, After you finish cleaning both heads, close the lint, or dust that has adhered to the parts that are maintenance cover and press Done in the control indicated by in the illustration. - Page 74 SC-F3000 Series User's Guide (Excerpt) Maintenance Check the message, and then press Start. Prepare two new thin cleaning sticks and two new wide cleaning sticks, and soak them with ink The platen and print head move to the cleaner. maintenance position.
- Page 75 SC-F3000 Series User's Guide (Excerpt) Maintenance “Checking for clogged nozzles” on Important: page 84 Carefully wipe off any dirt from the edges until you can see the color of the cap. Disposing of Used Consumables U “Disposal” on If dirt is left, it creates a gap between the caps...
-
Page 76: Replacing Consumables
SC-F3000 Series User's Guide (Excerpt) Maintenance Shaking method Replacing Consumables Make sure the printer is on, and then pull the tray that needs to be shaken out of the ink unit. Shaking and Replacing Ink Any ink supply unit whose LED lamp is flashing blue needs to be shaken. - Page 77 5 seconds. Important: In the case of WH, shake it well approx. 25 times Epson recommends the use of genuine Epson ink in 25 seconds during replacement only. supply units. Epson cannot guarantee the quality or reliability of non-genuine ink. The use of...
- Page 78 SC-F3000 Series User's Guide (Excerpt) Maintenance Place the new ink supply unit into the tray and Move the lock switch to the left to lock it. lower the handle. Repeat steps 2 to 7 to replace other ink supply units.
-
Page 79: Disposing Of Waste Ink
SC-F3000 Series User's Guide (Excerpt) Maintenance U User's Guide (Online Manual) Disposing of Waste Ink Important: Preparing and Replacement Timing Always do the replacement work from the settings When The Waste Ink Bottle is nearing the end of its menu and clear the waste ink counter if you replace service life. - Page 80 SC-F3000 Series User's Guide (Excerpt) Maintenance Remove the Waste Ink Bottle from the Waste Ink Important: Bottle holder. Make sure that the waste ink tube is inserted into the neck of the bottle. If the waste ink tube comes out of the bottle, waste ink will spill out.
-
Page 81: Replacing The Head Cleaning Set
SC-F3000 Series User's Guide (Excerpt) Maintenance Replacing the Head Cleaning Set Before starting this procedure, be sure to read the following: Preparing and Replacement Timing “Cautions when operating” on page 67 When The Head Cleaning Set is nearing the end of its service life. - Page 82 SC-F3000 Series User's Guide (Excerpt) Maintenance Hold it at an angle and wait until the waste ink To avoid soiling your surroundings with ink, stops dripping from the Flushing Pad. Remove wrap the used wiper unit in the packaging and place it on the metal tray.
- Page 83 SC-F3000 Series User's Guide (Excerpt) Maintenance Insert the two hooks on the new Flushing Pad Close the right side of the printer cover. into the slots on the printer and press the tab down until the pad clicks into place.
-
Page 84: Other Maintenance
SC-F3000 Series User's Guide (Excerpt) Maintenance Attach the media to the platen before printing. See the Other maintenance following section for information on loading media. Loading media Checking for clogged nozzles You cannot use the S size hanger platen, XS size platen We recommend that you check the nozzles for clogs or the sleeve platen to print a check pattern. -
Page 85: Head Cleaning
SC-F3000 Series User's Guide (Excerpt) Maintenance Secure the media with cellophane tape and so on Check that media is loaded on the platen, and to keep it in place. then press Start. The nozzle check pattern is printed. Check the nozzle check pattern. -
Page 86: Disposal Of Used Consumables
71 laws and statutes such as entrusting it to an industrial waste disposal company. In such cases, submit the “Safety data sheet” to the industrial waste disposal company. You can download it at your local Epson Web site. -
Page 87: Appendix
Appendix Appendix Options and Consumable Products The following options and consumable products are available for use with your printer. (As of May, 2020) For the latest information, see the Epson Web site. Ink Supply Unit Printer model Product name Part number... -
Page 88: Maintenance Parts
Epson recommends the use of genuine Epson Ink Supply Unit. Epson cannot guarantee the quality or reliability of nongenuine ink. The use of non-genuine ink may cause damage that is not covered by Epson’s warranties, and under certain circumstances, may cause erratic printer behavior. -
Page 89: Others
SC-F3000 Series User's Guide (Excerpt) Appendix For SC-F3080 Product name Product number Explanation Waste Ink Bottle C13S210072 Identical to the waste ink bottle supplied with the printer. Head Cleaning Set C13S210106 Set of flushing pads and wiper unit. Anti-Drying Cap C13S210110 Replacement anti-drying caps. - Page 90 SC-F3000 Series User's Guide (Excerpt) Appendix Product Part number Explanation Platen Grip Pad - S C13S210120 A grip pad for using the S-size hanger platen as a grip pad covered platen. C12C891201 Set of roller sections x3, handle, and tray.
- Page 91 SC-F3000 Series User's Guide (Excerpt) Appendix Product Part number Explanation Hard roller C12C891221 Set of roller sections (hard) and handle. Grip Pad Tool C12C934161 The same as the grip pad tool supplied with the printer. Funnel C12C936571 A funnel used to filter cotton pre-treatment liquid.
-
Page 92: Printable Area
SC-F3000 Series User's Guide (Excerpt) Appendix B: Areas that Cannot be Printed Printable area C: Top plate Type Available Area Sleeve platen L size hanger platen 16 x 20 inches (406 x 508 mm) You cannot print on certain areas from the raised section inside the platen frame. - Page 93 SC-F3000 Series User's Guide (Excerpt) Appendix C: Top section D: Square part...
-
Page 94: System Requirements
The Epson Edge Dashboard can be used in the following environments. Important: Make sure the computer on which the Epson Edge Dashboard is installed meets the following requirements. If these requirements are not met, the software cannot monitor the printer correctly. -
Page 95: Garment Creator For Sc-F3000 Series
1280 x 1024 or better Communication interface High Speed USB Ethernet 1000Base-T Browser Safari 6 or later Garment Creator for SC-F3000 Series Windows Operating systems Windows 8.1 / Windows 8.1 x64 Windows 10 / Windows 10 x64 Multi-core processor (2.0 GHz or more recommended) -
Page 96: Web Config
SC-F3000 Series User's Guide (Excerpt) Appendix Communication interface High Speed USB Ethernet 100Base-TX Web Config The following is a list of supported browsers. Microsoft Edge, Internet Explorer 11, Firefox , Chrome , Safari *Use the newest version. -
Page 97: Specifications Table
SC-F3000 Series User's Guide (Excerpt) Appendix Specifications Table Printer Specifications Temperature Recommended: 15 to 25 ˚C (59 to 77 ˚F) Printer Specifications Operating: 10 to 35 ˚C (50 to 95 ˚F) Printing method On-demand ink jet Storage: -20 to 40 ˚C (-4 to 104 ˚F) (within one month at 40 ˚C/104 ˚F) - Page 98 SC-F3000 Series User's Guide (Excerpt) Appendix Pre-treatment liquid specifications Warning: This is a class A product. In a domestic environment Temperature Cotton pre-treatment liquid this product may cause radio interference in which Operating: 10 to 35 ˚C (50 to 95 ˚F)
-
Page 99: Where To Get Help
Support Technical Support Web Before Contacting Epson Site If your Epson product is not operating properly and you cannot solve the problem using the troubleshooting Epson's Technical Support Web Site provides help with information in your product documentation, contact problems that cannot be solved using the Epson support services for assistance. -
Page 100: Help For Users In Latin America
U.S. or 800-807-7766 in Canada. Other cities: 018000-915235 Costa Rica 800-377-6627 Help for Users in Latin America Dominican 1-888-760-0068 Republic If you need additional help with your Epson product, contact Epson. 1-800-000-044 Ecuador Epson provides these technical support services: 800-6570 El Salvador 1-800-835-0358... -
Page 101: Help For Users In Europe
Address number number Check your Pan-European Warranty Document for 03-4393119 03-4396589 5F., No.2, Nandong Rd., information on how to contact Epson support. Pingzhen City, Taoyuan County 32455, Taiwan (R.O.C.) Help for Users in Taiwan 03-5325077 03-5320092 1F., No.9, Ln. 379, Sec. 1, Jingguo Rd., North... -
Page 102: Help For Users In Singapore
(e-mail). Help for Users in Thailand Epson Helpdesk Epson Helpdesk is provided as a final backup to make Contacts for information, support, and services are: sure our clients have access to advice. Operators on the Helpdesk can aid you in installing, configuring and World Wide Web operating your Epson product. -
Page 103: Help For Users In Indonesia
❏ Technical support Internet Home Page Phone (62) 21-572 4350 Epson Hong Kong has established a local home page in (62) 21-572 4357 both Chinese and English on the Internet to provide users with the following information: ❏ Product information Epson Service Center ❏... -
Page 104: Help For Users In Malaysia
Help for Users in the Philippines Contacts for information, support, and services are: To obtain technical support as well as other after sales services, users are welcome to contact the Epson Philippines Corporation at the telephone and fax World Wide Web numbers and e-mail address below: (https://www.epson.com.my)
Need help?
Do you have a question about the SC-F3000 Series and is the answer not in the manual?
Questions and answers