Table of Contents
Advertisement
Advertisement
Table of Contents

Related Manuals for PHILIPS Respironics OmniLab Advanced +


Summary of Contents for PHILIPS Respironics OmniLab Advanced +
- Page 1 OmniLab Advanced + Clinical Manual...
- Page 2 © 2013 Koninklijke Philips Electronics N.V. All rights reserved.
-
Page 3: Table Of Contents
1.4 Contraindications ........................5 1.5 Patient Precautions ........................5 1.6 System Overview ........................6 1.7 Symbols ............................8 1.8 How to Contact Philips Respironics ..................9 Section 2: Therapy Modes and Features .........................10 2.1 Device Therapy Modes ......................10 2.2 Therapy Features ........................11 2.3 Therapy Event Detection ......................14... - Page 4 Section 5: Device Alarms ..............................30 5.1 Audible and Visual Alarm Indicators ..................30 5.2 Silencing an Alarm ........................31 5.3 Resetting an Alarm ........................31 5.4 Alarm Descriptions ........................31 5.5 What to Do When An Alarm Occurs .................33 5.6 Alarm Summary Table ......................33 5.7 Verifying the Alarms ........................36 Section 6: Cleaning and Maintenance ..........................37 6.1 Cleaning the Device ........................37...
-
Page 5: Section 1: Introduction
Section 1: Introduction 1.1 Package Contents The OmniLab Advanced + system may include the following components. Some components are optional accessories that may not be packaged with the device. OmniLab Advanced + device Power cord retainer and screw Humidifier (optional) AC power adapter Clinical manual Reusable gray foam filter... -
Page 6: Warnings And Cautions
The device should only be used with patient interfaces (ex. masks, circuits and exhalation ports) recommended by Philips Respironics. Proper operation of the device, including alarms, with other circuits has not been verified by Philips Respironics and is the responsibility of the health care professional or respiratory therapist. - Page 7 Do not connect the device to an unregulated or high pressure oxygen source. When using oxygen with this system, a Philips Respironics Pressure Valve must be placed at the device outlet. Failure to use the pressure valve could result in a fire hazard.
- Page 8 Do not use the same external battery to operate both the device and any other equipment such as power chairs. An external battery should only be connected to the device using the Philips Respironics External Battery Cable. This cable is fused, pre-wired, and properly terminated to ensure safe connection to a standard deep cycle lead acid battery.
-
Page 9: Contraindications
1.4 Contraindications The OmniLab Advanced + is not a life support device. The device system should not be used on patients with the following conditions: • Patients without a spontaneous respiratory drive • Existing respiratory failure (failure to treat; risk of increased work of breathing due either to incomplete reversal of upper airway obstruction or to breathing at high lung volume, leading to worsening respiratory failure) •... -
Page 10: System Overview
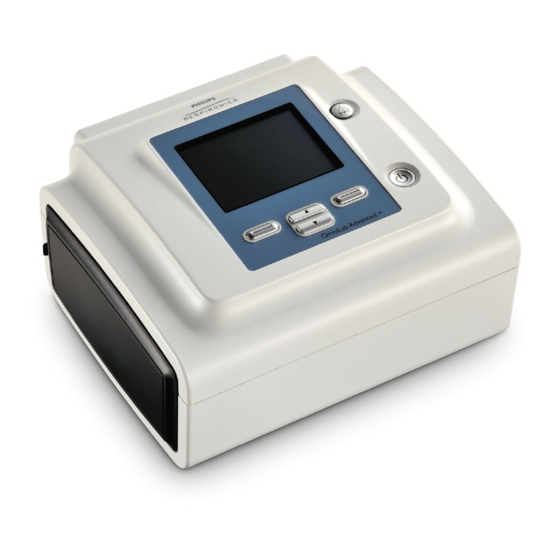
SD card slot If applicable, insert the optional SD card here. DC power inlet Connect an external battery here using the Philips Respironics DC power cord. AC power inlet Connect the AC power adapter here. A reusable, gray foam filter must be placed in the filter area to screen out normal household dust and Filter area pollen. - Page 11 Control Buttons The figure below shows the display screen and primary control buttons on the device. S/T AVAPS: 0.5 12/30/2010 06:12 PM Humidifier Ramp Menu Feature Description Display screen Shows therapy settings, patient data, and other messages. Alarm indicator/ This button serves two purposes: it temporarily silences the audible portion of an alarm, and it audio pause button also acts as an alarm indicator.
-
Page 12: Symbols
1.7 Symbols The following symbols may appear on the device or the included accessories. Symbol Description Symbol Description Consult accompanying instructions for use. Manufacturer AC Power Reorder Number DC Power Serial Number Dripping water protected equipment (15° tilted); IP22 Solid foreign object protected equipment Lot Number (≥... -
Page 13: How To Contact Philips Respironics
1.8 How to Contact Philips Respironics To have the device serviced, contact product support. If you need to contact Philips Respironics directly, call the Philips Respironics Customer Service department at 1-724-387-4000 or +49 8152 93060. You can also use the following addresses: Respironics, Inc. -
Page 14: Section 2: Therapy Modes And Features
Section 2: Therapy Modes and Features 2.1 Device Therapy Modes Therapy Description Modes CPAP Continuous Positive Airway Pressure; CPAP maintains a constant level of pressure throughout the breathing cycle. Spontaneous Pressure Support; A Bi-level therapy mode where breaths are patient-triggered and patient-cycled. The device triggers to IPAP (Inspiratory Positive Airway Pressure) in response to spontaneous inspiratory effort and cycles to EPAP (Expiratory Positive Airway Pressure) during exhalation. -
Page 15: Therapy Features
2.2 Therapy Features The device can provide the following therapy features. AVAPS Average Volume Assured Pressure Support (AVAPS) is a feature available in the S, S/T, PC, and T modes. (In AVAPS-AE mode, the AVAPS feature is always enabled.) AVAPS helps patients maintain a tidal volume (V ) equal to or greater than the target tidal volume (Tidal Volume setting) by automatically controlling the pressure support (PS) provided to the patient. - Page 16 A-Flex (C-Flex+) Comfort Feature The device is equipped with a special comfort feature called Exhalation starts and pressure level decreases A-Flex if in Auto-CPAP (or C-Flex+ if in CPAP mode). When A-Flex (C-Flex+) is enabled, it enhances patient Therapy comfort in three ways: 1) by smoothing the transition Pressure between the end of inhalation and the beginning of exhalation, 2) by providing significant pressure relief during...
- Page 17 Rise Time Rise Time PRESSURE If enabled, the device provides a feature called Rise Time in S, S/T, T, PC, autoSV, and Bi-level modes. Rise time is the amount of time it IPAP takes the device to change from the expiratory pressure setting to the inspiratory pressure setting.
-
Page 18: Therapy Event Detection
2.3 Therapy Event Detection The device monitors breathing and detects apneas, hypopneas, and other therapy events (as available). Event Definition Obstructed An apnea is detected when there is an 80% reduction in airflow from baseline for at least 10 seconds or Airway if there is no airflow detected for 10 seconds. -
Page 19: Section 3: Device Setup
• Philips Respironics headgear (for the mask) Note: See Section 6 for information on how to clean Philips Respironics flexible tubing prior to use. Refer to the instructions that accompany any other breathing circuit components for any necessary cleaning prior to use. -
Page 20: Supplying Power To The Device
Using DC Power The device can operate from a 12 VDC lead acid battery using the Philips Respironics External Battery Cable. This cable is pre-wired and properly terminated to ensure safe connection of an external battery to the device. Battery operating time depends on the characteristics of the battery and usage of the device. -
Page 21: Lab Setup
Control room PC Lab setups will vary. If you are not using a Philips Respironics polysomnograph (PSG) system, you will need to use the OmniLab Connect device. Refer to the instructions included with the OmniLab Connect and any accessories for... -
Page 22: Section 4: Viewing And Changing Settings
Section 4: Viewing and Changing Settings 4.1 Navigating the Menu Screens To navigate through all of the menu screens and settings: • Use the Up/Down button to scroll through the menu. • Use the Left and Right buttons to perform the actions specified on the on-screen buttons. 4.2 Using the Keypad Lock Feature Note: When Keypad Lock is enabled, the Alarm Indicator/Audio Pause and Start buttons continue to function normally. -
Page 23: Accessing The Setup Screen
4.4 Accessing the Setup Screen 1. To access the Setup screen, select Menu from the Standby screen. 2. You can access the device and therapy settings from this screen. The menu options vary based on the device setup. A sample screen is shown here. Setup Menu Settings And Alarms... -
Page 24: Changing Settings In Provider Menu Access Mode
In Detailed View, the same information is shown, except instead of displaying the Date and Time panel, the screen displays the following measured parameters: • Patient Pressure • Exhaled Tidal Volume • Leak • Minute Ventilation • Respiratory Rate • I:E Ratio Note: When an oximeter is connected, the current SpO and Heart Rate readings will only display on the Patient Accessory panel if Detailed View is turned on. - Page 25 Mode Setting Bi-Flex Flex Type (only if AVAPS Off) Flex Off, 1, 2, 3 Off, On AVAPS Off, On Off, On Off, On (only if Flex Off) EPAP-30 cm H EPAP-30 cm H EPAP-30 cm H EPAP-30 cm H IPAP 0.5 cm H O res 0.5 cm H...
- Page 26 Mode Setting Auto-BiLevel autoSV AVAPS-AE Flex Type Bi-Flex Bi-Flex Flex Off, 1, 2, 3 Off, 1, 2, 3 Min EPAP-25 cm H IPAP Max Pressure 0.5 cm H O res coerce Max PS 4-30 cm H 6-30 cm H Maximum Pressure 0.5 cm H O res 0.5 cm H...
- Page 27 Mode Setting CPAP Auto-CPAP Flex Type C-Flex, C-Flex+ C-Flex, A-Flex Flex Off, 1, 2, 3 Off, 1, 2, 3 4-20 cm H CPAP (0.5 cm H O res) Min Pressure-20 cm H Maximum Pressure (0.5 cm H O res) 4-Max Pressure cm H Minimum Pressure (0.5 cm H O res)
- Page 28 Maximum Pressure This setting lets you modify the maximum pressure setting for the device. Increase or decrease the setting from 6 to 30 cm H O in increments of 0.5. Minimum Pressure This setting lets you modify the minimum pressure setting for the device. Increase or decrease the setting from 6 to 30 cm H O in increments of 0.5.
- Page 29 This setting allows you to select the correct size diameter tubing that the patient is using with the device. Select 22 mm for the Philips Respironics 22 mm tubing, or 15 mm for the optional Philips Respironics 15 mm tubing.
- Page 30 Circuit Disconnect Alarm This setting enables or disables the circuit disconnect alarm. If enabled, an audible alarm will sound when a large, continuous air leak (such as mask removal) has been detected in the circuit. Select Off to disable the alarm, or choose 15 or 60 seconds.
- Page 31 Keypad Backlight Turn the backlight On or Off using this setting. Whenever you press the button to begin therapy, the keypad backlight temporarily lights up. Once therapy is being provided, the keypad will be lit according to this Keypad Backlight setting. If the setting is On, the backlight remains on while therapy is provided. If the setting is Off, the backlight remains off while therapy is provided.
- Page 32 Viewing the Alarm Log 1. From the Main Menu screen, use the Up/Down key to highlight the Alarm Log item. 2. Press the Right key to select Alarm Log. The alarm log displays the alarms in chronological order with the most recent events displayed first. It lists the 20 most recent alarms or messages that appeared on the device display.
-
Page 33: Display Symbols
4.7 Display Symbols The following table defines symbols that may appear on-screen. Symbol Description Symbol Description Symbol Description Humidifier is connected External Battery is full and Apnea alarm enabled and Humidifier setting in use (ex. 1) AVAPS enabled, and the Humidifier is active and External Battery is at 80% AVAPS: 1... -
Page 34: Section 5: Device Alarms
Section 5: Device Alarms There are three types of alarms: • High Priority – Requires immediate response by the operator. • Medium Priority – Requires prompt response by the operator. • Low Priority – Requires operator awareness. These alarms alert you to a change in the device status. Additionally, the device also displays informational messages and confirmation alerts that notify you of conditions that need attention but do not qualify as alarm conditions. -
Page 35: Silencing An Alarm
• Low Priority Audible Indicator: When a low priority alarm is detected, a series of beeps sound in a 2-beep pattern. This pattern repeats until the cause of the alarm is corrected or the audible alarm is paused. The alarm descriptions later in this manual display this indicator as: ◊◊... - Page 36 High Respiratory Rate Alarm This is a high priority alarm. It occurs when the respiratory rate is greater than the High Respiratory Rate alarm setting. The device continues to operate. The alarm will automatically terminate when the measured respiratory rate is less than the High Respiratory Rate alarm setting. Low Minute Ventilation Alarm This alarm is a high priority alarm.
-
Page 37: What To Do When An Alarm Occurs
Informational Messages Card Error This info message occurs when an unusable SD card is inserted into the device. The device continues to operate but data cannot be logged onto the SD card. Heated Tube Failure This info message occurs when failure has occurred with the heated tube accessory connected to the attached heated humidifier accessory. - Page 38 Alarm Priority Audible Visual Indicators Device Action User Action Apnea High ◊◊◊ ◊◊ Red flashing button; Operates Report the alarm to product Apnea message support. Continue using device. High High ◊◊◊ ◊◊ Red flashing button; Operates Continue using device. If alarm Respiratory High Respiratory Rate continues, contact product support.
- Page 39 Alarm Priority Audible Visual Indicators Device Action User Action Low Battery Escalates ◊◊◊ Medium Priority - Operates Switch to an alternate battery, or (When Battery from (Medium - Yellow flashing button; switch to AC power. is Attached) Medium to when approx. Low External Battery High 20 minutes...
-
Page 40: Verifying The Alarms
Message Priority Audible Visual Indicators Device Action User Action Start On Info ◊ Start On Battery Operates Check battery status. Connect Battery message to AC power source as soon as possible. Check AC Info ◊ Check AC Power Operates Connect device to a battery and Power Supply Supply message remove AC power. -
Page 41: Section 6: Cleaning And Maintenance
5. Allow the filter to air dry completely before reinstalling it. If the foam filter is torn or damaged, replace it. Only Philips Respironics-supplied filters should be used as replacement filters. 6. If the white ultra-fine filter is dirty or torn, replace it. -
Page 42: Service
6. Set the device to the specific pressure value for the patient. 7. Verify that the pressure setting matches the pressure displayed on the manometer. If the pressure setting does not match the measured value for the device, contact Philips Respironics or an authorized service center to have the device serviced. -
Page 43: Section 7: Accessories
7.4 Nurse Call System You can use an institutional Nurse Call system with the device. There are several Philips Respironics cables available to connect a nurse call system to the device. Refer to the instructions included with the cable assembly for details. -
Page 44: Section 8: Troubleshooting
Section 8: Troubleshooting This section lists some of the problems you may experience with the device and possible solutions to those problems. Problem What to do Why isn’t my device If you are using AC power: turning on? The • Check the outlet and verify that the device is properly plugged in. backlight on the buttons •... -
Page 45: Section 9: Technical Specifications
Degree of Protection against Ingress of Water: Drip Proof, IP22 Mode of Operation: Continuous SD Card and SD Card Reader Use only SD cards and SD card readers available from Philips Respironics, including the following: SanDisk ® Card Reader/Writer - SanDisk ImageMate - REF SDDR-99-A15... - Page 46 ± (10% of setting + 0.1 second) Specifications listed are based on using a standard patient circuit (Philips Respironics 15 or 22 mm tubing; Whisper Swivel II). * Pressure measured at the patient connection port with or without the integrated heated humidifier (no patient flow).
- Page 47 Sound Alarm Sound Level range: 60 dB(A) - 85 dB(A). Breathing Resistance During Power Fail or Fault Conditions The resistance measurements include the complete system, with humidifier, outlet bacteria filter, and patient circuit. Patient Flow (LPM) Expiratory Resistance (cm H Inspiratory Resistance (cm H <1.7 <1.9...
-
Page 48: Section 10: Emc Information
Section 10: EMC Information Guidance and Manufacturer’s Declaration - Electromagnetic Emissions This device is intended for use in the electromagnetic environment specified below. The user of this device should make sure it is used in such an environment. Emissions Test Compliance Electromagnetic Environment - Guidance RF Emissions... - Page 49 Guidance and Manufacturer’s Declaration - Electromagnetic Immunity This device is intended for use in the electromagnetic environment specified below. The user of this device should make sure it is used in such an environment. Immunity Test IEC 60601 Test Level Compliance Level Electromagnetic Environment - Guidance Portable and mobile RF communications equipment should be...
- Page 50 Recommended Separation Distances between Portable and Mobile RF Communications Equipment and This Device The device is intended for use in an electromagnetic environment in which radiated RF disturbances are controlled. The user of the device can help prevent electromagnetic interference by maintaining a minimum distance between portable and mobile RF communications equipment (transmitters) and the device as recommended below, according to the maximum output power of the communications equipment.
-
Page 51: Limited Warranty
Limited Warranty Respironics, Inc. warrants that the system shall be free from defects of workmanship and materials and will perform in accordance with the product specifications for a period of two (2) years from the date of sale by Respironics, Inc. to the dealer. - Page 52 1111036 1111019 R00 JR 8/22/2013 EN-INTL...
Need help?
Do you have a question about the OmniLab Advanced + and is the answer not in the manual?
Questions and answers