Table of Contents
Advertisement
Advertisement
Table of Contents

Related Manuals for Samsung SyncMaster 741MP


Summary of Contents for Samsung SyncMaster 741MP
- Page 1 SyncMaster 741MP Install Driver Install Program SyncMaster 741MP SyncMaster 941MP...
- Page 2 Notational Failure to follow directions noted by this symbol could result in bodily harm or damage to the equipment. Prohibited Do not disassemble Do not touch Power When not used for extended period of time, set your computer to DPMS. If using a screen saver, set it to active screen mode.
- Page 3 This may cause electric shock or fire. Do not pull the plug out by the wire nor touch the plug with wet hands. This may cause electric shock or fire. Use only a properly grounded plug and receptacle. An improper ground may cause electric shock or equipment damage. Insert the power plug firmly so that it does not come loose.
- Page 4 location with heavy dust, high or low temperatures, high humidity, and exposed to chemical substances and where it operates for 24 hours such as at airports, train stations etc. Failure to do so may cause serious damage to your monitor. Place your monitor in a location with low humidity and a minimum of dust.
- Page 5 Failing to do so may damage the monitor. Do not place the monitor face down. This may damage the TFT-LCD surface. The installation of the bracket must be done by a qualified professional. Installing the bracket by unqualified personnel may result in injury. Always use the mounting device specified in the owner's manual.
- Page 6 This may cause damage, electric shock or fire. Use the recommended detergent with a smooth cloth. If the connector between the plug and the pin is dusty or dirty, clean it properly using a dry cloth. A dirty connector may cause electric shock or fire. Make sure to unplug the power cord before cleaning the product.
- Page 7 Keep the product away from places exposed to oil, smoke or moisture; do not install inside a vehicle. This may cause malfunction, an electric shock or fire. In particular, avoid operating the monitor near water or outdoors where it could be exposed to snow or rain.
- Page 8 Do not insert metal objects such as chopsticks, wire and gimlet or inflammable objects such as paper and match into the vent, headphone port or AV ports or etc. It may cause a fire or an electric shock. If an alien substances or water flows into the product, turn the product off, unplug the power connector from the wall outlet and contact the Service...
- Page 9 When not using the product for an extended period of time, keep the product unplugged. Otherwise, this may cause heat emission from the accumulated dirt or degraded insulation, causing electric shock or fire. Do not place your children's favorite toys or any other objects of interest on the product.
- Page 10 Please make sure the following items are included with your monitor. If any items are missing, contact your dealer. Contact a local dealer to buy optional items. Unpacking Monitor Type A Monitor Type B Manual Warranty Card User's Guide, Monitor Driver, Quick Setup Guide (Not available in all locations) Natural Color pro software...
- Page 11 D-Sub Cable Other Remote Control Front 1. SOURCE Switches from PC mode to Video mode. Changing the source is only allowed for external devices that are connected to the monitor at the time. To switch Screen modes: [PC] [TV] [Ext.] >>Click here to see an animation clip For more information >...
- Page 12 2. MENU Use this button to open the on-screen menu and step back in the menu. Moves from one menu item to another horizontally or adjusts selected menu values. Adjusts the audio volume. >>Click here to see an animation clip Moves from one menu item to another vertically or adjusts selected menu values.
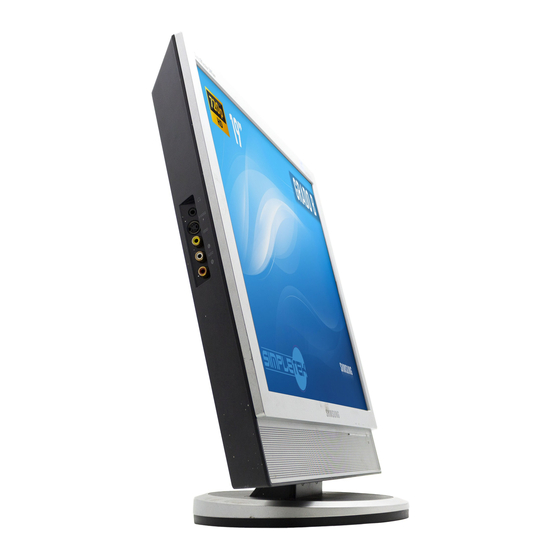
- Page 13 2. PC IN 3. AUDIO 4. EXT(RGB) 5. ANT IN Computer Connection Terminal (15 Pin D-SUB) Audio Connection Terminal EXT(RGB) Connection Terminal - EXT(RGB) is mainly used in Europe. As for EXT(RGB) port of the monitor, it makes TV or Video signal input and output.
- Page 14 6. AV Connection Terminal 7. Kensington Lock Connecting the Monitor Remote Control The performance of the remote control may be affected by a TV or other electronic devices operated near the monitor, causing malfuction due to interference with frequency. 1. Headphone Connection Terminal (Output) 2.
- Page 15 1. POWER Use this button to turn the monitor On/Off. 2. number buttons Selects TV channels in the TV mode. 3. -/-- (One/Two-Digit CHANNEL selection ) Use to select a CHANNEL numbered ten or over. Press this button, and the "--" symbol is displayed. Enter the two-digit CHANNEL number.
- Page 16 13. INFO Current picture information is displayed on the upper left corner of the screen. 14. EXIT Exits from the menu screen. 15. Up-Down Left-Right Buttons Moves from one menu item to another horizontally, vertically or adjusts selected menu values. 16.
- Page 17 Connecting the Monitor 1. Connecting to a Computer 1. Connect the power cord for your monitor to the power port on the back of the monitor. Plug the power cord for the monitor into a nearby outlet. 2. Using the D-sub (Analog) connector on the video card. Connect the signal cable to the 15-pin, D-sub connector on the back of your monitor.
- Page 18 1. Using the D-sub (Analog) connector on the video card. Connect the signal cable to the D-SUB port on the Macintosh computer. 2. For old model Macintoshes, you need to adjust the resolution control DIP switch on the Macintosh adapter (optional) referring to the switch configuration table shown on its rear. 3.
- Page 19 3. Then, start the DVD, VCR or Camcorders with a DVD disc or tape inserted. 4. Select AV or S-Video using the SOURCE button. 1-2. Connecting EXT(RGB) - It only applies to AV DEVICE that supports SCART. Connect to the DVD Devices input if the device has a EXT(RGB). You can watch DVD simply by hooking up the DVD player with the monitor as long as the power is 1.
- Page 20 3. Connecting Headphone You may connect your headphones to the monitor. 1. Connect your headphones to the Headphone connection terminal. Using the Stand This monitor supports various types of VESA-standard bases. You need to either fold or remove the base in use to install a VESA base. 1.
- Page 21 To mount the monitor on a wall, you should purchase the wall mounting kit that allows you to mount the monitor at least 10 cm away from the wall surface. Contact the nearest Samsung Service Center for more information.
- Page 22 This monitor driver is under certified MS logo and this installation doesn't damage your system.The certified driver will be posted on Samsung Monitor homepage. http://www.samsung.com. 5. Monitor driver installation is completed. Installing the Monitor Driver (Manual) When prompted by the operating system for the monitor driver, insert the CD-ROM included with this monitor.
- Page 23 4. Click the "Properties" button on the "Monitor" tab and select "Driver" tab. 5. Click "Update Driver.." and select "Install from a list or.." then click "Next" button. 6. Select "Don't search ,I will.." then click "Next" and then click "Have disk". 7.
- Page 24 This monitor driver is under certified MS logo and this installation doesn't damage your system.The certified driver will be posted on Samsung Monitor homepage. http://www.samsung.com 9. Click the "Close" button then click "OK" button continually. 10. Monitor driver installation is completed.
- Page 25 ® ® Microsoft Windows Millennium Operating System 1. Click "Start," "Setting," and then "Control Panel." 2. Double click the "Display" icon. 3. Select the "Settings" tab and click the "Advanced Properties" button. 4. Select the "Monitor" tab. 5. Click the "Change" button in the "Monitor Type" area. 6.
- Page 26 Samsung Electronics in association with Korea Electronics & Telecommunications Research Institute (ETRI). This system is available only for Samsung monitors and makes the color of the images on the monitor the same as the printed or scanned images.
- Page 27 Input Available Mode : PC The default setting may be different depending on the selected Input Mode (input signal source selected in External Input List) and the selected resolution. Description Use to select PC, TV, or other external input sources connected to the Source List Monitor.
- Page 28 1) PC 2) Ext. 3) AV 4) S-Video Picture PC Mode Available Mode The default setting may be different depending on the selected Input Mode (input signal source selected in External Input List) and the selected resolution. Description MagicBright™ MagicBright™ is a new feature providing the optimum viewing environment depending on the contents of the image you are watching.
- Page 29 Although the values are carefully chosen by our engineers, the pre-configured values may not be comfortable to your eyes depending on your taste. If this is the case, adjust the Brightness and Contrast by using the OSD menu. Custom You can use the on-screen menus to change the contrast and brightness according to personal preference.
- Page 30 Available Mode : PC The default setting may be different depending on the selected Input Mode (input signal source selected in External Input List) and the selected resolution. Description Mode The Monitor has four automatic picture settings ("Dynamic", "Standard", "Movie", and "Custom") that are preset at the factory. You can activate either Dynamic, Standard, Movie, or Custom.
- Page 31 Sound Available Mode The default setting may be different depending on the selected Input Mode (input signal source selected in External Input List) and the selected resolution. Description Mode The Monitor has a built-in high fidelity stereo amplifier. 1) Standard : Choose Standard for the standard factory settings.
- Page 32 Channel Available Mode The default setting may be different depending on the selected Input Mode (input signal source selected in External Input List) and the selected resolution. Description Country Select the country in which the product is being used before you use the Auto Store feature.
- Page 33 Manager you want are displayed. 2) Child Lock : Protects children from viewing inappropriate programs by blocking certain broadcast or video programs. The Child Lock feature can be selected only from the remote. It's used to exchange the numbers of two channels. Sort Name If channel name information is broadcast when you store the channels either...
- Page 34 - The direct button on the remote control is the 'SLEEP' button. Transparency Changes the opaqueness of the background of the OSD. 1) High 2) Medium 3) Low 4) Opaque If no signal is being received or the signal is very weak, a blue screen Blue Screen automatically replaces the noisy picture background.
- Page 35 Self-Test Feature Check Check the following items yourself before calling for service. Contact the service center for problems that you cannot solve by yourself. Self-Test Feature Check Not Optimum Mode Maintenance and Cleaning Symptoms & Recommended Actions 1. Self-Test Feature Check Your monitor provides a self test feature that allows you to check whether your monitor is functioning properly.
- Page 36 Never use acetone, benzene or thinner. (They may cause flaws or deformation of the screen surface.) We recommend a Samsung cleansing agent is used to prevent damage to the screen. The user will be required to pay costs and related expenses for repair of damages caused by the user.
- Page 37 4. Check if the scanning ratio of the video screen is set to between 60Hz. (The screen refresh rate must be set within in a range of 56~75Hz.) 5. If you have problems in installing the adapter (video) driver, boot the computer in Safe Mode, remove the Display Adapter at the "Control Panel, System, Device Administrator"...
- Page 38 Picture image is unstable and vibrates. Ghost images are shown in the picture. The image is too light or too dark Screen color is inconsistent. Color image is distorted with dark shadows. White color is poor. Power Indicator blinks green. The screen is blank and it is blinking.
- Page 39 How can I adjust the resolution? How can I set the Power Saving function? How can I clean the outer case/LCD Panel? Note that video card support can vary, depending on the version of the driver used. (Refer to the computer or the video card manual for details.) Windows XP : Set the resolution in the Control Panel→Appearance and...
- Page 40 General General Model Name SyncMaster 741MP LCD Panel Size 17.0 inch diagonal (43 cm) Display area 337.92 mm (H) x 270.336 mm (V) Pixel Pitch 0.264 mm (H) x 0.264 mm (V) Type a-si TFT active matrix Synchronization Horizontal 31 ~ 81 kHz Vertical 56 ~ 75 Hz Display Color...
- Page 41 ENERGY STAR Power saving mode Green Green Blinking Less than 1 W ® compliant and ENERGY2000 ® Partner, SAMSUNG has determined that this ® guidelines for energy efficiency. Power off (Power Button) EPA/ENERGY 2000 Black Less than 1 W...
- Page 42 Preset Timing Modes If the signal transferred from the computer is the same as the following Preset Timing Modes, the screen will be adjusted automatically. However, if the signal differs, the screen may go blank while the power LED is on. Refer to the video card manual and adjust the screen as follows.
- Page 43 Germany Norway Spain Israel Denmark Portugal Countries Netherlands Austria Singapore Indonesia Australia Broadcasting Systems SECAM-B Iran Iraq Saudi arabia Countries Syria Lebanon Egypt Horizontal Frequency The time to scan one line connecting the right edge to the left edge of the screen horizontally is called the Horizontal Cycle and the inverse number of the Horizontal Cycle is called the Horizontal Frequency.
- Page 44 General General Model Name SyncMaster 941MP LCD Panel Size 19.0 inch diagonal (48 cm) Display area 376.32 mm (H) x 301.056 mm (V) Pixel Pitch 0.294 mm (H) x 0.294 mm (V) Type a-si TFT active matrix Synchronization Horizontal 31 ~ 81 kHz Vertical 56 ~ 75 Hz Display Color...
- Page 45 ENERGY STAR Power saving mode Green Green Blinking Less than 1 W ® compliant and ENERGY2000 ® Partner, SAMSUNG has determined that this ® guidelines for energy efficiency. Power off (Power Button) EPA/ENERGY 2000 Black Less than 1 W...
- Page 46 Preset Timing Modes If the signal transferred from the computer is the same as the following Preset Timing Modes, the screen will be adjusted automatically. However, if the signal differs, the screen may go blank while the power LED is on. Refer to the video card manual and adjust the screen as follows.
- Page 47 Germany Norway Spain Israel Denmark Portugal Countries Netherlands Austria Singapore Indonesia Australia Broadcasting Systems SECAM-B Iran Iraq Saudi arabia Countries Syria Lebanon Egypt Horizontal Frequency The time to scan one line connecting the right edge to the left edge of the screen horizontally is called the Horizontal Cycle and the inverse number of the Horizontal Cycle is called the Horizontal Frequency.
- Page 48 Contact SAMSUNG WORLD-WIDE If you have any questions or comments relating to Samsung products, please contact the SAMSUNG customer care center. CANADA 1-800-SAMSUNG (7267864) MEXICO 01-800-SAMSUNG (7267864) U.S.A 1-800-SAMSUNG (7267864) ARGENTINE 0800-333-3733 BRAZIL 0800-124-421 CHILE 800-726-7864 (SAMSUNG) COSTA RICA 0-800-507-7267...
- Page 49 1800-SAMSUNG (7267864) THAILAND 1800-29-3232, 02-689-3232 TAIWAN 0800-329-999 VIETNAM 1 800 588 889 SOUTH AFRICA 0860 7267864 (SAMSUNG) U.A.E 800SAMSUNG (7267864) Terms Sync Signal Sync (Synchronized) Signals refer to the standard signals that are required to display desired colors on http://www.samsung.com/fi http://www.samsung.com/fr http://www.samsung.de...
- Page 50 the monitor. They are divided into Vertical and Horizontal Sync Signals. These signals display normal color images by the set resolution and frequency. Types of Sync Signals Separate This is a scheme of transmitting individual vertical and horizontal sync signals to the monitor.
- Page 51 Channel Fine Tuning This feature allows the viewer to fine-tune the TV channel to obtain the best viewing conditions. The Samsung LCD TV has both automatic and manual channel fine-tuning features to enable the viewer to adjust their desired settings.
- Page 52 Reproduction in any manner whatsoever without the written permission of Samsung Electronics Co., Ltd. is strictly forbidden. Samsung Electronics Co., Ltd. shall not be liable for errors contained herein or for incidental or consequential damages in connection with the furnishing, performance, or use of this material.
- Page 53 PRODUCT INFORMATION (Image Retention Free) LCD Monitors and TVs may have an image retention when switching from one image to another especially after displaying a stationary image for a long time. This guide is to demonstrate a correct usage of LCD products in order to protect them from Image retention.
- Page 54 The best way to protect your monitor from Image retention is to set your PC or System to operate a Screen Saver program when you are not using it. Image retention may not occur when a LCD panel is operated under normal conditions. Normal conditions are defined as continuously changing video patterns.
- Page 55 Correct Disposal of This Product (Waste Electrical & Electronic Equipment) - Europe only (Applicable in the European Union and other European countries with separate collection systems) This marking shown on the product or its literature, indicates that it should not be disposed with other household wastes at the end of its working life.
Need help?
Do you have a question about the SyncMaster 741MP and is the answer not in the manual?
Questions and answers