Page 1
Manual raining Manual 740N(Haydn) T 740N(Haydn) T SAMSUNG ELCECTRONICS [DM] VD Division LCD Monitor Development Department...
Page 2
Contents Contents Introduction Haydn Design & Function Haydn Specification Block Diagram AD Board and IP Board Circuits How to install winDDC program Updating Firmware Updating DDC Panel & Model Define process SVC Mode ...
Page 3
1. HADEN DESIGN AND FUNCTION 1. HADEN DESIGN AND FUNCTION HAS Stand Simple Stand Easy Contact Key function Various Direct Key...
Page 5
2-2. Specification(15 inch) 2-2. Specification(15 inch) Key Specifications Model 540N 540B Set Dimension(mm) 337.5x200.0x336.8 (W x H x D) 337.5x180.0x333.8 (W x H x D) Package(mm) 389x 380x 132(W x H x D) 447x334x215 (W x H x D) VESA(mm) 75 x 75 75 X 75 중...
Page 7
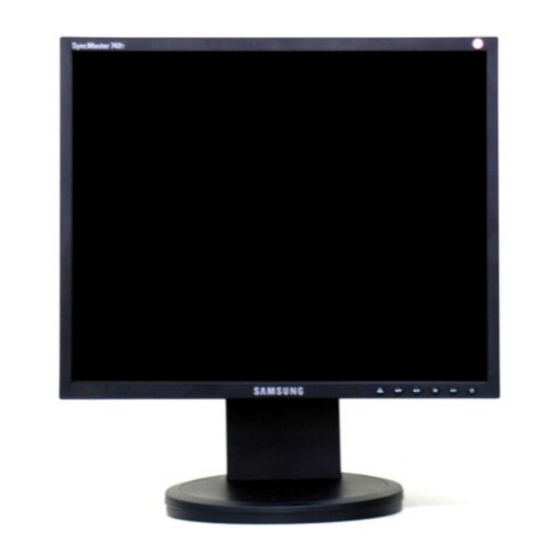
2-4. Specification(17 inch) 2-4. Specification(17 inch) Key Specifications Model 740N 740BF 740T Set Dimension(mm) 366.0x200.0x379.3 (W x H x D) 366.0 x180.0 x333.8 (W x H x D) 362.1 x200.0 x389.6 (W x H x D) Package(mm) 443 x435 x132 (W x H x D)
Page 9
2-6. Specification(19 inch) 2-6. Specification(19 inch) Key Specifications Model 940B 940T Set Dimension(mm) 407.6 x217.0 x421.5 (W x H x D) 403.2 x200.0 x406.4 (W x H x D) Package(mm) 495 x476 x150 (W x H x D) 522 x412 x235 (W x H x D) VESA(mm) 75 x 75 75 X 75...
Page 10
3. Block Diagram 3. Block Diagram (PC) DIGITAL Rx2+ Rx2- Rx1+ Rx2- Rx0+ Rx0- RxC+ RxC- LV D S Signal_Even LV D S Signal_Even TMDS ADC/ IMAGE SCALER/ LVDS (SE56AWJ-LF) HSYNC VSYNC LV D S Signal_Odd LV D S Signal_Odd (PC)ANALOG 24MHZ FUNCTION PBA...
Page 11
3.1 Main Board Power Tree 3.1 Main Board Power Tree ○ Lamp(typ.) : 7.5 ~ 3.5 mArms 17" : 650Vrms, 19" : 720 Vrms normal : 720 mA NTR2101OT1 dpms : 0.0 mA Panel Board normal : 720 mA dpms : 0 mA 1.8V normal : 300mA...
Page 14
4-2. Main Circuits 4-2. Main Circuits L V DS C ABL E(30P) 1. BL _ADJ_E N 2. NC (13V ) 3. G ND 4. G ND 5. G ND 6. 5V 7. 5V 8. BL _ADJ_ANAL OG 9. BL _E N 1.
Page 15
5-1. Trouble Shooting 5-1. Trouble Shooting The Check items before troubleshooting...
Page 16
5-2. Trouble Shooting 5-2. Trouble Shooting How to connect the cables...
Page 17
5-3. Trouble Shooting 5-3. Trouble Shooting No Power L S17HAA/L S17H AB/L S17H AT L S15HAA/L S15HAB L S19HAA/L S19H AB/L S19HAT/L S19H AP...
Page 18
5-4. Trouble Shooting 5-4. Trouble Shooting No Video (Analog)
Page 19
5-5. Trouble Shooting 5-5. Trouble Shooting No Video (Digital)
Page 20
5-6. Trouble Shooting 5-6. Trouble Shooting No Video (Digital)
Page 21
5-7. Disassembly 5-7. Disassembly W AR NI NG : This M onitor contaims eletrostatically sensitive devices. Use C aution when handling these components C aution : 1. Disconnect the monitor from the power source before disassembly. Has Stand...
Page 22
5-8. Disassembly 5-8. Disassembly Disconnect Lamp wires and function Harness Lift up the shield and disconnect LVDS cable...
Page 23
5-9. Disassembly 5-9. Disassembly Lift up the LCD Panel Please check the Panel Name and Company.
Page 24
5-10. Disassembly 5-10. Disassembly Disassembly the Board and Cables from the Shield...
Page 25
5-11. Assambly 5-11. Assambly Please fix the board completely to the shield like above picture.
Page 26
5-12. Assambly 5-12. Assambly Please check the head of the Please check the head of the 차 측 전 원 부 차 측 전 원 부 cable cable M A IN BOA RD M A IN BOA RD 19” LVDS HARNESS 17”...
Page 27
6. How to download the Program(17”/19”) 6. How to download the Program(17”/19”) 1. Download below EasyWriter program.zip file in your computer. in your computer. 2. Unzip winDDC program.zip file. 3. Click EasyWriter.exe file. M onitor P C for JIG...
Page 28
6. How to download the Program(17”/19”) 6. How to download the Program(17”/19”) 4. Click the LoadHex button 4. Click the LoadHex button Select the right Hex file on your Select the right Hex file on your computer computer (Please down load the last version (Please down load the last version form the site.) form the site.)
Page 29
6. How to install the winDDC Program (15”) 6. How to install the winDDC Program (15”) 1. Download below winDDC program.zip file in your computer. in your computer. winDDC program.zip 2. Unzip winDDC program.zip file. 3. Click winDDC.exe file. M onitor P C for JIG...
Page 30
How to install the WinDDC Program(15”) How to install the WinDDC Program(15”) 4. Click WinISP Tap, 4. Click WinISP Tap, and set as below and set as below -. Manufacture : WELTREND -. Device Type : WT61P4 -. Communication Port : DSUB15 (Analog)
Page 31
How to install the WinDDC Program (15”) How to install the WinDDC Program (15”) 4. Click ED ID W riter[V er.1.25] Tap, 4. Click ED ID W riter[V er.1.25] Tap, and set as below and set as below -.I2c Protocol file name M CU_rw128.iic 5.
Page 32
Firmware Updating_WinDDC Program (15”) Firmware Updating_WinDDC Program (15”) Select the program Select the program ‘WinD D C’ ‘WinD D C’...
Page 33
Firmware Updating – Load Hex (15”) Firmware Updating – Load Hex (15”) 2. Push Button ‘L oadFile’ 2. Push Button ‘L oadFile’ A ttention ! A ttention ! Select the Right M odel and the latest Select the Right M odel and the latest V ersion Program V ersion Program...
Page 34
Firmware Updating – Selecting firmware Firmware Updating – Selecting firmware 3. Select the Firmware 3. Select the Firmware...
Page 35
Firmware Updating – Up dating (AutoProgram Button) (15”) Firmware Updating – Up dating (AutoProgram Button) (15”) 5. Now updating is ready, 5. Now updating is ready, just push the button ‘A uto just push the button ‘A uto Program’ Program’...
Page 36
8.DDC - Device Setting 8.DDC - Device Setting 1. Set your devices & M onitor 1. Set your devices & M onitor 2. A fter you set like the picture, you have to wait until 2. A fter you set like the picture, you have to wait until ‘...
Page 37
DDC – Program & File Setting DDC – Program & File Setting 1: Push ‘Open’ 2: Choosing Port 3: Selecting DDC File 4:Push ‘Next(OK)’ button...
Page 38
DDC - Last DDC - Last 5: Writing the Monitor’s Serial Number, and push the ‘Enter’ key...
Page 39
9. Panel & Model Define Process 9. Panel & Model Define Process Control ‘B right / Contrast’ to ‘Zero(0)’ Control ‘B right / Contrast’ to ‘Zero(0)’ Push the ‘Enter’ key for 5 seconds Push the ‘Enter’ key for 5 seconds A nd then you can see ‘SV C OSD ’.
Page 40
Panel & Model Define Process(Method 1) Panel & Model Define Process(Method 1) The icon is the application of The icon is the application of Service Program for changing the Service Program for changing the Panel define and Model Define Panel define and Model Define 1.
Page 41
Panel & Model Define Process Panel & Model Define Process Click the Advanced Tool Click the Advanced Tool To check the current setting Value To check the current setting Value 2. Push the button 2. Push the button ‘A dvanced Tool’ ‘A dvanced Tool’...
Page 42
Panel & Model Define Process Panel & Model Define Process Choose the EEPROM Memory Choose the EEPROM Memory Register Map. You can see the Register Map. You can see the Detail setting value for your monitor Detail setting value for your monitor 3.
Page 43
Panel & Model Define Process Panel & Model Define Process 4. Select ‘M onitor 4. Select ‘M onitor EEPROM PA GE0’ EEPROM PA GE0’...
Page 44
Panel & Model Define Process Panel & Model Define Process 5. Click the pixel 5. Click the pixel (row : 0C/ column : 05 ) (row : 0C/ column : 05 )
Page 45
Panel & Model Define Process Panel & Model Define Process 6. Write the M odel & Panel 6. Write the M odel & Panel information in ‘D A TA ’ (The information in ‘D A TA ’ (The information is differnt in information is differnt in M odel &...
Page 46
Panel & Model Define Process Panel & Model Define Process 7. Push the button ‘Write’ 7. Push the button ‘Write’...
Page 47
Panel & Model Define Process Panel & Model Define Process 8. Click ‘Read’ button. A nd you have 8. Click ‘Read’ button. A nd you have to check the pixel(0C/ 05) data remains to check the pixel(0C/ 05) data remains the same.
Page 48
Panel & Model Define Process(Method 2) Panel & Model Define Process(Method 2) 1. Repeat the process 1~4 of M ethod 1 1. Repeat the process 1~4 of M ethod 1...
Page 49
Panel & Model Define Process Panel & Model Define Process 2. Click Button ‘Get all’. 2. Click Button ‘Get all’. Check current setting Check current setting values values...
Page 50
Panel & Model Define Process Panel & Model Define Process The M odel & Panel information The M odel & Panel information SHEET should be with you doing SHEET should be with you doing SV C work. SV C work. 3.
Page 51
Panel & Model Define Process Panel & Model Define Process 4. Turn Hard Power off, and Turn it on, 4. Turn Hard Power off, and Turn it on, and check whether data setting is right or not. and check whether data setting is right or not. This is the last process.
Page 52
9.SVC Mode - Information 9.SVC Mode - Information Control ‘B right / Contrast’ to ‘Zero(0)’ Control ‘B right / Contrast’ to ‘Zero(0)’ Push the ‘Enter’ key for 5 seconds Push the ‘Enter’ key for 5 seconds A nd then you can see ‘SV C OSD ’. A nd then you can see ‘SV C OSD ’.
Page 53
SVC Mode - Items SVC Mode - Items * ‘ ‘ key enables you change the item. * ‘ ‘ key enables you change the item. ▲ ▲...
Page 54
SVC Mode – Panel Change SVC Mode – Panel Change * * * If you change the PA NEL , you should change the information of PA NEL in SV C mode * * * * * * If you change the PA NEL , you should change the information of PA NEL in SV C mode * * * 1.
Page 55
SVC Mode – Lamp Change SVC Mode – Lamp Change * * * If you change the L A M P, you should change the information of L A M P in SV C mode * * * * * * If you change the L A M P, you should change the information of L A M P in SV C mode * * * 1.
Need help?
Do you have a question about the 740N and is the answer not in the manual?
Questions and answers