Xylem Flygt Compit 901 Installation, Operation And Maintenance Manual
Hide thumbs
Also See for Flygt Compit 901:
- Installation, operation and maintenance manual (124 pages)
Advertisement
Quick Links
Advertisement

Related Manuals for Xylem Flygt Compit 901


Summary of Contents for Xylem Flygt Compit 901
- Page 1 Installation, Operation, and Maintenance Manual 90011201_2.0 Flygt Compit 901...
- Page 3 4.1.3 Inspect the work area before permit-required hot work........19 4.2 Installing the unit........................19 4.2.1 Prepare the site......................19 4.2.2 Prepare the pit base....................20 4.2.3 Attach the anchoring ring (foot)................20 4.2.4 Install the unit......................21 Flygt Compit 901 Installation, Operation, and Maintenance Manual...
- Page 4 6 Maintenance..........................39 6.1 Precautions......................... 39 6.1.1 Inspect the work area before permit-required hot work........40 6.2 Maintenance guidelines....................40 6.3 Replace the check valve....................40 7 Declaration of Conformity.......................41 7.1 Declaration of Conformity....................41 Flygt Compit 901 Installation, Operation, and Maintenance Manual...
- Page 5 This includes any modification to the equipment or use of parts not provided by Xylem. If there is a question regarding the intended use of the equipment, please contact a Xylem representative before proceeding.
- Page 6 • The applicable safety laws, regulations, and guidelines for confined spaces are understood and followed. 1.4.2 Biological hazards The product is designed for use in liquids that can be hazardous to your health. Observe these rules when you work with the product: Flygt Compit 901 Installation, Operation, and Maintenance Manual...
- Page 7 • Clean-up of spills Exceptional sites CAUTION: Radiation Hazard Do NOT send the product to Xylem if it has been exposed to nuclear radiation, unless Xylem has been informed and appropriate actions have been agreed upon. 1.6 Spare parts CAUTION: Only use the manufacturer’s original spare parts to replace any worn or faulty...
- Page 8 2. To determine whether any parts have been damaged or are missing, examine the product. 3. If applicable, unfasten the product by removing any screws, bolts, or straps. Use care around nails and straps. 4. If there is any issue, then contact a sales representative. Flygt Compit 901 Installation, Operation, and Maintenance Manual...
- Page 9 1. Unload the unit from the truck and put it carefully on a rigid, horizontal surface. 2. Attach a sling to the lifting eye. Flygt Compit 901 Installation, Operation, and Maintenance Manual...
- Page 10 Units with a concrete access cover are delivered in a vertical position, standing upside down on the delivery pallet. 1. Unload the unit from the truck and put it carefully on a rigid, horizontal surface. 2. Attach a sling around the foot. Flygt Compit 901 Installation, Operation, and Maintenance Manual...
- Page 11 Use suitable lifting equipment and ensure that the product is properly harnessed. Wear personal protective equipment. Stay clear of cables and suspended loads. Make sure that the concrete cover stays on the pallet. Flygt Compit 901 Installation, Operation, and Maintenance Manual...
- Page 12 2. Fit a lifting sling around the pump station as shown in the following figure. Arrange the lifting sling so that the pump station outlet will face upwards when the pump station is lifted. Flygt Compit 901 Installation, Operation, and Maintenance Manual...
- Page 13 7. Attach a sling to the lifting eye. Figure 2: Lifting eye. Generic Compit 901 is shown. 8. Lift the unit. 9. Put the unit on the pallet in an upright position. Flygt Compit 901 Installation, Operation, and Maintenance Manual...
- Page 14 Make sure that the unit cannot roll or fall over and injure people or damage property. 2.8 Long-term storage Long-term storage outdoors must not exceed four months. Make sure that the unit is covered with a tarpaulin or similar. Flygt Compit 901 Installation, Operation, and Maintenance Manual...
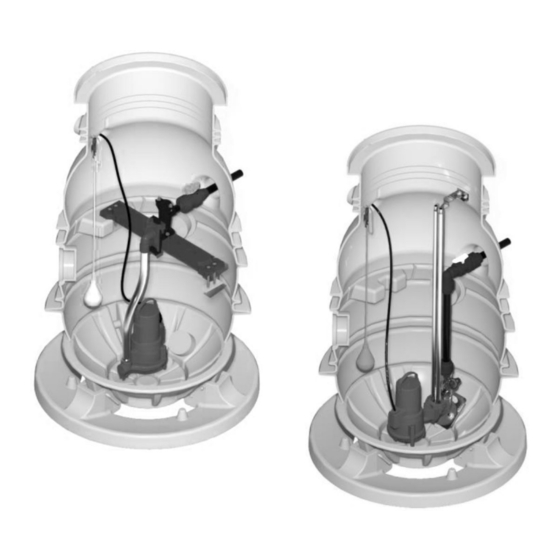
- Page 15 • Elbow pipe, if needed for the pump • Anchoring ring (foot) • Discharge connection • Operating handle with chain for shutoff valve • Level sensor • Control panel The following figures show examples of H- and P-installations. Flygt Compit 901 Installation, Operation, and Maintenance Manual...
- Page 16 The unit must be installed underground, outside of the building. Data Description Media temperature Maximum 60°C (140°F) pH of the pumped media 5.5 - 8 Other For other applications, contact the local sales and service representative for information. Flygt Compit 901 Installation, Operation, and Maintenance Manual...
- Page 17 2. Inlet: DN 100 3. Inlet: DN 150 4. Inlet: DN 100 5. Outlet: DN 32 or DN 50 6. Cable duct or venting: DN 100 Figure 4: Location of outlet and inlets Flygt Compit 901 Installation, Operation, and Maintenance Manual...
- Page 18 End cap color Installation Number of pumps Discharge connection characteristics Yellow One pump Cast iron parts Transparent Two pumps Cast iron parts One pump High performance polyamide (HPPA) parts Green One pump DN32 Flygt Compit 901 Installation, Operation, and Maintenance Manual...
- Page 19 For more information, please contact your local sales and service representative. 3.5 The data plate 1. Country of origin 2. Manufacturer 3. Product 4. Product number 5. Production week and year 6. Serial number Flygt Compit 901 Installation, Operation, and Maintenance Manual...
- Page 20 • The applicable safety laws, regulations, and guidelines for excavations are understood and followed. • Be aware that site conditions can change rapidly, for example due to heavy rain, rapid thaw, vibrations or other factors. Flygt Compit 901 Installation, Operation, and Maintenance Manual...
- Page 21 • If the unit is installed in filled material of stony material, silt and clay, or in organic soil, attach a separating layer of geotextile to the pit walls and bottom before backfilling and compaction. The geotextile prevents any material transportation from the backfill material into the soil. Flygt Compit 901 Installation, Operation, and Maintenance Manual...
- Page 22 2. Align the arrow on the foot with the arrow at the bottom of the pump station. WS011666A 3. Lower the pump station onto the foot. 4. Insert the U-shaped bolt through the two holes and fit the washer. 5. Lock the bolt with the pin. Flygt Compit 901 Installation, Operation, and Maintenance Manual...
- Page 23 2. Lift the unit on to the pit base in a vertical position and align it. NOTICE: Never lift the unit with a pump inside it. Use both lifting eyes when lifting the unit. Figure 7: Lifting eyes 3. Check that the unit is in level. Flygt Compit 901 Installation, Operation, and Maintenance Manual...
- Page 24 A: Drilled hole Inlet pipe diameter, mm Drilled hole, diameter A Minimum, mm Maximum, mm d) Drill at the center of the selected inlet. Use a hole saw which is applicable for cutting plastic. Flygt Compit 901 Installation, Operation, and Maintenance Manual...
- Page 25 Check that the 75 mm (2.95 in) mark is in line with the edge of the seal. 75 mm (3 in) 2. Connect a compression fitting to the outlet pipe of the unit. The compression fitting is ordered separately. Flygt Compit 901 Installation, Operation, and Maintenance Manual...
- Page 26 Connect the ventilation pipe. d) Cover the end of the pipe, so that dirt and gravel do not get in it during the backfill stage. Figure 8: Ventilation pipe. Generic pump station is shown. Flygt Compit 901 Installation, Operation, and Maintenance Manual...
- Page 27 4. Position the pieces of wood. The wood pieces prevent the extension from moving during backfilling. 4.2.7 Install the extension: P-installation Use a cutting device to adjust the length of the extension and extension guide bars. Flygt Compit 901 Installation, Operation, and Maintenance Manual...
- Page 28 The figure shows the angular position of the hooks in the extension. WS011681A 1. Hook for level regulator 2. Hook for chains 5. Put the pieces of wood in position. The wood prevents the extension from moving during backfilling. Flygt Compit 901 Installation, Operation, and Maintenance Manual...
- Page 29 It is essential to ensure the proper functioning of level regulators in the unit. Install the open bell 1. Read the open bell manual. 2. Put the open bell at the correct level. See the following figure. Flygt Compit 901 Installation, Operation, and Maintenance Manual...
- Page 30 5. Put the pump motor cable in a curved shape with a large radius and shorten the cable. If the cable is too long, then there is a risk that it can be pulled into the pump. Flygt Compit 901 Installation, Operation, and Maintenance Manual...
- Page 31 Coarse-grained soils, such as gravel and stone with grain size Extend the ground insulation at least 1.8 m above 2.0 mm around the unit • Mount the plastic pipe and install the unit insulation. Flygt Compit 901 Installation, Operation, and Maintenance Manual...
- Page 32 6. Plastic access cover 7. Concrete access cover 8. Paving, asphalt, concrete 0.7 m 0.3 m WS011558C Dimensions in the figure must be regarded as minimum dimensions. 1. Check that the following requirements are fulfilled: Flygt Compit 901 Installation, Operation, and Maintenance Manual...
- Page 33 3. Do the remaining fill before the groundwater surface is allowed to rise above the crushed material. 4.2.14 Installing the access cover Install a plastic access cover Table 3: Dimensions Item Millimeter Inch Ground level — — Flygt Compit 901 Installation, Operation, and Maintenance Manual...
- Page 34 • The extension must be used with the Class D cover. • The tank for Class D is blue. 1. Cut off the top of the extension. The arrow in the following figure shows the location of the cut. Flygt Compit 901 Installation, Operation, and Maintenance Manual...
- Page 35 Before installing the pump, read the Installation, Operation, and Maintenance manual for the pump. Make sure that the impeller rotates in the correct direction before installing the pump. NOTICE: Do not allow soil or gravel to get inside the unit. Flygt Compit 901 Installation, Operation, and Maintenance Manual...
- Page 36 3. Attach a chain with shackle to the sliding bracket part of the pressure connection unit. 4. Install the pump: a) Open the access cover. b) Lower the pump into the unit. Use an elastic guiding device that is connected to the discharge connection with check valve. Flygt Compit 901 Installation, Operation, and Maintenance Manual...
- Page 37 Installing the level sensors on page 27. 7. Close and lock the access cover before leaving the unit. 4.3.2 Install with P-installation This figure shows an example of a DN32 and a DN50 P-installation. Flygt Compit 901 Installation, Operation, and Maintenance Manual...
- Page 38 4. Connect the motor cable to the plug contact. 5. Install the level sensors. See Installing the level sensors on page 27. 6. Close and lock the access cover before leaving the unit. Flygt Compit 901 Installation, Operation, and Maintenance Manual...
- Page 39 Before opening the cover, make sure that the safety instructions in the section Precautions when opening the cover on page 37 have been read and understood. This section applies to the following: Flygt Compit 901 Installation, Operation, and Maintenance Manual...
- Page 40 5. Pull the high-level alarm level sensor, hold it in a horizontal position and verify that the pump starts. The alarm is activated if everything is right. 6. Always close and lock the access cover before leaving the unit. Flygt Compit 901 Installation, Operation, and Maintenance Manual...
- Page 41 Allow surfaces to cool before starting work, or wear heat-protective clothing. Pump manual The safety information in the Installation, Operation and Maintenance manual for the pump must be followed at all times. Flygt Compit 901 Installation, Operation, and Maintenance Manual...
- Page 42 If the check valve must be replaced, then contact an authorized service representative. DN32 DN50 The pump station is a confined space. Do not enter it. For more information on confined spaces, see Confined spaces on page 4. Flygt Compit 901 Installation, Operation, and Maintenance Manual...
- Page 43 NO Xylem Water Solutions Norge AS, Oslo, Norway, Tel. +47-22-90 16 00 Xylem Water Solutions Portugal Lda. Barca - Maia, Portugal, Tel. +351 229 478 550 PO Xylem Water Solutions Polska Sp. z o.o, Raszyn, Poland, Tel. +48-22-735 81 00 Xylem Water Solutions Sweden AB, Sundbyberg, Sweden, Tel.
- Page 44 For more information on how Xylem can help you, go to www.xylem.com Xylem Water Solutions Global Visit our Web site for the latest version of this document...
Need help?
Do you have a question about the Flygt Compit 901 and is the answer not in the manual?
Questions and answers