Table of Contents
Advertisement
Quick Links
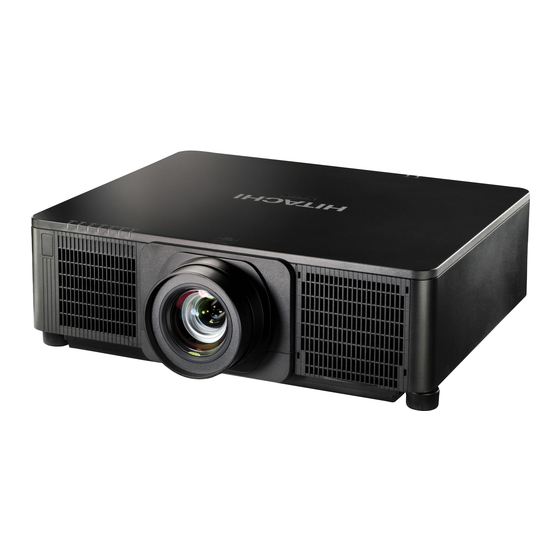
Projector
CP-WU9100/CP-HD9950
User's Manual (concise)
Thank you for purchasing this projector.
Read through this manual before using this product, safely use this product.
WARNING ►Before using this product, be sure to read all manuals for this
product. After reading them, store them in a safe place for future reference.
►Heed all the warnings and cautions in the manuals or on the product.
►Follow all the instructions in the manuals or on the product.
NOTE • In this manual, unless any comments are accompanied, "the
manuals" means all the documents provided with this product, and "the product"
means this projector and all the accessories came with the projector.
Contents
First of all ............................................ 2
Important safety instruction ..............................2
Regulatory notices .............................. 3
About Electro-Magnetic Interference ................3
Contents of package........................... 4
Installing the lens unit ......................... 5
Preparing for the remote control ......... 5
Arrangement ....................................... 6
Connecting with your devices ............. 7
Ferrite core for HDMI cable ................ 7
Fastening the adapter cover ............... 8
Connecting power supply ................... 9
Turning on the power ........................ 10
Adjusting the projector's elevator ..... 11
Adjusting the lens position ................ 11
Displaying the picture ....................... 12
Turning off the power ........................ 14
Replacing the lamp ........................... 15
internal clock battery....................... 20
Using the CD manual ....................... 21
Specifications ................................... 22
- Warranty and after-service ........... 24
1
Advertisement
Table of Contents

Related Manuals for Hitachi CP-WU9100


Summary of Contents for Hitachi CP-WU9100
-
Page 1: Table Of Contents
Projector CP-WU9100/CP-HD9950 User's Manual (concise) Thank you for purchasing this projector. Read through this manual before using this product, safely use this product. WARNING ►Before using this product, be sure to read all manuals for this product. After reading them, store them in a safe place for future reference. -
Page 2: First Of All
First of all Entries and graphical symbols explanation The following entries and graphical symbols are used for the manuals and the product as follows, for safety purpose. Know their meanings beforehand, and heed them. WARNING This entry warns of a risk of serious personal injury or even death. CAUTION This entry warns of a risk of personal injury or physical damage. -
Page 3: Regulatory Notices
Regulatory notices About Electro-Magnetic Interference This is a Class A product. In a domestic environment this product may cause radio interference in which case the user may be required to take adequate measures. This product may cause interference if used in residential areas. Such use must be avoided unless the user takes special measures to reduce electromagnetic emissions to prevent interference to the reception of radio and television broadcasts. -
Page 4: About Waste Electrical And Electronic Equipment
About Waste Electrical and Electronic Equipment The mark is in compliance with the Waste Electrical and Electronic Equipment Directive 2002/96/EC (WEEE). The mark indicates the requirement NOT to dispose the equipment including any spent or discarded batteries or accumulators as unsorted municipal waste, but use the return and collection systems available. -
Page 5: Installing The Lens Unit
Installing the lens unit See the manual of the optional lens. Preparing for the remote control Insert the batteries into the remote control before using it. If the remote control starts to malfunction, try to replace the batteries. If you do not plan to use the remote control for long period, remove the batteries from the remote control and store them in a safe place. -
Page 6: Arrangement
Arrangement Refer to tables T-1 to T-2 at the back of this manual as well as the following to determine the screen size and projection distance. The values shown in the table are calculated for a full size screen. Ⓗ × Ⓥ : Screen size ⓐ... -
Page 7: Connecting With Your Devices
Connecting with your devices Before connecting the projector to a device, consult the manual of the device to confirm that the device is suitable for connecting with this projector and prepare the required accessories, such as a cable in accord with the signal of the device. Consult your dealer when the required accessory did not come with the product or the accessory is damaged. -
Page 8: Fastening The Adapter Cover
Fastening the adapter cover When using the USB wireless adapter, use the supplied adapter cover to avoid possible burns. USB wireless adapter: USB-WL-11N Temperature range: 0 ~ 45 °C (Operating) Loosen the screw on the bottom left of the WIRELESS port. Insert the tab of the cover into the hole at the upper right of the WIRELESS port in the direction of the arrow. -
Page 9: Connecting Power Supply
Connecting power supply Insert the connector of the power cord into the AC (AC inlet) of the projector. Firmly plug the power cord’s plug into the outlet. In a couple of seconds after the power supply connection, the POWER indicator will light up in steady orange. -
Page 10: Turning On The Power
Turning on the power Make sure that the power cord is firmly and correctly connected to the projector and the outlet. Make sure that the POWER indicator is lighted in steady orange. Press the STANDBY/ON button on the projector or the ON button on the remote control. -
Page 11: Adjusting The Projector's Elevator
Adjusting the projector’s elevator Lengthening or shortening the length of the elevator feet shifts the projection position and the projection angle. Turn the elevator feet each to adjust their length. 5° max. 30 mm WARNING ►Do not lengthen the elevator feet exceeding 30 mm. The foot lengthened exceeding the limit may come off and drop the projector down, and result in an injury or damaging the projector. -
Page 12: Displaying The Picture
Displaying the picture Activate your signal source. Turn the signal source on, and make it send the signal to the projector. Press the INPUT button on the projector. Each time you press the button, the projector switches its input port in turn. You can also use the remote control to select an input signal. - Page 13 Press the ASPECT button on the remote control. Each time you press the button, the projector switches the mode for aspect ratio in turn. ASPECT button Use the ZOOM + / - buttons on the remote control or ZOOM button and ◄/►...
-
Page 14: Turning Off The Power
Turning off the power Press the STANDBY/ON button on the projector or the STANDBY button on the remote control.The message “Power off?” will appear on the screen for about five seconds. Press the STANDBY/ON or STANDBY button again while the message appears.The projector lamp will go off, and the POWER indicator will begin blinking in orange. -
Page 15: Replacing The Lamp
Replacing the lamp A lamp has a finite product life. Using the lamp for long periods of time could cause the pictures to darken or the color tone to turn poor. Note that each lamp has a different lifetime, and some may burst or burn out soon after you start using them. - Page 16 Loosen the three screws (marked by arrow) of the lamp, and slowly pull the lamp out by the handles. Never loosen any other screws. Handles 4, 5 LAMP2 UNIT LAMP1 UNIT (on the left side) (in the middle) Handles Insert the new lamp, and firmly retighten the three screws of the lamp loosened in the previous process to lock it in place.
- Page 17 HIGH VOLTAGE HIGH TEMPERATURE HIGH PRESSURE WARNING ►The projector uses a high-pressure mercury glass lamp. The lamp can break with a loud bang, or burn out, if jolted or scratched, handled while hot, or worn over time. Note that each lamp has a different lifetime, and some may burst or burn out soon after you start using them.
-
Page 18: Cleaning And Replacing The Air Filter
Cleaning and replacing the air filter Check and clean the air filter periodically. When the indicators or a message prompts you to clean the air filter, replace the filter as soon as possible. Replace the filters when they are damaged or too soiled. Request a filter set with the following type number from your dealer when purchasing a new one. - Page 19 Turn the projector on and reset the filter time using the FILTER TIME item in the EASY MENU. (1) Press the MENU button to display a menu. (2) Point at the FILTER TIME using the ▲/▼ cursor buttons, then press the ►...
-
Page 20: Replacing The Internal Clock Battery
Do not use any metal tools. While prying it up, put a finger lightly on the battery as it may pop out of the holder. Replace the battery with a new HITACHI MAXELL, Part No.CR2032 or CR2032H. Slide the battery in under the plastic claw, and push it into the holder until it clicks. -
Page 21: Using The Cd Manual
Using the CD manual The other manuals for this product are written into the included CD-ROM titled “User’s Manual (detailed)”. Before using the CD-ROM, read the following to ensure the proper use. System requirements The system for using the CD-ROM requires the following. Windows Windows Vista , Windows... -
Page 22: Specifications
Specifications Item Specification Product name projector ® CP-HD9950: 2,073,600 pixels (1920 horizontal x 1080 vertical) CP-WU9100: 2,304,000 pixels (1920 horizontal x 1200 vertical) 430W UHP x2 Lamp Power supply, AC110-120 V: 10.2A, AC220-240 V: 5.6A Rated current Power AC110-120 V: 1,090 W, AC220-240 V: 1,070 W consumption NORMAL MODE: 0 ~ 45 °C... - Page 23 Item Specification COMPUTER IN ......D-sub 15 pin mini jack x1 HDMI 1 ........... HDMI connector x1 HDMI 2 ........... HDMI connector x1 MONITOR OUT ......D-sub 15 pin mini jack x1 VIDEO ..............BNC jack x1 DVI-D ............DVI connector x1 Ports HDBaseT ............
-
Page 24: Troubleshooting - Warranty And After-Service
If this does not resolve the problem, please consult your dealer or service company. They will tell you what warranty condition is applied. Please check the following web address where you may find the latest information for this projector. Product http://www.hitachi-america.us/projectors information and Manuals : Production http://www.hitachidigitalmedia.com...
Need help?
Do you have a question about the CP-WU9100 and is the answer not in the manual?
Questions and answers