Table of Contents
Advertisement
Advertisement
Chapters
Table of Contents

Related Manuals for Sinclair SDV IV Series


Summary of Contents for Sinclair SDV IV Series
- Page 1 FULL DC INVERTER SYSTEMS SERVICE MANUAL SDV4-280-335EAA...
-
Page 3: Table Of Contents
CONTENTS Part 1 General Information ................3 Part 2 Component Layout and Refrigerant Circuits ........9 Part 3 Control ....................17 Part 4 Field Settings ..................29 Part 5 Electrical Components and Wiring Diagrams ........35 Part 6 Diagnosis and Troubleshooting ............49... -
Page 5: Part 1 General Information
Part 1 General Information Indoor and Outdoor Unit Capacities ..........4 External Appearance ................6 Combination Ratio ................8... - Page 6 1 Indoor and Outdoor Unit Capacities 1.1 Indoor Units Table 1-1.1: Indoor unit abbreviation codes Abbreviation Abbreviation Type Type code code One-way Cassette High Static Pressure Duct Two-way Cassette Wall-mounted Compact Four-way Cassette Ceiling & Floor Four-way Cassette Floor Standing Medium Static Pressure Duct Console Table 1-1.2: Indoor unit capacity range...
- Page 7 1.3 Outdoor Units Table 1-1.4: Outdoor unit capacity range Capacity Model Name SDV4-280EAA 10HP SDV4-335EAA 12HP Notes: SDV4 Series outdoor units could not be combined.
- Page 8 2 External Appearance 2.1 Indoor Units Table 1-2.1: Indoor unit appearance One-way Cassette Two-way Cassette Compact Four-way Cassette Four-way Cassette Medium Static Pressure Duct High Static Pressure Duct Wall-mounted Ceiling & Floor Floor Standing Console...
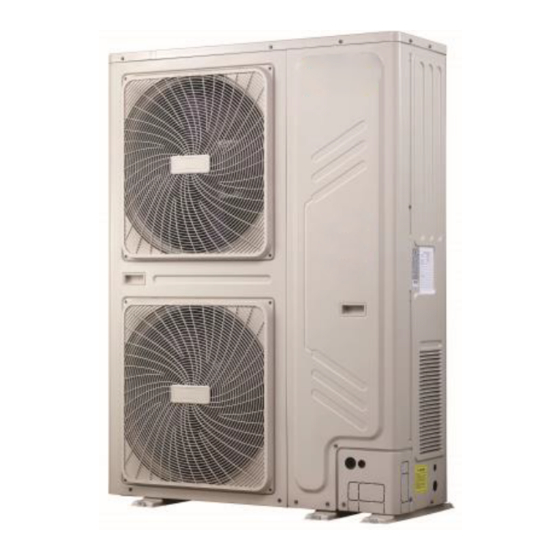
- Page 9 2.3 Outdoor Units Table 1-2.4: Outdoor unit appearance 10/12HP...
- Page 10 3 Combination Ratio Sum of capacity indexes of the indoor units Combination ratio = Capacity index of the outdoor unit Table 1-3.1: Indoor and outdoor unit combination ratio limitations Type Minimum combination ratio Maximum combination ratio SDV4 Series outdoor units 130% Table 1-3.2: Combinations of Indoor and outdoor units Outdoor unit capacity...
-
Page 11: Part 2 Component Layout And Refrigerant Circuits
Part 2 Component Layout and Refrigerant Circuits Layout of Functional Components ............10 Piping Diagrams .................. 11 Refrigerant Flow Diagrams ..............13... - Page 12 1 Layout of Functional Components Figure 2-1.1: 10Hp/12Hp front view Figure 2-1.2: 10Hp/12Hp side view Figure 2-1.3: 10Hp/12Hp top view Legend Parts name Parts name Compressor Stop valve (gas side) High pressure switch Stop valve (liquid side) High pressure sensor Heat exchanger temperature outlet sensor Oil separator Outdoor ambient temperature sensor...
- Page 13 2 Piping Diagrams Figure 2-2.1: 10/12HP piping diagram Legend Parts name Parts name Compressor Stop valve (gas side) High pressure switch Stop valve (liquid side) High pressure sensor Heat exchanger temperature sensor Oil separator Outdoor ambient temperature sensor Four-way valve Discharge temperature sensor Heat exchanger Heat sink temperature sensor...
- Page 14 Key components: 1. Oil separator: Separates oil from gas refrigerant pumped out of the compressor and quickly returns it to the compressor. Separation efficiency is up to 99%. 2. Accumulator: Stores liquid refrigerant and oil to protect compressor from liquid hammering. 3.
- Page 15 3 Refrigerant Flow Diagrams Cooling operation Figure 2-3.1: 10/12HP refrigerant flow during cooling operation High temperature, high pressure gas High temperature, high pressure liquid Low temperature, low pressure Unit on Thermostat on Filter Filter Normal control Unit on Thermostat on Filter Filter Normal control...
- Page 16 Heating operation Figure 2-3.3: 10/12HP refrigerant flow during heating operation High temperature, high pressure gas High temperature, high pressure liquid Low temperature, low pressure Unit on Thermostat on Filter Filter Normal control Unit on Thermostat on Filter Filter Normal control Unit off Filter Filter...
- Page 17 Defrosting operation Figure 2-3.5: 10/12HP refrigerant flow during defrosting operation High temperature, high pressure gas High temperature, high pressure liquid Low temperature, low pressure Unit on Thermostat on Filter Filter 480steps Unit on Thermostat on Filter Filter 480steps Unit off Filter Filter 480steps...
-
Page 19: Part 3 Control
Part 3 Control General Control Scheme Flowchart ............18 Stop Operation ..................19 Standby Control ................... 19 Startup Control ..................20 Normal Operation Control ..............21 Protection Control ................24 Special Control ..................26... -
Page 20: General Control Scheme Flowchart
1 General Control Scheme Flowchart Sections 3-2 to 3-7 on the following pages detail when each of the controls in the flowchart below is activated. Stop operation Abnormal shutdown System stop Standby control Crankcase heater control Thermo on Startup control ... -
Page 21: Stop Operation
2 Stop Operation The stop operation occurs for one of the three following reasons: 1. Abnormal shutdown: in order to protect the compressors, if an abnormal state occurs the system makes a 'stop with thermo off' operation and an error code is displayed on the outdoor unit digital displays. 2. -
Page 22: Startup Control
4 Startup Control 4.1 Compressor Startup Delay Control In initial startup control and in restart control (except in oil return operation and defrosting operation), compressor startup is delayed such that a minimum of 5 minutes has elapsed since the compressor stopped, in order to prevent frequent compressor on/off and to equalize the pressure within the refrigerant system. -
Page 23: Normal Operation Control
4.3 Startup Control for Heating Operation Table 3-4.2: Component control during startup in heating mode Wiring diagram Component 10Hp/12Hp Control functions and states label Controlled according to load requirement, operating frequency Inverter compressor COMP ● increased by 1 step / sec Fan speed controlled according to ambient temperature (T4) and Upper DC fan motor... - Page 24 5 Normal Operation Control 5.1 Component Control during Normal Operation Table 3-5.1: Component control during normal cooling operation Wiring diagram Component 10Hp/12Hp Control functions and states label Inverter compressor COMP Controlled according to load requirement ● Upper DC fan motor FAN_UP ●...
- Page 25 5.2 Compressor Output Control The compressor rotation speed is controlled according to the load requirement. Before compressor startup, the outdoor unit first estimates the indoor unit load requirement according to the nominal capacity of indoor units currently running, and then correct for ambient temperature. The compressors then start up according to the corrected load requirement. During operation the compressors are controlled according to the nominal capacity of indoor units currently running and the indoor unit heat exchanger temperatures.
-
Page 26: Protection Control
6 Protection Control 6.1 High Pressure Protection Control This control protects the system from abnormally high pressure and protects the compressors from transient spikes in pressure. Figure 3-6.1: High pressure protection control Normal operation > 4.4MPa < 3.2MPa High pressure protection, error code P1 is displayed Notes: : Discharge pressure When the discharge pressure rises above 4.4MPa the system displays P1 protection and the unit stops running. - Page 27 6.4 Compressor and Inverter Module Protection Control This control protects the compressors from abnormally high currents and protects the inverter modules from abnormally high temperatures. Figure 3-6.4: Compressor current protection control Normal operation Current ≥ Current Current < Current Compressor current protection, error code P3 is displayed Compressor model LNB65FAGMC Current...
-
Page 28: Special Control
7 Special Control 7.1 Oil Return Operation In order to prevent compressors from running out of oil, the oil return operation is conducted to recover oil that has flowed out of the compressor(s) and into the piping system. This operation is performed for all units including units that are in standby. - Page 29 Tables 3-7.3 and 3-7.4 show component control during oil return operation in heating mode. Table 3-7.3: Outdoor unit component control during oil return operation in heating mode Wiring diagram Component 10Hp/12Hp Control functions and states label Inverter compressor COMP Controlled according to load requirement ●...
- Page 30 7.2 Defrosting Operation In order to recover heating capacity, the defrosting operation is conducted when the outdoor unit heat exchanger is performing as an evaporator. The defrosting operation is controlled according to outdoor ambient temperature, outdoor heat exchanger temperature, indoor heat exchanger temperature and outdoor unit running time. When the outdoor unit is running in defrosting, the digital display on outdoor main PCB will display “df”.
-
Page 31: Part 4 Field Settings
Part 4 Field Settings Outdoor Unit Field Settings ..............30... - Page 32 1 Outdoor Unit Field Settings 1.1 PCB Switches and Switch Settings Figure 4-1.1: Outdoor unit main PCB switches PCB switches ENC1 ENC3...
- Page 33 Table 4-1.1: Outdoor unit main PCB switch settings Switch Setting Switch positions Description The number of indoor units is in the range 0-15 ENC1 S9-3 0-9 on ENC1 indicate 0-9 indoor units; A-F on ENC1 indicate 10-15 indoor units Number of indoor units The number of indoor units is in the range 16-31 0-9 on ENC1 indicate 16-25 indoor units;...
- Page 34 1.2 Modes Set on Main PCB 1.2.1 Priority mode setting Priority mode can only be set on the outdoor unit. When an indoor unit is in mode conflict with the outdoor units the unit displays the mode conflict error. The digital display on indoor main PCB will display error code E0. Figure 4-1.2: Indoor unit digital displays Digital display Digital display...
- Page 35 3. First on priority mode: The outdoor unit operates in the mode of the first on indoor unit is being requested. Indoor units that are in a mode different to the first on unit display the mode conflict error. 4. Heating only mode: The outdoor unit only operates in heating mode. Indoor units requesting heating operate in heating mode.
-
Page 37: Part 5 Electrical Components And Wiring Diagrams
Part 5 Electrical Components and Wiring Diagrams 1 Outdoor Unit Electric Control Box Layout ..........36 2 Outdoor Unit Main PCB ................. 37 3 Compressor Inverter Module ..............44 4 Filter Board ................... 46 5 Wiring Diagrams ..................48... -
Page 38: Outdoor Unit Electric Control Box Layout
1 Outdoor Unit Electric Control Box Layout Figure 5-1.1: 10Hp/12HP front view of electric control box Main PCB Communication terminals block Power supply terminals Figure 5-1.2: 10Hp/12HP rear view of electric control box Reactor Inverter module Filter board Inductor... -
Page 39: Outdoor Unit Main Pcb
2 Outdoor Unit Main PCB 2.1 Ports Figure 5-2.1: Outdoor unit main PCB ports ① ② ③ ④ ⑤ ⑥ ⑦ ⑧ ⑨ ⑩ Notes: Label descriptions are given in Table 5-2.1. - Page 40 Table 5-2.1: Main PCB ports Label in Port code Content Port voltage Figure 5-2.1 220V AC between A/B/C and N; CN30 Power input of main board 380V AC between A,B and C CN36 Inverter module connection 0V or 5V DC Control port of filter board 0V or 12V DC CN14...
- Page 41 2.2 Components 2.2.1 Layout Figure 5-2.2: Outdoor unit main PCB components Display Main control chip Dial switches Buttons Dial switches 2.2.2 Function of buttons SW1 to SW4 Table 5-2.2: Function of buttons SW1 to SW4 Button Function In menu mode: previous and next buttons for menu modes. SW3 (UP) Not in menu mode: previous and next buttons for system SW4 (DOWN)
- Page 42 2.2.3 Menu mode 1. Long press SW1 “MENU” button for 5 seconds to enter menu mode, and the digital display displays “n1”; 2. Press SW3 / SW4 “UP / DOWN” button to select the first level menu “n1”, “n2”, “n3”, “n4”, “nb” or “nF”; 3.
- Page 43 Menu mode function: Table 5-2.3: Menu mode function Digital display Menu mode Remarks content Force cooling mode All indoor units running in cooling mode Maintenance mode The system does not check the indoor units’ number. It is only used in maintenance process. The digital display displays “R01”, and all solenoid Vacuum mode valves are opened and EXVs are positioned to 480 steps.
- Page 44 2.2.4 UP / DOWN system check button Before pressing UP or DOWN button, make sure that the system has been operating steadily for more than one hour. On pressing UP or DOWN button, the parameters listed in Table 5-2.5 will be displayed in sequence. Table 5-2.5: System check Parameters displayed on DSP Remarks...
- Page 45 2.2.5 Digital display output Table 5-2.6: Digital display output in different operating states Outdoor unit state Parameters displayed on DSP Standby The number of indoor units in communication with the outdoor unit Frequency limitation code and running speed of the compressor in Normal operation rotations per second Error or protection...
-
Page 46: Compressor Inverter Module
3 Compressor Inverter Module 3.1 Ports Figure 5-3.1: Outdoor unit inverter module ports ⑨ ⑧ ① 3-phase bridge ⑩ rectifier power input 3-phase bridge rectifier power output ② ③ ④ ⑤ ⑥ ⑦ Notes: Label descriptions are given in Table 5-3.1. - Page 47 Table 5-3.1: Inverter module ports Label in Port code Content Port voltage Figure 5-2.1 Power input L1 of inverter module 380V AC Power input L2 of inverter module 380V AC CN11 Power input L3 of inverter module 380V AC Above 156V DC (varying according to CN12 Power output U of inverter module to compressor frequency)
-
Page 48: Filter Board
4 Filter Board 4.1 Ports Figure 5-4.1: Outdoor unit filter board ports ⑨ ⑧ ⑩ ① ⑦ ② Notes: ③ ④ ⑤ ⑥ Label descriptions are given in Table 5-4.1. - Page 49 Table 5-4.1: Filter board ports Label in Port code Content Port voltage Figure 5-4.1 Control port of filter board 12V DC CN211 Power supply to inverter board (CN211) and DC fan motor 310V DC CN212 (CN212) of filter board 220V AC between L1/L2/L3 and N; CN203 Power input N of filter board 380V AC between L1,L2 and L3...
-
Page 50: Wiring Diagrams
5 Wiring Diagrams Figure 5-5.1: 10Hp/12HP wiring diagram... -
Page 51: Part 6 Diagnosis And Troubleshooting
Part 6 Diagnosis and Troubleshooting Error Code Table .................. 50 Troubleshooting .................. 51 Appendix to Part 6 ................99... - Page 52 1 Error Code Table Table 6-1.1: Error code table Error Manual re-start Content Remarks code required Phase sequence error Displayed on the outdoor unit PCB Communication error between indoor and outdoor units Displayed on the outdoor unit PCB Outdoor heat exchanger temperature sensor (T3) error or Displayed on the outdoor unit PCB outdoor ambient temperature sensor (T4) error Abnormal power supply voltage...
- Page 53 2 Troubleshooting 2.1 Warning Warning All electrical work must carried by competent and suitably qualified, certified accredited professionals and in accordance with all applicable legislation (all national, local and other laws, standards, codes, rules, regulations and other legislation that apply in a given situation). ...
- Page 54 2.2 E1: Phase sequence error 2.2.1 Digital display output 2.2.2 Description Phase sequence error. The system stops running. Error code is displayed on the outdoor unit PCB. 2.2.3 Trigger / recover condition Trigger condition: Wrong phase connection for 1.6s or phase missing for 48s. ...
- Page 55 2.2.5 Procedure The phase sequence of the 3-phase Exchange any two of the 3 phase wires power supply is incrorrect Ensure all supply terminals are securely Some power supply terminals are loose fastened The power supply is abnormal, the voltage variation among L1 N, L2 N and Check the power supply equipment L3 N is greater than 5V Replace outdoor main PCB...
- Page 56 2.3 E2: Communication error between indoor and outdoor unit 2.3.1 Digital display output 2.3.2 Description Communication error between indoor and outdoor unit. The system stops running. Error code is displayed on the outdoor unit PCB. 2.3.3 Trigger / recover condition ...
- Page 57 2.3.5 Procedure Communication wires P Q E have short Reconnect the communication wires circuited or disconnected Communication wires P Q E are not Connect the communication wires in a connected in a daisy chain daisy chain IDU power supply is abnormal Ensure normal power supply Wires between outdoor main PCB and electric control box communication...
- Page 58 2.4 E4: Temperature sensor (T3/T4) error 2.4.1 Digital display output 2.4.2 Description Outdoor heat exchanger temperature sensor (T3) error or outdoor ambient temperature sensor (T4) error. The system stops running. Error code is displayed on the outdoor unit PCB. 2.4.3 Trigger / recover condition ...
- Page 59 2.4.5 Procedure Temperature sensor connection on main Ensure the sensor is connected properly PCB is loose Temperature sensor has short-circuited Replace the sensor or failed Replace outdoor main PCB Notes: Outdoor ambient temperature sensor (T4) and heat exchanger temperature sensor (T3) connection is port CN9 on the main PCB (labeled 10 in Figure 5-2.1 in Part 5, 2.1 “Ports”).
- Page 60 2.5 E5: Abnormal power supply voltage 2.5.1 Digital display output 2.5.2 Description Abnormal power supply voltage. The system stops running. Error code is displayed on the outdoor unit PCB. 2.5.3 Trigger / recover condition Trigger condition: Outdoor unit power supply phase voltage < 172V. ...
- Page 61 2.5.5 Procedure ODU power supply is abnormal or a Provide normal power supply phase is missing Wires between outdoor main PCB, filter boards and electric control box power Ensure the wires are connected properly supply terminals are loose The voltage between orange and blue wire connecting main PCB’s and filter Replace outdoor filter board board is not 2.5V...
- Page 62 2.6 E6, Eb: DC fan motor error 2.6.1 Digital display output 2.6.2 Description DC fan motor error. The system stops running. Error code is displayed on the outdoor unit PCB. 2.6.3 Trigger / recover condition Trigger condition: For E6 protection: Actual fan speed is <...
- Page 63 2.6.5 Procedure E6, Eb DC fan motor connection on main PCB or Ensure the wires are connected properly filter board is loose The voltage of CN53 terminals is 310V Replace the filter board Replace the DC fan motor, the problem is solved? Replace outdoor main PCB Notes:...
- Page 64 2.7 E7: Temperature sensor (T5) error 2.7.1 Digital display output 2.7.2 Description A compressor discharge pipe temperature sensor (T5) error. The system stops running. Error code is displayed on the outdoor unit PCB. 2.7.3 Trigger / recover condition ...
- Page 65 2.7.5 Procedure Temperature sensor connection on main Ensure the sensor is connected properly PCB is loose Temperature sensor has short-circuited Replace the sensor or failed Replace outdoor main PCB Notes: Compressor discharge pipe temperature sensor connection is port CN5 on the main PCB (labeled 6 in Figure 5-2.1 in Part 5, 2.1 “Ports”). Measure sensor resistance.
- Page 66 2.8 EH: Outdoor refrigerant cooling pipe temperature sensor (TL) error 2.8.1 Digital display output 2.8.2 Description An outdoor refrigerant cooling pipe temperature sensor (TL) error. The system stops running. Error code is displayed on the outdoor unit PCB. 2.8.3 Trigger / recover condition ...
- Page 67 2.8.5 Procedure Refrigerant cooling pipe temperature Ensure the sensor is connected properly sensor connection on main PCB is loose Refrigerant cooling pipe temperature Replace the sensor sensor has short-circuited or failed Replace outdoor main PCB Notes: Outdoor refrigerant cooling pipe temperature sensor connection is port CN24 on the main PCB (labeled 5 in Figure 5-2.1 in Part 5, 2.1 “Ports”). Measure sensor resistance.
- Page 68 2.9 F1: DC bus voltage error 2.9.1 Digital display output 2.9.2 Description F1 indicates compressor DC bus voltage error. The system stops running. Error code is displayed on the unit with the error. 2.9.3 Trigger / recover condition ...
- Page 69 2.9.5 Procedure F1 error Compressor inverter module wiring is Reconnect cables based on loosened wiring diagram Disconnect the Reconnect the reactor and power supply Reactor and DC bus wiring is incorrectly DC bus wire based on wiring diagram Check the power supply The power supply is abnormal equipment Replace the inverter module...
- Page 70 2.10 H0: Communication error 2.10.1 Digital display output 2.10.2 Description H0 indicates a communication error between the main control chip and the compressor inverter driver chip. The system stops running. Error code is displayed on the outdoor unit PCB. 2.10.3 Trigger / recover condition ...
- Page 71 2.10.5 Procedure Communication wire from main PCB Reconnect the communication wire CN36 to invert module CN8 is loose Both LED1 and LED2 on the inverter Check the power supply circuit module are off when power on Replace outdoor main PCB, is the Normal malfunction solved? Replace the inverter module...
- Page 72 2.11 H4: Inverter module protection 2.11.1 Digital display output 2.11.2 Description H4 indicates compressor inverter module protection. The system stops running. Error code is displayed on the outdoor unit PCB. 2.11.3 Trigger / recover condition Trigger condition: Compressor appears three inverter module protections. ...
- Page 73 The specific error codes L0, L1, L2 and L4 can also be obtained from the inverter module LED indicators. If an inverter module error has occurred, LED2 is continuously on and LED1 flashes. Figure 6-2.2: LED indicators LED1 and LED2 on inverter module Table 2-6.2: Errors indicated on LED1 LED1 flashing pattern Corresponding error...
- Page 74 2.11.6 L0: Inverter module protection Ensure the wire is The DC bus wire connected incorrectly L0 protection connected properly The compressor wiring is connected Reconnect the cables incorrectly based on wiring diagram The resistance between 3 phases of Disconnect compressor is over 5Ω the power supply Replace the compressor...
- Page 75 2.11.7 L1: DC bus low voltage protection L1 protection Check the power supply The power supply is abnormal equipment No output from bridge rectifier Replace the The DC bus voltage (P, N) is abnormal The reactor performs well reactor Replace the inverter module Note: The normal DC voltage between terminals P and N on inverter module should be 450-650V.
- Page 76 2.11.8 L2: DC bus high voltage protection L2 protection Check the power supply The power supply is abnormal equipment Replace the 3-phase bridge The DC bus voltage (P, N) is abnormal rectifier Replace the inverter module Note: The normal DC voltage between terminals P and N on inverter module should be 450-650V. When the voltage is higher than 700V, L2 protection will be appeared.
- Page 77 2.11.9 L4: MCE error L4 protection Remove barriers from heat ODU ventilation is not good exchanger and air outlet of ODU ODU stop valves are closed Open the ODU stop valves Reconnect the cables based on Compressor wiring is not properly Disconnect wiring diagram the power...
- Page 78 2.11.10 L5: Zero speed protection L5 protection There is abnormal noise of Replace the compressor compressor when startup or running Replace the inverter module...
- Page 79 2.11.11 L7: Phase sequence error L7 protection Reconnect cables based on Compressor wiring is loose wiring diagram Disconnect the An open circuit in the 3-phase U/V/W power supply Replace the compressor of compressor terminals Replace the inverter module...
- Page 80 2.11.12 L8: Compressor frequency variation greater than 15Hz within one second protection L9: Actual compressor frequency differs from target frequency by more than 15Hz protection L8 protection L9 protection ODU stop valves are closed Open the ODU stop valves Reconnect the cables based on Compressor wiring is not properly wiring diagram The resistance between 3 phases of...
- Page 81 2.11.13 Compressor replacement procedure Figure 6-2.5: Draining oil from a compressor Step 1: Remove faulty compressor and remove oil Remove the faulty compressor from the outdoor unit. Before removing the oil, shake the compressor so as to not allow impurities to remain settled at the bottom.
- Page 82 refrigerant. Refer to the V4+i Engineering Data Book, Part 3. Figure 6-2.7: Inspecting compressor oil This oil is a little This oil is black yellow, but is clear - it has been and transparent and carbonized the condition is acceptable This oil is still transparent but there are impurities which...
- Page 83 2.12 H7: Unmatched total number of indoor units 2.12.1 Digital display output 2.12.2 Description Number of indoor units detected by the outdoor unit not same as number set on main PCB. The system stops running. Error code is displayed on the outdoor unit PCB. 2.12.3 Trigger / recover condition ...
- Page 84 2.12.5 Procedure Number of indoor units set on main PCB Change the setting on the PCB to be the not same as actual number of indoor same as the actual number of indoor units units Some indoor units are powered off Power on all indoor units After re-starting the ODUs and IDUs and Refer to indoor unit troubleshooting...
- Page 85 2.13 H8: High pressure sensor error 2.13.1 Digital display output 2.13.2 Description High pressure sensor error. The system stops running. Error code is displayed on the unit with the error. 2.13.3 Trigger / recover condition Trigger condition: Discharge pressure ≤ 0.3MPa. ...
- Page 86 2.13.5 Procedure High pressure sensor connection on main Ensure the sensor is connected properly PCB is loose High pressure sensor has short-circuited Replace the sensor or failed Insufficient refrigerant caused by Add refrigerant and inspect system for refrigerant leakage leaks The low pressure side is blocked, caused Inspect the system and fix the error.
- Page 87 2.14 P1: Discharge pipe high pressure protection 2.14.1 Digital display output 2.14.2 Description Discharge pipe high pressure protection. The system stops running. Error code is displayed on the outdoor unit PCB. 2.14.3 Trigger / recover condition Trigger condition: Discharge pressure ≥ 4.4MPa. ...
- Page 88 … flowchart continued from previous page Discharge part of the refrigerant. Add oil Excess refrigerant if it leaks during discharge Flush all refrigerant then vacuum the System contains air or nitrogen system and recharge the refrigerant. Add oil to the system if it leaks The high pressure side is blocked, caused Inspect the system and fix the error by crushed or bent pipe or blocked EXV...
- Page 89 2.15 P2, H5: Suction pipe low pressure protection 2.15.1 Digital display output 2.15.2 Description Suction pipe low pressure protection. The system stops running. Error code is displayed on outdoor unit PCB. 2.15.3 Trigger / recover condition Trigger condition: For P2 protection: Suction pressure ≤...
- Page 90 2.15.5 Procedure P2 / H5 ODU stop valves are closed Open the stop valves Insufficient refrigerant caused by Add refrigerant or inspect the system for refrigerant leakage leaks The low pressure side is blocked, caused Inspect the system and fix the error. If the by crushed or bent pipe, blocked EXV, or filter is blocked by ice, the piping should dirty filter...
- Page 91 2.16 P3: Compressor current protection 2.16.1 Digital display output 2.16.2 Description P3 indicates current protection on compressor. The system stops running. Error code is displayed on the outdoor unit PCB. 2.16.3 Trigger / recover condition Trigger condition: Current of compressor LNB65FAGMC ≥ 29A. ...
- Page 92 … flowchart continued from previous page Discharge part of the refrigerant. Add oil Excess refrigerant if it leaks during discharge Flush all refrigerant then vacuum the System contains air or nitrogen system and recharge refrigerant. Add oil to the system if it leaks The condenser heat exchange is poor Inspect the system and fix the error The high pressure side is blocked, caused...
- Page 93 2.17 P4: Discharge temperature protection 2.17.1 Digital display output 2.17.2 Description Discharge temperature protection. The system stops running. Error code is displayed on the unit with the error. 2.17.3 Trigger / recover condition Trigger condition: Discharge temperature (T5) > 110 ...
- Page 94 … flowchart continued from previous page Insufficient refrigerant caused by Add refrigerant and inspect the system refrigerant leakage for leaks Inspect the system and fix the error. If the The system is blocked, caused by crushed filter is blocked by ice, the piping should or bent pipe, blocked EXV or dirty filter be cleaned Make sure the combination ratio is less...
- Page 95 2.18 P5: Outdoor heat exchanger temperature protection 2.18.1 Digital display output 2.18.2 Description Outdoor heat exchanger temperature protection. The system stops running. Error code is displayed on the unit with the error. 2.18.3 Trigger / recover condition ...
- Page 96 2.18.5 Procedure ODU stop valves are closed Open the stop valves Outdoor heat exchanger temperature Ensure the sensor is connected properly sensor connection on main PCB is loose Outdoor heat exchanger temperature Replace the sensor sensor has short-circuited or failed Make sure the combination ratio is less The indoor load is too large than 130%...
- Page 97 2.19 P8: Typhoon protection 2.19.1 Digital display output 2.19.2 Description P8 indicates strong wind protection. The system stops running. Error code is displayed on the outdoor unit PCB. 2.19.3 Trigger / recover condition Trigger condition: Fan speed ≥400rps when the outdoor unit is not start up. ...
- Page 98 2.19.5 Procedure There is strong wind around the outdoor Wait unit the strong wind stops unit Replace the DC fan motor, the problem is solved? Replace outdoor main PCB Notes: P8 protection recovers in 2 minutes when the strong wind stops.
- Page 99 2.20 PL: Inverter module temperature protection 2.20.1 Digital display output 2.20.2 Description PL indicates inverter module temperature protection. The system stops running. Error code is displayed on the outdoor unit PCB. 2.20.3 Trigger / recover condition Trigger condition: Inverter module heat sink temperature (Tf) ≥...
- Page 100 2.20.5 Procedure The inverter module heat sink is blocked Clean or replace the heat sink or dirty The screws connecting the heat sink to Tighten the screws and make sure the the inverter module are loose heat sink is well-connected Heat sink temperature sensor connection Ensure the sensor is connected properly on main PCB is loose...
- Page 101 3 Appendix to Part 6 3.1 Temperature Sensor Resistance Characteristics Table 6-3.1: Outdoor ambient temperature sensor, outdoor heat exchanger temperature sensor and refrigerant cooling pipe temperature sensor resistance characteristics Temperature Resistance Temperature Resistance Temperature Resistance Temperature Resistance (°C) (kΩ) (°C) (kΩ) (°C) (kΩ)
- Page 102 Table 6-3.2: Compressor discharge pipe temperature sensor resistance characteristics Temperature Temperature Temperature Temperature Resistance Resistance Resistance Resistance (kΩ) (kΩ) (kΩ) (kΩ) (°C) (°C) (°C) (°C) 542.7 68.66 13.59 3.702 511.9 65.62 13.11 3.595 483.0 62.73 12.65 3.492 455.9 59.98 12.21 3.392 430.5 57.37...
- Page 103 Table 6-3.3: Heat sink temperature sensor resistance characteristics Temperature Temperature Temperature Temperature Resistance Resistance Resistance Resistance (kΩ) (kΩ) (kΩ) (kΩ) (°C) (°C) (°C) (°C) 971.4 109.0 19.70 5.000 912.8 103.9 18.97 4.855 858.2 99.02 18.26 4.705 807.3 94.44 17.59 4.566 759.7 90.11 16.94...
- Page 104 3.2 Normal Operating Parameters of Refrigerant System Under the following conditions, the operating parameters given in Tables 6-3.4 and 6-3.5 should be observed: The outdoor unit can detect all the indoor units. The number of indoor units displayed on DSP is steady and is equal to the actual number of indoor units installed. ...
Need help?
Do you have a question about the SDV IV Series and is the answer not in the manual?
Questions and answers