Advertisement
Quick Links
ASSEMBLY, INSTALLATION, CARE, MAINTENANCE AND USE INSTRUCTIONS.
MODEL#
UBSQ01-12-BG
UBSQ01-12-OB
UBSQ01-16-BG
UBSQ01-16-OB
WARNING:
READ THESE MATERIALS PRIOR
TO ASSEMBLING AND USING THIS TRAMPOLINE.
EASY ASSEMBLE/DISASSEMBLE
TRAMPOLINE
USER MANUAL
UPPER BOUNCE INC.
2 MILL ST. CORNWALL NY 12518
1 - 8 8 8 - 9 6 5 - 3 3 3 1
WWW.UPPERBOUNCE.COM
Advertisement

Related Manuals for Upper Bounce UBSQ01-12-BG


Summary of Contents for Upper Bounce UBSQ01-12-BG
- Page 1 USER MANUAL ASSEMBLY, INSTALLATION, CARE, MAINTENANCE AND USE INSTRUCTIONS. WARNING: READ THESE MATERIALS PRIOR TO ASSEMBLING AND USING THIS TRAMPOLINE. UPPER BOUNCE INC. MODEL# UBSQ01-12-BG UBSQ01-12-OB 2 MILL ST. CORNWALL NY 12518 1 - 8 8 8 - 9 6 5 - 3 3 3 1...
- Page 2 UPPER BOUNCE Trampoline part ® Simply follow the assembly and safety instructions in this manual and you will soon be starting your UPPER BOUNCE exercise program for a ® happier, healthier lifestyle and fun! Should you have any questions, please call our Customer Service Department...
- Page 3 INTRODUCTION Before you begin to use this trampoline, you must read all the information in this manual. Just like in any other type of physical recreational activity, participants can be injured. To reduce the risk of injury, please carefully read and follow the appropriate safety rules and tips. Misuse and abuse of this trampoline is dangerous and can cause serious injury! Trampolines are rebounding devices which propel the performer to unaccustomed heights through a variety of movements.
- Page 4 TRAMPOLINE GUIDELINES 1. GENERAL INSTRUCTIONS 1.1 Purpose • The product is intended for home/domestic use only and is not suitable for professional or medical uses. • The maximum weight is 400 lbs. Overloading the trampoline above the recommended user weight will cause damage to the trampoline which is not covered by warranty.
- Page 5 TRAMPOLINE GUIDELINES (Cont.) • After installing the product according to the instruction manual, please make sure that all screws, bolts and nuts are correctly installed and tightened and that all joints are tightly fixed. • A clearance space of at least 7.3m is necessary above the trampoline. An appropriated clearance must be kept between the trampoline and possible sources of danger, such as electric cable, tree branches, playing devices, swimming pools and fences.
- Page 6 TRAMPOLINE GUIDELINES (Cont.) WARNING: 1. Please ensure that the safety enclosure net zipper is 100% closed and all three entrance clips are closed before jumping. 2. Do not intentionally jump into the safety net, it is only designed to stop persons from falling off the trampoline.
- Page 7 TRAMPOLINE GUIDELINES (Cont.) • Users should be familiar with the user manual. This manual contains assembly instructions and selected precautionary measures as well as recommendations for servicing and maintenance of the trampoline, in order to ensure a secured and fun use of the trampoline.
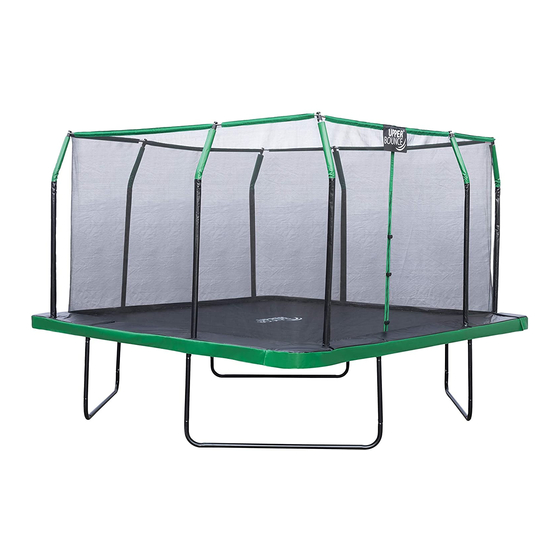
- Page 8 TRAMPOLINE PARTS LIST UBSQ01-12 UBSQ01-16 ITEM PART IMAGE MODEL QTY. ITEM PART IMAGE MODEL QTY. TOP RAIL A TOP RAIL A TOP RAIL B TOP RAIL B CORNER CORNER TUBE TUBE T-BAR T-BAR STYLE 1 STYLE 1 T-BAR SILVER STYLE 2 T-BAR T-BAR STYLE 3...
- Page 9 FRAME ASSEMBLY INSTRUCTIONS FOR UBSQ01-12 Step 1 - Frame Layout Layout the trampoline parts on the ground so that you start to form a square with the top rail sections. Make sure to keep all the tubes in the same direction all around the square.
- Page 10 FRAME ASSEMBLY INSTRUCTIONS FOR UBSQ01-16 Step 1 - Frame Layout Lay out the trampoline parts on the ground so that you start to form a square with the top rail sections. Make sure to keep all the tubes in the same direction all around the square.
- Page 11 FRAME ASSEMBLY INSTRUCTIONS WARNING: Step 3 - Trampoline Mat Assembly Be careful where you place your hands during spring assembly as connector points can pinch! 1. Lay out the Trampoline Mat inside the frame. 2. Connect all 4 corner springs to the corner top rails.
- Page 12 FRAME ASSEMBLY INSTRUCTIONS Step 4 - Cover Pads Assembly The trampoline is at a stage close to completion with all the springs in place. Before using the Trampoline please attach the provided safety pads. STEP 1 : Lay out 2 sides of the pad shown here and connect with the attached velcro strip.
- Page 13 ENCLOSURE PARTS LIST ITEM PART IMAGE MODEL UBSFQ01-12 UBSFQ01-16 POLE CAP UPPER POLE WITH FOAM LOWER POLE WITH FOAM 102cm FIBERGLASS RODS 109cm SAFETY ENCLOSURE NET POLE SCREW FOAM SLEEVES COVER WRENCH FIBER GLASS CORNER PUSH BUTTON BIG ROPE FOAM SLEEVES POLE CAP bolts...
- Page 14 SAFETY ENCLOSURE ASSEMBLY NOTE : Refer to PARTS LIST for identification of parts. Picture may vary slightly with the different WARNING: trampoline models. Two adults in good physical condition are required for the following assembly. For your safety, you should wear proper shoes and clothing.
- Page 15 STEP 7 : Insert the fiber glass into the channel at the top of the safety net. Long fiber glass for long side, short for short side; as explained in step 4. Make sure that the opening of the NOTE : net (the zipper) is placed on the long side of the trampoline.
- Page 16 TESTING THE TRAMPOLINE After assembling the trampoline, it is important that you perform the following safety checks: Trampoline Safety Checks: • Using a screw driver, check if all the bolts are tightly secured. • Look under the trampoline and check all the springs are hooked securely to the frame and triangle rings.
- Page 17 FUNDAMENTAL BOUNCE TECHNIQUES After assembling the trampoline, it is important that you perform the following safety checks: The Basic Bounce • Start from a standing position, feet shoulder width apart with head straight and eyes on the mat. • Swing your arms forward and up and around in a circular motion.
- Page 18 USE CODE : Our Customer Service Department staff are trained in the details of all trampolines and will help you find the right 15OFFMANUAL part to get you bouncing again. We never forget our goal... Get the Upper Bounce!
Need help?
Do you have a question about the UBSQ01-12-BG and is the answer not in the manual?
Questions and answers