
Related Manuals for Siemens HR478GC.6B


Summary of Contents for Siemens HR478GC.6B
- Page 1 Oven HR478GC.6B User manual and installation instructions Register your product on My Siemens and discover exclusive services and offers. siemens-home.bsh-group.com/welcome The future moving in. Siemens Home Appliances...
-
Page 2: Table Of Contents
en Safety ¡ Keep the instruction manual and the Table of contents product information safe for future refer- ence or for the next owner. ¡ Do not connect the appliance if it has been USER MANUAL damaged in transit. Safety .............. 2 1.2 Intended use Preventing material damage ....... - Page 3 Safety en ▶ Before using the appliance, remove the ▶ Do not use any harsh or abrasive cleaners worst of the food residues and remnants or sharp metal scrapers to clean the glass from the cooking compartment, heating ele- on the oven door, as they may scratch the ments and accessories.
-
Page 4: Safety
en Safety WARNING ‒ Risk of suffocation! WARNING ‒ Risk of fire! Children may put packaging material over Due to the hot surfaces, vapours from flam- their heads or wrap themselves up in it and mable liquids may catch fire in the cooking suffocate. compartment (explosion). The appliance door ▶... -
Page 5: Preventing Material Damage
Preventing material damage en WARNING ‒ Risk of harm to health! WARNING ‒ Risk of burns! The cleaning function heats up the cooking The cooking compartment gets very hot when compartment to a very high temperature so the cleaning function is in progress. that food left over from roasting, grilling and ▶... -
Page 6: Environmental Protection And Saving En- Ergy
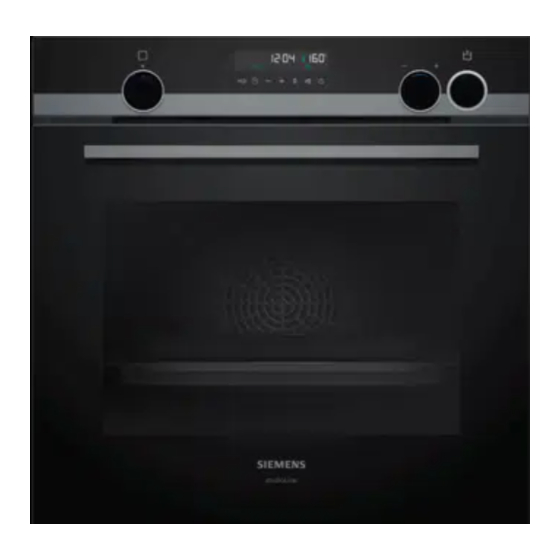
en Environmental protection and saving energy Do not clean the water tank in the dishwasher. Clean the water tank with a soft cloth and standard ▶ ▶ washing-up liquid. 3 Environmental protection and saving energy Help protect the environment by using your appliance in a way that conserves resources and by disposing of reusable materials properly. - Page 7 Familiarising yourself with your appliance en 4 Familiarising yourself with your appliance 4.1 Controls You can use the control panel to configure all functions of your appliance and to obtain information about the operat- ing status. Note: On certain models, specific details such as col- our and shape may differ from those pictured.
-
Page 8: Childproof Lock
en Familiarising yourself with your appliance Symbol Function Time-setting options Select the time , timer , cooking time and the end time . To select the individual time-setting options, press the button sev- eral times. The arrows above and below a symbol indicate the function to which the setting in the display corresponds. - Page 9 Familiarising yourself with your appliance en Symbol Type of heating and What it's used for/how it works temperature range Hot air grilling Roast poultry, whole fish and larger pieces of meat. 30 - 275 °C The grill element and the fan switch on and off alternately. The fan circulates the hot air around the food.
- Page 10 en Accessories Ensure that the ventilation slots are unobstructed. You can switch on the lighting without heating the oven ▶ using the Oven light button. To ensure that the appliance cools down more quickly after operation, the cooling fan continues to run for a Cooling fan certain period afterwards.
- Page 11 You will find a comprehensive range of products for top of the upper guide rod. your appliance in our brochures and online: www.siemens-home.bsh-group.com Accessories vary from one appliance to another. When purchasing accessories, always quote the exact product number (E no.) of your appliance.
- Page 12 en Basic operation 7 Basic operation When your food is ready, switch off the appliance. 7.1 Switching on the appliance Tips Turn the function selector to any position other than ▶ ¡ The most suitable type of heating for your food can the "Off"...
- Page 13 Steam en Empty the water tank and dry the cooking compart- Place the water tank back in the opening and press ment. it down until it clicks into place . → "After every steam operation", Page 13 8.3 Filling the water tank WARNING ‒ Risk of fire! Due to the hot surfaces, vapours from flammable li- quids may catch fire in the cooking compartment (ex- plosion).
- Page 14 en Time-setting options Requirement: The cooking compartment has cooled Drying the cooking compartment down. WARNING ‒ Risk of burns! Open the appliance door. The appliance will become hot during operation. Note: Allow the appliance to cool down before cleaning it. The drip trough is underneath the cooking com- ▶...
- Page 15 Time-setting options en Press the button repeatedly until is highlighted Use the button to delay the end time. in the display. a After a few seconds, the appliance applies the set- Use the button to set the cooking time. ting and the display shows the set end time. a Once the calculated start time has been reached, Button Default value...
- Page 16 en Meat thermometer 10 Meat thermometer Cook with precision by inserting the meat probe into Notes the food and setting a core temperature on the appli- ¡ If you remove the meat thermometer while the food ance. Once the set core temperature has been is cooking, all the settings will be reset.
- Page 17 Programme en 11 Programme The programmes help you to use your appliance to ¡ Unglazed clay prepare different dishes by selecting the optimum set- ¡ Plastic or plastic handles tings automatically. 11.2 Steam 11.1 Cookware for programmes For the steam function, the appliance provides you with You should therefore use heat-resistant cookware that programmes that allow you to prepare food easily and is suitable for temperatures up to 300 °C.
- Page 18 en Programme No. Food Cookware Weight range Add liquid Shelf Information posi- Weight setting tion Deep roasting dish 0.5–2.5 kg As per recipe 2 Place the meat at the 10 Goulash Diced beef or pork, with lid Total weight bottom and cover with vegetables with vegetables Do not sear the meat...
- Page 19 Programme en No. Food Cookware Weight range Add liquid Shelf Information posi- Weight setting tion Roasting dish with 0.5–2.5 kg Cover the Do not sear the meat 23 Leg of lamb, medium Boned, seasoned Weight of meat bottom of the beforehand roasting dish, and add up to 250 g ve- getables if...
- Page 20 en Childproof lock For some programmes, the button can be 11.5 Setting a programme ‒ used to delay the end. The appliance selects the optimal type of heating, tem- → "Setting the end time", Page 15 perature and cooking time. All you need to do is set a After a few seconds, the programme starts and the the weight.
- Page 21 Basic settings en Switch off the appliance. a Once the time has elapsed, the display shows the time as zero. 15 Basic settings You can configure the appliance to meet your needs. 15.1 Overview of the basic settings Here you can find an overview of the basic settings and factory settings. The basic settings depend on the features of your appliance.
-
Page 22: Home Connect
en Home Connect Use the temperature selector to set the water hard- 15.3 Discarding changes to the basic ness. settings Tip: If your tap water is very hard, we recommend Turn the function selector. ▶ that you use softened water. If you use only a All changes are discarded and not saved. - Page 23 Home Connect en 16.2 Home Connect Settings You can adjust the settings and network settings for Home Connect in the basic settings for your appliance. Setting Selection or display Explanation Connection to the network are displays that you cannot set. – Not connected – Connect automatically –...
- Page 24 The first time your appliance is registered on a home A detailed RED Declaration of Conformity can be found network connected to the Internet, your appliance will online at www.siemens-home.bsh-group.com among transmit the following types of data to the the additional documents on the product page for your Home Connect server (initial registration):...
-
Page 25: Appliance Door
Cleaning and servicing en Appliance front Surface Suitable cleaning agents Notes Stainless steel ¡ Hot soapy water To prevent corrosion, remove any limescale, grease, starch or albu- min (e.g. egg white) stains on stainless steel fronts immediately. ¡ Special stainless steel cleaning products Apply a thin layer of the stainless steel cleaning product with a soft cloth. - Page 26 en Self-cleaning Before using the appliance, remove the worst of the ▶ 17.2 Cleaning the appliance food residues and remnants from the cooking com- In order to avoid damaging the appliance, you must partment, heating elements and accessories. clean your appliance only as specified, and with suit- Requirement: Read the information on cleaning able cleaning products.
- Page 27 Descaling en Use the function selector to set the cleaning a Once the cleaning function has ended, an audible functions . signal sounds and the display shows the duration as zero. a The symbol and the cleaning functions appear in Switch off the appliance.
- Page 28 en Shelf supports switched back on. You will be prompted to rinse three 19.4 Fourth step ( ) times. The appliance cannot be used for other opera- Fill the water tank with 150 ml water and insert it. tions until the third rinse cycle comes to an end. a At the end of the rinse cycle, ...
- Page 29 Appliance door en 21 Appliance door To ensure that your appliance retains its appearance Close the appliance door fully . Grab hold of the and remains fully functioning for a long time, you can appliance door with both hands (on the left and detach the appliance door and clean it.
- Page 30 en Appliance door Using both hands, press down on the left and right Undoing and removing the left- and right-hand of the door cover from above to check whether the screws on the appliance door appliance has been pushed in as far as it will go. Place a folded-up tea towel in the appliance door.
-
Page 31: Troubleshooting
Troubleshooting en Turn the intermediate pane until the arrow is in Push the front pane to the appliance until the left- the top right. and right-hand hook is opposite the support . Insert the intermediate pane into the retainer Push the front pane in at the bottom until you the bottom and push it in firmly at the top. - Page 32 en Troubleshooting Fault Cause and troubleshooting Appliance is not heating, the Demo mode is activated. colon flashes in the display and a Briefly disconnect the appliance from the power supply by switching the cir- appears. cuit breaker in the fuse box off and back on again. Deactivate demo mode within five minutes by changing the basic setting ...
- Page 33 Troubleshooting en Fault Cause and troubleshooting lights up permanently in the The water tank is empty. display. Fill the water tank. ▶ → "Filling the water tank", Page 13 The water tank has not been put in fully. Slide the water tank back in fully. ▶...
-
Page 34: Disposal
en Disposal 23 Disposal Find out here how to dispose of old appliances cor- This appliance is labelled in accord- rectly. ance with European Directive 2012/19/EU concerning used elec- 23.1 Disposing of old appliance trical and electronic appliances (waste electrical and electronic equip- Valuable raw materials can be reused by recycling. -
Page 35: How It Works
How it works en ¡ Depending on the size and type of the food to be Notes ¡ When baking on several layers, always use hot air. roasted, add up to 1/2 litre water to the universal Baked goods that are placed in the oven at the pan. - Page 36 en How it works 25.4 Food selection Food Accessories/cook- Shelf pos- Heating Temperature in Steam intens- Cooking ware itions function °C/grill setting time in mins Victoria sponge cake 2 pcs 150-160 20-35 Ø 20 cm cake tin Rich fruit cake Deep 23 cm dia- 140-150 180-210 meter tin...
- Page 37 How it works en Food Accessories/cook- Shelf pos- Heating Temperature in Steam intens- Cooking ware itions function °C/grill setting time in mins Complete meal with Wire rack 180, then 200 Chicken: chicken (Yorkshire pud- (25+25) + Wire rack ding) 20 for Yorkshire Universal pan pudding...
- Page 38 en How it works Preheat the cooking compartment and cookware for 25.6 Slow cooking approx. 15 minutes. Slow cooking is a technique for cooking food over a Sear the meat on all sides on the cooking zone at a long period at low temperatures. For this reason, it is very high heat.
-
Page 39: 26.1 General Installation Instructions
Installation instructions en Baking Food Accessories/cook- Shelf pos- Type of Temperature in Cooking time in ware ition heating °C mins Viennese whirls Baking tray 140-150 25-35 Viennese whirls Baking tray 140-150 20-30 Viennese whirls, 2 levels Universal pan 3 + 1 140-150 25-35 Baking tray Viennese whirls, 3 levels... - Page 40 en Installation instructions ¡ Cut-out work on the units should be carried 26.2 Appliance dimensions out before installing the appliance. Remove You will find the dimensions of the appliance here any shavings. Otherwise, the correct opera- tion of electrical components may be ad- versely affected.
- Page 41 Installation instructions en ¡ If the tall unit has another back panel in addition to Electrically connecting an appliance without a the element back panels, this must be removed. protective contact plug ¡ Only fit the appliance up to a height which allows Note: Only a licensed professional may connect the ap- accessories to be easily removed.
- Page 44 BSH Hausgeräte GmbH Carl-Wery-Straße 34 81739 München GERMANY www.siemens-home.bsh-group.com Valid within Great Britain: Imported to Great Britain by BSH Home Appliances Ltd. Grand Union House Old Wolverton Road Wolverton, Milton Keynes MK12 5PT United Kingdom 由博西家用电器(江苏)有限公司根据西门子股份公司的商标许可制造 *9001580285* 9001580285 (010121)
Need help?
Do you have a question about the HR478GC.6B and is the answer not in the manual?
Questions and answers