Advertisement
Quick Links
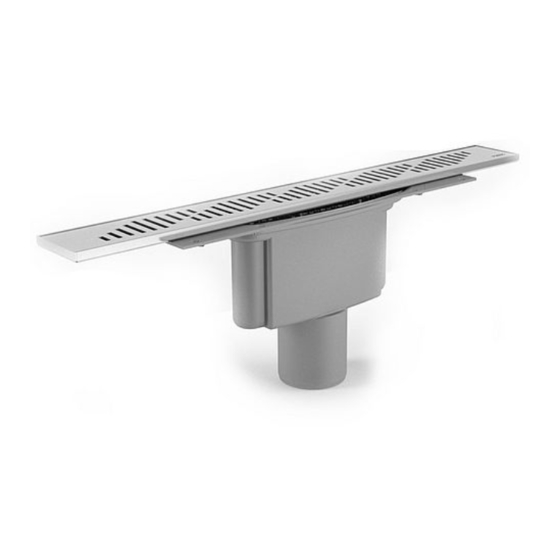
The gully must be located centrally under the frame
2
Our ongoing product development may cause chan-
ges in the specifications. We reserve these rights.
Installation Instructions
Purus Line - Twist
NOTE!
Wooden floor
Page 3
Concrete floor
Page 8
Cleaning and Maintenance
Page 12
1
Advertisement

Related Manuals for Purus Line - Twist


Summary of Contents for Purus Line - Twist
- Page 1 Installation Instructions Purus Line - Twist NOTE! The gully must be located centrally under the frame Wooden floor Page 3 Concrete floor Page 8 Cleaning and Maintenance Page 12 Our ongoing product development may cause chan- ges in the specifications. We reserve these rights.
-
Page 2: Installation
PURUS recommends You are allowed to install floor gullys. Contact your insurance company to find out what applies to you. However, we recommend that the installation is done by a licensed plumbing company. Installation The floor drain must be firmly mounted at a height that + / - 2 mm. - Page 3 Swedish Tile Association and the Swedish Flooring Trade Association. följs. PURUS är medlem i Kakelföreningen och Golvbranschens riksorganisation. Purus AB, Södergatan 7, SE 275 31 Sjöbo, Sweden – Tel +46 416-257 00, Fax +46 416-257 20 info@purus.se, www.purus.se Purus AB...
- Page 4 This reduces the load on the floor’s Använd handverktyg! sealing membrane. Screw the drain in the timber joist floor. Check Check that PURUS LINE Use hand tools! that Purus Line is installed level! is installed level! Use hand tools!
- Page 5 Koppla avloppet till avlopps- Connect the drain to the drain- ledningen. pipe. Lay flooring particle board. Golvspånplattan läggs. Checklista Purus Line skall vara monterad i våg. Brunnen måste placeras centralt under ramen. Checklist Tätskikt skall anslutas till Purus Line must be Purus Line enligt tätskikts-...
- Page 6 When the floor is finished, När golvet är färdigt, skruva upp unscrew the 6 screws from the de 6 skruvarna från brunnen drain and lift up the oval och lyft upp klämringsovalen. clamping ring. Mount the drain sleeve (1) in the Brunnsmanschetten (1) monteras groove and screw on tightly under Drain sleeve (1)
- Page 7 oval clamping ring. OBS: kontrollera möjligheterna Note: Check whether it is possible att demontera vattenlåset. to disassemble the drain trap. Ramen trycks fast. The frame can be angled ± 2° in relation to the floor drain. Press down the frame. ±...
- Page 8 PURUS is a member of the Swedish Tile Association and the Swedish Flooring Trade Association. Purus AB Purus AB, Södergatan 7, SE 275 31 Sjöbo, Sweden – Tel +46 416-257 00, Fax +46 416-257 20 info@purus.se, www.purus.se info@purus.se, www.purus.se...
- Page 9 PURUS Line placeras på under- Install PURUS Line on the laget med hjälp av Purustöden. substructure with the help of purus Stöden trycks på plats i fästen supports. Press the supports in på brunnens undersida. place in the attachment on the bottom of the drain.
- Page 10 Överkant brunn = färdigt Upper side drain = finished Check betonggolv that Purus Line is concrete floor Installed in level! Anslut till avloppet. Connect to drainage system. Golvet är klart för att gjutas. The floor is ready to be poured.
- Page 11 The stainless frame is given a thin layer of clinker compound on the bottom before it is laid. The hole in the frame is eccentrically Tätskiktet monteras efter Also fill the frame edges with and can thus be placed in two different tätskiktsleverantörens Mounted sealing clinker compound.
-
Page 12: Cleaning And Maintenance
3. Replace the water trap. Make sure the gaskets are completly clean so the trap is watertight. Ensure when placed back that the gully is fully inserted so the gasket is watertight using two thumbs at each side. info@purus.se www.purus.se/gl...
Need help?
Do you have a question about the Line - Twist and is the answer not in the manual?
Questions and answers