Advertisement
Table of Contents
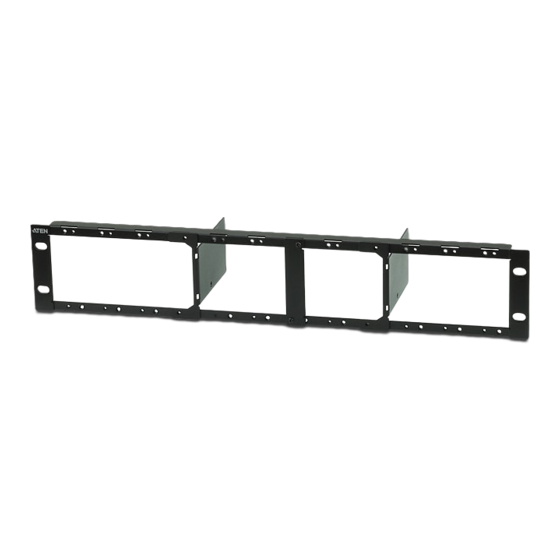
Video Extender Rack Mount Kit
VE-RMK2U
The VE-RMK2U kit provides a mounting frame and accessories to install
12 ATEN Video Extenders in 2U of rack space. Compatible with ATEN
models VE800A, VE803, VE810, VE600A, VE602A, VE560, and CE100.
Installation:
1. (A) Position the VE-RMK2U Frame on the front of the rack and align the holes in the mounting brack-
ets with the holes in the rack, then screw the mounting brackets to the rack. Rack screws are not
provided. (B) Remove the two screws to detach the center brace.
A
2. Place the video extender on the 2U Mounting Plate and align the holes, then screw the video extender
to the mounting plate.
M3X5 Countersunk
Head Screws
User Instructions
Package Contents:
1 x VE-RMK2U Frame
12 x 2U Mounting Plates
26 x Plastic Captive Screws
36 x Countersunk Head Screws
B
Front
Rear
Advertisement
Table of Contents

Subscribe to Our Youtube Channel
Related Manuals for ATEN VE-RMK2U


Summary of Contents for ATEN VE-RMK2U
- Page 1 Installation: 1. (A) Position the VE-RMK2U Frame on the front of the rack and align the holes in the mounting brack- ets with the holes in the rack, then screw the mounting brackets to the rack. Rack screws are not provided.
- Page 2 User Instructions VE-RMK2U 5. Slide a 2U Mounting Plate with video extender attached onto a slot in the VE-RMK2U Frame, align- ing the screw holes and fitting the notches. Secure the mounting plate to the frame with two Plastic Captive Screws. Repeat the process with each video extender you are installing.
Need help?
Do you have a question about the VE-RMK2U and is the answer not in the manual?
Questions and answers