Table of Contents
Advertisement
Quick Links
Operator's Manual
1520F, 2020F, 2420F, 1510HDF, & 2010HDF
15', 20', and 24' 3-Point Drills
Manufacturing, Inc.
www.greatplainsmfg.com
!
Read the operator's manual entirely. When you see this symbol, the subsequent
instructions and warnings are serious - follow without exception. Your life and
the lives of others depend on it!
24137
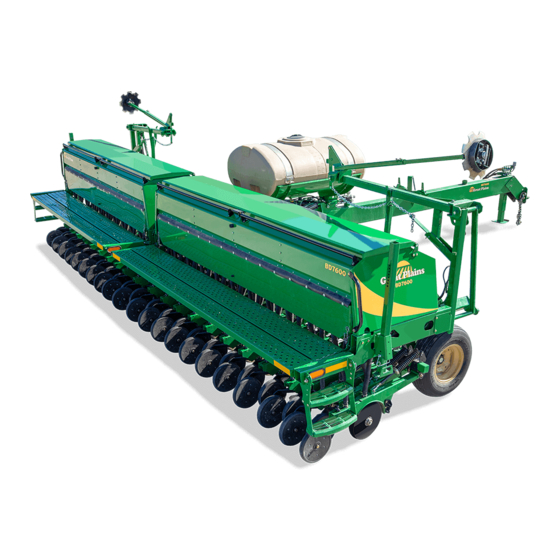
Cover illustration may show optional equipment not supplied with standard unit.
© Copyright 2006
Printed 2/28/2006
288-196M
Advertisement
Table of Contents

Subscribe to Our Youtube Channel
Related Manuals for GREAT PLAINS 1520F


Summary of Contents for GREAT PLAINS 1520F
- Page 1 Operator’s Manual 1520F, 2020F, 2420F, 1510HDF, & 2010HDF 15’, 20’, and 24’ 3-Point Drills Manufacturing, Inc. www.greatplainsmfg.com Read the operator’s manual entirely. When you see this symbol, the subsequent instructions and warnings are serious - follow without exception. Your life and...
-
Page 2: Table Of Contents
Great Plains Manufacturing, Inc. assumes no responsibility for errors or omissions. Neither is any liability assumed for damages resulting from the use of the information contained herein. Great Plains Manufacturing, Inc. reserves the right to revise and improve its products as it sees fit. This publication describes the state of this product at the time of its publication, and may not reflect the product in the future. -
Page 3: Important Safety Information
Important Safety Information Important Safety Information Look for Safety Symbol The SAFETY ALERT SYMBOL indicates there is a potential hazard to personal safety involved and extra safety precaution must be taken. When you see this symbol, be alert and carefully read the message that follows it. - Page 4 1520F, 2020F, 2420F, 1510HDF, & 2010HDF Be Familiar with Safety Decals Read and understand “Safety Decals,” page 7, thoroughly. Read all instructions noted on the decals. Keep Riders Off Machinery Riders obstruct the operator’s view. Riders could be struck by foreign objects or thrown from the machine.
- Page 5 Important Safety Information Transport Machinery Safely Maximum transport speed for implement is 20 mph. Some rough terrains require a slower speed. Sudden braking can cause a towed load to swerve and upset. Do not exceed 20 mph. Never travel at a speed which does not allow adequate control of steering and stopping.
- Page 6 1520F, 2020F, 2420F, 1510HDF, & 2010HDF Practice Safe Maintenance Understand procedure before doing work. Use proper tools and equipment. Refer to this man- ual for additional information. Work in a clean, dry area. Lower the drill, put tractor in park, turn off engine, and remove key before performing maintenance.
- Page 7 Important Safety Information Handle Chemicals Properly Agricultural chemicals can be dangerous. Im- proper use can seriously injure persons, animals, plants, soil and property. Read and follow chemical manufacturer’s instructions. Wear protective clothing. Handle all chemicals with care. Avoid inhaling smoke from any type of chemi- cal fire.
- Page 8 1520F, 2020F, 2420F, 1510HDF, & 2010HDF Safety At All Times Thoroughly read and understand the instructions in this manual before operation. Read all instruc- tions noted on the safety decals. Be familiar with all drill functions. Operate machinery from the driver’s seat only.
-
Page 9: Safety Decals
Keep all safety decals clean and legible. surface, being careful not to cause air Replace all damaged or missing decals. Order bubbles under decal. new decals from your Great Plains dealer. Refer to this section for proper decal place- ment. 818-055C... - Page 10 1520F, 2020F, 2420F, 1510HDF, & 2010HDF 838-265C Amber Reflectors Reflector on both ends of drill; four reflectors total. 18262 838-267C Decal Reflectors Daytime Reflectors on inside ends and off center on walk- 19189 boards next to red reflectors; four reflectors total.
- Page 11 Important Safety Information 818-587C General Instructions 18262 818-590C 18262 18262 Crushing Hazard WARNING To avoid serious injury or death: Watch your step when climbing ladder or walking on walkboard. 838-102C 838-102C 19195 Falling Hazard 8/17/2020...
- Page 12 1520F, 2020F, 2420F, 1510HDF, & 2010HDF 818-398C Falling Hazard 19197 818-855C 19197 Tire Pressure 818-229C Amber Reflector 18270 Reflector on each optional marker. 8/17/2020...
- Page 13 Important Safety Information 818-682C Crushing Hazard Two decals on first section of each optional marker; 18270 18270 four decals total. WARNING EXCESSIVE SPEED HAZARD To Prevent Serious Injury or Death: Do NOT exceed 20 mph maximum transport speed. Loss of vehicle control and/or machine damage can result.
-
Page 14: Introduction
1520F, 2020F, 2420F, 1510HDF, & 2010HDF Introduction Great Plains welcomes you to its growing family of new product owners. This drill has been designed with care and built by skilled workers using quality materials. Proper setup, maintenance and safe operating practices will help you get years of sat- isfactory use from the machine. -
Page 15: Using This Manual
Introduction Using This Manual This manual will familiarize you with safety, as- sembly, operation, adjustments, troubleshooting and maintenance. Read this manual and follow the recommendations to help ensure safe and ef- ficient operation. The information in this manual is current at print- ing. -
Page 16: Owner Assistance
16490 Serial Number: ___________________________ Serial Number Plate Your Great Plains dealer wants you to be satisfied with your new machine. If you do not understand any part of this manual or are not satisfied with the service received, please take the following actions. -
Page 17: Preparation And Setup
Preparation and Setup Preparation and Setup This section will help you prepare your tractor and drill for use. Before using the drill in the field, you must hitch the drill to a suitable tractor and level the drill. Prestart Checklist 1. -
Page 18: Hydraulic Hose Hookup
1520F, 2020F, 2420F, 1510HDF, & 2010HDF Hydraulic Hose Hookup Refer to Figure 3 Great Plains hydraulic hoses are color coded to help you hookup hoses to your tractor outlets. Hoses that go to the same remote valve are marked with the same color. -
Page 19: Leveling The Drill
Preparation and Setup Leveling the Drill 20 Series Opener Single Gauge Wheel Refer to Figure 4 Initially adjust drill so bottom of opener tube runs 24 inches above ground when drill is lowered in the field. Refer to Figure 5 To adjust: 1. - Page 20 1520F, 2020F, 2420F, 1510HDF, & 2010HDF 20 Series Opener Dual Gauge Wheels Refer to Figure 7 Initially adjust drill so bottom of opener tube runs 24 inches above ground when drill is lowered in the field. Refer to Figure 8 To adjust: 1.
- Page 21 Preparation and Setup HD 10 Series Openers with Single Gauge Wheel Refer to Figure 10 Initially adjust drill so bottom of opener tube runs 26 inches above ground when drill is lowered in the field. Refer to Figure 11 To adjust: 1.
- Page 22 1520F, 2020F, 2420F, 1510HDF, & 2010HDF HD 10 Series Openers Dual Gauge Wheels Refer to Figure 2 Initially adjust drill so bottom of opener tube runs 26 inches above ground when drill is low- ered in the field. Refer to Figure 3 To adjust: 1.
-
Page 23: Operating Instructions
Operating Instructions Operating Instructions This section covers general operating proce- dures. Experience, machine familiarity and the following information will lead to efficient opera- tion and good working habits. Always operate farm machinery with safety in mind. Prestart Checklist WARNING Escaping fluid under pressure can have sufficient pres- sure to penetrate the skin. -
Page 24: Field Operation
1520F, 2020F, 2420F, 1510HDF, & 2010HDF Field Operation DANGER You may be severely injured or killed by being crushed between the tractor and drill. Do not stand or place any part of your body between drill and moving trac- tor. Stop tractor engine and set park brake before in- stalling pins. -
Page 25: Opener Operation
“Troubleshooting”, page 45. Marker Operation Optional marker attachments are available from your Great Plains dealer. Before operating mark- ers, make sure hydraulics are properly bled as described under “Marker Adjustments”, page 40. Dual markers equipped with a sequence valve are powered off the same hydraulic circuit. -
Page 26: Transporting With Markers
1520F, 2020F, 2420F, 1510HDF, & 2010HDF Unload seed box. Unload seed box before trans- porting if at all possible. To do so: • Place tarp under drill or a bucket under each seed meter. • Use large bucket to empty box as much as possible. -
Page 27: Adjustments
Adjustments Adjustments Side Gauge Wheels for 20 Series Opener Openers Disks Side Gauge Side Gauge Refer to Figure 18 Wheel Wheel The side gauge wheels have two, interrelated adjustments: • angle of side gauge wheel, and • distance between side gauge wheel and row unit disk. Incorrect Correct Refer to Figure 19... -
Page 28: 20 Series Openers
1520F, 2020F, 2420F, 1510HDF, & 2010HDF 20 Series Openers Opener Spring Opener Down Pressure Refer to Figure 21 Opener springs provide the down pressure nec- essary for opener disks to open a seed trench. The springs allow the openers to float down into depressions and up over obstructions. -
Page 29: Opener Seeding Depth
Adjustments Opener Seeding Depth 20451 Refer to Figure 24 Side depth wheels beside the opener disks con- trol opener seeding depth. The position of an adjustable stop determines seeding depth. Disk Side Depth Wheel Refer to Figure 25 Figure 24 20 Series Opener Set opener seeding depth by adjusting T-handles. -
Page 30: Seed-Lok Lock Up
1520F, 2020F, 2420F, 1510HDF, & 2010HDF NOTE: The factory setting on the press wheel is Hole staggered to achieve optimum residue flow. locations Refer to Figure 27 If you want to adjust press wheels from staggered to even, remove 5/8 inch bolt (1), lock washer (2) and nut (3). -
Page 31: Hd 10 Series Openers
Adjustments HD 10 Series Openers Opener Down Pressure Opener spring Refer to Figure 38 IMPORTANT: Do not back up with openers in the ground. To do so will cause severe dam- age and opener plugging. Opener springs provide the down pressure nec- essary for opener disks to open a seed trench. -
Page 32: Spring Down Pressure
1520F, 2020F, 2420F, 1510HDF, & 2010HDF Refer to Figure 40 Minimum and maximum settings are indicated by position of adjustment cam. Each notch on the adjustment cam will increase the down pressure on the opener springs. Use the chart below as a setting reference. -
Page 33: Double V Press Wheel Adjustment
Adjustments Double V Press Wheel Adjustment Refer to Figure 42 The double V closing wheels (4) can be moved in- ward and outward to alter how they close the seed trench and press soil over the seed. To move the wheels (4) in toward the center of the trench, remove one of the 1/4 bushings (2) next to the press wheel arm and position it under the head of the bolt (1). -
Page 34: Lock-Up
1520F, 2020F, 2420F, 1510HDF, & 2010HDF Lock-Up The openers can be pinned in the up position to accommodate 30” row spacing. Lower parallel Refer to Figure 43 1. Select the individual opener you want to keep in the raised position. It is suggested that the down pressure springs be set to the minimum setting first. -
Page 35: Frame Height
Adjustments Frame Height Drill operating height directly affects the working range of the drill openers. Initially adjust frame height as explained under “Leveling Drill”, page 17. You can make further adjustments to compensate for field conditions. Single Gauge Wheel Refer to Figure 45 1. -
Page 36: Seeding Rate
1520F, 2020F, 2420F, 1510HDF, & 2010HDF Seeding Rate Reroute drive chain over sprockets and idlers as shown in Figure 5. Move idlers into chain so Adjusting the seeding rate requires the following: chain has 1/4-inch slack in its longest span. -
Page 37: Position Seed Cup Doors
Adjustments Position Seed Cup Doors NOTE: If your results vary greatly from the charts, For wheat and other smal seeds, move seed cup you may want to repeat the calibration procedure. door handles to highest position. For soybeans 8. When drilling, note acres drilled, amount of and other large seeds, lower handles to second seed added and level of seed in drill box. -
Page 38: Tire Revolutions Per Acre
1520F, 2020F, 2420F, 1510HDF, & 2010HDF Tire Revolutions Per Acre Planted Row Number of Tire Number of Tire Number of Tire Spacing (Inches) Rows for 15ft Revolutions Rows for 20ft Revolutions Rows for Revolutions drills per Acre for drills per Acre for... -
Page 39: Seed Rate Chart (Pounds Per Acre)
Adjustments Seed Rate Chart (pounds per acre) Setting number Alfalfa or 6" Rape 7" Drive Type 1 7.5" (Based on 8" 60#/bu) 10" 6" Barley 7" Drive Type 1 7.5" (Based on 8" 51#/bu) 10" 6" 104 114 123 133 142 152 154 156 Barley 7"... - Page 40 1520F, 2020F, 2420F, 1510HDF, & 2010HDF Setting number 6" 102 119 137 154 169 186 202 218 235 251 266 281 283 284 Peas 7" 102 118 132 145 160 173 187 202 215 228 241 243 244 Drive Type 3 7.5”...
- Page 41 Adjustments Setting number 6" Soybeans 7" Drive Type 1 7.5" (Based on 8" 58#/bu) 10" 102 114 125 136 147 158 167 179 190 191 192 6" Soybeans 107 117 126 136 144 153 163 164 164 7" Drive Type 2 100 109 118 127 134 143 152 153 153 7.5”...
-
Page 42: Marker Adjustments
1520F, 2020F, 2420F, 1510HDF, & 2010HDF Marker Adjustments Bleeding Marker Hydraulics To fold properly, the marker hydraulics must be free of air. If the markers fold in jerky, uneven mo- tions, follow these steps. CAUTION You may be injured if hit by a folding or unfolding marker. -
Page 43: Folding Speed With Needle Valves
Adjustments Folding Speed with Needle Valves Refer to Figure 78 A needle valve controls the folding speed of mark- ers that are plumbed separately. The needle valve is near the rod end of the marker cylinder. With tractor idling at a normal operating speed, adjust marker folding to a safe speed. -
Page 44: Marker Chain
1520F, 2020F, 2420F, 1510HDF, & 2010HDF Marker Chain There are two, interrelated adjustments for the marker chain. Make these adjustments in the follow- ing order. Refer to Figure 81 1. Lifting Slack. With marker unfolded, back full- threaded adjustment bolt (1) down until head extends as little as possible. -
Page 45: Marker Width
Adjustments Marker Width Refer to Figure 83 To adjust marker width, loosen jam nuts (1) and 1/2-inch set screws (2). Move marker disk tube in or out to get the proper dimension. 19204 Figure 83 Marker Width Adjustment 8/17/2020... -
Page 46: Seed-Lok™ Lock Up
1520F, 2020F, 2420F, 1510HDF, & 2010HDF Seed-Lok™ Lock Up Locked Optional Seed-Lok™ firming wheels provide addi- position. tional seed-to-soil contact. The wheels are spring loaded and do not require adjusting. In some wet and sticky conditions the wheels may accumulate soil. -
Page 47: Troubleshooting
Troubleshooting Troubleshooting Problem Solution Uneven seed spacing or uneven stand Check for plugging in seed cups. Check for plugging in seed tubes. Reduce ground speed. Check if opener disks are turning freely. Use faster drive type and position seed rate handle to a lower setting. Increase opener spring pressure to penetrate low spots. - Page 48 1520F, 2020F, 2420F, 1510HDF, & 2010HDF Problem Solution Excessive seed cracking Use slower drive type and position seed rate handle to higher setting. Position seed cup handle to a lower notch. Drill boxes not emptying evenly Certain models do not have the same number of cups between each divider of bulkhead.
-
Page 49: Maintenance And Lubrication
Maintenance and Lubrication Maintenance and Lubrication Maintenance Proper servicing and maintenance is the key to long implement life. With careful and systematic inspection, you can avoid costly maintenance, downtime and repair. Always turn off and remove the tractor key before making any adjustments or performing any maintenance. - Page 50 1520F, 2020F, 2420F, 1510HDF, & 2010HDF Drive System Refer to Figure 99 For proper operation and to prevent downtime and re- pair, keep drive chains properly adjusted and lubricated. Regularly check drive chains for excess slack and wear. Adjust idlers to remove any excess slack from chains.
- Page 51 Maintenance and Lubrication 20 Series Opener Disk Spreader Refer to Figure 102 1. On 20 Series openers, remove side gauge wheel arm and wheel assembly by removing 5/8 inch bolt (4) to access opener disks and spreaders. 2. With the unit raised, check blade spreader (1) for wear.
- Page 52 1520F, 2020F, 2420F, 1510HDF, & 2010HDF HD 10 Series Disk Spreaders and Scrapers NOTE: It is normal for blade spreader to have some loose- ness in the holder and between the blades. Some loose- ness is required for proper operation.
-
Page 53: Storage
Maintenance and Lubrication Seed Flap Replacement Squeeze tabs Refer to Figure 105 together 1. To replace a seed flap use a needle nose or similar tool and squeeze the tabs together. Pull plastic seed flap down out of metal brack- 2. -
Page 54: Lubrication
1520F, 2020F, 2420F, 1510HDF, & 2010HDF Lubrication Multipurpose Multipurpose Intervals at which Multipurpose spray lube oil lube lubrication is required grease lube Required Drive Chains Type of Lubrication: Chain Lube Quantity = Coat thoroughly 18265 Gauge Wheel Arm Pivots Zerks on both gauge-wheel arms... - Page 55 Maintenance and Lubrication Season- Wheel Bearings Type of Lubrication: Grease Quantity = Repack 21641 Marker Hinge Points Type of Lubrication: Grease Quantity = Until grease emerges 19196 Season- Marker Disk Bearings Type of Lubrication: Grease Quantity = Repack 19196 8/17/2020...
-
Page 56: Options
1520F, 2020F, 2420F, 1510HDF, & 2010HDF Options Markers Hydraulic markers are available. The units have a cast hub, tapered roller bearings and a bolt-on blade to leave a mark for you to follow on the next field pass. Each marker requires a hydraulic cir- cuit for operation. - Page 57 Options 20 Series Precision Opener Side Depth Wheel Scraper To order the opener wheel scraper, contact your Great Plains dealer. Scraper Packages Part Number 20P Side Wheel Scraper Kit 198-960A 20262 20327 Keeton Seed Firmer The optional Keeton Seed Firmer is a thin piece of...
-
Page 58: Appendix
1520F, 2020F, 2420F, 1510HDF, & 2010HDF Appendix Torque Values Chart Bolt Head Identification Bolt Head Identification 10.9 Bolt Size Bolt Size (Metric) (Inches) Class 5.8 Class 8.8 Class 10.9 Grade 2 Grade 5 Grade 8 in-tpi N · m ft-lb N ·... -
Page 59: Tire Inflation Chart
Titan www.titan-intl.com 11L x 15" 12-Ply Rib Implement Goodyear www.goodyearag.com Firestone www.firestoneag.com Specifications and Capacities 1520F & 1510HD Row Spacing, Inches 7 1/2 Rows Per Drill Weight with 20 Series Openers, Pounds 5602 5296 4684 Weight with HD 10 Series Openers, Pounds... -
Page 60: Sprocket Configuration
1520F, 2020F, 2420F, 1510HDF, & 2010HDF 15’ Single Gauge Wheel Sprocket Configuration 23041 8/17/2020... - Page 61 Appendix 20’ and 24’ Single Gauge Wheel Sprocket Configuration 23056 8/17/2020...
- Page 62 1520F, 2020F, 2420F, 1510HDF, & 2010HDF 20’ and 24’ Dual Gauge Wheel Sprocket Configuration 23041 8/17/2020...
-
Page 63: Warranty
Second year limited warranty covers Parts ONLY (personal usage only, excluding labor and wear items). This warranty is limited to the replacement of any defective part by Great Plains. Great Plains reserves the right to inspect any equipment or part which are claimed to have been defective in material or workmanship. - Page 64 Great Plains Manufacturing, Inc. Corporate Office: P.O. Box 5060 Salina, Kansas 67402-5060 USA...
Need help?
Do you have a question about the 1520F and is the answer not in the manual?
Questions and answers