Table of Contents

Subscribe to Our Youtube Channel
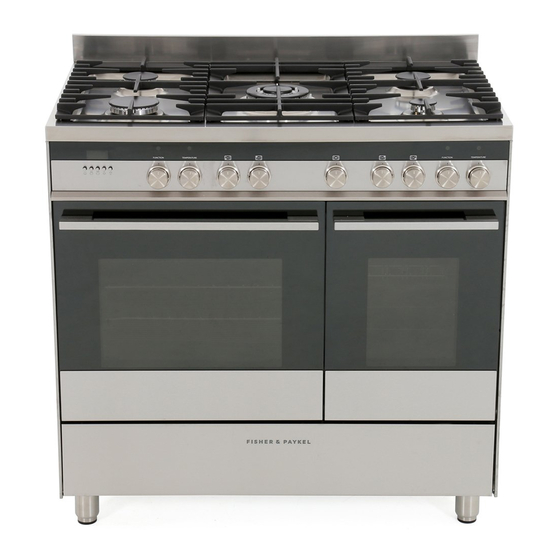
Related Manuals for Fisher & Paykel OR90LDBGFX3


Summary of Contents for Fisher & Paykel OR90LDBGFX3
- Page 1 Installation Instructions Fig. 1 Cooker dimensions and capacity https://producthelp.fisherpaykel.com/eu/Cook/Freestanding_Cookers/Dual_Fuel/OR90LDBGFX3/User_Guide_OR90LDBGFX… Updated: Fri, 10 Apr 2020 07:18:41 GMT Powered by...
-
Page 2: Fitting The Adjustable Feet
Rest the rear of the cooker on a piece of the polystyrene packaging exposing the base for the fitting of the feet. Fit the four legs by screwing them tight into the support base as shown. https://producthelp.fisherpaykel.com/eu/Cook/Freestanding_Cookers/Dual_Fuel/OR90LDBGFX3/User_Guide_OR90LDBGFX… Updated: Fri, 10 Apr 2020 07:18:41 GMT... -
Page 3: Levelling The Cooker
Fig. 4 Top of feet screwed in tightly Levelling the Cooker Level the cooker by screwing the bottom of the feet in or out, as shown. Fig. 5 Levelling the cooker https://producthelp.fisherpaykel.com/eu/Cook/Freestanding_Cookers/Dual_Fuel/OR90LDBGFX3/User_Guide_OR90LDBGFX… Updated: Fri, 10 Apr 2020 07:18:41 GMT Powered by... -
Page 4: Moving The Cooker
Fig. 6 Correctly raising the cooker DO NOT DRAG the cooker. Lift the feet clear of the floor. Fig. 7 Incorrectly raising the cooker https://producthelp.fisherpaykel.com/eu/Cook/Freestanding_Cookers/Dual_Fuel/OR90LDBGFX3/User_Guide_OR90LDBGFX… Updated: Fri, 10 Apr 2020 07:18:41 GMT Powered by... - Page 5 • Assemble the backguard as shown and fix it by screwing the central screw “B” and the spacers “A”. Fig. 9 Assembling the backguard https://producthelp.fisherpaykel.com/eu/Cook/Freestanding_Cookers/Dual_Fuel/OR90LDBGFX3/User_Guide_OR90LDBGFX… Updated: Fri, 10 Apr 2020 07:18:41 GMT Powered by...
-
Page 6: Anti-Tilt Bracket
5. Tighten the screws attaching the anti-tilt bracket. 6. Push the cooker against the wall so that the anti-tilt bracket is fully inserted in the slot on the cooker’s back. Fig. 10 Fitting a stability bracket https://producthelp.fisherpaykel.com/eu/Cook/Freestanding_Cookers/Dual_Fuel/OR90LDBGFX3/User_Guide_OR90LDBGFX… Updated: Fri, 10 Apr 2020 07:18:41 GMT Powered by... -
Page 7: Installation And Service Regulations
• Gas Safety (Installation and Use) • Regulations Building Regulations • British Standards • Regulations for Electrical Installation Failure to install the appliance correctly could invalidate any manufacturer’s warranty and lead to prosecution under the https://producthelp.fisherpaykel.com/eu/Cook/Freestanding_Cookers/Dual_Fuel/OR90LDBGFX3/User_Guide_OR90LDBGFX… Updated: Fri, 10 Apr 2020 07:18:41 GMT Powered by... -
Page 8: Gas Connection
• The hose should not be crushed or trapped or be in contact with sharp or abrasive edges. It should also not be subjected to corrosion by acidic cleansing agents. https://producthelp.fisherpaykel.com/eu/Cook/Freestanding_Cookers/Dual_Fuel/OR90LDBGFX3/User_Guide_OR90LDBGFX… Updated: Fri, 10 Apr 2020 07:18:41 GMT Powered by... -
Page 9: To Connect The Gas Supply
The presence of bubbles will indicate a leak. If there is a leak, tighten the fitting and then recheck for leaks. Do not use a naked flame to test for leaks. Fig. 11b Connecting the gas Fig. 11a Gas Supply Intake https://producthelp.fisherpaykel.com/eu/Cook/Freestanding_Cookers/Dual_Fuel/OR90LDBGFX3/User_Guide_OR90LDBGFX… Updated: Fri, 10 Apr 2020 07:18:41 GMT Powered by... -
Page 10: Replacement Of Burner Injectors
Remove pan supports and burners from the cooktop. Using a wrench substitute the nozzle injectors with those most suitable for the kind of gas for which it is to be used. The burners are designed so that adjustment of primary air is not required. https://producthelp.fisherpaykel.com/eu/Cook/Freestanding_Cookers/Dual_Fuel/OR90LDBGFX3/User_Guide_OR90LDBGFX… Updated: Fri, 10 Apr 2020 07:18:41 GMT Powered by... - Page 11 • Turn on the burner • Turn the tap to the MINIMUM position • Take off the knob • With a small flat screwdriver turn the screw to the correct regulation. https://producthelp.fisherpaykel.com/eu/Cook/Freestanding_Cookers/Dual_Fuel/OR90LDBGFX3/User_Guide_OR90LDBGFX… Updated: Fri, 10 Apr 2020 07:18:41 GMT Powered by...
- Page 12 Reduced Power Burners [KW] [KW] Ø Injector [1/100 Ø Injector [1/100 Auxiliary 1,00 0,30 72 (X) Semi-Rapid 1,75 0,45 97 (Z) Rapid 3,00 0,75 115 (Y) Triple-Ring 3,50 1,50 135 (T) https://producthelp.fisherpaykel.com/eu/Cook/Freestanding_Cookers/Dual_Fuel/OR90LDBGFX3/User_Guide_OR90LDBGFX… Updated: Fri, 10 Apr 2020 07:18:41 GMT Powered by...
-
Page 13: Lubrication Of The Gas Taps
• Take up any slack in the cable and secure with the cable clamp “D”. • Replace the cover “A”. The earth conductor must be left about 3 cm longer than the others. https://producthelp.fisherpaykel.com/eu/Cook/Freestanding_Cookers/Dual_Fuel/OR90LDBGFX3/User_Guide_OR90LDBGFX… Updated: Fri, 10 Apr 2020 07:18:41 GMT Powered by... -
Page 14: Power Supply
Fig. 16a Connecting the feeder cable Power Supply 230V - 50Hz 3700W 16,1A (230V) Feeder Cable Section “TYPE H05RR-F” 230V ~ 3 x 2.5 mm2 (**) (**) - Connection with wall box connection. https://producthelp.fisherpaykel.com/eu/Cook/Freestanding_Cookers/Dual_Fuel/OR90LDBGFX3/User_Guide_OR90LDBGFX… Updated: Fri, 10 Apr 2020 07:18:41 GMT Powered by... - Page 15 Fig. 16b Connecting the feeder cable https://producthelp.fisherpaykel.com/eu/Cook/Freestanding_Cookers/Dual_Fuel/OR90LDBGFX3/User_Guide_OR90LDBGFX… Updated: Fri, 10 Apr 2020 07:18:41 GMT Powered by...
Need help?
Do you have a question about the OR90LDBGFX3 and is the answer not in the manual?
Questions and answers