Table of Contents
Advertisement
Quick Links
Thank you very much for choosing the Yoshitake's product. To ensure the correct and safe use of the product,
please read this manual before use. This manual shall be kept with care for future references.
The symbols used in this manual have the following meanings.
Warning
Caution
1. Usage of the Product ·················································· 1
2. Features ·································································· 1
3. Specifications ···························································· 1
4. Dimensions and Weights ············································· 2
5. Operation ······························································· 3
6. Maximum Continuous Discharge Capacity ······················ 4
7. Installation ······························································ 5
8. Operating Procedure ················································· 10
9. Maintenance ···························································· 11
PRODUCT MANUAL
This symbol indicates a potentially hazardous situation that, if not avoided,
could result in death or serious injury.
This symbol indicates a hazardous situation that, if not avoided, may result in
minor or moderate injury or may result in only property damage.
7.1 Piping example ···················································· 5
7.2 Precaution for installation ······································· 7
8.1 Precaution for operating procedure ························· 10
9.1 Precaution for maintenance ·································· 11
9.2 Daily and periodic inspections ······························· 12
9.3 Troubleshooting ·················································· 13
9.4 Exploded drawing ··············································· 14
9.5 Disassembly ······················································ 15
9.6 Reassembly ······················································· 17
9.7 Parts replacement procedure ································ 20
Table of Contents
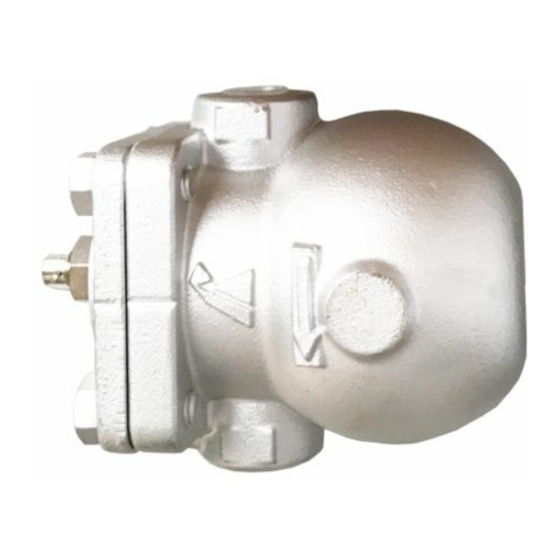
MODEL TSF-10・11
STEAM TRAP
EPDT-261f
.
Advertisement
Table of Contents

Related Manuals for Yoshitake TRAP STAR TSF-10

Summary of Contents for Yoshitake TRAP STAR TSF-10
-
Page 1: Table Of Contents
STEAM TRAP PRODUCT MANUAL Thank you very much for choosing the Yoshitake’s product. To ensure the correct and safe use of the product, please read this manual before use. This manual shall be kept with care for future references. The symbols used in this manual have the following meanings. -
Page 2: Usage Of The Product
1. Usage of the product The TSF-10, TSF-10F, TSF-11, and TSF-11F can discharge condensate effectively without retention, and realize energy saving steam system without steam loss. In addition, incorporated thermostatic air vent discharges air inside the piping and shortens warming-up time. So, the product is suitable for steam equipments used in various industries such as air-conditioning equipment, hot-water supply equipment, plant, and food. -
Page 3: Dimensions And Weights
4. Dimensions and Weights 1. TSF-10 and TSF-11 Connection: JIS Rc screwed TSF-10 (mm) Nominal Weight Model size (kg) Rc 1/2 TSF-10 Rc 3/4 Rc 1 Rc 1 Rc 1 1/4 10.0 TSF-11 Rc 1 1/2 10.2 Rc 2 10.5 2. -
Page 4: Operation
5. Operation Air vent Float 1. Start-up of the operation At start-up, since the float is down, the valve is closed. In this state, air in the system and piping is discharged out through the air vent which is opened. When condensate flows into the product, the float lifts up opens valve,... -
Page 5: Maximum Continuous Discharge Capacity
6. Maximum Continuous Discharge Capacity 1. Discharging capability of the steam trap differs by working differential pressure, that is, difference between inlet pressure and outlet pressure (back pressure). In selecting discharge capacity, consider outlet pressure. If inlet pressure is 0.5 MPa and outlet pressure is 0.2 MPa, discharge capacity is of working differential pressure of 0.3 MPa. -
Page 6: Installation
7. Installation 7.1 Piping example Stop valve Pressure gauge Drip Pressure gauge Stop Stop valve Sight Check Stop Strainer valve glass valve valve Stop valve Steam trap Description Correct Incorrect If the product is installed close Regulating Regulating valve to a regulating valve, make valve sure to install the product at the inlet side of the regulating... - Page 7 Description Correct Incorrect Install the product below a device which generates condensate. Install the products for each device independently. The diameter of collecting pipe shall be more than summation of sectional areas of discharge pipes. In addition, install check valves for back flow prevention.
-
Page 8: Precaution For Installation
Description Correct Incorrect End portion of discharge pipe shall be off the water surface in the pit. * If the discharge pipe is in contact with the water, it absorbs dirty water in the pit and causes malfunction of the product. Provide a by-pass line around the product, and install stop By-pass valve... - Page 9 4. Check installation posture. * Wrong posture hampers proper operation. * Allowable tilt from horizontal line is within ±10°. 5. Adjust direction of the name plate in no pressure condition after installation. * Do not turn the cock unless the pressure inside of the product and piping is completely discharged. Forcing the cock to turn may result in damage to the cock.
- Page 10 8. Secure enough space for maintenance (such as cleaning of strainer), inspections and repair as shown below. * Failure to follow this notice prevents maintenance, inspection and repair. TSF-10・10F 200 mm or more TSF-11・11F 300 mm or more 9. Slope the piping and place the product at as a low position as possible in order to make condensate flow into the product by its own weight.
-
Page 11: Operating Procedure
8. Operating Procedure 8.1 Precaution for operating procedure Warning 1. Before leading fluid, make sure that the product is securely connected to piping and that there is no loose. * Failure to follow this notice may result in scalds or injury due to blow-off. 2. -
Page 12: Maintenance
5. To assemble, connect all the parts securely and tighten the bolts uniformly in diagonal order. * Failure to follow this notice may cause malfunction or outside leakage. 6. When repairing, do not use the parts other than the dedicated parts manufactured by Yoshitake. Do not modify the product. -
Page 13: Daily And Periodic Inspections
9.2 Daily and periodic inspections Conduct daily and periodic inspections in order to maintain the optimal performance of the product. See ”9.3 Troubleshooting” on Page 13 for the remedies if trouble is observed. ⚫ Daily inspection (once a day) Conduct daily inspection during operation of the product. Items Standards for Inspection Discharge condition... -
Page 14: Troubleshooting
9.3 Troubleshooting Trouble Cause Remedy Condensate is not 1. Blockage of foreign substances in 1. Disassemble and clean it. discharged. a discharge hole of the valve seat. 2. The screen is clogging. 2. Disassemble and clean it. 3. The float (P) is damaged. 3. -
Page 15: Exploded Drawing
9.4 Exploded drawing The parts shown in the rectangle boxes are available as consumable supply. *The air vent (P) cannot be removed from the cock assembly. *The plate cannot be removed from the cover. Valve... -
Page 16: Disassembly
9.5 Disassembly ⚫ Tools to be used Name of tool Size (Nominal size) Spanner 22 mm Ring wrench 19 mm [Procedure 1] Loosen the bolts fixing the cover with ring wrench (width across flat: 19 [Procedure 1] mm), and remove the cover and gasket from the body. Pull out the screen from the body. - Page 17 [Procedure 3] Remove the split pin from the cock. With fixing the cock (width across flat: 9 mm), remove the nut by using spanner (width across flat: 22 mm), and then remove the collar and the name plate. By pulling out the cock from the cover, the cock assembly can be [Procedure 4] replaced.
-
Page 18: Reassembly
9.6 Reassembly ⚫ Tools to be used Name of tool Size (Nominal size) * Tightenable with torque of 45 N・m Torque Wrench Width across flat: 19 mm * Tightenable with torque of 35 N・m, Open-head type Torque Wrench Width across flat: 22 mm Spanner 9 mm Ring Wrench... - Page 19 [Procedure 3] Attach the name plate, collar, and nut to the cock. * When installing, match the holes on the name plate and collar with shape of the cock. Put the D-shaped portion in the same direction. [Procedure 4] Connect the float holder and float (P) assembly with the spindle. Check that the float (P) assembly moves smoothly, and that the seat surface of the valve is in contact with that of the valve seat.
- Page 20 [Procedure 5] Attach the screen to the body. The screen can be inserted from either end. [Procedure 6] Install the cover gasket to the cover. Make the oval-shaped holes on the cover and on the cover gasket in the same position. Make sure to use a new cover gasket.
-
Page 21: Parts Replacement Procedure
[Procedure 8] With applying spanner to the cock (width across flat: 9 mm), adjust the direction of the name plate. After adjustment, tighten the nut with torque wrench (width across flat: 22 mm) with torque of 35 N・m. * If the name plate is not in correct direction, the product does not work properly. -
Page 22: Warranty Information
Fire, flood, earthquake, thunder and other natural disasters. Consumable parts such as O-ring, gasket, diaphragm and etc. Yoshitake is not liable for any damage or loss caused by malfunction or defect of the product. INTERNATIONAL DEPT. 955-5, Miyamae, Irukadeshinden, Komaki, Aichi, 485-0084, Japan...
Need help?
Do you have a question about the TRAP STAR TSF-10 and is the answer not in the manual?
Questions and answers