Table of Contents
Advertisement
Quick Links
Advertisement
Table of Contents

Subscribe to Our Youtube Channel
Related Manuals for ReadyNet AC1100MSF


Summary of Contents for ReadyNet AC1100MSF
- Page 1 AC1100MSF User Manual...
-
Page 2: Table Of Contents
Advanced (Administrative Users) ..................13 Wireless Security ........................13 WMM (Administrative Users) ....................14 WPS ............................15 Station Info ..........................15 SIP, FXS1 and FXS2 (AC1100MSF) ......................16 Register ............................16 8.1.1 Configure SIP from Web Page .................... 16 8.1.2 View the Register Status ..................... - Page 3 8.2.8 VoIP QoS ..........................20 FSX ............................. 20 8.3.1 Dial Plan..........................20 8.3.2 Call Log ..........................21 Security ............................... 22 Filtering Setting .......................... 22 DMZ ............................22 MAC Clone ..........................23 Port Forward ..........................23 Content Filtering ......................... 23 Administration ............................ 24 10.1 Management ..........................
-
Page 4: User Manual
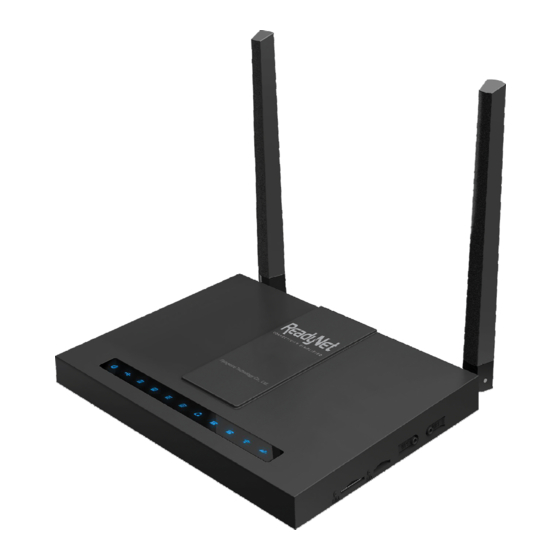
Preface ’ ’ LED Indicators and Connectors LED Indicators Front Panel Status Explanation Wireless access point is On (Green) ready. It will blink while wireless Blinking (Green) traffic goes through. Version 1.0 P a g e... -
Page 5: Hardware Installation
Step 1. Pick up phone and press “****” to start IVR. Step 2. Choose “1” and the AC1100MSF reports the current WAN port connection type. Step 3. Prompt "Please enter password”, user needs to input password with end char # if user wants to configure WAN port connection type. - Page 6 If at any time you want to quit, press “**”. Step 1. Pick up phone and press “****” to start IVR. Step 2. Choose “3”, and the AC1100MSF reports the current WAN port subnet mask. Step 3. Input a new WAN port subnet mask with the end char #.
- Page 7 Step 6. Report “operation successful” if user operation is correct. Step 1. Pick up phone and press “****” to start IVR. Step 2. Choose “9”, and the AC1100MSF reports “ WEB Access Port”. Step 3. Prompt “Please enter password”, inputting password is the same as in operation 1.
-
Page 8: User Interface Web Page
User Interface Web Page Two-Level Management “ ” “ ” Accessing the User Interface Web Page 4.2.1 From the LAN Port ’ ’ Notice: You may either simply set up your computer to get IP dynamically from the router or set up the IP address of the computer to be the same subnet as the default IP address of the router, which is 192.168.11.1. -
Page 9: Web Page
’ ’ > > 4.3 Web Page After every change, click this button to apply the change. After clicking Save, the red Version 1.0 P a g e... -
Page 10: Status
will appear. Click to cancel changes. Click to reboot the router. Status System Log > > Version 1.0 P a g e... -
Page 11: Network
Network > > – – Version 1.0 P a g e... -
Page 12: Static Ip
6.1.1 Static IP Type the IP IP Address address. Subnet Type the subnet Mask mask. Gateway Type the gateway IP Address IP address. Primary Type in the primary IP address for the Server route. Type in secondary Secondary IP address for necessity in the Server future. -
Page 13: Pppoe
6.1.3 PPPoE Assign a specific valid user name PPPoE provided by the ISP. Account PPPoE Assign a valid password provided by Password the ISP. Confirm Input the password again. Password Set the DNS Mode to Auto or Manual. DNS Mode If Manual, fill in primary and secondary DNS addresses. -
Page 14: Port Forward
DHCP Start/End The DHCP start/end address. Address Set the DNS Mode to Auto or Manual. DNS Mode If Manual, fill in the primary and secondary DNS addresses. Primary DNS Type in the primary IP address Server for the route Secondary Type in the secondary IP DNS Server address for the route... -
Page 15: Mac Clone
MAC Clone Step 1. Press clone the current PC or MAC address to router’s Internet port.. Step 2. Press save the changes. Step 3. Press Reboot to make changes effective. 2.4GHz and 5GHz Wireless Connection Enable Wireless and Set the SSID >... -
Page 16: Advanced (Administrative Users)
7.1.1 Advanced (Administrative Users) Wireless Security > > SSID Select the SSID you’d like Choice to configure. Select an appropriate encryption mode for the security and privacy of your Security wireless data packets. Mode Each encryption mode will bring out a different web page to offer additional configurations. -
Page 17: Wmm (Administrative Users)
SSID Select the SSID you’d like Choice to configure. Select an appropriate encryption mode to improve the security and privacy of Security your wireless data Mode packets. Each encryption mode will activate a different web page to configure. WMM (Administrative Users) Version 1.0 P a g e | 14... -
Page 18: Wps
Enable WPS. Press the button to apply. Station Info Version 1.0 P a g e | 15... -
Page 19: Sip, Fxs1 And Fxs2 (Ac1100Msf)
SIP, FXS1 and FXS2 (AC1100MSF) Register 8.1.1 Configure SIP from Web Page > > Version 1.0 P a g e | 16... -
Page 20: View The Register Status
8.1.2 View the Register Status AC1100MSF Version 1.0 P a g e | 17... -
Page 21: Phone Features
Phone Features 8.2.1 Calling phone or extension numbers “ ” “ ” 8.2.2 Direct IP calls “ ” “ ” 8.2.3 Call Hold “ ” “ ” “ “ ” ” 8.2.4 Blind Transfer “ ” ’ “ ” “ ”... -
Page 22: Attended Transfer
8.2.5 Attended Transfer “ “ ” ” ’ ’ “ ” “ ” 8.2.6 Conference “ “ ” ” ’ ’ “ ” “ ” 8.2.7 SIP Settings Version 1.0 P a g e | 19... -
Page 23: Voip Qos
8.2.8 VoIP QoS 8.3.1 Dial Plan Version 1.0 P a g e | 20... -
Page 24: Call Log
8.3.2 Call Log Version 1.0 P a g e | 21... -
Page 25: Security
Security Filtering Setting Version 1.0 P a g e | 22... -
Page 26: Mac Clone
MAC Clone Port Forward Content Filtering Version 1.0 P a g e | 23... -
Page 27: Administration
10 Administration 10.1 Management Select the user type User Type New User User can change new user name Name Input the new password Password Confirm Confirm the password Password NTP Enable Enable NTP Current Time Display the current time. NTP Settings Select the time zone. -
Page 28: Logout
10.2 TR-069 > > ‘ ’ ‘ ‘ ’ ‘ ’ ‘ ’ ’ ‘ ’ ‘ ’ ‘ ‘ ’ ‘ ’ ’ ‘ ’ ‘ ’ ‘ ’ ‘ ’ 10.3 Logout 10.4 Reboot Version 1.0 P a g e | 25... -
Page 29: Fcc Statement
FCC Statement ’ ’ Version 1.0 P a g e | 26...
Need help?
Do you have a question about the AC1100MSF and is the answer not in the manual?
Questions and answers