Table of Contents
Advertisement
Available languages
Available languages
Advertisement
Table of Contents

Related Manuals for TEFAL Vitacompact FP413DAD


Summary of Contents for TEFAL Vitacompact FP413DAD
- Page 1 www.tefal.com...
- Page 3 m4-1 m4-2 m4-3 m4-4 m5 m4 m3 m2 m4-1 m4-2 m5 m4 m3 m2 q3-1 q3-2...
- Page 4 fig.1a fig.1b fig.1c fig.2a fig.2b fig.2c fig.3 fig.4 fig.5 fig.6 fig.7 fig.8...
- Page 5 fig.9 fig.10a fig.10b fig.10c fig.10d fig.10e fig.10f fig.10g fig.11a fig.11b fig.11c...
-
Page 6: Consignes De Sécurité
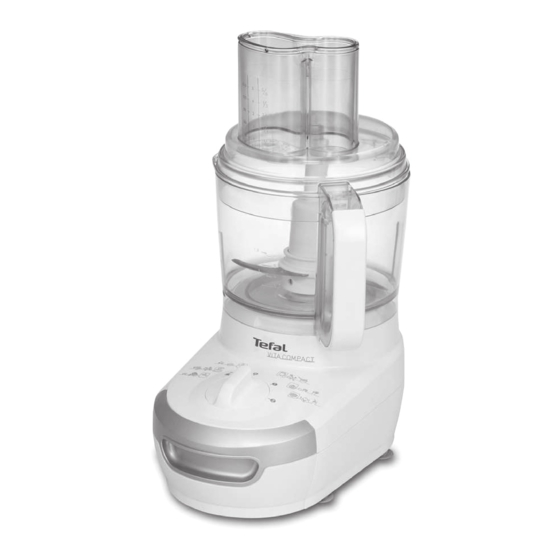
Nous vous remercions d’avoir choisi un produit de la gamme TEFAL exclusivement prévu pour la préparation des aliments. Consignes de sécurité - Lisez attentivement le mode d’emploi avant la première utilisation de votre appareil : une utilisation non conforme au mode d’emploi dégagerait TEFAL de toute responsabilité. - Page 7 Description Tête hachoir Bloc moteur ma : Tête hachoir métal Sortie bloc moteur mb : Tête hachoir plastique Sélecteur de vitesses : position 0-1-2-Pulse Corps (marche intermittente) Ensemble bol transparent Couteau Poussoir doseur Grilles (pour le hachage de la viande) Couvercle à...
-
Page 8: Mise En Service
Mise en service - Avant une première utilisation, lavez toutes les pièces des La numérotation des paragraphes est en accessoires à l’eau chaude savonneuse (voir paragraphe correspondance avec la numérotation des nettoyage). Rincez et séchez. schémas encadrés. - Placez le bloc moteur sur une surface plane, propre et sèche. - Branchez votre appareil. - Page 9 PETRIR / MELANGER (selon modèle) - Utilisez le couteau métal (d1) ou le pétrin plastique (d2) selon modèle. - Tournez le sélecteur de vitesse (a2) sur la position 2 pour la mise en marche. Vous pouvez pétrir jusqu’à : - 1 kg de pâte lourde, telle que : pâte à pain blanc, pâte brisée… en 40s. - 800g de pâte à...
- Page 10 5. Emulsionner/battre/fouetter ACCESSOIRES UTILISES - Ensemble bol (b). Mettre le disque - Tige d’entraînement (c). émulsionneur - Disque émulsionneur (f). dans le bon sens : voir schéma encadré 5. MONTAGE DES ACCESSOIRES - Posez le bol (b3) sur le bloc moteur (a) sans le verrouiller. - Glissez et verrouillez le disque émulsionneur (f), sur la tige d’entraînement (c), et positionnez le tout sur la sortie bloc moteur (a1).
- Page 11 Conseils : - Lors du mélange, si des ingrédients restent collés aux parois du bol, arrêtez l’appareil et débranchez-le. Retirez l’ensemble bol mixeur du corps de l’appareil. A l’aide de la spatule, faites tomber la préparation sur la lame. Ne mettez jamais, les mains ou les doigts dans le bol ou à proximité de la lame. Vous pouvez : - préparer des potages finement mixés, des veloutés, des crèmes, des compotes, des milk-shakes, des cocktails.
- Page 12 8. Presser les agrumes (selon modèle) ACCESSOIRES UTILISES Ensemble presse-agrumes (g). MONTAGE DES ACCESSOIRES - Glissez l’entraîneur (g4) sur la sortie bloc moteur (a1). - Placez le réceptacle à jus (g3), sur le bloc moteur (a). - Descendez le filtre (g2) autour du réceptacle. - Posez le cône (g1) sur la cheminée du réceptacle (g3), puis tournez le tout vers la droite jusqu’en butée.
- Page 13 10. Hâcher/façonner/extraire (selon modèle) TÊTE HACHOIR MÉTAL OU TÊTE PLASTIQUE ACCESSOIRES UTILISES - Ensemble réducteur (l) et tête hachoir (m). AVANT LA PREMIERE UTILISATION Lavez la tête hachoir à l’eau chaude savonneuse, et essuyez-la aussitôt soigneusement. MONTAGE DES ACCESSOIRES 10a : Mise en place du réducteur sur le robot - Posez le réducteur (l) sur le bloc moteur (a), puis tournez le vers la droite jusqu’en butée.
- Page 14 10d : Entonnoir à saucisses (selon modèle) Cet accessoire s’adapte sur la tête hachoir métal (ma), et vous permet de réaliser des saucisses. ACCESSOIRES UTILISÉS - Entonnoir à saucisses (n), réducteur (l) et tête hachoir métal (ma). MONTAGE DES ACCESSOIRES - Mettez la vis (m2) en place dans le corps (m1) de la tête hachoir métal.
- Page 15 10f : Accessoire à kebbé (selon modèle) Cet accessoire s’adapte sur la tête hachoir métal (ma), et vous permet de façonner des petites boulettes de viande. Remarque : cet ACCESSOIRES UTILISÉS accessoire - Accessoire à kebbé (p), réducteur (l) et tête hachoir métal (ma). s’utilise sans grille, ni couteau.
-
Page 16: Rangement Des Accessoires
11. Rangement des accessoires : Rangement presse-agrumes : il vous est possible de ranger l’entraîneur (g4) du presse-agrumes (g) sous le réceptacle (g3), afin d’éviter l’égarement ou la perte de celui-ci. 11b : Votre robot est muni : d’un tiroir de rangement (r) : vous pouvez y placer : le couteau métal (d1), la tige d’entraînement (c), 2 disques coupe- légumes (e), ainsi que l’émulsionneur (f) : Après avoir mis les accessoires en place, coulissez le tiroir de rangement (r) dans le bloc moteur (a). - Page 17 16. Produits électroniques ou électriques en fin de vie Participons à la protection de l’environnement ! Votre appareil contient de nombreux matériaux valorisables ou recyclables. Confiez celui-ci dans un point de collecte ou à défaut dans un centre service agréé pour que son traitement soit effectué.
- Page 18 18. Quelques recettes de base Pâte à pain blanc 500g de farine – 300g d’eau tiède – 2 sachets de levure de boulanger – 10g de sel. Dans le bol du robot muni du couteau métal, mettez la farine, le sel, la levure de boulanger. Faites fonctionner à...
-
Page 19: Safety Recommendations
- Do not use the appliance if the power cord or plug is damaged. The power cord must be replaced by an authorised TEFAL service centre to avoid all danger (see the list in the service booklet). - Page 20 Description Mincer head Motor unit ma : metal mincer head motor unit power outlet mb : plastic mincer head speed selector: position 0-1-2-Pulse body (intermittent operation) Transparent bowl assembly screw blade pusher with measuring marks screens (for mincing meat) lid with feeder tube - m4-1 : : small-hole screen bowl - m4-2 : large-hole screen...
-
Page 21: Getting Started
Getting started - Before using for the first time, wash all accessory parts in hot, The paragraph numbering corresponds to soapy water (see “cleaning” paragraph). Rinse and dry. the numbers in the diagrams. - Set the motor unit on a clean, stable, dry, flat surface. - Plug in your appliance. - Page 22 KNEADING / MIXING (depending on the model) - Use the metal blade (d1) or plastic kneading blade (d2), depending on the model. - Turn the speed selector (a2) to the 2 position to start. You can knead up to: - 1 kg of heavy dough, such as: white bread dough, shortcrust pastry, etc. in 40 seconds. - 800g of special bread dough such as: rye bread, whole wheat bread, multigrain bread, etc.
- Page 23 5. Emulsify/beat/whip/whisk ACCESSORIES USED - Bowl unit (b). make sure you - Drive shaft (c). install the - Emulsifying disc (f). emulsifying disc the right way round: see ASSEMBLING THE ACCESSORIES diagram. - Place the bowl (b3) on the motor unit (a) without locking it. - Slide and lock the emulsifying disc (f) onto the drive shaft (c) and position the assembly on the motor unit outlet (a1).
- Page 24 Recommendations: - If ingredients stick to the sides of the jug when mixing, stop the appliance and unplug it. Remove the blender assembly from the body of the appliance. Using a spatula, push the food down onto the blade. Never put your hands or fingers in the bowl or near the blade.
- Page 25 8. Squeezing citrus fruit (depending on the model) ACCESSORIES USED Citrus press unit (g). ASSEMBLING THE ACCESSORIES - Slide the drive unit (g4) onto the motor unit outlet (a1). - Place the juice receptacle (g3) on the motor unit (a). - Lower the filter (g2) around the receptacle.
- Page 26 10. Mince/shape/extract (depending on the model) METAL MINCER HEAD OR PLASTIC HEAD ACCESSORIES USED- Motor block assembly (l) and mincer head (m). BEFORE USING FOR THE FIRST TIME Wash the mincer head with hot, water and washing up liquid, then carefully dry it immediately. ASSEMBLING THE ACCESSORIES 10a : Installing the motor block assembly on the food processor - Place the mincer head motor block (l) on the motor unit (a), then turn toward the right to the...
- Page 27 10d : : Sausage filler tube (depending on the model) This accessory fits on the metal mincer head (ma), enabling you to make sausages. ACCESSORIES USED - Sausage filler tube (n), motor block assembly (l) and metal mincer head (ma). ASSEMBLING THE ACCESSORIES - Insert the screw (m2) into the body (m1) of the metal mincer head.
- Page 28 10f : Kebbe accessory (depending on the model) This accessory fits on the metal mincer head (ma), enabling you to make small meatballs. ACCESSORIES USED - Kebbe accessory (p), motor block assembly (l) and metal mincer head (ma). Comment: this accessory is used ASSEMBLING THE ACCESSORIES without screens...
-
Page 29: Storing The Accessories
11. Storing the accessories : :storing the citrus press: the drive unit (g4) of the citrus press (g) can be stored in the container (g3) to avoid misplacing or losing it. 11b : Your food processor is equipped with: a storage drawer (r) which can hold the metal blade (d1), the drive shaft (c), 2 vegetable cutting discs (e) as well as the emulsifying unit (f). - Page 30 Leave it at a local civic waste collection point. 17. Accessories You can personalise your appliance with the following accessories, available from your usual dealer or from an authorised TEFAL service centre: Mincer unit Stainless steel French fries cutting disc...
-
Page 31: Basic Recipes
18. Basic recipes White bread dough 500g white flour– 300ml warm water – 2 packets baker’s yeast – 10g or 1 tsp salt Put the flour, salt and baker’s yeast in the bowl of the food processor fitted with the metal blade. Run at speed 2, and a few seconds later start pouring in the warm water through the feed tube in the lid. -
Page 32: Consejos De Seguridad
Le agradecemos que haya elegido un producto TEFAL exclusivamente destinado a la preparación de alimentos. Consejos de seguridad - Lea atentamente el modo de empleo antes de utilizar por primera vez el aparato: una utilización no conforme al modo de empleo liberaría a TEFAL de cualquier responsabilidad. - Page 33 Descriptión Cabezal picador Bloque motor ma : cabezal picador de metal salida bloque motor mb : : cabezal picador de plástico selector de velocidades: posición 0-1-2- cuerpo Pulse (marcha intermitente) Conjunto bol transparente tornillo cuchilla empujador dosificador rejillas (para picar carne) tapa con chimenea - m4-1 : rejilla orificios pequeños Varilla de arrastre...
-
Page 34: Puesta En Marcha
Puesta en marcha - Antes de utilizar el aparato por primera vez, lave todas las piezas La numeración de los párrafos se de los accesorios con agua caliente y jabón (ver párrafo de corresponde con la numeración de los limpieza). Aclare y seque. esquemas enmarcados. - Page 35 AMASAR / MEZCLAR (según modelo) - Utilice la cuchilla de metal (d1) o la amasadora de plástico (d2) según modelo. - Gire el selector de velocidad (a2) hacia la posición 2 para ponerlo en marcha. Podrá amasar hasta: - 1 kg de masa pesada como: masa de pan blanco, masa quebrada… en 40 segundos. - 800 g de masa de pan especial como: pan de centeno, pan integral, pan de cereales…...
- Page 36 5. Emulsionar/batir/montar ACCESORIOS UTILIZADOS - Conjunto del bol (b). Colocar el disco - Varilla de arrastre (c). emulsionador en - Disco emulsionador (f). el sentido correcto: ver esquema enmarcado 5. MONTAJE DE LOS ACCESORIOS - Coloque el bol (b3) en el bloque motor (a) sin bloquearlo. - Introduzca y bloquee el disco emulsionador (f), en la varilla de arrastre (c), y coloque todo en la salida del bloque motor (a1).
- Page 37 Consejos: - Durante el mezclado, si quedaran ingredientes adheridos a las paredes del vaso, pare el aparato y desconéctelo. Retire el conjunto vaso batidor del cuerpo del aparato. Con la espátula, haga caer la preparación a la cuchilla. No introduzca nunca las manos o los dedos en el vaso o cerca de la cuchilla. Podrá: - preparar cremas, compotas, batidos, cócteles.
- Page 38 8. Exprimir los cítricos (según modelo) ACCESORIOS UTILIZADOS Conjunto exprimidor (g). MONTAJE DE LOS ACCESORIOS - Introduzca la varilla de arrastre (g4) en la salida del bloque motor (a1). - Coloque el recipiente de zumo (g3), en el bloque motor (a). - Baje el filtro (g2) alrededor del recipiente.
- Page 39 10. Picar/formar/extraer (según modelo) CABEZAL PICADOR DE METAL O CABEZAL DE PLÁSTICO ACCESORIOS UTILIZADOS - Conjunto motor (l) y cabezal picador (m). ANTES DE LA PRIMERA UTILIZACIÓN Lave el cabezal picador con agua caliente y jabón, y séquelo enseguida cuidadosamente. MONTAJE DE LOS ACCESORIOS 10a : Colocación del reductor en el robot - Coloque el reductor (l) en el bloque motor (a), a continuación gírelo todo hacia la derecha hasta...
- Page 40 10d : Embudo para salchichas (según modelo) Este accesorio se adapta al cabezal picador de metal (ma), y le permite hacer salchichas. ACCESORIOS UTILIZADOS - Embudo para salchichas (n), motor (l) y cabezal picador de metal (ma). MONTAJE DE LOS ACCESORIOS - Coloque el tornillo (m2) en su sitio en el cuerpo (m1) del cabezal picador de metal.
- Page 41 10f : : Accesorio de kebbé (según modelo) Este accesorio se adapta al cabezal picador de metal (ma), y le permite formar albóndigas de carne. ACCESORIOS UTILIZADOS Observación: este - Accesorio de kebbé (p), motor (l) y cabezal picador de metal (ma). accesorio se utiliza sin rejilla ni MONTAJE DE LOS ACCESORIOS...
- Page 42 - la conexión del aparato. - el bloqueo de cada accesorio. ¿El aparato sigue sin funcionar? Diríjase a un Servicio Técnico Autorizado TEFAL (ver lista en el folleto de Servicio). 15. Eliminación de los materiales de embalaje y del aparato El embalaje está...
- Page 43 Servicios Oficiales Post Venta donde será tratado de forma adecuada 17. Accesorios Puede personalizar el aparato y adquirir en su distribuidor habitual o en un Servicio Técnico Autorizado TEFAL, los siguientes accesorios: Disco de acero inoxidable corta patatas fritas (disco E)
- Page 44 18. Algunas recetas básicas Masa de pan blanco 500 g de harina – 300 g de agua templada – 2 sobres de levadura de pan – 10 g de sal. En el bol del robot provisto de una cuchilla de metal, introduzca la harina, la sal y la levadura de pan. Póngalo a funcionar a velocidad 2, y desde los primeros segundos, vierta el agua templada por la chimenea de la tapa.
-
Page 45: Consigli Di Sicurezza
Assistenza autorizzato TEFAL (vedere l'elenco nel libretto). - Non utilizzate l’apparecchio se la centrifuga è difettosa. - Per la sicurezza personale utilizzate solo accessori e ricambi originali TEFAL, gli unici ad essere veramente adatti al vostro apparecchio. - Utilizzate sempre i pressini per guidare gli alimenti dentro le imboccature, mai le dita, né... - Page 46 Descrizione l Riduttore per testa tritatutto Blocco motore uscita del blocco motore Testa tritatutto: selettore di velocità: posizione 0-1-2-Pulse ma: testa tritatutto in metallo (funzionamento intermittente) mb: testa tritatutto in plastica Gruppo contenitore trasparente corpo vite Pressino dosatore coltello Coperchio con imboccatura griglie (per tritare la carne) Contenitore - m4-1:...
- Page 47 Accensione - Al primo utilizzo, lavate ogni accessorio con acqua calda e La numerazione dei paragrafi detergente per piatti (vedere paragrafo pulizia). Sciacquate e asciugate. corrisponde a quella degli - Posizionate il blocco motore su una superficie piana, pulita e asciutta. schemi.
- Page 48 IMPASTARE/MESCOLARE (a seconda del modello) - Utilizzate il coltello in metallo (d1) o l'impastatore in plastica (d2) a seconda del modello. - Girate il selettore di velocità (a2) sulla posizione 2 per la messa in funzione. Potete impastare fino a: - 1 kg di pasta pesante, tra cui: pasta per pane bianco, pasta brisée…...
- Page 49 5. Emulsionare/Sbattere/Montare ACCESSORI UTILI - Gruppo contenitore (b). inserire il disco - Asta di trascinamento (c). emulsionatore - Disco emulsionatore (f). nel verso giusto: vedere schema 5. MONTAGGIO DEGLI ACCESSORI - Posizionate il contenitore (b3) sul blocco motore (a) senza fissarlo. - Inserite e fissate il disco emulsionatore (f) sull'asta di trascinamento (c) e posizionatelo sull'uscita del blocco motore (a1).
- Page 50 Consigli: - se, durante la lavorazione, parte degli ingredienti rimane attaccata alle pareti del contenitore, fermate l'apparecchio e scollegatelo. Estraete il gruppo vaso frullatore dal corpo dell'apparecchio. Con l'aiuto della spatola, fate ricadere la preparazione sulla lama. Non mettete mai le mani o le dita nel contenitore o in prossimità della lama. Potete: - preparare minestre frullate finemente, vellutate, creme, composte, milk-shake, cocktail;...
- Page 51 8. Spremere gli agrumi (a seconda del modello) ACCESSORI UTILI Gruppo spremiagrumi (g). MONTAGGIO DEGLI ACCESSORI - Inserite il trascinatore (g4) sull'uscita del blocco motore (a1). - Posizionate la vaschetta per la raccolta del succo (g3) sul blocco motore (a). - Abbassate il filtro (g2) attorno alla vaschetta di raccolta.
- Page 52 10. Tritare/impastare/estrarre (a seconda del modello) TESTA TRITATUTTO IN METALLO O IN PLASTICA ACCESSORI UTILI - Gruppo riduttore (l) e testa tritatutto (m). AL PRIMO UTILIZZO Lavate la testa tritatutto con acqua calda e detergente per piatti e asciugatela accuratamente. MONTAGGIO DEGLI ACCESSORI 10a: installazione del riduttore sull'apparecchio - Posizionate il riduttore (l) sul blocco motore (a), quindi girate verso destra fino a fine corsa.
- Page 53 10d : accessorio per salsicce (a seconda del modello) Questo accessorio si monta sulla testa tritatutto in metallo (ma) e vi consente di insaccare salsicce. ACCESSORI UTILI - Accessorio per salsicce (n), riduttore (l) e testa tritatutto in metallo (ma). MONTAGGIO DEGLI ACCESSORI - Inserite la vite (m2) nel corpo (m1) della testa tritatutto in metallo.
- Page 54 10f : accessorio per polpette (a seconda del modello) Questo accessorio si monta sulla testa tritatutto in metallo (ma) e vi consente di preparare polpette di carne. Attenzione: ACCESSORI UTILI questo accessorio si utilizza senza - Accessorio per polpette (p), riduttore (l) e testa tritatutto in metallo (ma). griglia e senza coltello.
- Page 55 11. Porta accessori : spremiagrumi: è possibile riporre il trascinatore (g4) dello spremiagrumi (g) sotto la vaschetta di raccolta (g3), per evitare di smarrirlo. 11b : il vostro apparecchio è dotato: - di un cassetto porta accessori (r) in cui è possibile riporre: il coltello in metallo (d1), l'asta di trascinamento (c), dischi taglia-verdure (e) e l'emulsionatore (f).
- Page 56 16. Apparecchi elettronici o elettrici non più utilizzabili Partecipiamo alla protezione dell’ambiente ! Il vostro apparecchio è composto da diversi materiali che possono essere riciclati. Lasciatelo in un punto di raccolta o presso un Centro Assistenza Autorizzato. 17. Accessori Potete personalizzare il vostro apparecchio procurandovi, presso il vostro rivenditore ufficiale o presso un Centro Assistenza autorizzato SEB, i seguenti accessori: disco inox taglia patatine (disco E) gruppo tritatutto...
- Page 57 18. Alcune ricette base Pasta per pane bianco 500 g di farina – 300 g di acqua tiepida – 2 bustine di lievito per pane – 10 g di sale Nel contenitore dotato di coltello in metallo versate la farina, il sale e il lievito per pane. Azionate alla velocità...
-
Page 58: Conselhos De Segurança
Parabéns por ter escolhido um aparelho da gama TEFAL concebido exclusivamente para a preparação de alimentos. Conselhos de segurança - Leia atentamente o manual de instruções antes da primeira utilização do aparelho: uma utilização não conforme ao manual de instruções liberta a Tefal de qualquer responsabilidade. - Page 59 Descrição Cabeça picadora Bloco do motor ma : : cabeça picadora de metal eixo do bloco do motor mb : : cabeça picadora de plástico selector de velocidades: posição 0-1-2-Pulse corpo (funcionamento intermitente) parafuso Conjunto da taça transparente lâmina grelhas (para picar carne) calcador doseador - m4-1 : grelha com orifícios pequenos tampa com chaminé...
-
Page 60: Colocação Em Funcionamento
Colocação em funcionamento - Antes da primeira utilização, lave todas as peças dos acessórios com água A numeração dos parágrafos quente e detergente (consulte o parágrafo referente à limpeza). Enxagúe e corresponde à numeração dos seque. desenhos. - Coloque o bloco do motor sobre uma superfície plana, limpa e seca. - Ligue o aparelho. - Page 61 AMASSAR/MISTURAR (consoante o modelo) - Utilize a lâmina de metal (d1) ou o amassador de plástico (d2) consoante o modelo. - Rode o selector de velocidade (a2) para a posição 2 para a colocação em funcionamento. Pode amassar até: - 1 kg de massa pesada, como por exemplo: massa para pão branco, massa quebrada, etc. em apenas 40s. - 800g de massa para pães especiais, como por exemplo: pão de centeio, pão integral, pão com cereais, etc.
- Page 62 5. Emulsionar/bater ACESSÓRIOS UTILIZADOS - Conjunto da taça (b). Coloque o disco - Eixo de transmissão (c). emulsionador - Disco emulsionador (f). no sentido correcto: consulte o desenho MONTAGEM DOS ACESSÓRIOS nº 5. - Coloque a taça (b3) no bloco do motor (a) sem a bloquear. - Coloque e bloqueie o disco emulsionador (f) no eixo de transmissão (c) e posicione o conjunto sobre o eixo do bloco do motor (a1).
- Page 63 Conselhos: - No decorrer da mistura, ficaram colados ingredientes nas paredes do copo, interrompa o funcionamento do aparelho e desligue-o da corrente. Retire o conjunto do copo liquidificador do corpo do aparelho. Com a ajuda da espátula, deixe cair a preparação sobre a lâmina. Nunca coloque as mãos ou os dedos no copo ou na proximidade da lâmina.
- Page 64 8. espremer citrinos (consoante o modelo) ACESSÓRIOS UTILIZADOS Conjunto espremedor de citrinos (g). MONTAGEM DOS ACESSÓRIOS - Coloque o eixo (g4) sobre a saída do bloco do motor (a1). - Coloque o recipiente para sumos (g3) no bloco do motor (a). - Coloque o filtro (g2) sobre o recipiente.
- Page 65 10. Picar/moldar/extrair (consoante o modelo) CABEÇA PICADORA DE METAL OU CABEÇA DE PLÁSTICO ACESSÓRIOS UTILIZADOS - Conjunto do redutor (l) e cabeça picadora (m). ANTES DA PRIMEIRA UTILIZAÇÃO Lave a cabeça picadora com água quente e detergente e seque-a cuidadosamente. MONTAGEM DOS ACESSÓRIOS 10a : Colocação do redutor no robot - Coloque o redutor (l) no bloco do motor (a) e, de seguida, rode-o para a direita até...
- Page 66 10d : : Funil para salsichas (consoante o modelo) Este acessório adapta-se à cabeça picadora de metal (ma) e permite-lhe confeccionar salsichas. ACESSÓRIOS UTILIZADOS - Funil para salsichas (n), redutor (l) e cabeça picadora de metal (ma). MONTAGEM DOS ACESSÓRIOS - Coloque o parafuso (m2) no devido lugar no corpo (m1) da cabeça picadora de metal.
- Page 67 10f : Acessório para almôndegas (consoante o modelo) Este acessório adapta-se à cabeça picadora de metal (ma) e permite-lhe confeccionar pequenas almôndegas. ACESSÓRIOS UTILIZADOS Observação: este - Acessório para almôndegas (p), redutor (l) e cabeça picadora de metal (ma). acessório é utilizado grelha nem MONTAGEM DOS ACESSÓRIOS...
- Page 68 - a ligação do aparelho. - o bloqueio de cada acessório. O seu aparelho continua sem funcionar? Dirija-se a um Serviço de Assistência Técnica TEFAL (ver lita no folheto anexo) 15. Eliminação dos materiais da embalagem e do aparelho A embalagem contém exclusivamente materiais que não constituem um perigo para o meio ambiente, passíveis de serem eliminados em conformidade com as disposições de reciclagem em vigor.
- Page 69 17. Acessórios Pode personalizar o aparelho de acordo com as suas necessidades adquirindo junto do seu revendedor habitual ou num Serviço de Assistência Técnica autorizado TEFAL os seguintes acessórios: Disco em inox para cortar batatas fritas (disco E) Conjunto da picadora: - Lâmina...
- Page 70 18. Algumas receitas simples Massa para pão branco 500g de farinha – 300g de água morna – 2 saquetas de fermento de padeiro 10g de sal. Na taça do robot equipada com a lâmina de metal, deite a farinha, o sal e o fermento de padeiro. Coloque o aparelho a funcionar na velocidade 2, e passados alguns segundos, deite a água morna pela chaminé...
- Page 71 Özel olarak gıda hazırlama amaçlı üretilmiş olan TEFAL ürünlerinden birini tercih ettiğiniz için teşekkür ederiz. Güvenlik tavsiyeleri - Cihazınızın ilk kullanımından önce kullanım kılavuzunu dikkatle okuyunuz: kullanım kılavuzuna uygun olmayan her türlü kullanım TEFAL’i her türlü sorumluluktan muaf tutacaktır. - Çocukların ve engelli kişilerin bu cihazı gözetimsiz kullanmasına izin vermeyin.
- Page 72 Tanım Kıyma başlığı motor ünitesi Motor Ünitesi motor ünite çıkışı Kıyma başlığı hız ayar düğmesi: 0-1-2-Pulse ma : metal kıyma başlığı (aralıklı çalışma) seviyeleri mb : plastik kıyma başlığı Saydam hazne ünitesi gövde vida doz ayarlamalı itici parça bıçak baca tipi çıkıntılı kapak diskler (etin kıyılması...
- Page 73 Çalıştırma - İlk kullanımdan önce, bütün parçaları sabunlu sıcak su ile Paragraflardaki numaralar şemalardaki yıkayınız (temizlik bölümüne bakınız). Durulayınız numaralara karşılık gelmektedir. kurulayınız. - Motor ünitesini düz, temiz ve kuru bir zemin üzerine yerleştiriniz. - Cihazınızın fişini prize takınız. - Pulse (aralıklı çalışma) : (a2) düğmesini hazırladığınız bazı gıdaların daha iyi karışması...
- Page 74 YOĞURMA / KARIŞTIRMA (modele göre) - Modele göre metal bıçağı (d1) veya plastik hamur karıştırıcıyı (d2) kullanın. - Çalıştırmak için hız ayar düğmesini (a2) kademe 2’ ye getirin. Aşağıda belirtilen miktarları aşmadan yoğurma yapabilirsiniz : - 1 kg ağır hamur, örneğin : beyaz ekmek hamuru, tart hamuru… 40sn’yede - 800gr özel ekmek hamuru, örneğin: çavdar ekmeği, , kepekli ekmek, tahıl ekmeği…...
- Page 75 KARIŞTIRMA İŞLEMİ/ DÖVME/ ÇIRPMA GEREKLİ AKSESUARLAR - Hazne ünitesi (b). karıştırıcı diski - İtici mil (c). doğru yönde - Karıştırıcı diski (f). takınız : 5 numaralı şemaya bakınız. AKSESUARLARIN MONTAJI - Hazneyi (b3) motor bloğunun (a) üzerine kilitlemeden yerleştirin. - Karıştırıcı diski (f) itici mil (c) üzerine yerleştirin ve kilitleyin ve tümünü motor ünitesi çıkışına (a1) yerleştirin.
- Page 76 Öneriler - mélanger toutes les pâtes fluides (crêpes, beignets, clafoutis, far).- Karıştırma esnasında haznenin kenarlarında malzemeler kalırsa, cihazı durdurun ve fişini çekin. Karıştırıcı hazne ünitesini cihazdan çıkarın. Spatula yardımı ile karışımı kesici bıçak üzerine alın. Ellerinizi veya parmaklarınızı asla haznenin içine yada kesici bıçağın yakınlarına sokmayın..
- Page 77 NARENCİYE SIKMA (modele göre) KULLANILACAK AKSESUARLAR Narenciye sıkacağı ünitesi (g). AKSESUARLARIN MONTAJI - İtici mili (g4) motor ünitesi çıkışının (a1) üzerine oturtun. - sıkılan suyun birikme haznesini (g3), motor ünitesi (a) üzerine yerleştirin. - Filtreyi (g2) birikme haznesi etrafına indirin. - Koniyi (g1) birikme haznesi (g3) üzerine yerleştirin, daha sonra hepsini sağa doğru tamamen durana kadar döndürün.
- Page 78 KIYMA / ŞEKİLLENDİRME / ÇEKME (modele göre) METAL KIYMA BAŞLIĞI VEYA PLASTİK BAŞLIK KULLANILACAK AKSESUARLAR - Motor ünitesi (l) ve kıyma başlığı (m). İLK KULLANIMDAN ÖNCE Kıyma başlığını sıcak sabunlu su ile yıkayınız ve hemen ardından özenle kurulayınız. AKSESUARLARIN MONTAJI 10a : Redüktörün robot üzerine yerleştirilmesi - Redüktörü...
- Page 79 10d : Sosis hunisi (modele göre) Bu aksesuar metal kıyma başlığı (ma) üzerine monte edilir ve sosis yapmanıza olanak sağlar. KULLANILAN AKSESUARLAR - Sosis hunisi (n), redüktör (l) ve metal kıyma başlığı (ma). AKSESUARLARIN MONTAJI - Vidayı (m2) metal kıyma başlığının gövdesindeki (m1) yerine koyun. - Huniyi (n) ve somunu (m5) yerleştirin ve çok güçlü...
- Page 80 10f : kebbe aksesuarı (modele göre) Bu aksesuar metal kıyma başlığına (ma) adapte edilir ve küçük köfteler elde etmenizi sağlar. KULLANILACAK AKSESUARLAR Uyarı : bu - Kebbe aksesuarı (p), redüktör (l) ve metal kıyma başlığı (ma). aksesuar AKSESUARLARIN MONTAJI ızgarasız ve - Vidayı...
- Page 81 Cihazınız çalışmıyorsa aşağıdaki hususları kontrol ediniz: - cihazınızın elektrik bağlantısını. - her aksesuarın kilitlenmiş olmasını. Cihazınız hala çalışmıyor mu? En yakın TEFAL yetkili servisine başvurunuz (Servis kitapçığındaki listeye bakınız). 15. Cihazın ve paketinin ambalaj malzemeleri Ambalaj çevreye zararı olmayan özel malzemeler içermektedir, yürürlükteki geri dönüşüm koşullarına uygun olarak atılabilirler.
- Page 82 16. Aksesuarlar Cihazınızı, satıcınızdan veya yetkili bir TEFAL servisinden aşağıdaki aksesuarları temin ederek size özel kılabilirsiniz: Paslanmaz kızartmalık patates kesici disk (disk E) Paslanmaz Hindistan cevizi, parmesan peyniri rendeleyici disk (disk G) Paslanmaz kalın rendeleme/dilimleme diski (disk C/H) Paslanmaz ince rendeleme/dilimleme diski (disk A/D) Öğütücü...
- Page 83 Tart hamuru 200gr un – 100gr tereyağı– 50ml su (50gr) – bir tutam tuz Metal bıçaklı robot haznesi içerisine, unu, tuzu ve tereyağı koyun. 2 numaralı hız kademesinde birkaç saniye çalıştırın, ardından kapağın besleme haznesinden ılık suyu ekleyin. Hamur top halini alana kadar (20 sn) robotu çalıştırın. Serin bir yerde en az 1 saat bekletin ardından yayın ve istediğiniz malzemeyle pişirin.
-
Page 84: Οδηγίες Για Την Ασφάλεια
Οδηγίες για την ασφάλεια - ∆ιαβάστε προσεκτικά τις οδηγίες χρήσεως πριν χρησιµοποιήσετε για πρώτη φορά τη συσκευή σας: η TEFAL δεν φέρει καµία ευθύνη σε περίπτωση που δεν χρησιµοποιήσετε τη συσκευή σύµφωνα µε αυτές τις οδηγίες χρήσεως. - Μην αφήνετε τη συσκευή σας να λειτουργεί χωρίς επίβλεψη ιδιαίτερα ταν... - Page 85 Περιγραφή Μύλος Σώµα συσκευής Καπάκι Έξοδος σώµατος συσκευής Μπολ Πλήκτρο επιλογής ταχύτητας: θέση 0-1-2-Pulse (διακεκοµµένη Μειωτήρας για κεφαλή λειτουργία) κ πτη ∆ιαφανές µπολ Κεφαλή κ πτη Πιεστήρας µε δοσοµµετρητή ma : µεταλλική κεφαλή κ πτη Καπάκι στοµίου τροφοδ τησης mb : πλαστική κεφαλή κ πτη Μπολ...
- Page 86 Λειτουργία - Πριν απ την πρώτη χρήση, πλύνετε λα τα εξαρτήµατα των Η αρίθµηση των παραγράφων αξεσουάρ µε ζεστή σαπουνάδα (βλέπε σχετική παράγραφο για αντιστοιχεί στην αρίθµηση των τον καθαρισµ ). Ξεπλύνετε και στεγνώστε . σχεδίων που βρίσκονται εντ ς - Τοποθετήστε...
- Page 87 ΖΥΜΩΜΑ / ΑΝΑΜΙΞΗ (ανάλογα µε το µοντέλο) - Χρησιµοποιείτε τη µεταλλική λεπίδα (d1) ή τον πλαστικ ζυµωτήρα (d2) (ανάλογα µε το µοντέλο). - Γυρίστε το πλήκτρο επιλογής ταχύτητας (a2) στη θέση 2 για να βάλετε τη συσκευή σε λειτουργία. Μπορείτε να ζυµώνετε µέχρι: - 1 kg βαριάς...
- Page 88 ΠΑΡΑΣΚΕΥΗ ΚΡΕΜΑΣ / ΧΤΥΠΗΜΑ ΑΞΕΣΟΥΑΡ ΠΡΟΣ ΧΡΗΣΗ - ∆ιαφανές µπολ (b). - Στήριγµα (c). Βάλτε το - ∆ίσκος παρασκευής κρέµας (f). δίσκο παρασκευής κρέµας ΣΥΝΑΡΜΟΛΟΓΗΣΗ ΤΩΝ ΑΞΕΣΟΥΑΡ απ τη σωστή µεριά: - Τοποθετήστε το µπολ (b3) στο σώµα συσκευής (a) χωρίς να το ασφαλίσετε. βλέπε...
- Page 89 Χρήσιµες συµβουλές: - Κατά τη διάρκεια της ανάµιξης, αν κολλήσουν υλικά στα τοιχώµατα της κανάτας, σταµατήστε τη συσκευή και βγάλτε το φις απ την πρίζα. Αφαιρέστε το µπλέντερ απ το σώµα της συσκευής. Χρησιµοποιώντας τη σπάτουλα ρίξτε το µείγµα πάνω στη λεπίδα. Μη βάζετε ποτέ τα χέρια ή τα δάκτυλα...
- Page 90 ΣΤΙΨΙΜΟ ΕΣΠΕΡΙ∆ΟΕΙ∆ΩΝ (ανάλογα µε το µοντέλο) ΑΞΕΣΟΥΑΡ ΠΡΟΣ ΧΡΗΣΗ Στίφτης εσπεριδοειδών (g). ΣΥΝΑΡΜΟΛΟΓΗΣΗ ΤΩΝ ΑΞΕΣΟΥΑΡ - Τοποθετήστε τον οδηγ (g4) στην έξοδο σώµατος συσκευής (a1). - Τοποθετήστε την υποδοχή χυµού (g3) στο σώµα συσκευής (a). - Κατεβάστε το φίλτρο (g2) γύρω απ την υποδοχή. - Τοποθετήστε...
- Page 91 ΨΙΛΟΚΟΨΙΜΟ / ∆ΙΑΜΟΡΦΩΣΗ / ΕΞΑΓΩΓΗ (ανάλογα µε το µοντέλο) ΜΕΤΑΛΛΙΚΗ Ή ΠΛΑΣΤΙΚΗ ΚΕΦΑΛΗ ΚΟΠΤΗ ΑΞΕΣΟΥΑΡ ΠΡΟΣ ΧΡΗΣΗ - Mειωτήρας για κεφαλή κ πτη (l) και κεφαλή κ πτη (m). ΠΡΙΝ ΑΠΟ ΤΗΝ ΠΡΩΤΗ ΧΡΗΣΗ Πλύνετε την κεφαλή κ πτη µε σαπουνάδα και σκουπίστε την αµέσως µε προσοχή. ΣΥΝΑΡΜΟΛΟΓΗΣΗ...
Need help?
Do you have a question about the Vitacompact FP413DAD and is the answer not in the manual?
Questions and answers