Table of Contents
Advertisement
Advertisement
Table of Contents

Related Manuals for Custom Works Outlaw 4

Summary of Contents for Custom Works Outlaw 4
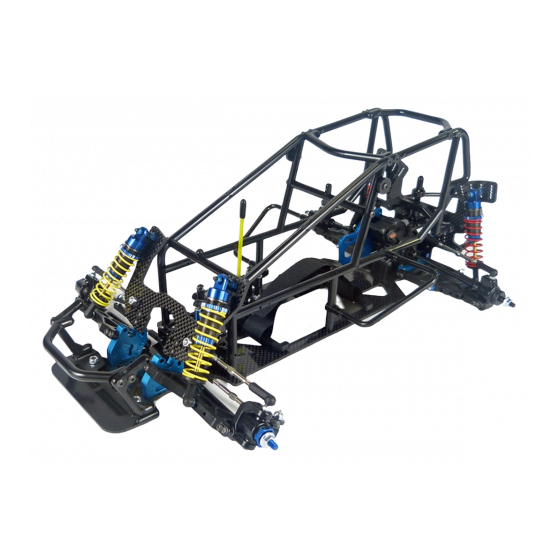
- Page 2 Thank you for purchasing the Outlaw 4 Sprint Car! The Outlaw sprint car platform has been developed for loose dirt buggy tire racing. In this kit you will find the 4 evolution of the car which features several improvements including a new 2.6 to 1 transmission and front and rear axles for hex wheels.
- Page 3 Front Kick-Up Assembly Caster Block Assembly Steering Block Assembly...
- Page 4 Front Shock Tower Assembly Bellcranks Steering/Front Camber Links...
- Page 5 Front Bumper Assembly Servo Assembly Servo Mounting...
- Page 6 Rear Adjustable Arm Assembly Rear Suspension Mount Assembly...
- Page 7 Differential Assembly...
- Page 8 Transmission Assembly...
- Page 9 Transmission Assembly continued Rear Shock Tower Assembly Rear Hub Carrier Assembly...
- Page 10 Rear Camber Link Assembly Drivetrain (CVA) Assembly Shock Assembly...
- Page 11 Shock Assembly continued...
- Page 12 Shock Mounting Electronics Mounting...
- Page 13 Cage Assembly...
- Page 14 Cage Assembly continued...
- Page 15 Cage Attachment Body Assembly Body pieces are shown painted for ease of viewing. Trim pieces and drill all holes BEFORE painting. On most pieces, a protective green film will keep overspray from getting on the outside of the body. Clean pieces with a mild detergent and dry before painting.
- Page 16 2. Nose piece continued – Remove the front nerf bar and install the nose piece as shown. Mark the location of the 2 front nerf bar holes on each side and then drill with a .125 drill. The optional low downforce nose piece can also be prepared in a similar manner.
- Page 17 6. Top wing – build the top wing using the instructions included. Mount in the location shown on the cage. 7. Front wing – Assemble the frontwing and mount to the front nerf bar uprights as shown. Congratulations! The assembly process is nearly complete. Install wheels and tires of your choice using the included wheel nuts.
- Page 18 2. Shocks If tires are 50% of handling, shocks are probably the next 30%. Now that you’ve done all the work to make a great set of tires, it’s the shock’s job to keep them on the track as much as possible. We’ve found the 6lb rear and 5lb front springs to be the best combination for this car and honestly we don’t change them too often.
- Page 19 in on the right rear. To help the car turn more, try 6 degrees in on the left and 1 degree out on the right. To make the car drive straighter try 3 degrees in on the left rear and 2 degrees in on the right rear. This is also a very easy adjustment to make before a race to quickly adapt to a changing track surface.
Need help?
Do you have a question about the Outlaw 4 and is the answer not in the manual?
Questions and answers