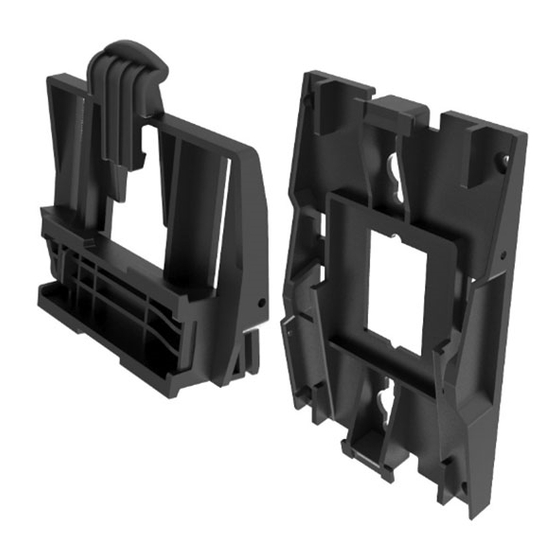
Mitel 6800i Series Installation Manual
Hide thumbs
Also See for 6800i Series:
- Administrator's manual (1008 pages) ,
- Release notes (74 pages) ,
- Quick start manual (2 pages)
Table of Contents
Advertisement
Quick Links
Advertisement
Table of Contents

Summary of Contents for Mitel 6800i Series
- Page 1 Mitel 6800i Series Wall Mount Kit Installation Guide 41-001518-00 REV00 – 10.2014...
-
Page 2: Software License Agreement
Software in object form solely with the Equipment for which the Software was intended. This Product may integrate programs, licensed to Mitel by third party Suppliers, for distribution under the terms of this agreement. These programs are confidential and proprietary, and are protected as such by copyright law as unpublished works and by international treaties to the fullest extent under the applicable law of the jurisdiction of the Customer. -
Page 3: Table Of Contents
Content Software License Agreement ................ii Welcome . -
Page 4: Welcome
About This Guide This manual describes how to physically install your 6800i Series IP Phone to a wall using the 6800i Series Wall Mount Kit. Contact your System Administrator if you have any additional questions with regards to the 6800i Series Wall Mount Kit or your 6800i Series IP Phone. -
Page 5: Wall Mount Kit Parts
Wall Mount Kit Parts When you unpack the 6800i Series Wall Mount Kit package, you should ensure that you have all of the following items. If any part is missing, contact the supplier of your phone. Regulatory/ Wall Mount Handset Hook... -
Page 6: Installation
Installation The 6800i Series Wall Mount Kit can be used to mount your 6800i Series IP Phone to the wall in one of two ways: • Directly to the wall • On top of an existing telco wall plate Direct Wall Mount Installation... - Page 7 Wall Mount Base to the wall. Note: Depending on the wall type, you may need to use wall anchors. Wall anchors are included with your 6800i Series Wall Mount Kit On the back of your phone, connect the provided Ethernet cable into the network port marked with .
- Page 8 Installation Gently slide the Wall Mount Connector attached to your phone into the Wall Mount Base until it snaps into place. Use the figure below as a guideline (viewed from the right side). 10° Orientation 20° Orientation (Optional) Insert the locking screw into the Screw Lock Hole located on the right side of the Wall Mount Connector and gently tighten using a Philips-head screwdriver to secure the Wall Mount Connector to the Wall Mount Base.
-
Page 9: Telco Wall Plate Installation
Installation Telco Wall Plate Installation To mount your phone on top of an existing telco wall plate: Separate the Wall Mount Connector from the Wall Mount Base by pulling the Release Lever (on the Wall Mount Connector) in and pulling the Wall Mount Connector up. Locate the wall mount insertion area on the back of the phone (above the various ports). - Page 10 Installation Using the handset hook rotating tool, rotate the handset hook 180° as illustrated in the figure below. The handset hook is now in the correct position ensuring that your phone’s handset securely stays on hook when the phone is mounted to the wall. If possible, loosen the screws from the existing telco wall plate enough so that the Wall Mount Base is able to slide in place.
- Page 11 Installation The orientation of the Wall Mount Base determines the viewing angle of the phone. Use the degree markings on the Wall Mount Base to select the viewing angle, overlay the Wall Mount Base on top of the telco wall plate with the desired angle facing up, and pull down to secure the Wall Mount Base in place.
- Page 12 Installation Gently slide the Wall Mount Connector attached to your phone into the Wall Mount Base until it snaps into place. Use the figure below as a guideline (viewed from the right side). 10° Orientation 20° Orientation (Optional) Insert the locking screw into the Screw Lock Hole located on the right side of the Wall Mount Connector and gently tighten using a Philips-head screwdriver to secure the Wall Mount Connector to the Wall Mount Base.
-
Page 13: Dismounting The Phone
Dismounting the Phone To dismount the installed phone from the wall mount: Locate and place your fingers on the Release Lever (on the Wall Mount Connector) and with your thumb on the top front of the phone press the Release Lever firmly towards you. ✓... -
Page 14: Limited Warranty
(1) year period from the date of original purchase (“Warranty Period”). If there is a defect or malfunction, Mitel shall, at its option, and as the exclusive remedy, either repair or replace the product at no charge, if returned within the Warranty Period. -
Page 15: Limited Warranty (Australia Only)
Part 5-4 of Schedule 2 to the Competition and Consumer Act 2010 (the ACL), the exercise of a right conferred by such a provision or any liability of Mitel in relation to a failure to com- ply with a guarantee that applies under Division 1 of Part 3-2 of the ACL to a supply of goods or services. -
Page 16: Services
Mitel in relation to a failure to comply with a guarantee that applies under Division 1 of Part 3-2 of the ACL to a supply of goods or services. - Page 17 While every effort has been made to ensure accuracy, Mitel will not be liable for technical or editorial errors or omissions contained within this documentation. The information contained in this documentation is subject to change without notice.


Need help?
Do you have a question about the 6800i Series and is the answer not in the manual?
Questions and answers