Advertisement
Quick Links
Instructions for Installation and Operation
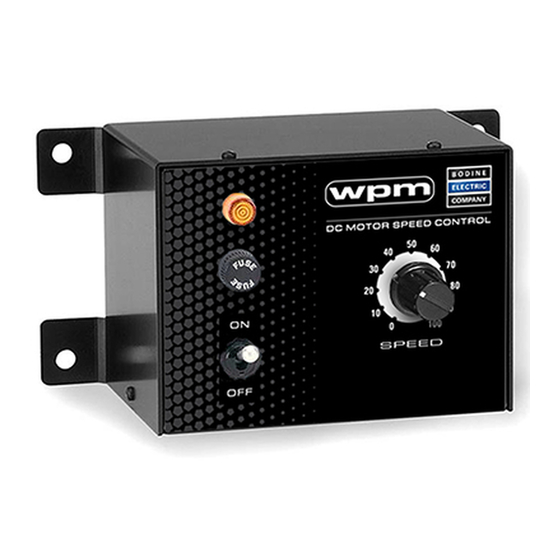
Type WPM Filtered PWM Speed Controls for Permanent Magnet DC Brush Motors
• Models 0790 & 0791, NEMA 1 enclosure
SPECIFICATIONS
Input Voltage
Maximum Input Current, Continuous
Model 0790
Model 0791
Output Voltage
Ambient Temperature
Maximum Output Current, Continuous
Model 0790
Model 0791
Maximum Output Current, Peak
Model 0790
Model 0791
Speed Regulation
Acceleration/Deceleration Time
Means for Speed Adjustment
Means for Drive Inhibit
Diagnostics
* Thermal rating only. Actual max. continuous output current is 1.25 Amps.
INSTALLATION
WARNING: This control should only be installed by a qualified person familiar with
its operation and associated hazards. The National Electrical Code (NEC), local
electrical and safety codes, and when applicable, the Occupational Safety and
Health Act (OSHA) should be observed to reduce hazards to personnel and property.
Step 1: Mounting the Control
The control may be mounted using any two or all four mounting holes. The mounting
holes have clearance for 1/4-20 or M6 screws.
Step 2: Preliminary Setup
HORSEPOWER & ACCELERATION SELECTOR SWITCHES–Control models 0790 and
0791 are packaged with the enclosure cover unattached. Remove the cover to set
the horsepower and acceleration selector switches. Figure 4 shows the location of
a bank of 8 dip switches. Set switches 1 through 6 to match the type, speed, and
current ratings on the Bodine motor nameplate per Figure 2 (consult Bodine on
settings for non-Bodine motors). Set switches 7 and 8 to select the acceleration/
deceleration time range per Figure 3.
Step 3: Electrical Connections
The enclosure cover must be removed as shown in Figure 4 to make the electrical
connections.
WARNING–All parts of the circuit operate at voltages capable of causing
serious injury or death.
WARNING–The AC power line to the control should be the last connection made.
CAUTION–The control board signal common is not at ground potential. Any
external signal or equipment connected to the control must be electrically
isolated from ground.
INHIBIT SWITCH (OPTIONAL)–A mechanical switch or relay with contacts rated
for low voltage may be connected to terminals "H1" and "H2". With the switch
open, the motor will run. With the switch closed, the motor will coast to a stop.
WARNING–The inhibit switch should not be used to disable motor or control
when servicing these or driven equipment. Disconnect the AC power instead.
201 Northfield Road | Northfield Illinois, 60093, U.S.A. | Phone 773.478.3515 | www.bodine-electric.com | info@bodine-electric.com
115 VAC ±10%, 50/60 Hz, single phase
2.5 Amps RMS
5.7 Amps RMS
0-130 VDC
0-40° C.
2.00 Amps DC*
3.20 Amps DC
2.20 Amps DC
5.00 Amps DC
1% of rated speed
obtainable with most motors
Adjustable, 0.1-15 seconds
10K Ohm potentiometer
switch closure
green power LED, red current limit LED
FIGURE 1–Control mounting dimensions
3.63 REF.
.109
MIN.
FIGFIGURE 2–Setup of Dip Switches 1 through 6
Motor Ratings
Armature
Motor
RPM@
Motor Rated
Control
Type
130V
1
Amps
24A0
2500
0.22
24A2
2500
24A4
2500
0.48
24A4
2500
.56 | .81
Model
33A3
2500
.78 | 1.0
0790
33A3
2500
0.74
33A3
2000
0.71
33A5
2500
0.91
42A3
2500
42A4
2000
24A4
11500
33A3
2500
0.74
33A3
2500
.78 | 1.0
33A3
2000
0.71
33A5
2500
1.4(1.3) | 1.8(1.7)
33A5
2000
33A5
2500
0.91
Model
33A7
2500
1.8 | 2.4
0791
42A3
2500
42A4
2000
42A5
2500
1.9 | 1.8
42A5
2500
42A5
2500
42A7
2500
42A7
2500
42A7
2500
FIGURE 3–Setup of dip switches 7 and 8
Switches
Acceleration/Deceleration Time Range (seconds)
7
8
ACC pot fully CCW (factory setting)
Off
Off
Off
On
On
Off
On
On
1. For armature speed of a geared motor, multiply the output speed at the driveshaft by the
gear ratio.
2. If the user desires to install their own armature fuse on the control output to protect the motor
from continuous overloads, base fuse ratings on the motor rating in this column.
3. Peak current available with TORQ pot in fully CW position (factory setting). This current exceeds
the continuous rating of the motor and is for intermittent overload conditions only.
4. Use this column for sizing a line fuse on the control input.
5. The REG potentiometer must be turned fully CCW (off) for high-speed type 24ABEPM motor.
6. Time for voltage across A1 and A2 to ramp up to 130 V when speed pot is turned from 0 to 100;
or to ramp down to 0 V when it is turned from 100 to 0. The time for a motor to accelerate from 0
to 2500 rpm or decelerate from 2500 to 0 rpm is dependent on motor size and loading conditions.
7.12 REF.
6.35 REF.
5.25 REF.
POWER
B O D I N E
R
w
wp
m
ELECTRI C
COMPANY
DC
C motor speed contro
l
.12 R.
TYP.
ON
0
1 00
SPEED
O F
72" REF.
Control Setup
Dip
Peak
Switches
Output
2
Motor HP
On
Amps
1/50
Consult Bodine Factory
0.3
1/29
1,2
0.6
1/17
1,2,3
1.0
1/23 | 1/11
3,5,6
1.2
1/16 | 1/8
2,4,5,6
2.1
1/12
3,5,6
1.2
1/12
3,5,6
1.2
1/8
2,4,5,6
2.1
1
1/8
2,4,5,6
2.0
1.3
1/6
1,2,4,5,6
2.2
1.1
1/7
3
1.7
5
1/12
1
1
1/16 | 1/8
3
1.7
1/12
1
1
1/8 | 1/4
2,3
2.0
1.4
1/6
3
1.7
1/8
3
1.7
1/6 | 1/3
3,5
4.1
1
1/8
1,3
1.9
1.3
1/6
2,3
2
3/16 | 1/4
3
1.7
1.8
1/4
3,5
4.1
2.7
1/3
3,5
4.1
2.3
1/3
2,3,5
4.9
3.4
1/2
2,3,5
5.0
3.3
7/16
2,3,5
5.0
ACC pot fully CW
.1
.5
3.5
4.0
07400213 Rev.C
1.00 TYP.
.38 TYP.
.38 TYP.
1.00 TYP.
.28 I.D.
HOLE TYP.
RoHS
COMPLIANT
Continuous
Input
3
Current
4
0.8
1.1
1.4
1.9
1.4
1.2
1.9
2.0
2.5
1.9
1.4
1.9
1.4
2.5
1.9
1.9
3.6 | 4.8
2
2.5
1.9
3.6
4.8
4.0
5.7
5.7
6
.3
2.0
12.0
15.0
Advertisement

Related Manuals for Bodine 0790


Summary of Contents for Bodine 0790
- Page 1 Disconnect the AC power instead. to 2500 rpm or decelerate from 2500 to 0 rpm is dependent on motor size and loading conditions. 201 Northfield Road | Northfield Illinois, 60093, U.S.A. | Phone 773.478.3515 | www.bodine-electric.com | info@bodine-electric.com 07400213 Rev.C...
- Page 2 SPEED REGULATION–The REG pot sets the gain of the IR compensation. It is factory- TORQ set so that the speed of most Bodine motors varies no more than 2% from no load to full load at full speed when the horsepower switches are set per Figure 2. The REG...
Need help?
Do you have a question about the 0790 and is the answer not in the manual?
Questions and answers