
Summary of Contents for Carson CG-1
- Page 1 PIEZO MINI KREISEL MIT HEADING LOCK Instruction Manual Page 2 - 21 Betriebsanleitung Seite 22 - 41 Mode d‘emploi Page 42 - 61 CARSON Gyro 507027...
-
Page 2: Preface
In the event of a product defect during the warranty period, return the product along with your receipt as proof of purchase to any CARSON store. CARSON will, at its option, unless otherwise provided by law: (a) Correct the defect by repairing the product without charging for parts and labour (b) replace the product with one of the same or similar design;... - Page 3 All replaced parts and products, and products on which a refund is made, become the property of CARSON. New or reconditioned parts and products may be used in the performance of warranty services. Repaired or replaced parts and products are warranted for the remainder of the original warranty period.
- Page 4 It is forbidden to dispose of this equipment in the household waste. We wish you lots of fun with your CARSON Gyro System! Please read this manual carefully before using your new CARSON Gyro System! CARSON Gyro 507027...
-
Page 5: Table Of Contents
10. Initialisation of the CG-1 ............15 11. Setting the gyro sensitivity ”GAIN” (dual mode).....15 12. Setting gyro sensitivity ”GAIN” (single mode) ......18 13. Setting the effective direction of your CG-1 ......19 14. Checking the gyro sensivity in flight ........20 15. Care and maintenance.............21 16. -
Page 6: Included Items
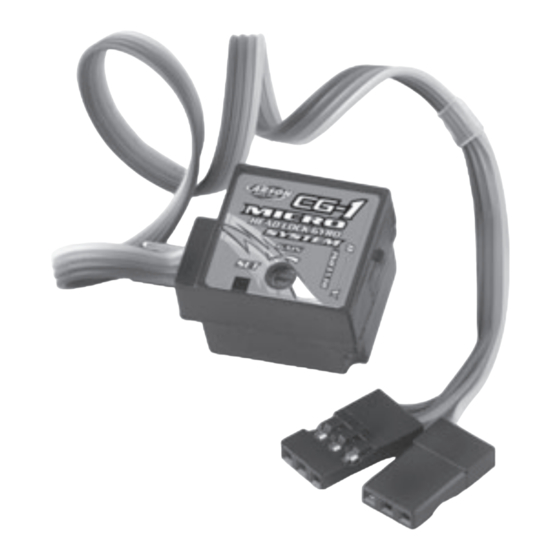
Included items 507027 Gyro 1. Description CG-1 This gyro system is a compact stabilising system which detects position changes thanks to a Piezo sensor. Via integrated electronics a downstream servo is controlled in order to counteract the position changes. Due to the compact construction, this system is ideal for a small electric helicopter. -
Page 7: Safety Instructions
Never exceed the technical limits specified for the CG-1 gyro. The product is not a toy and should be kept out of reach of children under 14 years of age! The product must not get damp or wet. -
Page 8: Before You Start
Otherwise there can be unforeseeable reactions of the model or of the servo. • Check the gyro CG-1 before every fl ight for correct function and secure fi t in the model. A loose and disconnected gyro makes the model uncontrollable. -
Page 9: Control Elements And Connections
1 Receiver connection for the tail servo 2 Receiver connection for the tail servo controller for gyro sensitivity 3 Connection plug for the tail servo 4 Set-LED 5 Potentiometer for gyro sensivity (GAIN) 6 Switching the servo rotation direction CARSON Gyro 507027... -
Page 10: Installation Of The Cg-1 Gyro-System
In addition, the gyro is connected to another receiver output ”GAIN“ (2) via which the sensitivity regulation is later carried out. 6. Installation of the CG-1 Gyro system When installing the gyro, ensure that you select a place of instal- lation where the gyro is well protected from vibrations and heat fluctuations (picture page 11). - Page 11 The settings controller and the slide switches must be easily accessible from the side. The cables connected to the gyro must be laid so that they cannot be caught in rotating parts of the mechanics or be worn out on sharp edges. CARSON Gyro 507027...
-
Page 12: Installation Of The Tail Servo
Observe an absolutely smooth and at the same time free-of-clearance control of the tail rotor. Because only if the smallest of servo deflections trigger a control reaction on the model, the gyro can work to its optimum. CARSON Gyro 507027... -
Page 13: Connecting The Cg-1 Gyro
8. Connecting the CG-1 Gyro Connect the gyro with a 3-pin connection cable (1) to the receiver output for the tail servo. The connections are: Brown = minus = plus Orange = pulse Connect the 1-pin normal input (yellow) of the gyro (2) with a free channel which is controlled on the sender with a sliding controller. -
Page 14: Operating The Cg-1 Gyro
(see page 9, Pos. 5) and the gyro works in the heading lock operating mode only. 9. Operating the CG-1 Gyro Before you launch the gyro for the first time, all tail mixed programs programmed in the sender, such as revolution mix or gyro hide mixer, must first be deactivated. -
Page 15: Initialisation Of The Cg-1
11. Setting the gyro sensitivity ”GAIN” (dual mode) The sensitivity of the gyro CG-1 system is 0 - 100% and can be set best with a roll bar (dispenser). For the sensitivity settings of 0%, the stabilising effect of the gyro is deactivated and at 100% the highest gyro sensitivity achieved. - Page 16 The sliding controller should be set so that the gyro works at about 75% of sensitivity in ”normal mode”. The sensor route is then at approx. 12.5%. 100% 100% 100% 100% CARSON Gyro 507027...
- Page 17 Tip: The required settings of gyro CG-1 sensitivity for the initial flight depends very strongly from the respective model and from the servo used. The better quality and faster the connected servo is, the greater the maximum flyable gyro sensitivity.
-
Page 18: Setting Gyro Sensitivity "Gain" (Single Mode)
12. Setting gyro sensitivity ”GAIN” (single mode) Gyro CG-1 sensitivity in single mode is set on the gain controller of the gyro (5). Use a suitable screwdriver. If the controller is turned right to the left, the gyro sensiti- vity is 0%. If the controller is turned right to the right, the gyro sensitivity is 100%. - Page 19 If the rotation direction for the tail servo created by the gyro CG-1 runs precisely against the directions as illustrated, you can change the rotation direction of the tail servo. The switch reacts to the rotation direction created by the gyro only.
-
Page 20: Checking The Gyro Sensivity In Flight
14. Checking the gyro sensivity in flight Warning!!! Before you start the model on the airfield, allow the gyro CG-1 to warm up to ambient temperature with a receiving system turned on. Switch the received off after approx. 5 minutes and then back on again. -
Page 21: Care And Maintenance
15. Care and maintenance The exterior of the gyro CG-1 may be cleaned with a soft, dry cloth or a brush only. Never use aggressive cleansing agents or chemical solvents, since this might damage the surfaces. Disposal Dispose of the product at the end of its lifecycle in accordance with the applicable legal regulations. -
Page 22: Vorwort
Bewahren Sie diese Anleitung zum Nachlesen auf und für die eventuelle Weitergabe des Modells an Dritte. Garantiebedingungen Für dieses Produkt leistet CARSON eine Garantie von 24 Monaten betreffend Fehler bei der Herstellung in Bezug auf Material und Fertigung bei normalem Gebrauch ab dem Kauf beim autorisierten Fachhändler. - Page 23 (c) den Kaufpreis erstatten. Alle ersetzten Teile und Produkte, für die Ersatz geleistet wird, werden zum Eigentum von CARSON. Im Rahmen der Garantie- leistungen dürfen neue oder wiederaufbereitete Teile verwendet werden. Auf reparierte oder ersetzte Teile gilt eine Garantie für die Rest- laufzeit der ursprünglichen Garantiefrist.
- Page 24 Land zu Land verschiedene Geltend- machung anderer Ansprüche denkbar. Eine Entsorgung über den Hausmüll ist untersagt! Wir wünschen Ihnen viel Spaß mit Ihrem CARSON Gyro System! Vor dem Gebrauch Ihres neuen Carson Gyro Systems lesen Sie bitte dieses Handbuch sorgfältig durch! CARSON Gyro 507027...
- Page 25 3. Vor Inbetriebnahme..............28 4. Nach bzw. während des Betriebes ........28 5. Bedienelemente und Steckanschlüsse ........29 6. Installation des CG-1 Gyro-Systems ........30 7. Installation des Heckservos ........... 32 8. Anschluss des CG-1 Gyro ............33 9. Betrieb des CG-1 Gyro ............34 10.
-
Page 26: Lieferumfang
CG-1 Gyro System ideal für kleine Elektrohubschrauber geeignet. Es kann aber auch in größeren Hubschraubern oder Flugmodellen eingesetzt werden. • Der CG-1 kann im Normal-Modus oder im Heading Lock- Modus betrieben werden. • Beim Normalmodus korrigiert das am Gyro angeschlossene Servo nur solange, wie auch eine Drehbewegung des Modells vom Gyro erkannt wird. -
Page 27: Sicherheitshinweise
Luftschrauben und Rotorblättern darauf, dass sich niemals Körperteile oder Gegenstände im Dreh- und Ansaugbe- reich des Propellers/Rotors befinden. Überschreiten Sie niemals die technischen Grenzen des CG-1 Gyros. Das Produkt ist kein Spielzeug, es ist nicht für Kinder unter 14 Jahren geeignet. -
Page 28: Vor Inbetriebnahme
3. Vor Inbetriebnahme • Bitte installieren Sie den CG-1 Gyro so in Ihr Modell, dass Schwingungen, Vibrationen und Erschütterungen ferngehalten werden. • Die Funktionssicherheit Ihres Modells und der Fernsteuer- anlage muss immer gewährleistet sein. Kontrollieren Sie dabei auch sämtliche Kabel, Stecker usw. auf sichtbare Beschädigungen. -
Page 29: Bedienelemente Und Steckanschlüsse
über längere Zeit der direkten Sonneneinstrahlung oder großer Hitze aus. 5. Bedienelemente und Steckanschlüsse 1 Empfängerstecker für Heckservo 2 Empfängerstecker für Kreiselempfi ndlichkeit 3 Gyro-Anschluss für Heckservo 4 Set-LED 5 Einstellpoti für Kreisel - empfi ndlichkeit (GAIN) 6 Servoreverse der Servo-Drehrichtung CARSON Gyro 507027... -
Page 30: Installation Des Cg-1 Gyro-Systems
Sie worauf beim Einbau und beim Betrieb besonders zu achten ist. Nur so lassen sich Fehlfunktionen oder Beschädigungen vermeiden. Der Empfängerstecker (1) des CG-1 Gyro´s wird am Empfänger für das Heckservo angeschlossen. Das Heckservo selbst wird direkt am CG-1 Gyro System Am Gyroanschluss (3) angesteckt (Abbildung Seite 29). - Page 31 Zur Befestigung verwenden Sie ausschließlich doppelseitig klebende Schaumstoffpads (9). Parallel zur Hauptrotorwelle verläuft dann die Stabilisierungsachse des CG-1 Gyro´s (10). Achtung!!! Bitte berücksichtigen Sie bei der Montage, das die Einstellregler sowie die Schiebeschalter leicht von der Seite her zugänglich sein müssen.
-
Page 32: Installation Des Heckservos
7. Installation des Heckservos Achtung wichtig! Um die volle Wirkung des CG-1 Kreisels zu erzielen, müssen in der Neutral- stellung der Servohebel (12) und das Anlenk gestänge (13) im 90°-Winkel zueinander stehen. Die Installation des Heckservos (11), sowie die Ausschläge/Einstellung... -
Page 33: Anschluss Des Cg-1 Gyro
8. Anschluss des CG-1 Gyro Schließen Sie den CG-1 mit dem 3poligen Anschlusskabel (1) am Empfängersteckplatz für das Heckrotorservo an. Die Kontakte sind: Braun = Minus = Plus Orange = Impuls Den 1poligen Regeleingang (gelbes Kabel) verbinden Sie an einem freien Empfängersteckplatz (2) der am Sender mit einem Schiebe-... -
Page 34: Betrieb Des Cg-1 Gyro
Einstellung der Empfindlichkeit kann dann nur noch über den Drehpoti des Gyro (siehe Seite 29, Pos 5) eingestellt werden. 9. Betrieb des CG-1 Gyro Ehe der CG-1 zum ersten mal in Betreib genommen wird, müssen alle im Sender programmierten Heckservo-Mixprogramme oder Kreisel-Ausblendmischer deaktiviert werden. -
Page 35: Initialisierung Des Cg-1
11. Justierung der Empfindlichkeit „GAIN“ (Im Dual-Modus) Die Empfindlichkeit des CG-1 Gyro-Systems lässt sich am Sender am besten über einen Schieberegler von 0 - 100% einstellen. Bei der eingestellten Empfindlichkeit von 0% ist die stabilisierende Wirkung des Gyro´s abgeschaltet und bei 100% ist die höchste Empfindlichkeit justiert. - Page 36 Rundflug und für den Kunstflug eine individuelle Empfindlichkeit des CG-1 programmiert werden. Um zu prüfen, ob der CG-1 Gyro bei der jeweiligen Geber-Einstel- lung in der richtigen Betriebsart arbeitet, schalten Sie zunächst den Sender ein. Dann nehmen Sie anschließend den Empfänger mit Gyro und angeschlossenem Servo in Betrieb.
- Page 37 Servohebel etwa stabil in der Mittelstellung steht bzw. nur sehr langsam auf Anschlag läuft. Tipp: Die Einstellung der Empfindlichkeit des CG-1 für den Erstflug ist sehr stark vom jeweiligen Flug-Modell und vom eingesetzten Heckrotor-Servo abhängig. Je hochwertiger und schneller das verbaute Servo ist, desto größer ist die maximal fliegbar und...
-
Page 38: Justierung Der Empfindlichkeit „Gain" (Im Single-Modus)
Empfindlichkeit auf 100% eingestellt. 13. Einrichten der Wirkrichtung des Kreisels Der CG-1 Gyro muss immer einen Heckrotorservo-Befehl erzeugen, der einen Gegenlenkmoment um die Hochachse des Hubschraubermodells abgibt. Nehmen Sie den Sender in die Hand und schalten Sie anschließend das Modell an. - Page 39 Servo weitergegeben werden, bleiben davon unberührt. Der Reverse-Schalter für die Servo-Drehrichtung (siehe Seite 38, Pos. 6) befindet sich an der rechten Seite des CG-1 Gyro- Gehäuses. Je nach Notwendigkeit können Sie die Drehrichtung von A (Normal) auf B (Reverse) einstellen. Nehmen Sie bei Bedarf zum Bedienen des Umschalters einen kleinen Schraubendreher als Hilfestellung.
-
Page 40: Überprüfung Der Gyro-Empfindlickeit Im Flug
Flug VORSICHT!!! Bevor Sie den ersten Start am Flugfeld vornehmen, lassen Sie den CG-1 bei eingeschalteter Empfangsanlage auf die Umgebungs- temperatur initialisieren. Schalten Sie den Empfängerstrom nach ca. 5 Minuten ab und wieder ein. Das CG-1 Gyro- System ist nun betriebsbereit. -
Page 41: Wartung Und Pflege
Entsorgung Entsorgen Sie das Produkt am Ende seiner Lebensdauer gemäß den geltenden gesetzlichen Vorschriften. 16. Technische Daten Betriebsspannung: 4,2 – 7 V/ DC Temperaturbereich: -5°C bis +60°C Abmessungen: 17 x 17 x 14 mm Gewicht inkl. Anschlusskabel: CARSON Gyro 507027... -
Page 42: Préface
Cher client Touts nos félicitations pour l’achat de votre Gyroscope à conser- vateur de cap CARSON, modèle réduit construit à la pointe de la technologie. Comme nous travaillons continuellement au développement et à l’amélioration de nos produits, nous nous réservons la possibilité... - Page 43 • tout dommage provoqué par la perte de contrôle de la voiture ; • toute réparation autre que celles réalisées par un organisme agrée par CARSON ; • les consommables tels que les fusibles et les batteries ; • des dommages esthétiques ;...
- Page 44 Nous vous souhaitons beaucoup de plaisir avec votre Gyroscope à conservateur de cap (Heading Lock) CG-1 de CARSON ! Lire attentivement ce manuel avant l’utilisation de votre nouveau Gyroscope à conservateur de cap (Heading Lock) CG-1 de Carson ! CARSON Gyro 507027...
- Page 45 7. Montage du servo arrière ............52 8. Branchement du gyroscope CG-1 ......... 53 9. Mise en marche du gyroscope CG-1 ........54 10. Initialisation du gyroscope CG-1 ..........55 11. Réglage de la sensibilité gyroscopique (mode dual) .... 55 12.
-
Page 46: Périmètre De Livraison
507027 Gyroscope à conservateur de cap (Heading Lock) 1. Description gyroscope CG-1 Ce système gyroscopique est un système de stabilisation compacte reconnaissant à l’aide d’un capteur piézo tout changement de position. Une électronique intégrée permet de commander un servo connecté en aval afin de pouvoir compenser ainsi tout changement de position. -
Page 47: Consignes De Sécurité
Ne dépassez jamais les limites techniques du gyroscope CG-1. Ce produit n´est pas un jouet, maintenez-le hors de la portée des enfants de moins de 14 ans. -
Page 48: Avant La Mise En Service
• Une utilisation non conforme peut provoquer de graves dommages corporels ou matériels ! Pour cette raison, veillez, lors du fonctionnement, à maintenir une distance suffi sante entre le modèle et les personnes, animaux et objets à proximité. CARSON Gyro 507027... -
Page 49: Éléments De Connexion Et De Manipulation
1 Connexion du récepteur pour le servo arrière 2 Connexion du récepteur pour la sensibilité du gyroscope 3 Connecteur pour le servo arrière 4 Affi chage par DEL 5 Régulateur de la sensibilité gyroscopique 6 Commutation du sens de rotation du servo CARSON Gyro 507027... -
Page 50: Montage Du Gyroscope Cg-1
De plus, le gyroscope est relié à une autre sortie du récepteur (2) par le biais duquel s‘effectuera ultérieurement le réglage de la sensiblité. 6. Montage du gyroscope CG-1 Lors du montage du gyroscope, veillez toujours à choisir un emplacement de montage protégeant le gyroscope des vibrations et des variations de température (image page 51). - Page 51 Les régulateurs ainsi que les interrupteurs à coulisse doivent être facilement accessibles du côté. Les câbles raccordés au gyroscope doivent être posés de manière à ce qu‘ils ne puissent pas pénétrer dans les pièces rotatives de la mécanique ou être détruits par des bords coupants. CARSON Gyro 507027...
-
Page 52: Montage Du Servo Arrière
En effet, pour que le gyroscope puisse fonctionner de manière optimale, il est nécessaire que déjà les débattements les plus petits des servos mènent à une réaction dans la commande du modèle réduit. CARSON Gyro 507027... -
Page 53: Branchement Du Gyroscope Cg-1
8. Branchement du gyroscope CG-1 Raccordez le gyroscope à la sortie du récepteur pour le servo arrière en utilisant le câble de liaison à trois broches (1). Les contacts sont: Marron = Moins Rouge = Plus Orange = Impulsion Reliez l‘entrée de réglage à 1 brochee (jaune) du gyroscope (2) à... -
Page 54: Mise En Marche Du Gyroscope Cg-1
(« Standard » ou « Heading Lock ») s’effectuent à l’aide de l’émetteur. Si l’entrée de réglage à une broche du gyroscope CG-1 (2) n’est pas raccordée, le gyroscope fonctionnera en mode simple. Le réglage de la sensibilité... -
Page 55: Initialisation Du Gyroscope Cg-1
10. Initialisation du gyroscope CG-1 Pour pouvoir atteindre le fonctionnement correct, le gyroscope doit être initialisé. Cet ajustement interne se fait automatiquement après la mise en marche de l’installation émettrice et dure env. 2 à 3 secondes. Pendant ce temps, le modèle réduit, et alors également le gyroscope, ne doivent pas être déplacés ou tournés. - Page 56 Lock. La position de fin de course de l‘interrupteur à coulisse (à 0% ou 100% de la course du transmetteur) correspond donc toujours à la sensibilité maximale du gyroscope CG-1 de 100%. Lors d‘un réglage du transmetteur entre 0% et 50%, le gyroscope fonctionne en mode normal, lors d‘un réglage du transmetteur...
- Page 57 Si le levier de commande ne revient en position médiane (position neutre) qu‘après l‘arrière a été ramené dans sa position initiale, le gyroscope CG-1 fonctionne en mode « Heading Lock ». Dans ce cas, modifiez la direction de fonctionnement de l‘interrupteur à...
-
Page 58: Réglage De La Sensibilité Gyroscopique (Mode Simple)
La rotation du servo doit s‘effectuer dans la même direction que lorsque vous actionnez le levier de commande de l‘émetteur pour la fonction Arrière vers la droite (voir esquisse B). CARSON Gyro 507027... - Page 59 Si le sens de rotation pour le servo arrière généré par le gyroscope CG-1 devait être contraire aux sens indiqués à la figure, vous pouvez changer le sens de rotation du servo arrière. Le commutateur ne réagit cependant qu‘aux impulsions de commande générées par le gyroscope.
-
Page 60: Vérifier La Sensibilité Du Gyroscope En Vol
Attention !!! Avant de faire décoller votre modèle réduit sur l’aérodrome, allumez l’installation émettrice et laissez atteindre le gyroscope Cg-1 la température ambiante. Après env. 5 minutes, éteignez et rallumez l’émetteur. Votre gyroscope est à présent en ordre de marche. -
Page 61: Entretien Et Nettoyage
être montée à un endroit plus à l’extérieur du levier du servo. 15. Entretien et nettoyage Pour le nettoyage externe du gyroscope CG-1, utilisez unique- ment un chiffon sec et doux. N‘utilisez en aucun cas un détergent agressif ou une solution chimique, ceux-ci pouvant détériorer les surfaces du produit. - Page 62 Notiz CARSON Gyro 507027...
- Page 63 Notiz CARSON Gyro 507027...
- Page 64 For Germany: Service-Hotline: Mo - Do 8.00 – 17.00 Uhr 8.00 – 14.30 Uhr 01805–73 33 00 12 ct/min CARSON-Model Sport Abt. Service Mittlere Motsch 9 96515 Sonneberg CARSON-Model Sport Werkstraße 1 • D-90765 Fürth / Germany www.carson-modelsport.de...
Need help?
Do you have a question about the CG-1 and is the answer not in the manual?
Questions and answers