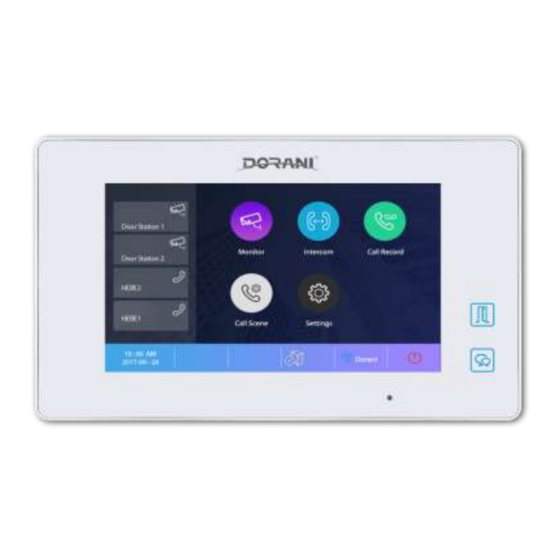
Summary of Contents for Dorani Limited DORVT
- Page 1 DORANI TOUCH VIDEO INTERCOM SYSTEM INSTALL MANUAL MODEL: DORVT 2 WIRE SYSTEM WW.DORANI.COM.AU Dorani (PJM Sales) – 03 9357 0942 4/1 Merri Concourse, Campbellfield, Victoria 3061...
-
Page 2: Know Your Monitor
KNOW YOUR MONITOR Intercom Menu Call Record Menu Monitor Menu Calling Other Reviewing of picture Monitoring of Door Monitors in System Memory Stations Shortcut SIP Menu WiFi Menu Menu Connection WiFi Status Status Call Scene Menu Functions of Diverting to Mobile Settings Menu All Installer Setting Lock Release... - Page 3 INSTALLATION THE MONITOR WILL TAKE APPROXIMATELY 2 MINUTES TO POWER UP CABLE Cable diameter of 1mm Stranded (twisted) MUST be used to achieve distances specified. Recommended: 4 Core Security - 14/020 2 Conductors per Bus Line Wire Cat 5 – All Conductors Lock release will require an additional 2 cores for 12V Power feed to door station Alternative Cables may be used Cable distances and picture quality may be compromised.
- Page 4 Loop Wiring REFER LOCK RELEASE CONNECTIONS PAGE 9 Cable 2 Wires - Twisted No Polarity 1mm² to achieve max distance Dip Switches Dip Switch 6 ON = Last Monitor All Other DIP Switches NOT USED Accessory Connector SW+ = 12V Positive Pulsing on Ring SW- = 12V Negative on Ring RING = Door Bell Normally Open Input...
- Page 5 Star Wiring REFER LOCK RELEASE CONNECTIONS PAGE 9 Cable 2 Wires - Twisted No Polarity 1mm² to achieve max distance Dip Switches Dip Switch 6 ON = ALL Monitors All Other DIP Switches NOT USED Accessory Connector SW+ = 12V Positive Pulsing on Ring SW- = 12V Negative on Ring RING = Door Bell Normally Open Input...
- Page 6 Legacy Wiring REFER LOCK RELEASE Legacy Wiring Limitations CONNECTIONS PAGE 9 MAXIMUM of 1 x Door Station MAXIMUM of 1 x DORVT22 + 1 x DORVT03 Cable Distance max 40m Type of Cable will determine image Quality Cable 2 Wires - Twisted No Polarity 1mm²...
-
Page 7: Lock Connections
LOCK CONNECTIONS Standard and Keypad Door Station – DORVT11,12,13,14 Preferred Method 12VDC Out Relay Out Slimline Door Station – DORVT25 Preferred Method Relay Out 12VDC Out Lock Settings SLIMLINE – DORVT25 THIS DIP SETTING IS UNDER THE LABEL – REINSTALL STICKER AFTER CHANGING Time Dip 3 Dip 4... - Page 8 LOCK RELEASE SETTINGS MASTER MONITOR DORVT22 Page ½ Button Enter Settings Meny Enter Installer Menu Press Page ½ Button Adjust Lock Time Adjust Normally Open / Closed SETTINGS – MASTER MONITOR DORVT22 Page ½ Button Call Tune Adjust Call Tune Settings of each door station individually, and intercom tones Adjust ringing time of door stations General...
- Page 9 Wireless Enabling Wi-Fi SIP (Diversion) Configuration SIP Testing (Tools) About Shows the Monitor Information Firmware IP Address ADDING SLAVE MONITORS– SLAVE MONITOR DORVT03 Installer Setup Page Step 1: Step 2: Exit Should Appear Press Dorani Symbol Press and Hold Lock button Slave Monitor Settings: Slave 1...
- Page 10 ADDING ADDITIONAL DOOR STATIONS Keypad Doors (DORVT13,14) 1234 # 12 # Door Number # * Door 1 = 0 Door 2 = 1 Door 3 = 2 Door 4 = 3 Non - Keypad Doors (DOVT010,11) Remove front fascia cover The next steps need to be done QUICKLY Power up Door station –...
-
Page 11: Remote Device Connection
REMOTE DEVICE CONNECTION Step 1 - Connect Device to Wi-Fi Press WiFi Menu Button to bring the WiFI Settings Page Turn Switch to ON Press WLAN Setting to Open Wireless Search Setting Select you desired network Input Password Press Connect Button If connection fails, please check correct SSID and password. - Page 12 Step 3 – Link the Monitor to the Device Press PC Symbol to Open the SIP Menu page as below When in the Assistant Page of the APP Press Scanner Button Scan QR Code on Monitor Press Save Note: You can manually enter all settings The App should now say Account Registered...
- Page 13 KEYPAD DOOR STATION PROGRAMMING Setting Notes: Substitute 1234 for Installer Code 3 Beeps = Incorrect setting, code or location Long Beep = Correct * = Exit Programming Default Installer Code= 1234 New Installer Code ___________ Program New Installer Code 1234 # 01 # New Master Code # * * Program New User Code Lock 1 (Locations 20-29) New Code 1234 # 20 # New User Code # *...
- Page 14 CONGRATULATIONS, on your new Dorani Video Intercom Product Dorani Video Intercoms pride themselves on providing innovative solutions in domestic, commercial and apartment video intercom systems. We endeavour to provide all of our clients with the highest level of customer service, and ongoing product support.


Need help?
Do you have a question about the DORVT and is the answer not in the manual?
Questions and answers