
Related Manuals for Zoom MRS-802


Summary of Contents for Zoom MRS-802
- Page 1 Operation Manual © ZOOM Corporation Reproduction of this manual, in whole or in part, by any means, is prohibited.
-
Page 2: Usage And Safety Precautions
Also make sure to disconnect all cables and the AC adapter before moving the MRS-802. • Volume Do not use the MRS-802 at a loud volume for a long time since this can cause hearing impairment. Caution • CD-R/RW Drive... -
Page 3: Usage Precautions
• Cleaning Use a soft, dry cloth to clean the MRS-802. If necessary, slightly moisten the cloth. Do not use abrasive cleanser, wax, or solvents (such as paint thinner or cleaning alcohol), since these may dull the finish or damage the surface. -
Page 4: Table Of Contents
Overview ....... . 7 Introducing the MRS-802 ....9 Recorder section . - Page 5 Erasing a rhythm song ......89 ZOOM MRS-802 Assigning a name to a rhythm song ....89 Creating an original rhythm pattern .
- Page 6 Appendix ......141 MRS-802 Specifications ....141 Troubleshooting .
-
Page 7: Introduction
Overview Thank you for purchasing the ZOOM MRS-802 multitrack recording studio (subsequently referred to as " the MRS-802 "). The MRS-802 is a digital audio workstation with the following features: ■ Brings together all the functionality you need for complete music... - Page 8 ■ Versatile effects The MRS-802 provides "insert effects" that can be inserted into a specified signal path, and "send/ return effects" that are used via the mixer send/return loop. The effects can be used in a variety of ways, from modifying the tone while recording a track, to spatial processing or mastering during mixdown.
-
Page 9: Introducing The Mrs-802
• Effect section Processes input signals or signals of the mixer section. The MRS-802 has two types of effects: an insert effect that is inserted in a specific signal path, and a send/return effect that uses the send/return loop of the mixer section. -
Page 10: Rhythm Section
• Send level to the send/return effect • Mute on/off • V-take switching (except for drum track) Effect section The MRS-802 provides two types of effects: insert effects and send/return effects. These effects which can be used simultaneously have the characteristics described below. ■ Insert effect This effect can be inserted at one of the following three points in the signal path. - Page 11 There are two types of send/return effect, reverb and chorus/delay, which can be used simultaneously. The send level of each mixer channel adjusts the depth of the send/return effect. Raising the send level will produce a deeper reverb or chorus/delay effect for that channel. ZOOM MRS-802...
-
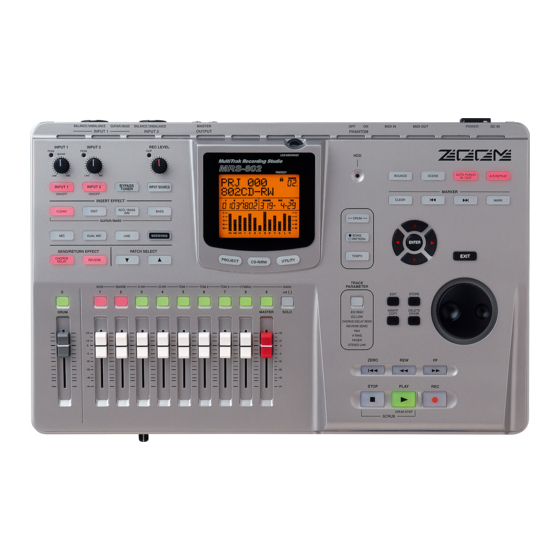
Page 12: Parts Of The Mrs-802
Parts of the MRS-802 Parts of the MRS-802 Top panel Input section Effect section Fader section Input section [INPUT] controls 1/2 [PEAK] indicator [INPUT 1]/[INPUT 2] key Effect section [BYPASS/TUNER] key [REVERB] key PATCH SELECT [CHORUS/DELAY] key [Q]/[W] keys In this manual, the names of faders, knobs, and other controls on the unit are enclosed in square brackets [ ]. -
Page 13: Transport Section
Cursor keys [ENTER] key [STORE] key [EDIT] key [INSERT/COPY] key [DELETE/ERASE] key FF [Y] key REC [O] key Parts of the MRS-802 [SOLO] key [SCENE] key [AUTO PUNCH IN/OUT] key [A-B REPEAT] key MARKER [I] key [MARK] key [EXIT] key... -
Page 14: Rear Panel
Parts of the MRS-802 Rear panel DC 12V jack [PHANTOM ON/OFF] switch GUITAR/BASS jack INPUT 2 jack INPUT 1 jack MIDI IN connector MIDI OUT connector MASTER OUTPUT jacks [POWER] switch Expansion board slot Front panel CONTROL IN jack CD-R/RW drive bay... -
Page 15: Connections
DC 12V jack. This will prevent the plug from being disconnected if the AC adaptor cable is accidentally pulled. ZOOM MRS-802 Connections GUITAR or BASS Only one of these jacks can be used at a time. If instruments/microphones are connected to both jacks, the GUITAR/BASS jack has priority. - Page 16 ■ About grounding Depending on installation conditions, a slight electrical charge may be felt when touching a metal part of the MRS-802. If you wish to avoid this, ground the unit Warning by connecting the ground screw on the bottom to a good external ground.
-
Page 17: Installing The Cd-R/Rw Drive
Installing the CD-R/RW Drive To install the separately available CD-R/RW drive into the MRS-802 model without preinstalled CD-R/RW drive, proceed as follows. Make sure to disconnect all cables and AC adaptor before installing the CD-R/RW drive. Caution Power cable ZOOM MRS-802... - Page 18 1. • Make sure to use the optional CD-R/RW drive CD-01. • Zoom Corporation does not accept any responsibility whatsoever for any kind of damage arising from the use of the other type of drive, whether they be direct or indirect from any third parties.
-
Page 19: Listening To The Demo Songs
Listening to the Demo Songs When shipped from the factory, the internal hard disk of the MRS-802 contains two demo songs. To listen to these, proceed as follows. Demo song protect status The demo songs on the hard disk are set to protected status,... -
Page 20: Playing The Demo Song
To stop the demo song, press the STOP [ Turning power off (shutdown) Whenever you want to turn the MRS-802 off, be sure to follow the procedure described below. Turn power to the audio system off. Press the [POWER] switch on the rear panel of the MRS-802. -
Page 21: Quick Tour
finished song. ZOOM MRS-802 Quick Tour Step 1: Preparations 1.1 Creating a new project On the MRS-802, song data are managed in units called “projects”. A project encompasses the following information: • All recorder section data • All mixer section settings •... -
Page 22: 1.2 Selecting A Rhythm Pattern
Turn the dial to select the number of the rhythm pattern to be used as guide rhythm. The MRS-802 has 511 rhythm patterns of which more than 400 are preprogrammed. The illustration below shows the display when rhythm pattern no. 30 (ROCK01) has been selected. - Page 23 You should therefore always set the tempo first and then record the audio track. ZOOM MRS-802 You can also change the tempo setting by tapping the [TEMPO] key ( To stop playback, press the [STOP] key.
-
Page 24: Step 2: Recording The First Track
[REC LEVEL] control lights up. [CLIP] indicator 2.2 Applying the insert effect The signal supplied to the MRS-802 can be modified with the insert effect. This effect can be applied to the input, to any track, or immediately before the [MASTER] fader. The... -
Page 25: 2.3 Selecting A Track And Recording
A total of 280 patches are available for the insert effect. You can edit these patches if desired to alter the sound or the effect depth (→ p. 103). ZOOM MRS-802 The number of patches for each algorithm is listed below. Algorithm... - Page 26 When this key is held down while pressing the PLAY [R] key, the recorder starts to record. Pressing this key during playback causes punch- in, and pressing the key during recording causes punch-out. ZOOM MRS-802 ] key. If you → p. 33).
-
Page 27: Step 3: Overdubbing
1/2 and the [DRUM] fader to adjust the monitor level balance between tracks. To begin recording, press the ZERO [ ZOOM MRS-802 return to the beginning of the song. Then hold down the REC [ Recording on track 2 will begin. Play your instrument while listening to the rhythm section and track 1. -
Page 28: Step 4: Mixdown
The result of the mixdown process can be either recorded on an external master recorder or on the master track incorporated in the MRS-802. The following example describes recording on the master track. Instead of the master track you can also select one or two ordinary tracks as recording target. -
Page 29: 4.3 Applying The Send/Return Effect
1/2, 3/4 etc.) on or off ( Selects V-take for track ( x=1 – 8 y=1 – 10 y is V-take number. 4.3 Applying the send/return effect The internal mixer of the MRS-802 incorporates two kinds of send/return effects (chorus/delay and reverb). CHORUS/ DELAY SEND LEVEL... - Page 30 Adjust the send level for other tracks in the same way. Adjust the intensity of the other send/return effect in the same way. To return to the main screen, press the [EXIT] key several times. REV SEND REV SEND REV SEND REV SEND ZOOM MRS-802...
-
Page 31: 4.4 Using The Mastering Insert Effect
MASTER MASTER Press the [EXIT] key. The unit returns to the main screen. ZOOM MRS-802 ■ Selecting a patch for the insert effect Press the [MASTERING] key in the effect section. The insert effect algorithm is switched to MASTERING. The display shows the currently selected patch. - Page 32 The master track is played back. To stop playback, press the STOP [ ] key. To return the MRS-802 to normal operation, repeatedly press the [MASTER] status key until it is out. Muting of other tracks is canceled, and the status keys revert to the original condition.
-
Page 33: Reference [Recorder]
GTR 1- 1 V-take name If you select a V-take on which nothing is recorded, the ZOOM MRS-802 indication “NO DATA” is shown instead of the V-take name. In the level meter display area, a lit dot indicates a recorded V-take. - Page 34 To return to the main screen, press the [EXIT] key. The [TRACK PARAMETER] key goes out. If the data on a V-take are erased, the name of the V-take reverts to “NO DATA”. + , - . / : ■ ˜ ZOOM MRS-802...
-
Page 35: Moving To A Desired Point In The Song (Locate Function)
“punch-in”, and the action of switching back from recording to playback is called “punch-out”. Tick The MRS-802 provides two ways to do this. You can use the panel keys or a foot switch (sold separately) to punch-in/out Beat manually (“manual punch-in/out”), or you can cause punch- in/out to occur automatically at previously specified points... -
Page 36: Using Auto Punch-In/Out
(Out point). This is convenient for example when you cannot operate the MRS-802 because you are playing the instrument yourself, or when very fast playback/record switching is required. -
Page 37: Recording Several Tracks On A Master Track (Mixdown Function)
The contents of the master track can be used to create the material for an audio CD. The MRS-802 offers one master track for each project. Similar to the regular tracks 1 - 8, the master track also has ten virtual tracks (V-takes). -
Page 38: Playing The Master Track
] key to return to the beginning of the song, and then press the PLAY [ Playback of the master track starts from the beginning. You can use the [MASTER] fader to adjust the playback volume. ] key while Master track ] key. ZOOM MRS-802... -
Page 39: Combining Multiple Tracks On Another Track (Bounce Function)
■ Specifying playback/mute for the recording track(s) In the default condition of the MRS-802, the bounce destination recording track(s) will be muted. If you want to play back a track while you bounce-record on another V- take of that track, use the following procedure to change the... -
Page 40: Executing Bounce Recording
■ Selecting the recording destination V-take In the default condition of the MRS-802, the result of the Bounce operation will be recorded on the V-take that is currently selected for the recording track(s). If you want to play back a track while bouncing onto another V-take of that track, you can use the following procedure to change the recording destination V-take. -
Page 41: Recording The Drum Sound (Rhythm Recording)
ZOOM MRS-802 Recording the drum sound (Rhythm recording) The MRS-802 allows you to record the drum kit sound onto any track. This function is called “rhythm recording”. To use the function, proceed as follows. From the main screen, press the [UTILITY] key in the display section. -
Page 42: Assigning Marks Within A Song (Marker Function)
If you add a new mark between two existing marks, the subsequent marks will be renumbered. Mark number Song Mark number Song PRJ 002 PRJ 002 MY SONG MY SONG Add a mark 01 02 01 02 ZOOM MRS-802... -
Page 43: Locating A Mark
Turn the dial to select the desired mark number. As soon as the number is changed, the unit jumps to that number. ZOOM MRS-802 Deleting a mark Here’s how to delete a mark that you assigned. Locate the mark that you want to delete. -
Page 44: Playing Back The Same Passage Repeatedly (A-B Repeat Function)
The A/B point locations also will be erased. Finding a desired location (Scrub/Preview function) The MRS-802 provides a “Scrub” function that lets you search for a desired location while repeatedly playing a short region before or after the current point. This is convenient when you want to accurately find the point at... -
Page 45: Changing The Settings Of The Scrub Function
You can also use the cursor up/down keys to change the scrub playback length. ZOOM MRS-802 If you want to change the direction of scrub playback, use the cursor left/right keys to cause the scrub playback direction indication to flash, and turn the dial. -
Page 46: Reference [Track Editing]
When this screen is shown, turning the dial to the right selects tracks in odd-numbered/even-numbered pairs (1/2, 3/4, 5/6, 7/8) or the master track. In this case, the currently selected V-take for the two tracks or the master track becomes the editing target. Press the [ENTER] key. ZOOM MRS-802... -
Page 47: Copying A Specified Range Of Data
Use the cursor left/right keys to move the flashing section of the counter, and turn the dial to specify the copy start point. ZOOM MRS-802 The point can be specified in hours/minutes/seconds/ milliseconds. When a value is specified, the measure/beat/ tick counter reflects the new location. -
Page 48: Moving A Specified Range Of Data
Move Src Move Src 0 3 1200 083 4 ] key at this point, the specified Move Dst Move Dst TR 1- 1 TR 1- 1 Move Src Move Src TO TO 0 0 0 0 001 1 ZOOM MRS-802... -
Page 49: Erasing A Specified Range Of Data
If you press the PLAY [ ] key at this point, the specified range will be played. ZOOM MRS-802 Press the [ENTER] key. The indication “Erase SURE?” appears on the display. To execute the erase operation, press the [ENTER] key. -
Page 50: Fade-In/Fade-Out Of Specified Data Range
The three different kinds of curves look as follows. Fade Src Fade Src START START 0 0 0 0 001 1 Fade Src Fade Src 0 0 4260 003 1 ] key, the specified range of the Fade Src Fade Src CURVE CURVE ZOOM MRS-802... -
Page 51: Reversing A Specified Range Of Audio Data
Rvrs Src START START 0 0 0 0 001 1 ZOOM MRS-802 You can also specify the point as a mark. The display changes to “Rvrs Src END”. If you press the PLAY [ specified V-take will be played. The indication “Reverse SURE?” appears on the display. - Page 52 V-take of the desired length first. At the point where you want the time stretch/ compress function to end, press the STOP [ To execute the time stretch/compress operation, press the [ENTER] key. ZOOM MRS-802 ] key.
-
Page 53: Editing Using V-Takes
It is also possible to select the master track. In this case, the indication shows “M- 1” and the [MASTER] status key is lit. ZOOM MRS-802 Reference [Track Editing] Press the [UTILITY] key in the display section. A menu for editing audio data in track units appears on the display. -
Page 54: Erasing A V-Take
The indication “MOVE SURE?” appears on the display. To execute the move operation, press the [ENTER] key once more. To cancel the operation, press the [EXIT] key. After the move operation is completed, the unit returns to the V-take editing menu. ZOOM MRS-802... -
Page 55: Exchanging V-Takes
[ENTER] key once more. To cancel the operation, press the [EXIT] key. After the exchange operation is completed, the unit returns to the V-take editing menu. ZOOM MRS-802 Reference [Track Editing] Track capture and swap You can capture the audio data of any track and temporarily store them on the hard disk. -
Page 56: Swapping Track Data And Captured Data
The audio data of the selected track are swapped with the previously captured audio data. By performing the swap operation once more, you can return the track contents to the previous condition. To return to the main screen, press the [EXIT] key. ZOOM MRS-802... -
Page 57: Reference [Phrase Looping]
Reference [Phrase Looping] The MRS-802 lets you handle part of a recorded track or an audio file on CD-ROM as a phrase that can be loaded and played freely, in a preprogrammed sequence or for a specified number of times. The result can be written to any track/V-take. This function is called “phrase looping”. -
Page 58: Loading A Phrase
V-take number) appears on the display. This indicates the import source. Turn the dial to select the track number (1 - 8), and use the cursor up/down keys to select the V-take number (1 - 10). IMPORT IMPORT TAKE TAKE ZOOM MRS-802... -
Page 59: Importing A Wav/Aiff File
• You cannot specify a point where there are no audio data. If you try to do this, the indication “*” appears on the display. ZOOM MRS-802 When you have specified the start point, press the [ENTER] key. The display changes as follows. -
Page 60: Importing A Phrase From A Different Project
Refer to steps 1 - 6 of “Basic phrase loading steps” to select “PHRASE” as import source. Then press the [ENTER] key. The indication “PRJ SEL xxxxx” (where xxxxx is the project name) appears on the display. You can now select the source project. → p. 61). ZOOM MRS-802... -
Page 61: Adjusting Phrase Parameters
The phrase is imported. When the import process is completed, the phrase menu appears again. ZOOM MRS-802 Adjusting phrase parameters Once you have imported phrases into the phrase pool, you should specify parameters such as playback range and number of measures. -
Page 62: Copying A Phrase
Use the cursor left/right keys to bring up the indication “UTILITY PHRASE” on the display, and press the [ENTER] key. The display changes as follows. ] key to check the phrase both UTILITY UTILITY TR EDIT TR EDIT ZOOM MRS-802... -
Page 63: Creating A Phrase Loop
The [DRUM] status key enters "0" and the 1 - 9 status keys enter the numbers "1" - "9". Status key [DRUM] ZOOM MRS-802 Creating a phrase loop Phrases stored in the phrase pool can be selected and lined up in any desired sequence, and with any number of repetitions. - Page 64 • Inserting numbers or symbols Use the cursor left/right keys to move the cursor (flashing segment) to the desired position and enter the new numeral or symbol. 0+ 0+ 0+(1 0+(1 0+(1+ 0+(1+ 0+(1+2 0+(1+2 0+(1+2) 0+(1+2) 0+(1+2)x 0+(1+2)x 0+(1+2)x 0+(1+2)x ZOOM MRS-802...
-
Page 65: Writing A Phrase Loop To A Track
[ENTER] key. If “PHRASE IMPORT” is shown, use the cursor left/right keys to call up “PHRASE CREATE” and press the ZOOM MRS-802 [ENTER] key. The display changes as follows. This screen lets you select a track/V-take for writing the phrase loop. - Page 66 [ENTER] key once more. The phrase loop is created. When the process is completed, the display reverts to the condition of step 2. Phrase B Phrase A Phrase B (MEAS x02) (MEAS x01) Phrase A Phrase B (MEAS x02) (MEAS x01) ZOOM MRS-802...
-
Page 67: Reference [Mixer]
Reference [Mixer] This section explains the functions and operation of the two types of mixers built into the MRS-802. About the mixer The mixer of the MRS-802 is divided into two sections: an “input mixer” that processes the input signals from the input jacks, and a “track mixer”... -
Page 68: Basic Operation Of The Input Mixer
The [REC LEVEL] control adjusts the signal level before it is sent to the recording track (i.e., after it has passed through Track 1 - 8 Master track IN SRC IN SRC IN IN INSERT INSERT MRS-Drv MRS-Drv ZOOM MRS-802... -
Page 69: Adjusting The Depth Of The Send/Return Effects
• Two mono tracks selected as recording tracks INPUT 1 INPUT 1 INPUT 2 ZOOM MRS-802 • One mono track selected as recording track INPUT 1 INPUT 1 INPUT 2 • No track selected as recording track... -
Page 70: Adjusting The Pan/Balance
Press the [INPUT 1] or [INPUT 2] key in the input section. INPUT INPUT Turn the dial to edit the value of the PAN parameter. ZOOM MRS-802... -
Page 71: Basic Operation Of The Track Mixer
(if the input is in mono) or the balance (if the input is in stereo). • When one mono track is selected as recording track The PAN parameter will have no effect. ZOOM MRS-802 Basic operation of the track mixer Adjusting the volume/pan/EQ For each channel, you can adjust the volume, panning (stereo position between L/R channels), and EQ (equalizer). -
Page 72: Adjusting Depth Of Send/Return Effect
The range and default values for the parameters are shown below. • CHORUS/DELAY SEND: 0 - 100 (default: 0) • REVERB SEND: 0 - 100 (default: 0) ] keys in the effect section. CHO SEND CHO SEND REV SEND REV SEND ZOOM MRS-802... -
Page 73: Linking Odd-Numbered/Even-Numbered Channels (Stereo Link)
TR7/8 TR7/8 ST LINK ST LINK ZOOM MRS-802 When the setting is complete, press the [EXIT] key. The unit returns to the main screen. The PAN parameter of two stereo-linked channels will function as a BALANCE parameter that adjusts the volume balance between the odd-numbered / even-numbered channels. -
Page 74: Using The Solo Function
In this condition, you can specify a name for the scene. Use the cursor left/right keys to move the flashing position to the character you want to change, and turn the dial to select a character. For information on available characters, refer to page 34. ZOOM MRS-802... -
Page 75: Recalling A Saved Scene
A mark is entered at this point. Repeat this step to enter ZOOM MRS-802 marks at all other points where you want to change the mix. Save the mix to be used at the start of the song as well as all other mix settings as scenes. -
Page 76: Deleting Certain Parameters From A Scene
When the setting is complete, press the [EXIT] key. The unit returns to the scene menu. To return to the main screen, press the [EXIT] key. The parameter group on/off status is stored as part of the project. Permissn Permissn AllFader AllFader ZOOM MRS-802... -
Page 77: Reference [Rhythm]
This section explains the functions and operation of the rhythm section, which uses internal drum sounds to generate backing performances. About the rhythm section The rhythm section of the MRS-802 contains a variety of drum sounds. The section can be operated in synchronization with the recorder or as an independent drum machine. -
Page 78: Rhythm Pattern Mode And Rhythm Song Mode
Rhythm song mode Synchronizing the recorder section and rhythm section In the default condition of the MRS-802, the rhythm section will operate in synchronization with the recorder section. When you operate the transport section to start the recorder section running, the rhythm pattern or rhythm song will also begin playing. -
Page 79: Changing The Tempo Of The Rhythm Pattern
Verify that the [SONG/PATTERN] key is out. If the key is lit, press it so that it goes out. ZOOM MRS-802 The current tempo value will be displayed in BPM (beats per minute). The tempo can be adjusted in steps of 0.1 over a range of 40 - 250 (BPM). -
Page 80: Creating A Rhythm Song
Creating a rhythm song The MRS-802 allows you to save up to 10 rhythm songs per project. Out of these, one is selected for editing or playing. One rhythm song can have up to 999 measures of rhythm patterns. -
Page 81: Inputting Rhythm Pattern Data
During rhythm song step input, the first line of the display shows the currently selected item, and the second line the ZOOM MRS-802 setting value of that item. Because an empty rhythm song does not yet contain any information, the second line of the display indicates “EOS”... - Page 82 If you go to a point where no pattern information is input (first line of display shows “ PTN”), you can add rhythm PTN” is → p. 86). ZOOM MRS-802...
-
Page 83: Fast Input
Serve to specify the pattern number and number of repetitions. The [DRUM] status key enters "0" and the 1 - 9 status keys enter the numbers "1" - "9". Status key [DRUM] ZOOM MRS-802 PATTERN A PATTERN A Rhythm pattern information recorded at the beginning of the rhythm song cannot be deleted. - Page 84 If you use the cursor left/right keys 0+ 0+ 0+1+ 0+1+ 0+1+( 0+1+( 0+1+(2 0+1+(2 0+1+(2+ 0+1+(2+ 0+1+(2+3 0+1+(2+3 0+1+(2+3 0+1+(2+3 0+1+(2+3 0+1+(2+3 )x )x 0+1+(2+3 0+1+(2+3 0+1+(2+3 0+1+(2+3 )x2+ )x2+ 0+1+(2+3 0+1+(2+3 )x2+4 )x2+4 ZOOM MRS-802...
- Page 85 Use the cursor left/right keys to move to the position you want to insert and enter the new number/symbol. • Deleting a number/symbol ZOOM MRS-802 Use the cursor left/right keys to move to the position where you want to delete a number/symbol. Then press the [DELETE/ERASE] key.
-
Page 86: Inputting Other Event Data
The duration of the entire rhythm pattern does not change. Input the other events in the same way. ]/FF [ ] keys to move to the beginning of å TimSig TimSig TimSig TimSig ZOOM MRS-802 ”. This... -
Page 87: Playing A Rhythm Song
During playback of a rhythm song, the display shows information about the rhythm pattern number and other information at the current location. ZOOM MRS-802 To stop the rhythm song, press the STOP [ To return to the main screen, press the [EXIT] key. -
Page 88: Editing A Rhythm Song
Turn the dial to select the rhythm song to be copied. Press the [INSERT/COPY] key. The screen for selecting the number of the copy destination COPY COPY 003 1 0 COPY COPY TO TO 007 1 0 ] key. ZOOM MRS-802... -
Page 89: Zoom Mrs
If you press the [ENTER] key, the rhythm song will be erased and the display returns to the rhythm song screen. ZOOM MRS-802 Assigning a name to a rhythm song You can edit the name of any rhythm song as follows. -
Page 90: Creating An Original Rhythm Pattern
To set the rhythm pattern time signature, use the cursor left/right keys to bring up the indication “EDIT TimSig” on the display, and press the [ENTER] key. The current time signature setting appears on the display. TimSig TimSig 4/4 beat ZOOM MRS-802... -
Page 91: Step Input
3. Step input For step input, you enter each note separately, while the MRS-802 is in the stop condition. For rhythm pattern step input, you specify the step length (interval to next note or rest) using the quantize value. Then you use the status keys 1 - 8 and the PLAY [ notes and rests. - Page 92 The unit returns to the rhythm pattern screen. Press the PLAY [ To terminate pattern recording and return to the main screen, press the [EXIT] key. → P. 79). ] key. ] key to hear the pattern that you recorded. ZOOM MRS-802...
-
Page 93: Real-Time Input
This section explains how to use the status keys 1 - 8 on the MRS-802 to input a rhythm pattern in real time. In rhythm pattern mode ([SONG/PATTERN] key out), press the [DRUM] key so that it is lit. -
Page 94: Editing A Rhythm Pattern
(For information on which drum sound corresponds to which note number, see p. 161.) • When the MRS-802 is in the default condition, the MIDI receive channel for the drum kit is set to 10. For real-time input using a MIDI keyboard, set the MIDI send channel of the keyboard also to 10. -
Page 95: Copying A Rhythm Pattern
If the copy destination rhythm pattern contains any information, this will be overwritten. To return to the main screen, press the [EXIT] key several times. ZOOM MRS-802 Editing the name of a rhythm pattern This section explains how to edit the name of a rhythm pattern. -
Page 96: Erasing A Rhythm Pattern
Press the [ENTER] key. The data are imported into the current project. When the process is completed, the screen of step 2 appears again. To return to the main screen, press the [EXIT] key several times. Import Import PRJ012 PRJ012 ZOOM MRS-802... -
Page 97: Editing Various Settings Of The Rhythm Section
Change the velocity value for input of notes with the status keys. • MIDI Make MIDI-related settings (→ p. 129). ZOOM MRS-802 • Import Import rhythm patterns and the rhythm song from a project saved on the hard disk (→ p. 96). -
Page 98: Changing The Metronome Volume
(%). Select “Memory” from the rhythm utility menu and press the [ENTER] key. This screen is for display only. There is no setting that can be edited. ZOOM MRS-802... -
Page 99: Reference [Effects]
Reference [Effects] This section explains the functions and operation of the effect section built into the MRS-802. About the effects The MRS-802 has two types of effects, “insert effects” and “send/return effects”. The two types can be used simultaneously. The two types of effect are described below in detail. -
Page 100: Using The Insert Effect
"effect module". For the insert effect, you can use up to six effect modules simultaneously. A combination of such effect modules is called an "algorithm". The MRS-802 incorporates the following algorithms. • CLEAN • DIST • ACO/BASS SIM • BASS These algorithms are for recording guitar/bass. -
Page 101: Changing The Insert Location Of The Insert Effect
[INPUT 1]/[INPUT 2] keys and the status keys. To select the track pairs 1/2, 3/4, 5/6, and 7/8, press two status keys simultaneously. ZOOM MRS-802 When the insert point has been selected, press the [EXIT] key. - Page 102 ( M → S ) Track Track EFFECT ( S → S ) Track Track EFFECT ( DUAL ) Track Track mixer EFFECT FADER ( M → S ) EFFECT FADER ( S → S ) EFFECT FADER ( DUAL ) ZOOM MRS-802...
-
Page 103: [Master] Fader
For example in the MIC algorithm, the MODULATION/ DELAY effect module provides ten effect types such as chorus, flanger, and phaser, and use any one of these. When you change the effect type, the effect parameters will also change. ZOOM MRS-802 Effect MODULATION/ module Track mixer... - Page 104 TOTAL DOUBLING ZNR, VOL PDL, PAT LVL MOD/DLY MOD/DLY TOTAL TOTAL MODULATION/DELAY ZNR, VOL PDL, PAT LVL DIM/RESO DIM/RESO TOTAL TOTAL DIMENSION/ ZNR, VOL PDL, PAT LVL RESONANCE FLANGER FLANGER DEPTH DEPTH Setting value FLANGER FLANGER -OFF- -OFF- ZOOM MRS-802...
-
Page 105: Storing An Insert Effect Patch
Turn the dial to select the store destination patch number. To store the patch, press the [STORE] key once more. ZOOM MRS-802 The patch will be stored, and the unit returns to the patch select screen. • Patches that you have stored are saved on the hard disk as part of the project. -
Page 106: Applying The Insert Effect Only To The Monitor Signal
The input signal that has passed through the insert effect will be recorded on the track (default setting). • DRY Only the unprocessed input signal will be recorded on the track. Even in this case, however, the insert effect will be applied to the monitor signal. ZOOM MRS-802... -
Page 107: Using The Send/Return Effects
The “UTILITY REC SRC” setting is stored for the entire project. Before you begin recording other parts, change the setting back to “WET”. ZOOM MRS-802 Using the send/return effects This section explains how to select and edit patches for the send/return effects (chorus/delay, reverb). -
Page 108: Editing A Send/Return Effect Patch
Keep in mind that if you select another patch without first storing the patch, the edited contents will be lost. If you want to keep the results of your editing session, refer to the following section. TYPE TYPE DELAY DELAY DELAY DELAY TIME TIME Effect parameter Setting value ZOOM MRS-802... -
Page 109: Storing A Send/Return Effect Patch
If necessary, use the PATCH SELECT [ the dial to select the patch whose name you want to edit. ZOOM MRS-802 The name of the selected patch can now be edited. The character currently selected for editing flashes. -
Page 110: Importing Patches From Another Project
To carry out the import process, press the [ENTER] key once more. To cancel the process, press the [EXIT] key. The patches of the selected project are imported into the current project. When the import process is completed, the screen of step 1 appears again. ZOOM MRS-802... -
Page 111: Reference [Creating A Cd]
This section describes how to use the CD-R/RW drive in the MRS-802. • On a MRS-802 without preinstalled CD-R/RW drive, creating a CD is not possible. • Mixed mode CDs or copy controlled CDs cannot be played or used as data source. -
Page 112: Recording Audio Data By Project
When writing is complete, the display shows “CDtrkxx COMPLETE” (where xx is the track number). By pressing the [EXIT] key instead of the [ENTER] key, you can cancel the write process and return to the previous display screen. ZOOM MRS-802... -
Page 113: Recording Audio Data By Album
CD-R/RW disc, refer to page 115.) To return to the main screen, press the [EXIT] key several times. ZOOM MRS-802 Reference [Creating a CD] Recording audio data by album This method involves creating a list for the audio CD (called an “album”) which contains information about master tracks... - Page 114 When you have stored all desired projects in the album, press the [ENTER] key twice. The display changes as follows. ] key. The master track of the project ] key. ALBUM ALBUM SURE? SURE? ZOOM MRS-802...
-
Page 115: Playing An Audio Cd
[ENTER] key. To terminate the process, press the [EXIT] key. To return to the main screen, press the [EXIT] key several times. ZOOM MRS-802 Reference [Creating a CD] Playing an audio CD To play an audio CD inserted in the CD-R/CD-RW drive, proceed as follows. - Page 116 Each push of the cursor up/down keys toggles between the following two methods. • D (Digital playback) The digital audio signal of the CD is read by the MRS-802 in the digital domain and becomes available as an audio signal at the rear panel MASTER OUTPUT jacks, and front panel MASTER PHONES jack.
-
Page 117: Erasing A Cd-Rw Disc
700 MB disc.) • QUICK Only the track information on the CD-RW disc is erased. This requires less time than the NORMAL erase operation. ZOOM MRS-802 Reference [Creating a CD] Press the [ENTER] key. The display now shows the indication “CdrwErs SURE?”. -
Page 118: Finalizing A Cd-R/Rw Disc
When the process is finished, the display indication changes to “FINALIZE COMPLETE”. By erasing the entire disc, a CD-RW disc can be used again also after finalizing. For details, refer to page 117. To return to the main screen, press the [EXIT] key several times. ZOOM MRS-802... -
Page 119: Loading Data From An Audio Cd
Backup and restore This section explains how you can use the CD-R/RW drive in the MRS-802 to back up a project to a CD-R/RW disc and how to restore a project from a disc backup. On a MRS-802 without preinstalled CD-R/RW drive, creating a backup CD as described here is not possible. - Page 120 “CHANGE DISCxxx” (where xxx is the disc number) is shown. The indication will change to “SAVE CANCEL?”. Press the [ENTER] key to terminate the process. To return to the main screen, press the [EXIT] key several times. ZOOM MRS-802...
-
Page 121: Saving All Projects To Cd-R/Rw Disc
Use the cursor left/right keys to bring up the indication “BACKUP ALL SAVE” on the display, and press the [ENTER] key. ZOOM MRS-802 The display shows the space required for the backup of all projects in MB (megabytes). Press the [ENTER] key. -
Page 122: Loading A Project From Cd-R/Rw Disc
Project name Project number to be assigned When being restored to the MRS-802, an empty project number is automatically assigned to the project. Even if a project with the same name already exists on the hard disk, it will not be overwritten. - Page 123 “CHANGE DISCxxx” (where xxx is the disc number) is shown. The indication will change to “LOAD CANCEL?”. Press the [ENTER] key to terminate the process. To return to the main screen, press the [EXIT] key several times. ZOOM MRS-802 Reference [Creating a CD]...
-
Page 124: Reference [Projects]
This section describes how to perform operations for entire projects. About projects On the MRS-802, the data needed to reproduce a song you create are managed in units called “projects”. By loading a project from the hard disk, you can always go back to exactly the same condition that existed when the project was saved. -
Page 125: Loading A Project
• When you press the [ENTER] key, the current project will be automatically saved on the hard disk before the new project is loaded. • When power to the MRS-802 is turned on, the project that you were last working on will be loaded automatically. Creating a new project This operation creates a new project. -
Page 126: Duplicating A Project
Use this operation with care. • This item cannot be selected for projects with the protect ON setting. PRJ COPY PRJ COPY COPY TO COPY TO Copy destination project number PRJ ERS PRJ ERS PRJ011 PRJ011 Project name Project number ZOOM MRS-802... -
Page 127: Editing The Project Name
“PROJECT PROTECT” on the display. Then press the [ENTER] key. The screen for setting the protect status to ON/OFF is shown on the display. ZOOM MRS-802 PRJ PRT PRJ PRT Turn the dial to select ON (write-protect enabled) or OFF (write-protect disabled). -
Page 128: Reference [Midi]
The MRS-802 can receive Control Change messages from an external MIDI device to perform a control change, set the drum kit level, and so on. The MRS-802 also can send out Control Change messages according to drum level information contained in a rhythm song. -
Page 129: Making Midi-Related Settings
There is no parameter for turning Control Change on or off. When the drum kit is set to send and receive MIDI messages, ZOOM MRS-802 Control Change send/receive is also enabled. Press the [ENTER] key to display the setting of the selected item, and turn the dial to change the setting. -
Page 130: Setting The Drum Kit Midi Channel
MIDI device on that MIDI channel to play the sounds of the MRS-802’s drum kit. Also, when you play back a rhythm pattern (or rhythm song) on the MRS-802, the content of the drum track will be transmitted as Note On/Off messages. -
Page 131: Specifying Transmission Of Song Position Pointer Messages
This section explains how to use this function. “Format 0” is a type of SMF that contains all MIDI channel playing information in a single track. The MRS-802 can only read this type of SMF. The following SMF types cannot be read. -
Page 132: Selecting The Smf Output Destination
Rhythm pattern When an SMF is played in the above condition, the rhythm song or rhythm pattern of the MRS-802 will be played at the same time. If you do not want to play the drum kit sound, set the [DRUM] status key to OFF or select an empty rhythm song/rhythm pattern. - Page 133 When an SMF is played in the above condition, the SMF playing information and the rhythm song or rhythm pattern information of the MRS-802 will be sent to the internal drum kit at the same time. If you want to use the drum kit only for the SMF, you must first select an empty rhythm song/rhythm...
-
Page 134: Smf Playback
SMF, regardless of the [DRUM] key status (on/off). • When playing an SMF including tempo information, locating a measure/beat in the song of the MRS-802 may therefore lead to a mismatch with the measure/beat of the SMF. -
Page 135: Reference [Other Functions]
Changing the function of the foot switch With the default settings of the MRS-802, a foot switch connected to the CONTROL IN jack can be used to control play/stop of the recorder. If you want to use the foot switch to control manual punch-in/out recording (→... -
Page 136: Using The Tuner Function
Reference [Other Functions] Using the tuner function The MRS-802 has a built-in chromatic tuner that can be used when tuning an instrument connected to the GUITAR/ BASS or INPUT 1/2 jacks. This section explains how to use the tuner. Connect the instrument that you want to tune to... -
Page 137: Switching The Level Meter Display Type
The basic procedure is as follows. Turn power to the MRS-802 off. While holding down the [CLEAR] key, turn power on again. The MRS-802 starts up in “ROM utility mode” which serves for performing special functions. ROM UTY... -
Page 138: Test/Restore Integrity Of Data On Internal Hard Disk (Scandisk)
1. Formatting the hard disk (All Initialize) This action formats the hard disk of the MRS-802 and then restores the system files and other data necessary for operation of the MRS-802. All existing projects on the hard disk including the demo songs will be erased. -
Page 139: Hard Disk Maintenance Using Supplied Cd-Rom
To make this possible, connect the computer and MRS-802 with a USB cable and start the MRS-802 in USB mode. Depending on the computer and the operating system, driver installation may be required. - Page 140 To terminate the USB mode and start the unit in normal mode, press the [EXIT] key. To turn off the power, set the [POWER] switch to OFF. When the following screen appears on the display, press the [ENTER] key. PowrOFF PowrOFF ENT/EXIT ENT/EXIT ZOOM MRS-802...
-
Page 141: Appendix
MRS-802 Specifications ● Recorder Number of physical tracks Number of virtual tracks 100 (10 V-takes per track) Drum track 1 (stereo) Number of simultaneous recording tracks Number of simultaneous playback tracks 10 (8 audio tracks + stereo drum) Recording data format... -
Page 142: Troubleshooting
Appendix Troubleshooting If there are problems during operation of the MRS-802, check the following points first. Problems during playback ■ No sound, or sound is very weak • Check the connections to your audio system, and the volume of your audio system. -
Page 143: Problems With The Rhythm Section
MIDI OUT connector of the MRS-802 to the MIDI IN connector of the external device. • At the MRS-802, make sure that output is enabled for the Timing Clock, Song Position Pointer, and Start/Stop/ Continue messages (→ p. 130). -
Page 144: Problems With Cd-R/Rw Drive
The disc inserted in the CD-R/RW drive is not a CD-R/RW disc. HDD FULL There is not enough free space on the internal hard disk. PRJ FULL No more projects can be created on the internal hard disk. ZOOM MRS-802... -
Page 145: Effect Type/Parameter List
Combination of vintage distortion and cabinet simulator. GAIN MZ+CAB Combination of metal-style distortion and cabinet simulator. GAIN 9002+CB Combination of the Zoom 9002 distortion and cabinet simulator. ZOOM MRS-802 Parameter SENS ATTACK 0 – 10 Adjusts the compression input sensitivity. - Page 146 3BandEQ Three-band equalizer. Parameter Description Parameter Name Setting Range HIGH LEVEL ● ZNR module Type Zoom's proprietary noise reduction that minimizes noise in play pauses. Parameter Description Parameter Name Setting Range OFF, 1 – 30 THRSHOLD BODY LEVEL TONE LEVEL...
- Page 147 TYPE = WIDE : 1 – 64 TIME TYPE = DELAY : 1 – 50 WET LVL DRY LVL ZOOM MRS-802 Parameter MIN VOL When using an expression pedal as a volume pedal, this parameter specifies the 0 – 10 minimum volume.
- Page 148 6. Vocal characteristics with low cut 0 – 10 Adjusts the tone. 1 – 8 Adjusts the module output level. 0 – 10 Adjusts the amount by which vocal sibilants will be cut. LEVEL LEVEL Parameter Description LEVEL DE-ESSER Parameter Description ZOOM MRS-802...
- Page 149 SIZE TYPE = FLANGER : -10 – 10 TYPE = DELAY : 0 – 10 TYPE = DELAY : 1 – 50 TIME TYPE = DOUBLE : 1 – 100 TONE ZOOM MRS-802 Parameter DEPTH RATE DEPTH RATE RATE COLOR...
- Page 150 Adjusts the module output level. 1 – 8 Parameter TIME TONE 1 – 100 Adjusts the delay time (x 1 ms) 0 – 10 Adjusts the tone. 0 – 30 Adjusts the module output level. LEVEL Parameter Description Parameter Description ZOOM MRS-802...
- Page 151 COLOR CLIP -12.0 – 24.0 SHIFT TONE BALANCE SIZE TIME ZOOM MRS-802 Parameter XOVER_Hi MIX_HIGH Adjusts the frequency for bass/midrange division. Adjusts the frequency for midrange/treble division. Adjusts the treble mix amount. Adjusts the midrange mix amount. Adjusts the bass mix amount.
- Page 152 Adjusts the mix amount of the effect sound. 0 – 30 0 – 30 Adjusts the mix amount of the direct sound. Parameter GAIN -12 – 12 Adjusts the level. SENS_LOW MIX_HIGH MIX_MID EFX LVL DRY LVL Parameter Description Parameter Description ZOOM MRS-802 MIX_LOW...
-
Page 153: Send/Return Effect
Parameter Description Parameter Name Setting Range PRE DLY REV TIME EQ_HIGH EQ_LOW E/R MIX EFX LVL ZOOM MRS-802 Parameter RISE_2 FreqOFST RATE TYPE 0 – 30 Adjusts the degree to which the stereo component is emphasized. 0 – 30 Adjusts the spaciousness that includes the monaural component. -
Page 154: Effect Patch List
High-gain amp sound ideal for single coil half-tone settings Soldan Drive sound of a modern class-A amp MatchDrv Heavy metal sound with a solid bottom Snake 800 series crunch sound ensemble Crunch Warm lead sound Ballad Comment Comment ZOOM MRS-802... - Page 155 Vintage blues sound V-Blues Bluesy sound suitable for finger picking BlueFngr Wet hard rock sound HDR-Drv Zoom's original "cry effect" sound Cry-Lead Lead sound with auto-wah ZakWah L.A. studio-style big chorus sound LA-Std Ring modulator also usable as a sound effect for recording TheRing 40 –...
- Page 156 Acoustic guitar / Vocal Acoustic guitar / Vocal Acoustic guitar / Vocal Acoustic guitar / Vocal Acoustic guitar / Acoustic guitar Acoustic guitar / Acoustic guitar Acoustic guitar / Acoustic guitar Acoustic guitar / Acoustic guitar Acoustic guitar / Acoustic guitar ZOOM MRS-802...
- Page 157 Special sweep effect using strong filter RaveRez Strong compression over full frequency range FullComp Power tuning with emphasized midrange, strong impact and clear sound ClearPWR Sound with enhanced clarity and spaciousness ClearDMS 20 – 29 EMPTY ZOOM MRS-802 Comment Comment Appendix...
-
Page 158: Send/Return Effect
Simulates the reverberation of a large venue such as a gym BigRoom Gate reverb type effect PowerSt. Simulates a bright concert hall BritHall Simulates the reverberation at Budokan in Tokyo BudoKan Reverb effect for slow ballads Ballade 15 – 19 EMPTY Comment Comment ZOOM MRS-802... -
Page 159: Rhythm Pattern List
ROCK18 ROCK19 ROCK20 ROCK21 ROCK22 ROCK23 ROCK24 ROCK25 ROCK26 ROCK27 ROCK28T ROCK29 ROCK30 ROCK31 ZOOM MRS-802 Pattern Name ROCK32 ROCK33 HROCK 01 HROCK 02 HROCK 03 HROCK 04 HROCK 05 HROCK 06 HROCK 07 HROCK 08 HROCK 09 METAL 01... - Page 160 JAZZ F2 SHFL F1 SHFL F2 SHFL F3 REGGA F1 REGGA F2 AFRO F1 AFRO F2 LATIN F1 LATIN F2 LATIN F3 LATIN F4 MIDE F1 MIDE F2 ENDING01 ENDING02 ENDING03 ENDING04 ENDING05 ENDING06 ENDING07 METRO4/4 METRO3/4 ALL MUTE ZOOM MRS-802...
-
Page 161: Drum Kit List
O-HH Scratch 2 TOM 1 High Q TOM 2 Square click TOM 3 Short click CYMBAL Vibraslap ZOOM MRS-802 Pattern Name Live Rock 1 TECHNO BEAT Live Rock 2 Studio 1 LO-FI KIT Studio 2 Standard 1 PERCUSSION Standard 2... - Page 162 Wood block high Wood block low Jingle bell Castanet Mute surdo Open surdo Mute triangle Open triangle Bank 3 Instrument Name Note # Wood block high Wood block low Jingle bell Castanet Mute surdo Open surdo Mute triangle Open triangle ZOOM MRS-802...
-
Page 163: Phrase List
Sg-02-2B Sg-03-1A Drum Bass Loops Sg-03-1B Sg-04-1A Sg-04-1B Sg-04-1C Reggae Variations Sg-04-2A Sg-04-2B Sg-04-2C ZOOM MRS-802 Comments Drum loop 1 Drum loop 2 Drum fill 1 Drum variation 1 Drum fill 2 Drum variation 2 Bass Drum end Drum intro... -
Page 164: Mrs-802 Hard Disk Contents
Appendix MRS-802 hard disk contents The hard disk in the MRS-802 comprises two partitions called "MSR-USR" and "MSR-FAC". The "MSR-FAC" partition contains files that are needed for performing hard disk maintenance. Never attempt to manipulate the files in this partition. - Page 165 BASS SIM, and BASS algorithms in numerical order. ● In DUAL algorithm patches, the parameters of G/B&Mic type and of Gtr&Bass type will be changed. ■ When loading MRS-802 projects into the MRS-1044/CD ● The following data will not be read: •...
-
Page 166: Midi Implementation
All Notes Off Description Note Off kk: note number Note Off kk: note number Note On kk: note number vv: velocity Channel Volume vv: volume value All Notes Off Song Position Pointer shsl: song position Timing Clock Start Continue Stop ZOOM MRS-802... -
Page 167: Midi Implementation Chart
MIDI implementation chart [HardDisk Recorder Model MRS-802 Function ... Basic Default Channel Changed Default Mode Messages Altered Note Number True voice Velocity Note ON Note OFF After Key's Touch Ch's Pitch Bend Control Change Prog Change True # System Exclusive... -
Page 168: Zoom Mrs
Range of data ......49 Rhythm pattern ......83 ZOOM MRS-802... - Page 169 Maintenance ......137 MRS-802 hard disk contents ....164 Rewriting system file data .
- Page 170 Saving a scene ......74 Saving a send/return effect patch ... . 109 ZOOM MRS-802...
- Page 171 Erasing a specified data range ....49 ZOOM MRS-802 Erasing a V-take ......54 Fade-in/out of a specified data range .
- Page 172 ZOOM CORPORATION NOAH Bldg., 2-10-2, Miyanishi-cho, Fuchu-shi, Tokyo 183-0022, Japan PHONE: +81-42-369-7116 FAX: +81-42-369-7115 Web Site: http://www.zoom.co.jp MRS-802- 5000-1...
Need help?
Do you have a question about the MRS-802 and is the answer not in the manual?
Questions and answers