
Related Manuals for Zoom MRS-8


Summary of Contents for Zoom MRS-8
- Page 1 Operation Manual © ZOOM Corporation Reproduction of this manual, in whole or in part, by any means, is prohibited.
-
Page 2: Usage And Safety Precautions
[Battery operation] • Volume • Use four conventional IEC R6 (size AA) batteries Do not use the MRS-8 at a loud volume for a long (alkaline). time since this can cause hearing impairment. Caution • The MRS-8 cannot be used for recharging. -
Page 3: Usage Precautions
Care should be taken to minimize the risk of damage. • Cleaning Use a soft, dry cloth to clean the MRS-8. If necessary, slightly moisten the cloth. Do not use abrasive cleanser, wax, or solvents (such as paint thinner or cleaning alcohol), since these may dull the finish or damage the surface. -
Page 4: Table Of Contents
Step 5: Mixdown ..... . 29 Introducing the MRS-8 ....8 Using the mastering effect . - Page 5 ....... . . 74 Assigning a name to a rhythm pattern..75 ZOOM MRS-8...
- Page 6 Formatting an SD card ....118 Checking the available SD card capacity/ project size ......118 ZOOM MRS-8...
-
Page 7: Introduction
Everything you need to create music is right there. Use it to pre-produce a song at home or take it into the studio for some serious recording work. The MRS-8 is a great tool that will go anywhere. -
Page 8: Introducing The Mrs-8
Introducing the MRS-8 The MRS-8 is internally divided into the following four sections. ● Recorder Recorder Records and plays back audio signals. ● Rhythm section The recorder section of the MRS-8 has eight audio tracks. Uses the internal drum/bass sound source to play (A “track”... -
Page 9: Rhythm Section
This is called the master track. The master track is reserved for use in mixdown. The MRS-8 provides two types of effects: insert effect and send/return effect. These effects have the characteristics described below. -
Page 10: Names Of Parts
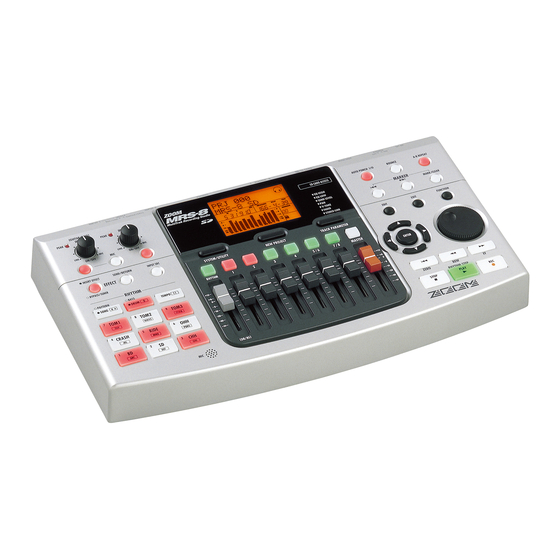
Fader section Transport section Input section Rhythm section [INPUT] controls 1/2 [SONG/PATTERN] key [DRUM/BASS] key [PEAK] indicators [TEMPO] key [MIC] key Pads 1 – 9 INPUT [ON/OFF] keys 1/2 Effect section [INSERT EFFECT] key [INPUT SRC] key [SEND/RETURN] key ZOOM MRS-8... -
Page 11: Rear Panel
Faders ([RHYTHM], 1 – 4, 5/6, 7/8, [MASTER]) PLAY [R] key Rear panel INPUT 1/2 MASTER connectors OUTPUT jacks MIDI OUT connector DC 9V jack PHONES jack [POWER ON/OFF] Card slot [PHONES] [INPUT 1 SELECT] switch volume control switch ZOOM MRS-8... -
Page 12: Connections
Bass the [INPUT 1 SELECT] switch to MIC/LINE. MIDI IN Dynamic or condenser microphone Rear panel To power the MRS-8 from an AC outlet, be sure to use only the ZOOM AD-0006 (available separately). Using another AC adapter can lead to malfunction and AC adapter damage. -
Page 13: Inserting Sd Card And Batteries
Before inserting a card, verify that the write protect feature is turned off. Make sure that power Turn the unit over and open the battery to the MRS-8 is turned off, and then insert the card as compartment cover. shown below. -
Page 14: Power On/Off
To return to the main screen from other screens, press the [EXIT] key repeatedly. If an SD card that is not ready for use in the MRS-8 is inserted, the indication “FORMAT?” appears when you turn the MRS-8 on. If you press the [ENTER] key at this point, the SD card will be formatted. -
Page 15: Let's Record
Let’s Record This section demonstrates the basics of recording and playback with the MRS-8. As an example, we explain how to record an electric guitar connected to the INPUT 1 connector. Connect the guitar to the INPUT 1 connector and set the [INPUT 1 SELECT]... - Page 16 To start recording, press the PLAY [ R ] key while holding down the REC [ O ] key. A four-beat pre-count is heard, and recording starts. In the default condition of a project, an 8-beat rhythm pattern is played during recording and playback. Play ZOOM MRS-8...
-
Page 17: Quick Tour
Quick Tour Now let’s use your MRS-8 to do some actual recording. This Quick Tour describes the five steps that cover the entire process from preparation until the completion of a song. • Step 1: Preparations Step 1: Preparations Shows how to create a new project, select a guide rhythm, and perform other steps necessary for recording. -
Page 18: Selecting The Rhythm Pattern To Use
Otherwise data may be destroyed and malfunction may the current pattern has finished. When you select a new occur. If you want to remove the SD card while the MRS-8 is pattern with the cursor up/down keys, the new pattern on, be sure to follow the correct procedure ( p. - Page 19 When the key is lit, the drum track is selected. When the key is out, the bass track is selected. The [RHYTHM] fader then controls the respective level. To return to the main screen, press the [EXIT] key. ZOOM MRS-8...
-
Page 20: Step 2: Recording The First Track
Connect an instrument to the INPUT 1/2 connector. • Input source = INPUT 1 connector The MRS-8 can handle up to two input sources at a time, from INPUT 1, INPUT 2, and the built-in mic. INPUT 1 and the built-in mic are mutually exclusive. A switch selects one of these for use as input source. -
Page 21: 2.2 Applying The Insert Effect
The input signal level can be checked with the level meter IN 1/IN 2 bars in the display. The MRS-8 has eight algorithms with multiple patch selections for each algorithm. To use the insert effect, 2.2 Applying the insert effect select the algorithm first and then call up one of the... - Page 22 HINT MASTERING 0 – 29 • To record without using the insert effect, press the [INSERT EFFECT] key in the effect section repeatedly until the key goes out. While the key is out, the insert effect is bypassed. ZOOM MRS-8...
-
Page 23: Selecting A Track And Recording
To begin recording, press the ZERO [ U ] MASTER key to return to the beginning of the song. Two Input sources Track 1 Then hold down the REC [ O ] key and press Track 2 the PLAY [ R ] key. ZOOM MRS-8... - Page 24 If you press the PLAY [R] key while holding down this key, recording starts. Pressing the key during PLAY [R] key playback causes punch-in and pressing the key Starts recorder playback during recording causes punch-out (→p. 37). from the current position. ZOOM MRS-8...
-
Page 25: Step 3: Overdubbing
If necessary, set the recorder to playback and operate the faders to adjust the monitor level balance between the recorded track and the track to record. To begin recording, press the ZERO [ U ] key to return to the beginning of the song. ZOOM MRS-8... -
Page 26: Step 4: Mixing
→ bass track → audio track 1 – 8. Use the cursor up/down keys to bring up the parameter that you want to adjust. Track 1 – 8 signal level ZOOM MRS-8... -
Page 27: Applying The Send/Return Effect
(which controls the signal level that is sent to the effect). Increasing this parameter will result in stronger effect action. This section describes how to adjust the send level for each track. ZOOM MRS-8... -
Page 28: Applying The Insert Effect To A Track
The screen for selecting the insert effect algorithm/patch Send level value appears. While playing the song, turn the dial to adjust the send level value for the track. Adjust the send level for other tracks in the same way. ZOOM MRS-8... -
Page 29: Step 5: Mixdown
final mix during mastering. NOTE While the insert effect is inserted immediately before the [MASTER] fader, you cannot use the effect for processing the input signal or for post-processing a recorded track. Press the [INPUT SRC] key. ZOOM MRS-8... -
Page 30: Mixdown Onto The Master Track
Press the ZERO [ U ] key to return to the beginning of the song. Then hold down the REC [ O ] key and press the PLAY [ R ] key. Recording on the master track starts. ZOOM MRS-8... - Page 31 This lets you switch the V-take and create different versions with different mixing balance (→ p. 32). • The contents of the master track can be edited later (→ p. 44). • You can play the master tracks of multiple projects in succession (→ p. 111). ZOOM MRS-8...
-
Page 32: Reference [Recorder]
(where x is the track number and yy is the number.) V-take number). The V-take name is shown on the second line of the • GTR x-yy display. V-take recorded through CLEAN, DIST, or ACO/BS SIM algorithm of insert effect ZOOM MRS-8... - Page 33 Numeral: 2 Numeral: 3 The cursor (flashing box) appears on the first character of the V-take name. This indicates that you can change the V-take name. When you press a pad or key, the character is inserted and ZOOM MRS-8...
- Page 34 To finish, press the [EXIT] key. The main screen appears again. Cursor down key HINT If the contents of a V-take are erased, the name reverts to TakeName TakeName “NO DATA”. Lower case Case character indication ZOOM MRS-8...
-
Page 35: Moving To A Desired Point In The Song (Locate Function)
For details, see the Add a mark next section. Mark number Song Mark number Song HINT Mark number 00 is already set at the beginning of the song (the counter zero location). ZOOM MRS-8... -
Page 36: Locating A Mark
HINT In this condition, the mark number can be changed. The A/B point can be specified either during playback or when the MRS-8 is stopped. 006- 2- 8 Move to the point where repeat playback should end, and press the [A-B REPEAT] key once more. -
Page 37: Re-Recording Only A Specified Region (Punch-In/Out Function)
When you come to the intended punch-out [ P ] key. point, press the REC [ O ] key once more. The REC [ O ] key goes out, and the MRS-8 switches To turn off repeat playback, press the [A-B from recording to playback. -
Page 38: Recording Several Tracks On A Master Track (Mixdown Function)
PLAY [ R ] key. the master track is as a track on which the end result of a The MRS-8 will begin playing. When you reach the In mixdown process is recorded. point, the track on which you are punching in/out will be The MRS-8 offers one master track for each project. -
Page 39: Master Track Mixdown Steps
To carry out the mixdown operation, press the ZERO [ U ] key to return to the beginning of the song, and then press the PLAY [ R ] key while holding down the REC [ O ] key. ZOOM MRS-8... -
Page 40: Combining Multiple Tracks On One Or Two Tracks (Bounce Function)
TAKE” is shown on the display, and press display. the [ENTER] key. The V-take currently selected as bounce destination is Use the cursor left/right keys to bring up shown. the indication “SYSTEM BOUNCE” on the display, and press the [ENTER] key. ZOOM MRS-8... -
Page 41: Executing Bounce Recording
• When a pair of mono tracks with odd/even numbers is selected as bounce destination, the bounce signal is recorded in stereo. To achieve correct left/right positioning of the ZOOM MRS-8... -
Page 42: Recording Drum/Bass Sound On Audio Tracks (Rhythm Recording)
(rhythm recording) TR” as recording source. Press the [EXIT] key repeatedly to return to The MRS-8 allows you to bounce only the drum track or the main screen. bass track onto any track, while playing all tracks. This function is called “rhythm recording”. -
Page 43: Making Settings For Pre-Count Operation
The current setting is shown. Turn the dial to make the selection from the following choices. • OFF The pre-count is turned off. • 1 – 8 A pre-count of 1 – 8 beats is heard. • SPECIAL A special pre-count as follows is heard. ZOOM MRS-8... -
Page 44: Reference [Track Editing]
Move a specified range of audio data. editing source, the editing destination must also be two tracks or the master track. The currently selected V-take for each • Erase track will be the destination. Erase a specified range of audio data. ZOOM MRS-8... -
Page 45: Copying A Specified Range Of Data
Select the copy destination track/V-take in the same way as for the copy source, and press the [ENTER] key. ZOOM MRS-8... -
Page 46: Moving A Specified Range Of Data
The display changes as follows. From this screen, you specify the move start point. can specify the move destination start point. Move Src Move Src Move Dst Move Dst START START TO TO 1- 0 4 28 103- 3-44 ZOOM MRS-8... -
Page 47: Erasing A Specified Range Of Data
Press the [ENTER] key. Trim Src Trim Src The display changes to “Ers Src END”. This screen lets START START you specify the erase range end point. 1- 0 ZOOM MRS-8... -
Page 48: Fade-In/Fade-Out Of Specified Data Range
Curves I-1 to I-3 are for fade-in, and curves o-1 to o-3 are for fade-out. The different kinds of curves look as follows. Refer to steps 1 – 6 of “Basic steps for range editing” to select the track for fade- in or fade-out, and press the [ENTER] key. ZOOM MRS-8... -
Page 49: Reversing A Specified Range Of Audio Data
Refer to steps 1 – 6 of “Basic steps for range editing” to select the track/V-take for reversing, and press the [ENTER] key. The display changes as follows. In this condition, you can specify the reverse start point. Rvrs Src Rvrs Src START START 1- 0 ZOOM MRS-8... -
Page 50: Editing Using V-Takes
( p. 53). → the odd-numbered track and even-numbered track in sequence. Press the [FUNCTION] key in the control section. Commands for editing audio data in V-take units appear on the display. ZOOM MRS-8... -
Page 51: Erasing A V-Take
The display changes as follows. In this condition, you can MOVE TO MOVE TO specify the copy destination track/V-take. TR 1- 2E TR 1- 2E COPY TO COPY TO HINT TR 1- 2E TR 1- 2E If nothing is recorded on the V-take selected as editing ZOOM MRS-8... -
Page 52: Exchanging V-Takes
The display changes as follows. In this condition, you can keys and the dial to select the exchange specify the import source track/V-take. destination track/V-take, and press the [ENTER] key. The indication “EXCHG SURE?” appears on the display. ZOOM MRS-8... -
Page 53: Track Capture And Swap
Capturing a track You can capture the audio data of any specified track. From the main screen, press the [SYSTEM/ UTILITY] key in the display section. The indication “SYSTEM PROJECT” appears on the display. ZOOM MRS-8... -
Page 54: Swapping Track Data
To return to the main screen, press the time. [EXIT] key repeatedly. HINT By performing the swap operation once more, you can return the track contents to the previous condition. To return to the main screen, press the [EXIT] key repeatedly. ZOOM MRS-8... -
Page 55: Reference [Mixer]
Reference [Mixer] This section explains the functions and operation of the mixer built into the MRS-8. Similarly, mute on/off for the audio tracks is switched About the mixer using the status keys (1 – 4, 5/6, 7/8), and mute on/off for the drum/bass track is switched using the [RHYTHM] status key. -
Page 56: Assigning Input Signals To Recording Tracks
INPUT [ON/OFF] key The MRS-8 allows you to select up to two signals from the INPUT 1/2 connectors and the built-in mic. The • Selecting two INPUT connectors INPUT 1 connector and the built-in mic are switchable, Verify that the [MIC] key is not lit. - Page 57 flicker slightly. press the [INSERT EFFECT] key in the effect section. The display changes as follows. In this condition, the cursor up/down keys select the insert effect algorithm, and the dial selects the effect patch for the algorithm. ZOOM MRS-8...
- Page 58 60). In this case, the track parameter PAN functions as INPUT 1 (built-in mic) a BALANCE parameter that adjusts the left/right level Track INPUT 2 balance. Two Input sources Recorder INPUT 1 (built-in mic) Track INPUT 2 ZOOM MRS-8...
-
Page 59: Adjusting The Signal For Each Track (Track Parameters)
TR 3 TR 3 EQ HI G EQ HI G The mixer of the MRS-8 lets you adjust various aspects for each track (called track parameters), such as level, HINT panning, EQ, and send/return effect intensity. • When selecting the V-take of stereo tracks (5/6, 7/8), the track is toggled between odd-numbered track and even-numbered track with each push of the key. -
Page 60: Linking Two Tracks (Stereo Link)
Therefore, if a track is in recording standby mode, the input track parameter settings will have no effect. (However, In the MRS-8, the parameters of adjacent odd-numbered/ the REC LVL parameter is always active.) even-numbered mono tracks (1/2 or 3/4) can be linked, resulting in a pair of stereo tracks. -
Page 61: Reference [Rhythm]
Reference [Rhythm] This section explains the functions and operation of the built-in rhythm section of the MRS-8. About the rhythm section The rhythm section of the MRS-8 uses internal drum sound and bass sound sources to generate rhythm accompaniment. It can be used instead of a metronome... -
Page 62: Rhythm Patterns
Up to 10 rhythm songs can be programmed in one project. PATTERN A PATTERN B PATTERN C PATTERN D PATTERN E Rhythm song Measure number PATTERN A PATTERN E PATTERN B Drum sequence Drum sequence Drum sequence Bass sequence Bass sequence Bass sequence Chords ZOOM MRS-8... -
Page 63: Playing Rhythm Patterns
If there is one or more recorded audio tracks, these will also be played back. To play the rhythm pattern only, turn down the faders of the audio tracks. HINT You can change the tempo either in playback or stop mode. ZOOM MRS-8... -
Page 64: Changing The Drum Kit / Bass Program
The display changes as follows. Sound assigned to pads Use the cursor left/right keys to bring up the indication “UTILITY DRUM KIT” or Pad=DRUM Pad=DRUM “UTILITY BASS PRG” on the display. Then PadBank= PadBank= press the [ENTER] key. ZOOM MRS-8... - Page 65 When the [DRUM/BASS] key is out, the pads can be Use the [RHYTHM] fader and [RHYTHM] status key to used to play a bass program. The display changes as control the bass program volume and switch mute on and follows. off as necessary. ZOOM MRS-8...
-
Page 66: Creating A Rhythm Pattern
---#500 ---#500 EMPTY EMPTY HINT If there is no empty rhythm pattern, erase an unneeded pattern ( p. 76). → Press the [EDIT] key. The rhythm pattern edit menu for making various rhythm pattern settings appears. ZOOM MRS-8... -
Page 67: Drum Sequence Real-Time Input
When you press the [EXIT] key, the rhythm pattern edit menu appears again. For real-time input of a drum sequence, you play the rhythm pattern on the pads of the MRS-8. To set the number of measures of the rhythm pattern, use the cursor left/right At the rhythm pattern screen, select an keys to bring up the indication “PTN EDIT... - Page 68 STOP [ P ] key. when you press the REC [ O ] key once more. Rhythm pattern recording will stop. Press the PLAY [ R ] key to hear the pattern that you recorded. ZOOM MRS-8...
-
Page 69: Bass Sequence Real-Time Input
To return, press the [EXIT] key. For real-time input of a bass sequence, you play the pads of the MRS-8. • Switching to a drum sequence during real- At the rhythm pattern screen, select an... -
Page 70: Drum Sequence Step Input
The intensity with which you hit the pad is also recorded. Drum sequence step input Quantize: quarter note Quantize: sixteenth note ZOOM MRS-8... -
Page 71: Bass Sequence Step Input
(see diagram length as necessary, to enter the desired on next page). rhythm pattern. When you reach the end of the pattern, the unit automatically returns to the first measure, letting you ZOOM MRS-8... - Page 72 The counter shows the current position in measures/beats/ticks. Use the cursor up/down keys to select the quantize value. This setting becomes the length of one step. ZOOM MRS-8...
-
Page 73: Entering Rhythm Pattern Chord Information
To return to the main screen, press the When the setting is complete, press the [EXIT] key repeatedly. [EXIT] key. The rhythm pattern edit menu appears again. ZOOM MRS-8... -
Page 74: Changing The Drum/Bass Sequence Volume Level
The rhythm pattern selection screen appears. Turn the dial to select the rhythm pattern for which to specify volume information, and press the [EDIT] key. The rhythm pattern edit menu appears. PTN EDIT PTN EDIT QUANTIZE QUANTIZE ZOOM MRS-8... -
Page 75: Assigning A Name To A Rhythm Pattern
By To return to the main screen, press the pressing the [EXIT] key instead of the [ENTER] key, you [EXIT] key repeatedly. can cancel the operation and back up one step at a time. ZOOM MRS-8... -
Page 76: Erasing A Rhythm Pattern
The This section explains how to erase all data from a MRS-8 allows you to save up to 10 rhythm songs per specified rhythm pattern, returning it to the blank state. project. While the [SONG/PATTERN] key is lit, one of these can be selected for editing or playing. -
Page 77: Entering Pattern Information Using Step Input
For an empty song, “EOS” will be located at the beginning. Therefore nothing INSERT? INSERT? happens if you play the song. P000x 4 P000x 4 Rhythm pattern number to insert Number of measures to insert ZOOM MRS-8... - Page 78 “EOS” is shown on the second line of the display. rhythm pattern information was deleted, the previous pattern will remain valid until the point where the next å rhythm pattern information is input. 3- 1- 0 Delete PATTERN A PATTERN B PATTERN C PATTERN A PATTERN C ZOOM MRS-8...
-
Page 79: Using Fast For Pattern Information Input
4 – 7. A new rhythm pattern is inserted at the current The FAST (Formula Assisted Song Translator) method location, and all subsequent patterns are moved back by developed by ZOOM uses simple formulas to specify the duration of the inserted pattern. rhythm pattern sequences and write an entire rhythm song in one operation. - Page 80 A cursor appears on the first line of the display, and FAST input is possible. 0+(1+2) 0+(1+2) ± Press twice Cursor 0+(1+2)x 0+(1+2)x Use the pads and keys of the rhythm section to enter the formula for creating the 0+(1+2)x 0+(1+2)x rhythm song. 0+(1+2)x 0+(1+2)x ZOOM MRS-8...
-
Page 81: Entering Chord Information
Chord type [EXIT] key repeatedly. Chord root Turn the dial to specify the note name (C – B) that will be the root of the chord. The following screen shows an example of changing the chord root to A. ZOOM MRS-8... - Page 82 Use the REW [ T ]/FF [ Y ] keys to move to the beginning To return to the main screen, press the [EXIT] key. of the preceding or following beat. • Moving in steps of a sixteenth note Repeatedly press the cursor up key to bring up the ZOOM MRS-8...
-
Page 83: Entering Other Information
If the event you select here has been input at the current location, its value will be displayed. Measure Pattern PATTERN 001 PATTERN 020 Time signature Root/chord D maj G min Tempo BPM-135 Drum track volume Bass track volume Drum kit number Bass program number ZOOM MRS-8... -
Page 84: Playing A Rhythm Song
When you have finished, press the STOP [ P ] key. The REC [ O ] key goes out, and the rhythm song selection screen appears again. To return to the main screen, press the [EXIT] key repeatedly. ZOOM MRS-8... -
Page 85: Editing A Rhythm Song
COPY COPY START START From the main screen, press the [SONG/ 1- 1- 0 PATTERN] key repeatedly, until the key is lit. Copy source start point The rhythm song selection screen appears. ZOOM MRS-8... -
Page 86: Copying A Rhythm Song
By pressing the [EXIT] key instead of the [ENTER] key, opposite direction. you can cancel the operation and back up one step at a time. To return to the main screen, press the [EXIT] key repeatedly. To return to the main screen, press the [EXIT] key repeatedly. ZOOM MRS-8... -
Page 87: Erasing The Rhythm Song
For information on how to input characters, refer to page When the name has been input, press the [EXIT] key. The rhythm song name is changed, and the display returns to the rhythm song edit menu. To return to the main screen, press the [EXIT] key repeatedly. ZOOM MRS-8... -
Page 88: Importing Rhythm Patterns And Rhythm Songs From Another Project
Use the cursor left/right keys to select ALL (import all rhythm patterns and rhythm songs) or PATTERN (import specific rhythm pattern), and press the [ENTER] key. In this condition, you can select the source project from which to import. ZOOM MRS-8... -
Page 89: Editing Various Settings Of The Rhythm Section
• 1 – 8 • ClickVol A pre-count of 1 – 8 beats is heard (default: 4). Change the volume level of the metronome click that is heard during real-time input of a rhythm pattern. ZOOM MRS-8... -
Page 90: Changing The Metronome Volume
The volume will be medium, regardless of how strongly Left/right pan setting applies as seen from the listener you tap the pad. (audience). • LOUD The volume will be loud, regardless of how strongly you tap the pad. ZOOM MRS-8... -
Page 91: Reference [Effects]
Reference [Effects] This section explains the functions and operation of the effect section built into the MRS-8. result will be recorded when you carry out recording. About the effects When the insert effect is applied to one of the audio tracks (tracks 1 –... -
Page 92: Using The Insert Effect
“algorithm”. Depending on the selected algorithm, the input/output configuration of the effect will differ. The arrangement of The MRS-8 allows the following algorithms. effect modules for each algorithm and the input/output signal flow are shown in the diagram below. -
Page 93: Changing The Insert Location Of The Insert Effect
The current insert position is shown on the display. The following display is shown. In this condition, you can select the algorithm and patch for the insert effect. IN SRC IN SRC IN IN Insert position The display meaning is as follows. ZOOM MRS-8... - Page 94 Odd- Input 1 numbered track EFFECT for mono input/stereo output, “S → S” stands for stereo (DUAL) Even- Input 2 input and output, and “Dual” stands for mono input x 2 numbered track and mono output x 2.) ZOOM MRS-8...
-
Page 95: Editing An Insert Effect Patch
Effect MODULATION/ module DELAY Effect CHORUS FLANGER PHASER type DEPTH DEPTH RATE Effect RATE RATE COLOR parameters This section explains how to edit the effect type and effect parameters for the currently selected patch. ZOOM MRS-8... -
Page 96: Clean Dist
EQ L EQ L DOUBLE L DOUBLE L TOTAL TOTAL DUAL MIC COMP/LIM MICPRE DOUBLING ZNR, PAT LVL DIM/RESO DIM/RESO CMP/LoFi CMP/LoFi NORMLZR NORMLZR 3BandEQ 3BandEQ TOTAL TOTAL MASTERING DIMENSION/ 3BAND COMP/ NORMALIZER ZNR, PAT LVL RESONANCE Lo-Fi ZOOM MRS-8... - Page 97 The effect module is turned off. The module name or the effect type is shown on the first line and the indication “-OFF-” on the second line of the display. Pressing the [ENTER] key once more in this condition turns the ZOOM MRS-8...
-
Page 98: Storing Or Swapping Insert Effect Patches
(→ p. 102). To confirm the new name, press the [FUNCTION] key in the control section twice. The patch is stored, overwriting the old information. When storing is complete, the insert effect patch selection screen appears again. ZOOM MRS-8... -
Page 99: Applying The Insert Effect Only To The Monitor Signal
REC SRC You can now select one of the following two signal types to be recorded on the track. • WET The input signal that has passed through the insert effect will be recorded on the track (default setting). ZOOM MRS-8... -
Page 100: Using The Send/Return Effect
About the send/return effect screen. patches Editing a send/return effect The send/return effect of the MRS-8 is a single effect patch module for which one effect type (reverb, chorus, delay, etc.) can be selected. Each effect type has various effect parameters which can This section explains how to edit a send/return effect be adjusted to control the sound produced by the effect. -
Page 101: Storing Or Swapping Send/Return Effect Patches
When carrying out swap, the currently selected patch and the patch settings selected here will be interchanged. COMPARE COMPARE VoChorus VoChorus To return to the edited patch, press the [SEND/RETURN] key once more, or press the [EXIT] key. ZOOM MRS-8... -
Page 102: Assigning A Name To A Send/Return Effect Patch
Press the [SYSTEM/UTILITY] key to bring pads and keys to select a character. up the indication “UTILITY IMPORT” on the For information on how to input characters, refer to page display, and then press the [ENTER] key. The display changes as follows. ZOOM MRS-8... - Page 103 When the process is completed, the display of step 1 appears again. By pressing the [EXIT] key instead of the [ENTER] key, you can cancel the operation and back up one step at a time. ZOOM MRS-8...
-
Page 104: Reference [Projects]
This section describes how to perform operations for entire projects. About projects Working with projects On the MRS-8, the data needed to reproduce a song you This section explains how to perform operations such as create are managed in units called “projects”. By loading loading or saving a project. -
Page 105: Loading A Project
HINT character. For details on entering characters, see page 33. When power to the MRS-8 is turned on, the project that was last worked on will be loaded automatically. To create the project, press the [ENTER] key. -
Page 106: Copying A Project
When copying is completed, the copy destination project is loaded, and the unit returns to the main screen. By pressing the [EXIT] key instead of the [ENTER] key, you can cancel the operation and back up one step at a time. ZOOM MRS-8... -
Page 107: Changing The Project Name
• Setting or deleting marker information • Changing the names of various data HINT A project that has been protected can still be played normally, and you can change the mixing balance and make certain other changes, but the changes cannot be saved. ZOOM MRS-8... -
Page 108: Reference [Midi]
Reference [MIDI] This section explains the MIDI-related settings and functions of the MRS-8. About MIDI Making MIDI-related settings MIDI (Musical Instrument Digital Interface) is a standard This section explains how to make MIDI-related settings. that allows messages such as play data and sound data (collectively called “MIDI messages”) to be exchanged... -
Page 109: Setting The Drum Kit/Bass Program Midi Channel
Then turn the dial to select one of the the MRS-8. To synchronize the measure indication at the following settings. MRS-8 and the MIDI device, the time signature setting at both devices must be matched. • 1 – 16CH Select one of MIDI channels 1 –... -
Page 110: Turning Song Position Pointer Messages On Or Off
MTC messages will not be transmitted. ON ON When using MTC to synchronize MIDI devices, the Turning Start/Stop/Continue MRS-8 always functions as MTC master. Set up the other messages on or off device to operate as MTC slave which receives MTC messages and functions accordingly. -
Page 111: Reference [Other Functions]
The display changes as follows. (sequence play) SEQ PLAY SEQ PLAY The MRS-8 lets you line up the master tracks from EMPTY EMPTY multiple projects saved on the SD card and play them Playlist number continuously in a specified order (sequence play). This is handy to record several projects on an external recorder, The display shows the screen for selecting a playlist. -
Page 112: Playing A Playlist
“INSERT?” appears on the display.) Turn the Press the [ENTER] key. dial to select another project, and press the [ENTER] key. The project menu for various project related functions The project is inserted and subsequent projects are appears. renumbered. ZOOM MRS-8... - Page 113 • ZERO [ U ] key Return to the start of the project registered for playback position 1. • FF [ Y ] key Stop playback, jump to the beginning of the next project, and resume playback. ZOOM MRS-8...
-
Page 114: Using The Tuner Function
(C, C#, D, D#, E...). The display also indicates by how much the current pitch is The MRS-8 incorporates a versatile tuner that can also different from the correct pitch. accommodate 7-string guitar, 5-string bass and other unconventional tunings. -
Page 115: Using Other Tuning Types
For example, when you select the tuning type Using other tuning types “GUITAR”, the display shows the following information. The MRS-8 allows various other tuning types besides GUITAR GUITAR chromatic tuning, including standard tuning for guitar >>... -
Page 116: Switching The Level Meter Display Type
Turn the dial to change the setting. CONTRAST CONTRAST When the setting is complete, press the [EXIT] key repeatedly to return to the main screen. When the setting is complete, press the [EXIT] key repeatedly to return to the main screen. ZOOM MRS-8... -
Page 117: Changing The Sd Card
When the formatting and saving process is completed, the If the SD card is changed without following the procedure main screen appears. below and while the MRS-8 is on, data may be permanently destroyed. HINT From the main screen, press the [SYSTEM/ If you cancel the format by pressing the [EXIT] key, the UTILITY] key in the display section. -
Page 118: Formatting An Sd Card
Formatting an SD card Checking the available SD card capacity/project size To format an SD card in the MRS-8, proceed as follows. This operation displays the remaining capacity of the SD card and the size of the currently loaded project. - Page 119 To return to the main screen, press the [EXIT] key repeatedly. NOTE • These screens are for display only and contain no settings that can be changed. • The remaining recordable time is an approximation. Use it for general reference only. ZOOM MRS-8...
-
Page 120: Troubleshooting
Troubleshooting If there are problems during operation of the MRS-8, check the following points first. • Make sure that the [INPUT 1 SELECT] switch is set Problems during playback to the appropriate position for the instrument connected to the INPUT 1 connector. -
Page 121: Problems With Effects
• Make sure that the MIDI cable is correctly connected • Press the [DRUM/BASS] key repeatedly to select from the MIDI OUT connector of the MRS-8 to the the desired sound (drum kit/bass program), and then MIDI IN connector of the external device. -
Page 122: Other Problems
■ SD card is not recognized • Format the SD card in the MRS-8 ( → p. 118). • The MRS-8 cannot use SD cards with a capacity of less than 16 MB. If such a card is inserted, the indication “Too Small”... -
Page 123: Appendix
24-bit, 128-times oversampling fade-in/out, reverse Sampling frequency 44.1 kHz Other function Punch-in/out, bounce recording, A-B repeat, capture/swap ● Mixer Fader Level meter Post-fader/pre-fader Track parameter 2-band equalizer, effect send level, panning (balance) Stereo link Track 1/2 or 3/4 linkable ZOOM MRS-8... - Page 124 Appendix Display 55 x 35 mm custom LCD with Power supply AC adaptor DC 9 V, 300 mA (ZOOM AD- backlight 0006) Input 1 Standard mono phone jack Battery 4 x IEC R6 (size AA); Input impedance10 kilohms approx. battery life 4 hours/5...
-
Page 125: Effect Parameters
CR+CAB Combination of vintage overdrive and cabinet simulator. TS+CAB Combination of vintage distortion and cabinet simulator. GV+CAB Combination of metal-style distortion and cabinet simulator. MZ+CAB Combination of the Zoom 9002 distortion and cabinet simulator. 9002+CAB GAIN TONE LEVEL CABINET SPEAKER DEPTH Parameters for type SNS BASS to 9002+CAB are the same. - Page 126 Gives a varying wah sound that depends on the picking intensity. SHIFT TONE BALANCE PITCH Modifies the pitch of the direct sound. POSITION TIME CURVE SLOW-ATK Creates a “violin playing” sound with soft attack. DEPTH RATE BALANCE VIBE Automatic vibrato effect. ZOOM MRS-8...
-
Page 127: Zoom Mrs
Adjusts the spatial width. SIZE 0 – 30 Adjusts the mix amount of the effect sound. WET LVL DRY LVL 0 – 30 Adjusts the mix amount of the direct sound. LEVEL 1 - 8 Adjusts the module output level. ZOOM MRS-8... - Page 128 8th note Half triplet Dotted 8th note Quarter note Dotted quarter note Half note Whole note 2 x whole note 3 x whole note 4 x whole note ZNR module Type Parameter THRSHOLD Cuts noise during performance pauses. ZOOM MRS-8...
- Page 129 Adds pulsation and spaciousness to the sound. DEPTH RATE V-CHORUS Simulates the warm sound of a vintage effect. DEPTH RATE FLANGER Produces a unique, undulating sound. RATE COLOR PHASER Produces a swooshing sound. DEPTH RATE CLIP TREMOLO Periodically varies the level of the sound. ZOOM MRS-8...
- Page 130 Adjusts the treble mix amount. MIX MID OFF, -24 – 6 Adjusts the midrange mix amount. MIX LOW OFF, -24 – 6 Adjusts the bass mix amount. 3 BAND EQ module See the CLEAN, DIST, ACO/BASS SIM, BASS algorithm. ZOOM MRS-8...
- Page 131 See the CLEAN, DIST, ACO/BASS SIM, BASS algorithm. ■ DUAL MIC algorithm COMP/LIM module MIC PRE module 3 BAND EQ module See the MIC algorithm. (Same with the MIC algorithm except that there is not the parameter “DE-ESSER” in MIC PRE module) ZOOM MRS-8...
- Page 132 Parameter GAIN NORMLZR Set the input level of the 3 BAND COMP/Lo-Fi module. Parameter description Parameter Setting range Description -12 – 12 Adjusts the level. GAIN 3 BAND EQ module See the CLEAN, DIST, ACO/BASS SIM, BASS algorithm. ZOOM MRS-8...
-
Page 133: Send/Return Effect
EQ HIGH -12 – 6 Adjusts the high range level of the effect sound. EQ LOW -12 – 6 Adjusts the low range level of the effect sound. E/R MIX 0 – 30 Adjusts the volume of early reflections. ZOOM MRS-8... -
Page 134: Effect Patch
Full distortion with rich sustain RCT-BG High-gain amp sound of American-made “Rectifier” series Crunch sound with a touch of compression CrnchCmp ZOOM 9002 sound 9002Lead Sound of a small, American-made vintage tube amp F-Tweed Heavy metal sound of “5100 series” American-made stack amp... - Page 135 Tastefully seasoned sound for melodies Vintage blues sound V-Blues Bluesy sound for finger picking BlueFngr Wet hard rock sound HDR-Drv Zoom's original “cry effect” sound Cry-Lead Lead sound with auto-wah ZakWah LA-Std L.A. studio-style big chorus sound TheRing Ring modulator simulation...
- Page 136 Gives spaciousness to a monaural source Mono->St AM radio simulation AM Radio Wide stereo effect for internal drums WideDrm Reinforces bass for dance rhythms DanceDrm Octaver Adds one-octave lower sound Percushn Gives air, presence, and stereo spread to percussion ZOOM MRS-8...
- Page 137 Simulates live sound in small club Acoustic guitars BigShape Enhances overall clarity Acoustic guitars FolkDuo Fresh and clean sound Acoustic guitars Suitable for guitar duos GtrDuo Acoustic guitars Bright and sharp outlook Bright Acoustic guitars 30 - 49 EMPTY ZOOM MRS-8...
- Page 138 Brings vocals to the foreground VocalMax Special sweep effect using sharp filter RaveRez FullComp Strong compression over full frequency range ClearPWR Power tuning with emphasized midrange ClearDMS Enhances clarity and spaciousness Boosts overall sound pressure level Maximizr 21 - 29 EMPTY ZOOM MRS-8...
-
Page 139: Send/Return Effect
Simulates the reverberation at Budokan in Tokyo BudoKan For slow ballads Ballade Reverb for brass section SecBrass Short reverb ShortPlt Dome Reverb of a Domed-stadium ClearSpr Clear reverb with short reverb time Dokan Simulates the reverberation of a clay pipe 40 - 59 EMPTY ZOOM MRS-8... -
Page 140: Rhythm Pattern
HIPs2VA CNTRs1VA ROCKs1VB INDTs1Va HIPs2Va CNTRs1Va ROCKs1Vb INDTs1FA HIPs2VB CNTRs1FA ROCKs1FB INDTs1VB HIPs2Vb CNTRs1VB ROCKs2VA INDTs1Vb HIPs2FB CNTRs1Vb ROCKs2Va INDTs1FB HIPs2VC CNTRs1FB ROCKs2FA POPs1VA HIPs2Vc JAZZs1VA ROCKs2VB POPs1Va HIPs2VD JAZZs1Va ROCKs2Vb POPs1FA DANCs1VA JAZZs1FA ROCKs2FB POPs1VB DANCs1FA JAZZs1VB ZOOM MRS-8... - Page 141 INTRO02 ROCK21 HIP01 BALD08 INTRO03 ROCK22 HIP02 BALD09 INTRO04 ROCK23 HIP03 BALD10 INTRO05 ROCK24 HIP04 BALD11 INTRO06 ROCK25 HIP05 BLUS01 INTRO07 ROCK26 HIP06 BLUS02 INTRO08 ROCK27 HIP07 BLUS03 INTRO09 ROCK28 HIP08 BLUS04 INTRO10 HRK01 HIP09 BLUS05 INTRO11 HRK02 ZOOM MRS-8...
-
Page 142: Drum Kits/Bass Programs
High timbale TOM3 Tom 3 Claves Low timbale Files on SD card ■ PROJxxx folder (xxx; 000-999 corresponding to project number) Contains various data for each project. PRJDATA.ZIF Settings for marker, track parameter, effect RHYTHM.SEQ Rhythm pattern/rhythm song data ZOOM MRS-8... -
Page 143: Midi Implementation
■ SYSTEM.BIN Common settings between projects on the card * Do not change the file names using a conventional SD card reader/writer. If the files have different names, they will not be recognized on the MRS-8. MIDI implementation 1. Recognized Messages None. -
Page 144: Midi Implementation Chart
Appendix MIDI implementation chart [SD card Recorder] Date : 30 Jun. 2004 Model MRS-8 MIDI Implementation Chart Version: 1.00 Transmitted Recognized Remarks Function ... Basic Default 1-16,OFF Memorized Channel Changed 1-16,OFF Default Mode Messages Altered ****************** Note 12-75 Number True voice... -
Page 145: Index
Display section ......11 Changing the insert point ....93 Contrast/backlight adjustment ... . 116 ZOOM MRS-8... - Page 146 Copying a rhythm pattern ....75 Entering chord information ....73 ZOOM MRS-8...
- Page 147 Stereo link ......60 Swap ........53 ZOOM MRS-8...
- Page 148 • Connect the equipment into an outlet on a circuit different from that to which the receiver is connected. • Consult the dealer or an experienced radio/TV technician for help. ZOOM CORPORATION ITOHPIA Iwamotocho 2chome Bldg., 2-11-2, Iwamoto-cho, Chiyoda-ku, Tokyo 101-0032, Japan Web Site: http://www.zoom.co.jp MRS-8 5000-1...
Need help?
Do you have a question about the MRS-8 and is the answer not in the manual?
Questions and answers