
Related Manuals for pottery barn kids BLYTHE CRIB GUARDRAIL CONVERSION KIT


Summary of Contents for pottery barn kids BLYTHE CRIB GUARDRAIL CONVERSION KIT
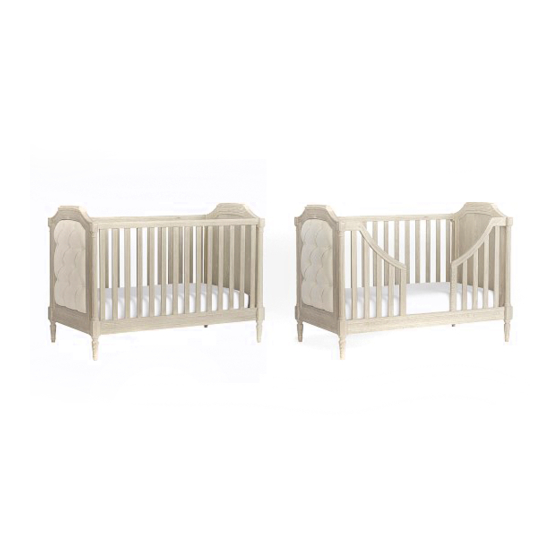
- Page 1 pottery barn kids BLYTHE CRIB GUARDRAIL CONVERSION KIT www.potterybarnkids.com Date: 2014-September-22 Page 1 of 6 Rev: 2015-January-02 ...
- Page 2 WARNING ENTRAPMENT/STRANGULATION HAZARD: Infants have died in toddler beds from entrapment and strangulation. Failure to follow these warnings and assembly instructions could result in serious injury or death. NEVER use a bed with children under 15 months. ...
- Page 3 PARTS INCLUDED: PARTS REQUIRED: PART 5). GUARDRAIL (1x) PART 1). BLYTHE CRIB (sold separately) PART 4). DÉCOR COVER HARDWARE REQUIRED (From Crib): (A) – Allen Key (1x) (C) – Medium Allen Bolt M6x2-1/4” (2x) (B) –Long Allen Bolt M6x2-3/4” (2x) (E) ...
- Page 4 Remove the Crib Assembly Instructions from the envelope attached to the Crib Mattress Base. Review and keep the instructions handy for referring to the part and hardware descriptions. If you cannot locate the crib Assembly Instructions, please contact Pottery Barn Kids for another copy. Take out the Décor cover (4) from the Crib End (1).
- Page 5 The mattress base (3) must be at the lowest level (Level 3) for a toddler bed. If your mattress base is not at the lowest level, follow instructions below to change. Using two adults carefully hold the mattress base taking care not to scratch the finish. To change position of the mattress base, unscrew Short Allen Bolts (D), line up the mattress base with the holes at lowest level (Level 3) and re-attach the mattress base using the same bolts.
- Page 6 Attached the assembled Conversion Kit to the Crib End Panels and secure with (2) Long Allen Bolts (B) and (2) Medium Allen Bolts (C) which were both removed from (Step 2) at the lower position. Insert the remaining Bolts ( B) & (C) (removed from Step 2) at the upper position, tighten with Allen Key (A). Put back the Décor cover (4) into the posts of Crib End (1).
Need help?
Do you have a question about the BLYTHE CRIB GUARDRAIL CONVERSION KIT and is the answer not in the manual?
Questions and answers