Table of Contents
Advertisement
Advertisement
Table of Contents

Related Manuals for pottery barn kids LARKIN


Summary of Contents for pottery barn kids LARKIN
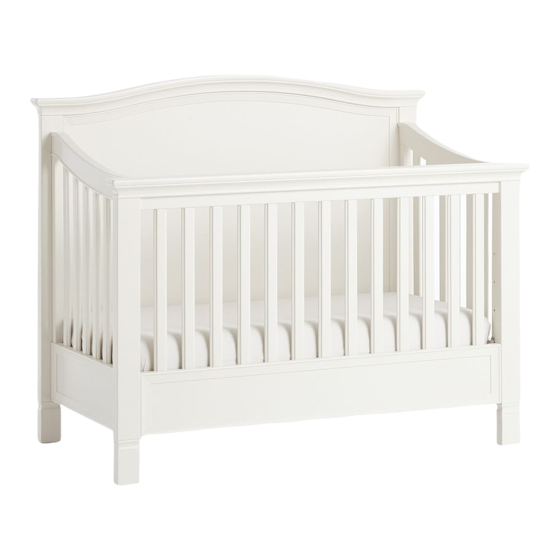
- Page 1 LARKIN 4 IN 1 CRIB Lit d’enfant 4 en 1 LARKIN 1/14...
- Page 2 Securely tighten loose bolts and other fasteners. DO NOT use crib if any parts are missing, damaged or broken. Contact Pottery Barn Kids for replacement parts and instructional literature if needed. DO NOT substitute parts.
- Page 3 CAUTION: ANY MATTRESS USED IN THIS CRIB MUST BE AT LEAST 27 ¼” (69 CENTIMETERS) BY 51 5/8” (131 CENTIMETERS) WITH A THICKNESS NOT EXCEEDING 6” (15 CENTIMETERS) THIS CRIB CONFORMS TO APPLICABLE REGULATIONS PROMULGATED BY THE CONSUMER PRODUCT SAFETY COMMISSION. 04-000094-3 IMPORTANT SAFETY INSTRUCTIONS: •...
- Page 4 N’UTILISEZ PAS LE LIT si des pièces sont endommagées ou manquantes. Appelez Pottery Barn Kids, ou écrivez-lui, pour obtenir, le cas échéant, des pièces de remplacement ou un mode d’emploi. N’UTILISEZ PAS de pièces de remplacement.
- Page 5 MISE EN GARDE: TOUT MATELAS UTILISÉ DANS CE LIT DE BÉBÉ DOIT MESURER AU MOINS 27.25 POUCES (69 CENTIMÈTRES) PAR 51.625 POUCES (131 CENTIMÈTRES). LE MATELAS NE DOIT PAS ÊTRE PLUS ÉPAIS QUE 6 POUCES (15 CENTIMÈTRES). CE LIT D’ENFANT EST CONFORME AUX RÈGLEMENTS PERTINENTS MIS AU POINT PAR LA COMMISSION DE LA SÉCURITÉ...
- Page 6 PARTS INCLUDED / PIÈCES COMPRISES: PART 1). Headboard (1x) Pièce 1).Tête de lit (1x) PART 2). Front Gate (1x) Pièce 2). Barrière avant (1x) PART 3). Left End Panel (1x) Pièce 3). Panneau latéral gauche (1x) PART 4). Right End Panel (1x) Pièce 4).
- Page 7 HARDWARE INCLUDED MATÉRIEL INCLUS (to convert crib into a full size bed) (pour la conversion en lit 2 places) (F) – Wrench (1x) (F) - Clé (1x) (G) – Nut (4x) (G) - Écrous (4x) (H) – Spring Washer (4x) (H) –...
- Page 8 ASSEMBLY INSTRUCTIONS / INSTRUCTIONS D’ASSEMBLAGE ENGLISH 1. Attach Left/Right End Panel (PART 3 & 4) to Front Gate (PART 2). Insert Bolt (E) at top of each End Panel as shown below. Then insert Bolt (E) with Half Moon Metal Block (B) at bottom of each End Panel. Secure all bolts with the Allen key (A).
- Page 9 (D) 4x ENGLISH *Note: The mattress support may be at the highest level when the child is born. It must be at the lowest level before he child can stand up. 3. Attach Headboard (PART 1) to Left/Right End Panel (PART 3 & 4) using (4) Bolt (C). Make sure the (4) holes at corners of Headboard (PART 1) align with holes on End Panels (PART 3 &...
- Page 10 ENGLISH 4. To change position of the mattress support, two adults hold the mattress support (PART 5) and unscrew the (4) bolts (D) as shown below. Line up the mattress support with the holes at the desired height and re-attach the mattress support using the same bolts.
- Page 11 NOTES: • As the Larkin 4-in-1 Crib is designed to grow with your child, please retain the instructions as well as all hardware for future use. Always keep all small parts and hardware out of the reach of small children.
- Page 12 Avec l’addition d’un châssis à sommier en métal (vendu séparément), la tête de lit et la barrière avant du lit d’enfant Larkin peuvent être convertis en lit 2 places. Désassemblez votre lit d’enfant ou lit pour tout-petit et mettez de côté...
- Page 13 ASSEMBLY INSTRUCTIONS TO CONVERT CRIB INTO FULL SIZE BED (headboard only) With the addition of a Box Spring Frame (sold separately), your Larkin 4-in-1 Crib Headboard can be utilized as a full sized headboard. Follow the instructions below with (2) Adults: 1.
- Page 14 (L) à partir de l’arrière des montants pour fixer les (2) appliques. Soutenez la tête du lit 4 en 1 Larkin en position verticale près de l’endroit où vous désirez installer le lit. Insérez (4) boulons (J) à partir de l’arrière de la tête de lit dans les trous prépercés dans la partie inférieure des deux montants.
Need help?
Do you have a question about the LARKIN and is the answer not in the manual?
Questions and answers