
Related Manuals for Master POWERLAND ET1501D


Summary of Contents for Master POWERLAND ET1501D
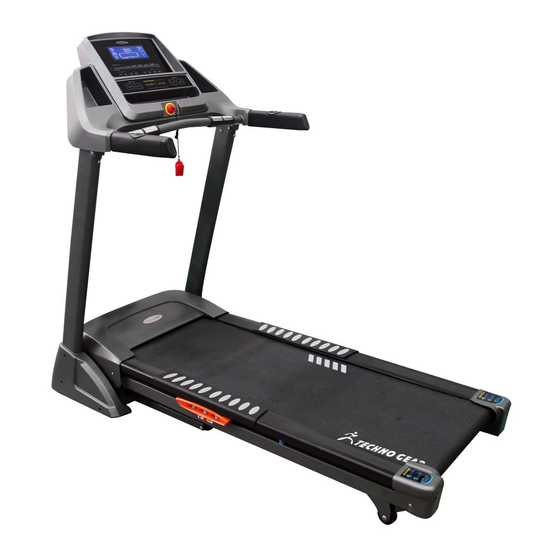
- Page 1 Běžecký pás POWERLAND ET1501D Uživatelský manuál DŮLEŽITÉ: Před použitím si důkladně přečtěte následující pokyny. Manuál uschovejte pro případ budoucí potřeby.
-
Page 2: Bezpečnostní Opatření
Bezpečnostní opatření Děkujeme, že jste zakoupili náš výrobek. Přesto, že věnujeme veškeré úsilí, abychom zajistili nejlepší kvalitu našich výrobků, mohou se objevit jednotlivé vady či přehlédnuté nedostatky. Pokud zjistíte vadu nebo chybějící součástku, neváhejte a kontaktujte nás. Přečtěte si prosím následující pokyny a to i v případě, že již máte zkušenosti s podobným výrobkem. Varování... - Page 3 13. Noste vhodný oděv, který není příliš volný. Volný oděv by se mohl zachytit o pohyblivé části stroje. Příliš těsný oděv by mohl způsobit restrikci pohybu. 14. Udržujte rovná záda, při cvičení na pásu se neprohýbejte. 15. Trénink přerušte v případě, že ucítíte bolest nebo pokud se vám začne točit hlava. 16.
- Page 4 Pokyny ke složení Díly v balení: Seznam dilů: Č. Popis Specifikace Č. Popis Specifikace Hlavní rám 66 Klíč S=13,14,15 M8*15 23 Levý dolní kryt 70 Šroub 24 Pravý dolní kryt 86 Šroub M5×12 37 Bezpečnostní klíč 95 Ozubená podložka 65 5# Klíč Nástroje ke složení: 5# Inbusový...
- Page 5 Krok 1: Hlavní rám vytáhněte z kartonu a umístěte na podlahu. Krok 2: Odmontujte bezpečnostní zarážku M2 pomocí inbusového klíče 5# (65), odšroubujte šroub M8*15 (M1). Při demontáži si přidržujte boční sloupek. Krok 3: Zvedněte displej (A) a boční sloupek B směrem vyznačeným šipkou.
- Page 6 Krok 4: Upevněte levý a pravý sloupek (B) k hlavnímu rámu (A) pomocí šroubu (70), ozubené podložky (95) a inbusového klíče 5# (65) . Upozornění: Sloupek neustále přidržujte. Step 5: Displej připevněte ke sloupku B pomocí ozubené podložky (95), šroubu (70) a inbusového klíče 5# (65) . Step 6: Připevněte levý...
- Page 7 Step 7: 1. Odstřihněte pásku N. Step8: Před spuštěním výrobku vložte bezpečnostní klíč (37) do konzole (A) a klip (37) si připněte na oděv. V případě nutnosti nouzového zastavení pásu jednoduše zatáhněte za provázek bezpečnostního klíče. UPOZORNĚNÍ:Ujistěte se, že je montáž pásu kompletní a zajistěte bezpečnostní zarážku.
- Page 8 Složení stroje Složení: Uchopte pás za část H, desku zvedejte, dokud nezaklaplne pojistka E. Rozložení: Jednou rukou přidržte část D, odjistěte pojistku K a stlačte část D dolů. Deska se samovolně spustí dolů. Děti a domácí mazlíčky držte z dosahu.
- Page 9 Transport Abyste výrobek naklonili, umístěte jednu ruku na část D, podepřete tak horní část pásu. Nohu umístěte na část F, abyste podepřeli i spodní část pásu. Poté pomalu naklánějte horní část pásu. Dostatečným nakloněním pásu přenesete výrobek na kolečka. Stroj uchopte v části D a pomocí koleček převezte.
- Page 10 Ovládání computeru Č. Symbol Popis funkce Mp3 rozhraní: K výrobku můžete připojit externí MP3 přehrávač nebo mobilní telefon. USB rozhraní: K výrobku můžete připojit externí USB. Mode: Pomocí tohoto tlačítka si můžete vybrat několika režimů: “15:00” - režim odpočtu času, "1.0”...
-
Page 11: Rychlý Start
Vol +/ Up: Dlouhým stisknutím tlačítka zvýšíte hlasitost. Krátkým stisknutím tlačítka přepnete na další skladbu. Vol -/ Down: Dlouhým stisknutím tlačítka zvýšíte hlasitost. Krátkým stisknutím tlačítkapřepnete na předchozí skladbu. Program: Stisknutím tlačítka si zobrazíte postupně programy P1-P2 až P24, U1-U3-FAT (P1-P24 jsou přednastavené... - Page 12 Vysvětlivky: “INCLINE”: Zobrazuje aktuální stupeň zdvihu od 0 do 15. “PULSE”: Uchopte senzory tepové frekvence oběma rukama a vyčkejte 5 sekund. Computer vypočítá a zobrazí vaši aktuální tepovou frekvenci/minutu v rozmezí od 50 do 200 BPM. (Naměřené hodnoty jsou pouze orientační a nemohou být použity k lékařským účelům). “TIME”: Zobrazuje aktuální...
-
Page 13: Popis Funkcí
3. Popis funkcí Stiskněte tlačítko MODE a přejděte na funkci odpočtu. Opakovaným stiskem tlačítka MODE můžete zvolit “15:00”、“1.00”、“50.0”、“závod” či jeden z pěti “0:00” režimů (15:00 je režim odpočtu, 1.00 je odpočet vzdálenosti, 50.0 je odpočet kalorií a 0:00 je manuální režim). Po výběru jednoho z režimů navolte rychlost a sklon pomocí tlačítek -SPEED+ or -INCLINE +. - Page 14 Stiskněte MODE, abyste spustili odpočet a čas 15:00 začal blikat na obrazovce. Stiskněte-INCLINE+ a -SPEED+, abyste nastavili čas odpočtu od 5:00 do 99:00. Odpočet vzdálenosti Stiskněte MODE, abyste spustili odpočet vzdálenosti. Na obrazovce začne blikat přednastavená vzdálenost 1.00. Stiskněte -INCLINE+ či -SPEED+ a upravte vzdálenost od 0.5 do 99.9. iii.
- Page 15 Režim závodu Na běžeckém pásu můžete také zvolit režim závodu s computerem. Zde najdete popis této funkce. Stiskněte MODE několikrát za sebou, dokud se nezobrazí volba režimu závodu. Můžete si vybrat ze 6 délek vzdáleností – 3,0 km, 5.0 km, 10.0 km, 15.0 km, 21.1 km, 42.19 km. Popis ikon Zobrazuje uraženou vzdálenost computeru v procentech.
- Page 16 Přednastavený program Stiskněte tlačítko PROG, vstoupíte do volby přednastaveného programu. Stiskněte PROG a zvolte program z nabídky programů 1-24, U1-U2-U3, FAT. Celkem můžete vybírat ze 30 odlišných přednastavených programů. FAT slouží k určení množství tělesného tuku. Popis ikon Nastavení času cvičení: přednastavený čas: 10 minut. Stiskněte -INCLINE+ nebo -SPEED+ , abyste upravili délku času cvičení...
- Page 17 Každý program je rozdělen do deseti fází, z nichž každá fáze má vlastní úroveň sklonu a rychlost. Nastavený čas / 10 = délka každé fáze Čas Program SPEED INCLINE SPEED INCLINE SPEED INCLINE SPEED INCLINE SPEED INCLINE SPEED INCLINE SPEED INCLINE SPEED INCLINE...
- Page 18 SPEED INCLINE SPEED INCLINE SPEED INCLINE SPEED INCLINE SPEED INCLINE SPEED INCLINE Manuální režim K dispozici jsou 3 uživatelské programy: user1, user 2, user3. Stiskněte PROG, dokud se na obrazovce neobjeví user1. Stiskněte incline or speed a nastavte délku cvičení. Stiskněte MODE a nastavte hodnoty cvičení...
- Page 19 Rozmezí jednotlivých hodnot Hodnota Počáteční stav Původní stav Rozmezí Zobrazené rozmezí Time (min: sec) - čas 0:00 30:00 5:00-99:00 0:00-99:00 Incline (step) - sklon 0-15 0-15 Speed (km/h) - rychlost 0.8-18 0.8-18 Distance (km) - vzdálenost 0.50-99.9 0.00-99.9 Heart rate (time/min) – tep. 50-200 frekvence Calorie (K) - kalorie...
- Page 20 =(26---29) Lehká nadváha ≥30 Těžká nadváha Přehrávání hudby Stiskněte , abyste vstoupili do režimu hudby a videa. Popis ikon Song1 Právě přehrávaná skladba je označena zeleně. Displej zobrazuje název skladby a její velikost. 8.36MB Bíle jsou označeny ostatní skladby. 01:56 Údaj označuje pozici v právě...
-
Page 21: Řešení Problémů
Popis ikon ZY-VIDEO-3 Právě přehrávané video je označeno zeleně. 160.06MB Ostatní videa jsou označena bíle. 01:56 Údaj označuje pozici v právě přehrávaném videu. 05:00 Údaj označuje délku přehrávaného videa. Ikona upozorňuje, že je spuštěno přehrávání videa. 4. Funkce bezpečnostního klíče V případě... - Page 22 • Ochrana proti přetížení Řešení: 1. Snižte zátěž pásu 2. Změňte napětí 3. Vyměňte motor • Chyba motoru Řešení: 1. Zkontrolujte kabel motoru 2. Zkontrolujte motor • Chyba paměti Řešení: 1. Zkontrolujte IC paměť 2. Vyměňte ovladač • Přepěťová ochrana Řešení: 1.
- Page 23 9. FUNKCE UPOZORNĚNÍ NUTNOSTI PROMAZÁNÍ Tento výrobek má automaticky nastavené připomenutí, které vás upozorní na nutnost promazání běžeckého pásu. Po každých uběhnutých 300 km vás systém upozorní na nutnost promazání. K promazání používejte pouze mazivo určené pro běžecké pásy. iii. Po promazání...
- Page 24 CVIČENÍ OBLASTI RAMEN Zvedejte střídavě levé a pravé rameno nebo obě ramena najednou. PROTAŽENÍ PAŽÍ Protahuje levou a pravou paži střídavě směrem nahoru ke stropu. Ucítíte tlak na pravé a levé straně. Toto cvičení několikrát opakujte. PROTAŽENÍ PŘEDNÍ STRANY STEHEN Stoj na jedné...
- Page 25 1. Je nutné, abyste výrobek promazali po každých uražených 300 km. Dosažení 300 km bude doprovázeno zvukových upozorněním a systémovým oznámením OIL. Mazivo naneste do střední části pásu. 2. Po nanešení silikonového oleje stiskněte na 3 sekundy tlačítko STOP. Pás přejde do pohotovostního režimu a upozornění...
- Page 26 Detailní nákres...
-
Page 27: Seznam Dílů
Seznam dílů Č. Popis Popis Spodní rám Bezpečnostní klíč Hlavní rám DC motor Rám zdvihového mechanismu Motor zdvihu Rám computeru Spodní kontrolní deska Rám motoru Černý tlumič Levý sloupek Zástrčka Pravý sloupek Spínací tlačítko Výztuž Napájecí zdroj EVA podložka Běžecký pás Víceklínový... - Page 28 Spodní kryt motoru Inbusový klíč #5 Tlumič Klíč Bočnice Matice M8 Pružina Matice M10 Prstencová podložka Šroub ST3.0*32 Bakelitový grip Šroub M8*15 Koncovka Šroub M8*20 Hnědý AC kabel 350 Šroub M8*30 Šroub M8*30 Modrý AC kabel 350 Šroub M8*40 Dolní kabel obrazovky Šroub M8*48 Kryt senzoru tepové...
- Page 29 Copyright - autorská práva Společnost MASTER SPORT s.r.o. si vyhrazuje veškerá autorská práva k obsahu tohoto návodu k použití. Autorské právo zakazuje reprodukci částí tohoto návodu nebo jako celku třetí stranou bez výslovného souhlasu společnosti MASTER SPORT s.r.o.. Společnost MASTER SPORT s.r.o. pro použití informací, obsažených v tomto návodu k použití...
- Page 30 MANUAL Treadmill POWERLAND ET1501D User Manual IMPORTANT: Read the following instruction before using this threadmill. Keep the manual for future reference.
-
Page 31: Electrical Safety Precautions
Safety Precautions Thank you for purchasing this treadmill, it has been designed and manufactured to give you many years of trouble free service. You may already be familiar with using a similar product but please take the time to read these instructions which have been written to ensure that you get the very best from your purchase. - Page 32 treadmill with at least 2 meters * 1 meter of free space behind the treadmill. 29. Keep the treadmill away from excessive moisture and dust. 30. Before using the treadmill, check the nuts and bolts are securely tightened. 31. The safety level of the treadmill can be maintained only if it is examined regularly for damage and wear. Replace defective components immediately.
-
Page 33: Assembly Steps
Assembly Steps The following are the part when you open the package. Package list: Description Specification QTY NO. Description Specification Mainframe 66 Solid wrench S=13,14,15 M8*15 23 Left bottom cover 70 Inner hex pan head bolt 24 Right bottom cover 86 Cross pan head screw M5×12 37 Safety key... - Page 34 Step 1: Open the package and put the mainframe on the floor. Step 2: Unlock the safety block M2 by using 5# allen wrench (65) and bolt M8*15 (M1). You should hold the upright tube during the process. Step 3: Lift up the display (A) and column B with the arrow direction.
- Page 35 Step 4: Fix the left and right column (B) to the mainframe (A) with inner hex pan head bolt (70), teeth washer (95) by 5# Allen wrench (65) . Notice: Support the column with hand to avoid falling down. Step 5: Fix the display to the column B with teeth washer (95) and inner hex pan head bolt (70) by using 5# Allen wrench (65) .
- Page 36 Step 7: 1. Cut off belt N. Step8: Before running, please insert the Safety Key (37) into the magnetic area of the Console (A) and nip the safety key clip 37 with your cloth. For any emergency, please pull the safety key rope , and the machine will stop.
-
Page 37: Folding Steps
Folding Steps Pulling Up: Put your hand on H position, then lift up the base frame till hearing the sound that the air pressure bar E is locked into the tube. Pulling Down: Support place D with one hand, then kick the air pressure bar at the position K, press the base frame of position D, then it will fall down automatically (Please keep person and pet away from the machine when it is... -
Page 38: Transport Tips
Transport Tips To tilt, start by placing one hand at position “D” to support the top end of the treadmill. Next, place one foot at position “F” to hold the bottom end of the treadmill steady. With your foot at “F”, slowly tilt the top of the treadmill downward towards the ground. - Page 39 Operation Instruction Icon Function description Mp3 interface: You can connect external MP3 and mobile phone with MP3 wire to play music. USB interface: You can insert external USB to play music and video. “MODE” button:Press this button to choose different modes: “15:00” flashing window is time countdown mode,“1.0”...
- Page 40 Switch button: You can press this button to make choice around: standby mode, music and video. VOL+/ UP button:For long press of this button, you can increase the volume. For short press of this button, you can turn to the next song. VOL-/ DOWN button:For long press of this button, you can reduce the volume.
-
Page 41: Homepage Introduction
11. Homepage introduction Icon description “INCLINE” window: Display the current incline. The Incline range is 0-15 level. “PULSE” window: Hold the pulse sensors with both hands for 5 seconds to calculate and display the runner’s heart beats per minute, the display range is 50-200 50-200 beats/min (This data is just for reference, and cannot be used as the medical data). -
Page 42: Function Description
12. Function description Press the MODE key and enter into countdown mode. Press the MODE key continuously to choose “15:00”、 “1.00”、 “50.0”、 “contest mode”、 and “0:00” five mode (15:00 is time countdown mode, 1.00 is distance countdown mode, 50.0 is calorie countdown mode, 0:00 is manual mode). Once you choose a certain mode and then you can adjust the data by pressing -SPEED+ or -INCLINE + key. - Page 43 Countdown mode Time countdown mode Press MODE key to enter into time countdown mode and the default time 15 will be flashed displaying on the screen. Press the “-INCLINE+” or “-SPEED+” key to change the time from 5:00 to 99;00. Distance countdown mode Press “MODE”...
- Page 44 Match running mode You can choose this mode to have a running competition with system. Please find below detail explanation of how to use match running mode. Press MODE key continuously and enter into contest mode. There are 6 distance modes. They are 3.0km、 5.0km、10.0km、5.0km、21.1km、42.19km Icon description Display the distance percentage of the computer...
- Page 45 Preset program Press PROG to enter into program mode. Press “PROG” key to select Program1-24、 U1-U2-U3、 FAT in sequence. There are 30 different kinds of preset program. FAT is fat test program. Icon description Program movement time: default time is 10 minutes. Press the “-INCLINE+” or “-SPEED+” key to change the time from 5 to 99.
- Page 46 Each program is divided into 10 stages and each stage has its own speed and incline. Set time / 10 = time of each stage Time stage program SPEED INCLINE SPEED INCLINE SPEED INCLINE SPEED INCLINE SPEED INCLINE SPEED INCLINE SPEED INCLINE SPEED...
- Page 47 SPEED INCLINE SPEED INCLINE SPEED INCLINE SPEED INCLINE SPEED INCLINE SPEED INCLINE Manual mode There are 3 user programs. They are user1, user 2, user3. Press PROG continuously until user1 appeared. Press incline or speed adjustment key to change the exercise time. Press MODE key to set exercise data.
- Page 48 Display range of each data Item Initial Original data Range Display range Time (min: sec) 0:00 30:00 5:00-99:00 0:00-99:00 Incline (step) 0-15 0-15 Speed (km/h) 0.8-18 0.8-18 Distance (km) 0.50-99.9 0.00-99.9 Heart rate (time/min) 50-200 Calorie (K) 10.0-999.0 0.0-999.0 Body fat test i.
- Page 49 Music Press the key to change the mode of music and video. Icon description Song1 The green words stand for the name of playing music and the size of the file. 8.36MB The white words stand for the rest of the music and the size of the file. 01:56 The data Stands for the progress of the playing music 05:00...
- Page 50 Icon description ZY-VIDEO-3 The green words stand for the name of playing video and the size of the file. 160.06MB The white words stand for the rest of the video and the size of the file. 01:56 The data Stands for the progress of the playing video 05:00 The data stands for the total time of the video The icon stands for the progress of the playing video.
-
Page 51: Simple Malfunction And Solution
17. Simple Malfunction and Solution... - Page 53 18. LUBRICATION REMIND FUNCTION i. This machine has lubrication remind function. After every total running distance of 300km, system will remind you to oil the treadmill. ii. Please use treadmill oil only. iii. After finish oil please press the START key lasts for 3 seconds and the tip will be swept off automatically. And then system will display will give you a treadmill work report.
-
Page 54: Tips For Stretching
Tips for Stretching: • Begin with gradual mobility exercises of all the joints, i.e. simply rotate the wrists, bend the arm and roll your shoulders. This will allow the body’s natural lubrication (synovial fluid) to protect the surface of the bones at these joints. -
Page 55: Maintenance
Maintenance Warning: Before cleaning the machine, please make sure the power has been switched off. Cleaning: Wipe away the dust on the belt, running board and side footboard as excess dust may increase the frictional on the belt and cause damage to the machine. It is better to clean the machine once a month. Lubrication: Lubrication is needed per 300km. -
Page 56: Explosive Drawing
Explosive Drawing... -
Page 57: Part List
Part List Description Description Bottom frame Safety key Main frame DC motor Incline frame Incline motor Display frame Lower control board Motor seat frame Black bumper cushion Left column Plug Right column Square switch Stiffening plate Overload protector EVA pad Running belt Front roller Multi-v belt... - Page 58 Bolt M8*30 AC wire blue 350 Bolt M8*40 Lower wire of the display Bolt M8*48 Handle pulse sheet Bolt M8*70 Screw M5*12 Bolt M8*80 Nut M6 Bolt M10*30 Non-slip mat Bolt M10*45 Screw ST4.2*15 Bolt M10*60 Speed sensor Bolt M8*45 Screw ST2.9*8 Bolt M8*35 USB connection wire...
-
Page 59: Warranty
© COPYRIGHT MASTER SPORT s.r.o. retains all rights to this owner’s manual. No text, details, or illustrations from this manual may be reproduced, distributed, or become the subject of unauthorized use for commercial purposes, nor may they be made available to others. - Page 60 Laufband POWERLAND ET1501D TRUCTION MANUAL Bedienungsanleitung WICHTIG: Lesen Sie alle Anweisungen sorgfältig, bevor Sie das Produkt aufbauen und in Gebrauch nehmen. Bewahren Sie diese Anleitung als künftige Referenz auf.
- Page 61 SICHERHEITSHINWEISE Vielen Dank, dass Sie unser Produkt gekauft haben. Lesen Sie bitte die Anleitung aufmerksam durch. Alle Bestandteile und Zubehör werden in der Packung geliefert. Kontrollieren Sie vor dem Aufbau, ob die Packung komplett ist. Warnung: Um ein Unfallrisiko zu minimieren, lesen Sie alle folgenden Anleitungen aufmerksam durch. Um einer Gesundheitsschädigung vorzubeugen oder bestehende Risiken zu minimieren, kontaktieren Sie vor Beginn Ihres Fitnesstrainings Ihren Arzt, um einen allgemeinen Fitnesscheck durchzuführen.
- Page 62 Ordnung sind. Regelmäßige Kontrolle des Stands Ihres Geräts kann seine Lebensdauer verlangen. Falls Sie einen Mangel finden, benutzen Sie das Gerät nicht, bis der Mangel behoben wird. Verwenden Sie nur die Orginal-Ersatzteile. 10. Das Laufband wurde gemäß H.C.: EN957 geprüft. Das Laufband ist nur für den Gebrauch im Haus/in der Wohnung gedacht.
- Page 63 AUFBAU Inhalt der Packung Liste der Hauptteile: Bezeichnung Spezifikation Bezeichnung Spezifikation Hauptrahmen 66 Schlüssel S=13,14,15 M8*15 23 Linke untere Deckelung 70 Schraube 24 Rechte untere Deckleung 86 Schraube M5×12 37 Sicherheitsschlüssel 95 Unterlegscheibe 65 5# Inbusschlüssel Montagewerkzeug: 5# Inbusschlüssel Schlüssel S=13 14 15 Warnung: Schalten Sie das Gerät nie ein, wenn die Aufbau noch nicht beendet wird.
- Page 64 Schritt 1: Machen Sie die Packung auf und legen Sie den Hauptrahmen auf den Boden. Schritt 2: Entsichern Sie den Sicherheitsblock M2 mit dem Inbusschlüssel 5# (65) und Schraube M8*15 (M1). Halten Sie die Haltepfoste auf. Schritt 3: Heben Sie den Computery (A) und Haltepfoste B in der Pfeilrichtung auf.
- Page 65 Schritt 4: Befestigen Sie die linke und rechte Haltepfoste (B) am Hauptrahmen (A) mit Schraube (70), Unterlegscheibe (95) und Inbusschlüssel 5# (65). Hinweis: Stützen Sie die Haltepfoste mit der Hand, um das Herunterfallen zu vermeiden. Schritt 5: Fixieren Sie den Computer an der Haltepfoste B mit Unterlegscheibe (95), Schraube...
- Page 66 Schritt 7: 1. Schneiden Sie den Gurt N ab. Schritt 8: Fügen Sie den Sicherheitschlüssel ein bevor Sie das Training anfange. Der Sicherheitschlüssel (37) gehört in den Magnetanschluss (A). Nutzen Sie das Laufband niemals, ohne Sie den Sicherheitsclip an Ihrer Kleidung Notfall ziehen Seile...
- Page 67 Zusammenklappen Hochziehen: Umfassen Sie fest das Ende des Laufbands (H) und heben Sie das Ende hoch. Heben Sie dann vorsichtig das Ende des Laufdecks an, bis es in einer aufrechten Position ist und die Laufdecksperre (E) einrastet. Aufklappen: Um das Laufband aufzuklappen, müssen Sie das Ende des Laufbands (D) fest umgreifen und dann mit dem Fuß...
- Page 68 Transport Das Laufband verfügt über Transportrollen, die den Transport vereinfachen. Überprü- fen Sie, dass der Hauptstromschalter ausgeschaltet und der Stecker aus der Steckdose gezogen ist, bevor Sie das Laufband bewegen. Heben Sie das Ende des Laufbands (D) auf, kippen Sie es zu Ihnen und stützen Sie das Gerät mit der Hand.
- Page 69 Computeranzeige Symbol Beschreibung Mp3 interface: Sie können Ihr MP3-Player oder ein Handy mit dem Laufband verbinden. USB interface: Sie können einen USB einlegen, um Musik oder Video spielen. “MODE”: Drücken Sie die Taste um eine von verschiedenen Funktionen zu wählen: “15:00” – Countdowm-Zeit, “1.0”...
- Page 70 VOL+/ UP: Erhöht die Lautstärke. Mit einem kurzen Druck wird der nächste Song gespielt. VOL-/ DOWN: Reduziert die Lautstärke. Mit einem kurzen Druck wird der vorherige Song zurückgeschaltet. “Program”: Drücken Sie die Taste um ein von den voreingestellten Programmen P1-P2, P24 -U1…U3-FAT (P1-P24 –...
- Page 71 2. Startseite Symbol-Bezeichnung “INCLINE” Fenster: Zeigt die aktuelle Steigung an. Display the current incline. Wert: 1 – 15. “PULSE” Fenster: Halten Sie beidhändig die Handpulssensoren an den Haltegriffen für 5 Sekunden fest um Ihre aktuelle Herzfrequenz zu berechnen. Die Herzfrequenz wird im BPM (beats per minute/ Schläge pro Minute) angezeigt.
- Page 72 3. Funktionen Drücken Sie MODE um in den Countdown-Modus zu steigen. Drücken Sie MODE und wählen Sie zwischen 15:00, 1.00, 50.0 und Wettkampfmodus oder 0:00 (15:00 ist Zeit-Countdown, 1.00 ist Distanz-Countdown, 50.0 ist Kalorie-Countdown und 0:00 ist Benutzerprogramm). Nachdem Sie einen Modus wählen, können Sie die Geschwindigkeit und Steigung mit -SPEED+ und -INCLINE +.
- Page 73 Drücken Sie -INCLINE+ oder-SPEED+ um die Zeit von 5:00 bis 99:00 zu verändern. Distanz-Countdown Drücken Sie MODE um in den Countdown-Modus zu steigen und die voreingestellte Distanz 1.00 wird angezeigt. Drücken Sie -INCLINE+ oder-SPEED+ um die Distanz von 0.5 bis 99.9 zu verändern. iii.
- Page 74 mit der detaillieten Erklärung. Drücken Sie MODE um in den Wettkampfmodus zu steigen. Es gibt 6 Distanz-Varianten: 3,0 km, 5,0 km, 10,0 km, 15,0 km, 21,10 km und 42,19 km. Symbol-Bezeichnung Zeigt die abgelaufene Distanz des Computers an. C ist Abkürzung Die voreingestellte Geschwindigkeit für Computer ist 9 für Computer km/h.
- Page 75 Symbol-Bezeichnung Programm-Zeit: Voreingestellte Zeit: 10 Minuten. Drücken Sie -INCLINE+ oder -SPEED+ um die Zeit von 5 bis 99 einzustellen. Programmspalten: Jedes Programm besteht aus 10 Spalten. Drücken Sie PROG und der Compter zeigt "Program 1-24” Spalten. Wählen Sie ein Programm aus. Die voreingestellte Zeit ist 10:00. Drücken Sie -INCLINE+ oder -SPEED+ um die Zeit zu verändern.
- Page 76 INCLINE SPEED INCLINE SPEED INCLINE SPEED INCLINE SPEED INCLINE SPEED INCLINE SPEED INCLINE SPEED INCLINE SPEED INCLINE SPEED INCLINE SPEED INCLINE SPEED INCLINE SPEED INCLINE SPEED INCLINE SPEED INCLINE SPEED INCLINE SPEED INCLINE...
- Page 77 Benutzerprogramm Es gibt 3 Benutzerprogramms: user1, user 2, user 3. Drücken Sie PROG bis Nr. 1 sich anzeigt. Drücken Sie SPEED oder INCLINE um die Trainingszeit zu verändern. Drücken Sie MODE um die Trainingsdaten zu verändern. Mit den Tasten INCLINE oder SPEED können Sie die Trainingszeit, Geschwindigkeit und Steigung für die erste Etappe einstellen.
- Page 78 Body Fat Test Programm Drücken Sie PROG um das Programm FAT sich anzeigt. Geben Sie Ihr Geschlecht, Alter, Höhe und Gewicht ein. Legen Sie beide Hände auf die Handpulssensoren auf und warten Sie 8 Sekunden. Ihr BMI wird angezeigt. Das beste Körperfettanteil-Ergebnis befindet sich zwischen 20 und 25. Der Körperfettanteil-Index unten 19 ist zu niedrig, über 26 hoch und über 30 sehr hoch.
- Page 79 Musik Drücken Sie die Taste um den Musik und Video Modus einzusteigen. Symbol-Bezeichnung Der Song, der momentan spielt, wird grün markiert. Es zeigt den Namen des Song1 Songs und seine Größe an. 8.36MB Die Songs in der Reihe sind weiß markiert. Es zeigt den Namen des Songs und seine Größe an.
- Page 80 Symbol-Bezeichnung Das Video, das momentan spielt, wird grün markiert. Es zeigt den Namen ZY-VIDEO-3 des Videos und die Größe an. 160.06MB Die Videos in der Reihe sind weiß markiert. Es zeigt den Namen des Videos und die Größe. 01:56 Stand des Abspielens des Videos. 05:00 Die komplette Länge des Videos.
- Page 81 8. Fehlersuche und Lösung • Kommunikationsfehler zwischen Kontrolltafel und Treiber Lösung: 1. Kontrollieren Sie das Verbindungskabel. 2. Wechseln Sie das Kabel. 3. Wechseln Sie die Kontrolltafel. 4. Wechseln Sie den Treiber. • Die Geschwindigkeit wird nicht angezeigt. Lösung: 1. Kontrollieren Sie den Geschwindigkeitssensor. 2.
- Page 82 • Externes Überstromen Lösung: 1. Kontrollieren Sie die aktuelle Spannung der Steckdose und passen Sie die Spannung entsprechend • Die Spannung ist zu niedrig Lösung: 2. Kontrollieren Sie die aktuelle Spannung der Steckdose und passen Sie die Spannung entsprechend 9. ERINNERUNG ZUR SCHMIERUNG i.
- Page 83 iv. Drücken Sie START und das Laufband schaltet sich in den Bereitschaftmodus um. Wichtigkeit der regelmäßigen Bewegung HINWEIS: vor dem Anfang des Trainings konsultieren Sie Ihren Gesundheitszustand mit dem Arzt. Dieses ist wichtig für Personen über 45 Jahre alt oder für Personen mit existierenden Gesundheitsprobleme. Der Wert der Pulsfrequenz ist nicht für medizinische Zwecke bestimmt.
-
Page 84: Wartung
STRECKUNG DES SCHENKELS Stützen Sie sich mit dem Arm an der Wand, dann ziehen Sie rechtes und linkes Bein nach hinten in der Nähe des Hinterns. Fühlen Sie angenehme Tat im vorderen Schenkel. Halten Sie in diesen Position etwa 30 Sekunden aus und holen Sie das Turnen zweimal bei beiden Beinen wieder. - Page 85 Schmierung: Das Laufband muss immer nach 300 km geschmiert werden. Lubrication is needed per 300km. Die Erinnerung wird mit einem Signalton “di di di” angemeldet. Auf dem Display wird “OIL” angezeigt. Schmieren Sie bitte den mittleren Teil des Bandes. Nach der Schmierung drücken Sie START Taste für 3 Sekunden und der Spray wird verstreicht. Danach wird auf dem Display ein Standbericht angezeigt.
- Page 86 Explosionszeichnung...
- Page 87 Teileliste Bezeichnung Anz. Bezeichnung Anz. Bodenrahmen Sicherheitschlüssel Hauptrahmen DC-Motor Steigungsrahmen Steigungsmotor Computerrahmen Untere Kontrolltafel Motorgehäuserahmen Schwarzes Stoßpolster Linker Pfosten Stecker Rechter Pfosten Rechteckiger Schalter Aussteifung Überlastungsschutz EVA-Polsterung Laufgurt Vordere Rollereinheit Multi-Keilriemen Hintere Rollereinheit Schaum Luftzylinder Handpulse-Sensor mit Steigungstaste Handpulse-Sensor mit Rotationscheibe Geschwindigkeitstaste Plastikunterlegscheibe...
- Page 88 Schraube M8*30 AC Kabel blau 350 Schraube M8*40 Unteres Computerkabel Schraube M8*48 Handpulse-Sensor-Platte Schraube M8*70 Schraube M5*12 Schraube M8*80 Mutter M6 Schraube M10*30 Anti-Rutsch-Matte Schraube M10*45 Schraube ST4.2*15 Schraube M10*60 Geschwindigkeitssensor Schraube M8*45 Schraube ST2.9*8 Schraube M8*35 USB-Verbindungskabel Schraube M6*55 USB-Interface Schraube M6*35 Audio-Socketverbindungskabel...
- Page 89 Entsorgung können Strafen laut der nationalen Regelungen auferlegt werden. Copyright - Autorenrecht Die Gesellschaft MASTER SPORT s.r.o. geltend machen alle Autorenrechte zu der Inhalt dieses Benutzermanuals. Autorenrechte verbieten die Reproduktion der Teilen der Anleitung oder als das Ganze von der dritten Seite ohne die ausdrückliche Zustimmung der Gesellschaft MASTER SPORT s.r.o.
Need help?
Do you have a question about the POWERLAND ET1501D and is the answer not in the manual?
Questions and answers