
Related Manuals for Parker PTM Series


Summary of Contents for Parker PTM Series
- Page 1 Effective: September 2015 Supercedes: HY25-1890-M1/US June 2015 Parker Thermal Mass Dryer Models PTM200 - PTM1000 PTM User Guide Rev D...
-
Page 2: Table Of Contents
PTM200 - PTM1000 USER GUIDE Contents Transport / Inspection Environmental & Location Considerations Dryer Installation Plumbing the Air Lines Electrical Connections Controls Controller Start Up Procedures When Operating Dryer Routine Maintenance Maintenance Schedule Maintenance Procedures List of Alarms / Warnings Troubleshooting / Service Refrigerant Charging Procedure Torque Values... -
Page 3: Transport / Inspection
PTM200 - PTM1000 USER GUIDE Transport / Inspection Before unpacking/uncrating your new dryer, inspect the carton/crate for damage. Note any damage on the freight bill. File notice of concealed damage if: there are any dents in the cabinets there is any sign of oil on the skid or floor the refrigerant gauge shows NO pressure (Upper right side –... -
Page 4: Electrical Connections
PTM200 - PTM1000 USER GUIDE Air piping must be supported independently of the dryer. • A properly sized Parker Airtek pre-filter must be installed ahead of the • dryer to maintain optimal performance and warranty validation. It should be installed as close to the dryer as possible. Any piping between the pre-filter and inlet of the dryer must be stainless steel, copper, galvanized, aluminum or other non-corroding material. - Page 5 PTM200 - PTM1000 USER GUIDE Wire the dryer separately from the air compressor. The dryer must not cycle with the air compressor. Crankcase heaters are pre-wired from the factory to the line side of the compressor contactor. When power is applied to the dryer, the heater will energize.
-
Page 6: Controls
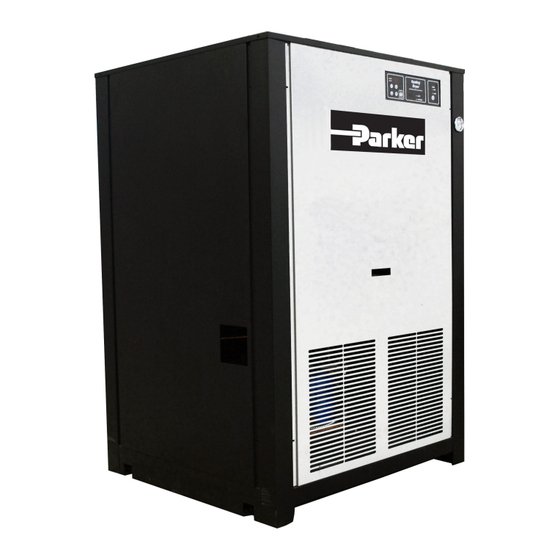
PTM200 - PTM1000 USER GUIDE Controls Controller (1) Digital Controller and Display. The controller has two temperature sensors. The thermal mass fluid temperature, and dewpoint temperature. The default setting for the controller display is the current dewpoint. When the SET button is depressed, the unit displays the dryer dewpoint setting. - Page 7 PTM200 - PTM1000 USER GUIDE When pressed, the display will show the thermal mass fluid temperature. When the fluid temperature falls to 36˚F (1.5˚C), the refrigeration compressor will cycle off. (6) Power Saver LED. Illuminates when dryer has cycled off indicating you are saving energy.
-
Page 8: Start Up Procedures
PTM200 - PTM1000 USER GUIDE Start Up Procedures There should be NO air flow through the dryer before or during start-up. It is recom- mended that the dryer be installed with bypass piping to better service the unit. Inlet & outlet valves to the dryer should be closed with the by-pass valve open. -
Page 9: Routine Maintenance
PTM200 - PTM1000 USER GUIDE Routine Maintenance The air cooled condenser must be kept clean. Inspect on a regular basis for dirt or debris that might accumulate. Remove any debris immediately. The Y-strainer should be checked weekly. Page 9 - Rev D... -
Page 10: Maintenance Schedule
PTM200 - PTM1000 USER GUIDE Maintenance Schedule The maintenance chart below indicates the components that should be checked while performing routine maintenance on the dryer. The chart also indicates how often a spe- cific check should be performed. Description of Service Required Service recommended every: Component Operation... -
Page 11: List Of Alarms / Warnings
PTM200 - PTM1000 USER GUIDE List of Alarms / Warnings SHUT- ALARM CODE CONDITION TIME-OUT RESET OFF STATE DOWN LOW EVAPORATOR Dewpoint <= 33˚F (2˚C) 2 minutes AUTO RESETS TEMPERATURE Dewpoint is 30 de- DRYER OVERLOAD grees above the set 40 minutes AUTO RESETS... -
Page 12: Troubleshooting / Service
PTM200 - PTM1000 USER GUIDE Troubleshooting / Service Fault Description Cause Remedy Code Low dewpoint 1) Ambient temperature is below 35°F (.6°C) 1) Install dryer in warmer area temperature 2) Inlet air temperature is below 35°F (1.6°C) 2) Raise inlet temperature. 3) Water / glycol too cold 3) see “A5”... -
Page 13: Refrigerant Charging Procedure
PTM200 - PTM1000 USER GUIDE Service/Maintenance 1 year timer has elapsed See maintenance sect. in manual & reminder reset by pressing up/down arrows at the same time High dewpoint 1) Excessive thermal load. 1) Reduce inlet and/or ambient tem- 2) Compressor stopped perature and/or inlet flow 3) Control board defective 2) Check circuit for loose connec-... -
Page 14: Technical Data
PTM200 - PTM1000 USER GUIDE Technical Data TECHNICAL DATA Air-Cooled Units Electrical Compressor Fan motor Pump Dryer Model V / Ph / Hz Fuse PTM200 230/1/60 1/15 12.2 230/1/60 12.1 1/15 17.0 230/3/60 1/15 11.6 PTM250 460/3/60 1/15 575/3/60 1/15 230/1/60 12.1 1/15... - Page 15 PTM200 - PTM1000 USER GUIDE Water-Cooled Units Model Electrical Compressor Pump 120v Dryer V/Ph/Hz Max. Fuse 230/1/60 12.1 1/15 15.8 230/3/60 1/15 10.4 PTM250 460/3/60 1/15 575/3/60 1/15 230/1/60 12.1 1/15 15.8 230/3/60 1/15 10.4 PTM325 460/3/60 1/15 575/3/60 1/15 230/3/60 1/15 10.4...
-
Page 16: Spare Parts List
PTM200 - PTM1000 USER GUIDE Spare Parts List MODEL Item PTM200 PTM250 PTM325 PTM400 PTM500 PTM700 PTM850 PTM1000 Replacement parts (DWG # (DWG # (DWG # (DWG # (DWG # (DWG # (DWG # (DWG # AD11525) AD11524) AD11523) AD11522) AD11521) AD11520) AD11519) -
Page 17: Recommended Filters
PTM200 - PTM1000 USER GUIDE Spare Parts List (cont’) MODEL Item PTM200 PTM250 PTM325 PTM400 PTM500 PTM700 PTM850 PTM1000 Replacement parts (DWG # (DWG # (DWG # (DWG # (DWG # (DWG # (DWG # (DWG # AD11525) AD11524) AD11523) AD11522) AD11521) AD11520) -
Page 18: Associated Drawings
PTM200 - PTM1000 USER GUIDE Associated Drawings REF: ADE11249 REV F. Page 18 - Rev D... - Page 19 PTM200 - PTM1000 USER GUIDE REF: ADE11249 REV F. Page 19 - Rev D...
- Page 20 PTM200 - PTM1000 USER GUIDE REF: ADE11249 REV F. Page 20 - Rev D...
- Page 21 PTM200 - PTM1000 USER GUIDE REF: ADE11249 REV F. Page 21 - Rev D...
- Page 22 PTM200 - PTM1000 USER GUIDE REF: ADE11249 REV F. Page 22 - Rev D...
- Page 23 PTM200 - PTM1000 USER GUIDE REF: ADE11249 REV F. Page 23 - Rev D...
- Page 24 PTM200 - PTM1000 USER GUIDE Page 24 - Rev D...
- Page 25 PTM200 - PTM1000 USER GUIDE Page 25 - Rev D...
- Page 26 PTM200 - PTM1000 USER GUIDE Page 26 - Rev D...
-
Page 27: Exploded Views
PTM200 - PTM1000 USER GUIDE Exploded Views Page 27 - Rev D... - Page 28 PTM200 - PTM1000 USER GUIDE Page 28 - Rev D...
- Page 29 PTM200 - PTM1000 USER GUIDE Page 29 - Rev D...
- Page 30 PTM200 - PTM1000 USER GUIDE Page 30 - Rev D...
- Page 31 PTM200 - PTM1000 USER GUIDE Page 31 - Rev D...
- Page 32 PTM200 - PTM1000 USER GUIDE Page 32 - Rev D...
- Page 33 PTM200 - PTM1000 USER GUIDE Page 33 - Rev D...
- Page 34 PTM200 - PTM1000 USER GUIDE Page 34 - Rev D...
-
Page 35: Warranty
IMPORTANT! Mail or Fax (716-685-1010) Today! Fold and Seal and your Service Warranty will be registered immediately. We are here to help. For more information on service or installation call the Service Department at 1-855-587-9323. Email to: fafwarranty@parker.com Model # Serial #... - Page 36 310 637 3400 +27 11 9610700 www.parker.com/processfiltration www.parker.com/watermakers www.parker.com/africa ©2015 Parker Hannifin Corporation. Product names are trademarks or registered trademarks of their respective companies. Publication: PTM User Guide Rev D Parker Hannifin Corporation Gas Separation & Filtration Division 4087 Walden Avenue...
Need help?
Do you have a question about the PTM Series and is the answer not in the manual?
Questions and answers