Table of Contents
Advertisement
Advertisement
Table of Contents

Related Manuals for Motorola CT610


Summary of Contents for Motorola CT610
- Page 1 Motorola CT610 Corded Telephone User Guide...
- Page 2 Safety information Follow these safety precautions when using your phone to reduce the risk of fire, electric shock, and injury to persons or property: • Do not set the phone on a heating register or over a radiator. Ensure that proper ventilation is provided at the installation site.
- Page 3 Call Timer display the duration of external calls. Need help? If you have any problems setting up or using your CT610, please contact Customer Services on 1-833-468-1468. Alternatively, you may find the answer in the ‘Help’ section at the back of this guide.
- Page 4 This user guide provides you with all the information you need to get the most from your phone. To set up your phone, follow the simple instructions in ‘Getting Started’, on the next few pages. Important Only use the telephone line cord supplied. Got everything? •...
-
Page 5: Table Of Contents
Getting started ..............7 Getting to know your phone ........10 Using the phone ............... 14 Calls ........................14 3.1.1 Make a call ..................14 3.1.2 Pre-dial ....................14 3.1.3 End a call ....................14 3.1.4 Receive a call ..................14 Mute ........................14 Phonebook ................15 Store a name and number ................15 View or dial an entry ..................15 Edit a name and number ................16... - Page 6 Date and time ..............24 Set the date and time ..................24 Set the time format ..................24 Base settings ..............25 Ringer tone ......................25 Ringer volume ....................25 Key tones ......................25 Confirmation tones ..................25 Display contrast ....................26 Language ......................26 Area code ......................26 Software version ....................26 Change system PIN ..................26 8.10 Reset ........................26...
-
Page 7: Getting Started
Important Do not place your CT610 in the bathroom or other humid areas. Place your CT610 base within reach of the AC power outlet and telephone wall jack. The socket-outlet should be installed near the equipment and should be easily accessible. - Page 8 Setting up your CT610 Once connected to the AC power the set-up wizard will then begin. Follow the prompts to finish set-up. To select OK, press the left soft key below the display. Set the time and date 2. Use the keypad to enter the time. The default time format setting is 12 hours, but you can change this to 24 hours under Time format in the Time &...
- Page 9 13. If you don’t want to add more contacts now, select No to finish the set-up wizard. You can now start using your phone. To find out how to use the most popular features of your CT610, please read the rest of this user guide.
-
Page 10: Getting To Know Your Phone
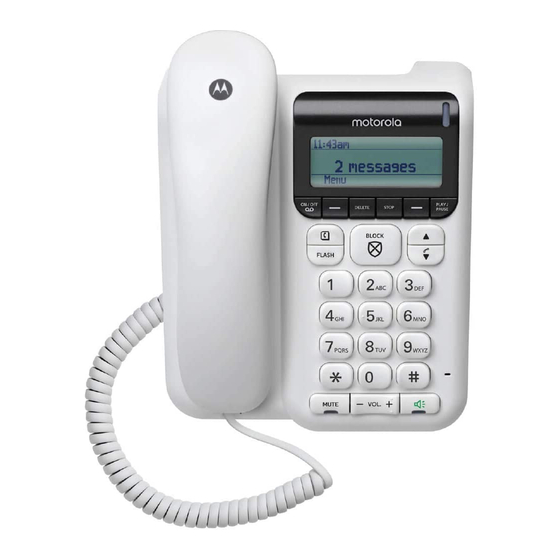
Getting to know your phone Overview of the handset A Earpiece To listen to your caller. B Microphone To speak to your caller. C Curly cord socket Where you plug in your curly cord. Getting to know your phone... - Page 11 Overview of the base A Delete answer phone messages Press to exit the menu and return to standby. Delete answer phone messages. B Left soft key / Skip back Press to open the Menu. Skip backwards when playing messages on the answer phone. C Answer machine On/Off Switches the answering machine on/off.
- Page 12 Display Stop Press to stop message playback. K Right soft key / Back / Skip forward Go back to previous Menu level. Skip forwards when playing messages on the answer phone. Play / Pause Press to play recorded messages Press again to pause message playback. M Up Press to scroll up through the Menu.
- Page 13 Menu map Answer Phone Time & Date Outgoing message Set time & date Record memo Time format Answer mode Settings Answer settings Ringer tone • Answer & record Ringer volume • Answer only Keypad tones • Remote access Confirmation tones Call blocking Display contrast On/Off...
-
Page 14: Using The Phone
Using the phone Calls 3.1.1 Make a call Lift the handset, when you hear the dial tone, dial the number. 3.1.2 Pre-dial Enter the phone number. If you make a mistake press to clear the entries. Lift the handset to dial the number. 2. -
Page 15: Phonebook
14 characters long and numbers up to 24 digits. Store a name and number If the CT610 is connected to a switchboard, you may need to enter a pause in a stored number. This gives the switchboard time to find an outside line. A pause is normally stored after the switchboard access code (e.g. -
Page 16: Edit A Name And Number
Edit a name and number Press p. The first entry will be displayed. Scroll to the entry you want to edit. 2. Press Options, the display shows Add new contact, scroll Edit contact. Press OK. 3. The name is displayed, delete the name if required, then enter the new name and press Next. -
Page 17: Delete All Contacts
Delete all contacts Press p. The first entry will be displayed. 2. Press Options, the display shows Add new contact, scroll Delete all contacts. Press OK. Are You Sure?. 3. The display shows 4. Press to confirm. 5. Press Back to return to standby. -
Page 18: Call Blocking
By doing this, you gradually build up your lists of allowed and blocked numbers and your CT610 will know how to deal with the call the next time it comes in. -
Page 19: How Do You Accept, Block Or Send A Call To The Answer Phone
Call blocking answers a call for you and asks the caller to say (“announce”) who they are. 2. Your CT610 then rings with the Announced call on the display and tells you the caller’s name when you pick up. (e.g. “You have a call from Mark”). -
Page 20: Switch Call Blocking On/Off
Switch Call blocking on/off When Call blocking is set to On, it is On for whichever mode you’re using (e.g. Announce mode). If you turn Call blocking Off, all calls will be allowed through, even if they are already on your blocked list. In idle mode, press On/Off is displayed. -
Page 21: Add A Number To The Allow List
Add a number to the Allow list In idle mode, press 2. Scroll Allow numbers and press OK. Add number is displayed, press OK. 4. Enter the telephone number you want to allow (make sure you enter the full dialling code) and press Save. Deleting your Blocked and Allowed lists When in the Block and Allow number menus, you also have the choice to delete the whole list. -
Page 22: Caller Id And Calls List
Caller ID and calls list Important To use Caller ID, you must first subscribe to the service from your network provider. A subscription fee may be payable. To ensure that the caller’s name is displayed, make sure you have stored the full telephone number, including the area code in the phonebook. -
Page 23: Unblock A Contact
5. Press to confirm. Back 6. Press to return to standby. Note If the number is stored in the phonebook the display will refer to the Contact name not the Number. 6.2.5 Unblock a contact Press to open the call list. 2. -
Page 24: Date And Time
Date and time If you have subscribed to Caller ID Service, the date and time is set automatically when you receive your first call. If you do not have Caller ID service, you can set the date and time manually. Set the date and time Press Menu, scroll Time &... -
Page 25: Base Settings
Base settings Ringer tone You can set different ringer tones for your calls. Choose from 15 different tones. You will hear a sample ring as you scroll to each ring tone. Press Menu, scroll Settings and press OK. Ringer tones is displayed, press OK. -
Page 26: Display Contrast
Display contrast You can change the contrast of the display; there are 5 levels to choose from. Press Menu, scroll Settings and press OK. 2. Scroll Display contrast and press OK. 3. Press to select the contrast you require. 4. Press to save. -
Page 27: Default Settings
8.11 Default settings Ringer tone Ringer volume Ear volume Hands-free volume Flash time 600 ms Phonebook Unchanged Calls list Empty Redial list Empty PIN code 0000 Dial mode Tone Ring delay Answer mode Answer & Record Base settings... -
Page 28: Using Your Answering Machine
Using your Answering Machine The phone can digitally record up to 30 minutes of messages. As well as recording incoming messages, it can record memos for other users. The answering machine can be operated from: • the base • remotely, from any other DTMF telephone, see page 30. Switch the answering machine on / off Press o on the base to turn the answering machine on or off. -
Page 29: Play The Current Outgoing Announcement
Record message is highlighted, press OK. Follow the voice prompt to record Save your message and select when you’ve finished. 5. Your message will be played back to you. Select if you’re happy with it or you can delete it by selecting Delete. 9.3.4 Play the current outgoing message Select Menu,... -
Page 30: Incoming Message Length
• If there are no new messages it will answer after 6 Rings. So you have the option to hang up, saving the time and cost of a call. • If the memory is full, it will automatically revert to Answer Only mode. Select Menu, Answer Phone is displayed, press OK. -
Page 31: Change The Remote Access Pin
9.8.2 Change the remote access PIN Select Menu, Answer Phone is displayed, press OK. Answer settings and press OK. 2. Scroll 3. Scroll Remote access and press OK. Change access PIN and press OK. 4. Scroll 5. Read the message prompt, press OK. 6. -
Page 32: Technical Specifications
Technical specifications Base voltage (AC voltage, 50Hz/60Hz) AC 100V to 240V, 50/60Hz Base voltage (Adaptor output) DC 7.5V 300mA Technical specifications... -
Page 33: Help
Help No dial tone • Use only the telephone line cord supplied. • Check that the telephone line cord is connected properly. Can’t make or receive calls • Check that product call blocking is not active. No ring tone • The ring tone is deactivated. -
Page 34: General Information
(“MZGW”) What Does this Warranty Cover? Subject to the exclusions contained below, MZGW warrants that this Motorola branded product (“Product”) or certified accessory (“Accessory”) sold for use with this product that it manufactured to be free from defects in materials and... - Page 35 THIS EXPRESS LIMITED WARRANTY IS THE EXCLUSIVE REMEDY OF THE CONSUMER, AND IS PROVIDED IN LIEU OF ALL OTHER WARRANTIES, EXPRESS OF IMPLIED. IN NO EVENT SHALL MOTOROLA OR MZGW BE LIABLE, WHETHER IN CONTRACT OR TORT (INCLUDING NEGLIGENCE) FOR DAMAGES IN EXCESS OF THE PURCHASE PRICE OF THE PRODUCT...
- Page 36 (c) use of the Products or Accessories for commercial purposes or subjecting the Product or Accessory to abnormal usage or conditions; or (d) other acts which are not the fault of Motorola or MZGW, are excluded from coverage.
- Page 37 FCC, ACTA and IC regulations FCC Part 15 This equipment has been tested and found to comply with the requirements for a Class B digital device under Part 15 of the Federal Communications Commission (FCC) rules. These requirements are intended to provide reasonable protection against harmful interference in a residential installation.
- Page 38 FCC Part 68 and ACTA This equipment complies with Part 68 of the FCC rules and with technical requirements adopted by the Administrative Council for Terminal Attachments (ACTA). This Product Complies With 47CFR PART 68. The plug and jack used to connect this equipment to premises wiring and the telephone network must comply with applicable Part 68 rules and technical requirements adopted by ACTA.
- Page 39 ISEDC Warning This device complies with Innovation, Science, and Economic Development Canada licence-exempt RSS standard(s). Operation is subject to the following two conditions: (1) this device may not cause interference, and (2) this device must accept any interference, including interference that may cause undesired operation of the device.
- Page 40 Manufactured, distributed or sold by Meizhou Guo Wei Electronics Co. LTD., official licensee for this product. MOTOROLA and the Stylized M Logo are trademarks or registered trademarks of Motorola Trademark Holdings, LLC. and are used under license. All other trademarks are the property of their respective owners.
Need help?
Do you have a question about the CT610 and is the answer not in the manual?
Questions and answers
Can i get a replacement cord DC7.5V 300mA
To obtain a replacement cord for the Motorola CT610 with specifications DC 7.5V 300mA, use only the supplied AC power adaptor as stated in the manual. For a replacement, contact the manufacturer or an authorized distributor, as repairs and replacements must be done by them or their authorized agents.
This answer is automatically generated
In the ct610 user guide there is an entry for area code. What does this do?
In the Motorola CT610 user guide, entering an area code in the Call Blocking settings allows the phone to block all incoming calls that begin with that area code.
This answer is automatically generated
le manuel existe-t-il en français?
Manuel d'instruction français Motorola CT 610, SVP