Table of Contents
Advertisement
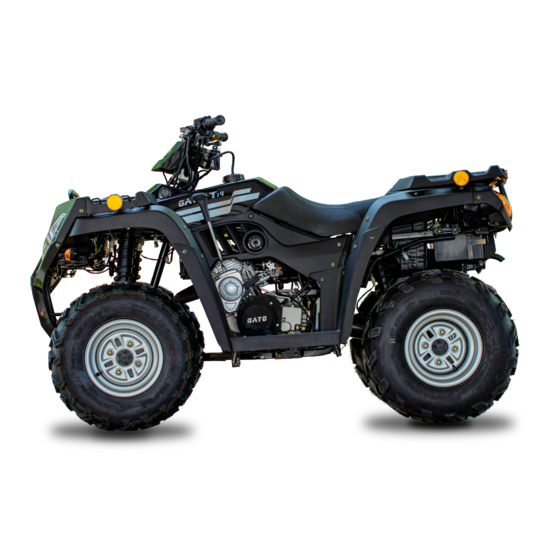
The full name of ATV is All-Terrain vehicles. 250 ATV is newly manufactured by our factory.
250ATV embodies the experience and essence of world motorcycle technology. It adpots single-cylinder
four-stroke air-cooled engine newly developed by our company, and employs the devices of carburetor carbrue-
tor, wet automatic centrifugal clutch, fi ve-speed shifting, through driving, reverse driving hand pulled recoil starter
and eletric-starter in combination, CDI electric ignition, pressure splash lubrication system, etc, which are good in
performance. This ATV is novel and bright in design, having moved, streamlined model and luxury decoration de-
sign, And it meet the national standard in noise and dirt drainage, especially it embodies the great power, reliability,
endurance,being an ideal transportation facility for ATV funs.
The correct operation and maintenance are the prerequisites at your safety riding of the ATV, and also can
reduce the fault of the ATV and keep its best performance. So please read this manual! to understand its basic
operation, repair and maintenance methoels. The information contained herein all relates to the ATV of the current
design and is subject to changes by our company according to the demands of market and users without notice. if
you have any questions. Please consult with our motorcycle dealer. We are welcome for you precious advice and
suggestions. Our company has established many service centers (stations, points), with specially-tranined techni-
Brief introduction
Advertisement
Table of Contents

Subscribe to Our Youtube Channel
Related Manuals for ATV 250 ATV


Summary of Contents for ATV 250 ATV
- Page 1 The correct operation and maintenance are the prerequisites at your safety riding of the ATV, and also can reduce the fault of the ATV and keep its best performance. So please read this manual! to understand its basic operation, repair and maintenance methoels. The information contained herein all relates to the ATV of the current design and is subject to changes by our company according to the demands of market and users without notice.
- Page 2 WARNING you are operating inspecting or repairing the ATV. A CAUTION indicates special precautions that must be taken to avoid damage to CAUTION the ATV. A NOTE provides information can make your operation in the ATV easier or clearer. NOTE...
-
Page 3: Table Of Contents
Content Safety information ............Ⅰ Fuel tank cap ..............7 Description and machine identifi cation ......1 Fuel cock ...............8 Control functions ............3 Seat ................8 Main switch ..............3 Storage box ..............9 Indicator lights ...............3 Front carrier ..............9 Handlebar switches ............3 Rear carrier ..............9 Start switche ..............3 Rear shock absorber .............9 Light switches ..............4... - Page 4 Content Switches ..............12 Accessories ..............17 Battery .................12 Loading ................17 Tire ................12 Operation attension .............18 How to measure tire pressure ........12 Operation ..............18 Tire wear limit ..............13 Speed limit valve ............19 Operation ..............14 Exhaust silencer ............19 How to start the engine ..........14 Turning ...............20 Starting a cold engine ..........14 Climbing slope .............21...
- Page 5 Content Periodic maintenance /Lubrication ......26 Wheel removal .............36 Engine oil ..............27 Wheel installation ............37 Lubrication oil of gear case .........29 Fuse replacement ............38 lubrication oil of gear case ...........29 Replacing the headlight bulb ........38 Spark plug inspection ..........30 Spark arrester cleaning ..........39 Air fi...
-
Page 6: Safety Information
● should be passed on together with it because the ate an ATV. Never allow drive of an ATV by an indivi- next user also need the manual. Please read the dal person if he or she does not have the abilities to manual carefully before driving the new. - Page 7 ATV on such shield), gloves, boots, long-sleeved shirt or jacket, terrain. Always be especially cautious on these kinds and long pants.
- Page 8 ATV. Never at- stacles as described in this manual. tempt to turn the ATV around on any hill until you Always be careful when skidding or sliding.
- Page 9 Never exceed the stated load capacity for an ● of skidding or sliding out of control. ATV. Cargo should be properly distributed and se- Never operate an ATV in fast fl owing water or curely attached. ● in water deeper than that recommended in this man- Reduce speed and follow instructions in this ●...
- Page 10 tor or fuel tank. Starting or running the engine in a closed area will cause the breakdown. And exhaust fumes are poison- ● ousus and may cause loss of consciousness and death within a short time. Always operate your machine in an area with adequate ventilation.
-
Page 11: Description And Machine Identification
DESCRIPTION AND MACHINE IDENTIFICATION 1.Front wheel 12.Seat 2.Headlight 13.Fuel tank cap 3.Drive select lever 14.Brake pedal 4.Shift lever 15.Front carrier 5.Fuel cock 16. Rear brake lever 6.Recoil starter 17.Parking switch 7.Starter(choke) 18.Ignition switch 8.Taillight 19.Throttle lever 9.Rear wheel 20.Mirror 10.Rear carrier 11.Moffl... - Page 12 Identifi cation numbers record When ordering spare parts from a our dealer or for reference in case the vehicle is stolen Record, vehicle identifi cation number in the spaces provided for assistance. 1.VEHICLE IDENTIFICATION NUMBER: ① Vehicle identifi cation number The vehicle identifi...
-
Page 13: Control Functions
CONTROL FUNCTIONS This indicator light comes on when the transmis- Main switch Functions of the respective switch positions are as sion is in reverse. The light is blue in color. follows: Neutral indicator light “ ” This indicator light comes on when the transmis- Engine can be started only at this position and the sion is in neutral. -
Page 14: Light Switches
main switch “ ” and the engine stop switch ” , the starter motor will be activated but the en- “ gine will not start. To start the engine, be sure to set the engine stop switch at “ ” . Lights swtich “... -
Page 15: Speed Limiter
ATV. Consult a our dealer if you can’t find or solve the probem yourself. ① ② 1.Locknut 2.Adjusting screw a.12mm(047in) change pic ① 1.Throttle lever CAUTION Do not turn the speed adjusting screw out more than 12mm. Always make sure the throttle lever free play is adjuted to 3-5mm. -
Page 16: Parking Brake
This could cause loss of control or a collision. handlebar. Pull the lever toward the handlebar or tread The barke could overheat if you ride the ATV with- slow the pedal to apply the rear brake. out releasing the parking brake.You could lose braking performance which could cause an accident. -
Page 17: Shift Pedal
HOW TO AVOID THE HAZARD Always set the parking brake before starting the engine. Always be sure the parking brake have been released before you begin to ride. Shift pedal This machine is equipped with a constant mesh ① 5-speed transmission. The shift pedal is located on the ②... -
Page 18: Fuel Cock
Fuel cock RES: The fuel cock supplies fuel from the fuel tank to This indicates reserve. If you run out of fuel while the carburetor. riding, turn the lever to this position.After refuelling, re- turn the fuel cock lever to the “ON”position. OFF: If the lever is in this position, fuel will not flow. -
Page 19: Storage Box
Maximum load limit:60kg. Rear shock absorber The spring preload can be adjusted to suit the rider’s weight and riding conditions. Spring preload adjustment To increase the spring preload, turn the adjuster in direction@. To decrease the spring preload, rurn the adjuster in direction. -
Page 20: Pre-Operation Checks
Always check the brakes at the start of every side should move smoothly and there shoud be a firm feel- .Do not ride the ATV if you find any problem with the ing when the brake is applied. If not, have the machine brakes. -
Page 21: Fuel
Test the brakes at slow speed after starting out ful. Not to spill fuel, especially on the engine or exhaust to make sure they are working properly. If the brakes pipe.wipe up any spilled fuel immediately. Be sure the do not provide proper braking performance, inspect the fuel tank cap is closed securely. -
Page 22: Fittings And Fasteners
Always check the tightness of chassis fittings and warning fasteners before a ride. Refer to the Service. Manual for Use of improper tires on this ATV, or operation of correct tightening torque. this ATV with improper tire pressure may increase your Lights risk of accident. -
Page 23: Tire Wear Limit
Use the low-pressure tire gauge. Caution: Recommended pres- The low-pressure tire gauge is included as stan- Minimum Maiximum sure dard equipment. conduct two measurements if the tire 20Kpa 17Kpa 23Kpa pressure and use the second reading. Dust or dirt in the Front (0.20kgf/cm (0.17kgf/cm... -
Page 24: Operation
Read the operation Manual carefully. If there is a controls or function you do not understand, ask your our dealer. WARNING Never ride the ATV in cold weather, always make sure all control cables work smoothly before you begin ridding. Please read the engine brake-in section before you operate the engine at first time. -
Page 25: Drive Select Lever Operation
Do not shift the Reverse Handle Bar be on. If the light does not come on. ask a our dealer to before you make sure that the ATV is in the Firest Gear inspect the machine. -
Page 26: To Start And Accelerate
CAUTION Engine break-in Do not coast for long periods with the engine There is never a more important period in the left off, and do not tow the machine a long distance.Even of your machine than the period between zero and 20 when gears are in neutral, the transmission is only. -
Page 27: Accessories
You must use common sense and good judgement with rocks or other object. Do not park the ATV on the when carring cargo or towing a trailer. keep the follow-... -
Page 28: Operation Attension
4.Always check your ATV each time before you ues 1.Get training if you are unexperienced. it to make sure the reliability of ATV. Always follow the Beginners should be trained at the guide of pro- inspection and maintenance procedures in the operation fessional person. -
Page 29: Speed Limit Valve
This valve is used for beginners to limit the max Don’t ride the ATV on asphalt road, including side- speed of the ATV. Rotate the bolt clockwise to incresase walks, driveways, parking lots and walk streets. max. speed, and rotate it coutercloclwise to decrease Prohibit to drive the machine on any driveway, max speed. -
Page 30: Turning
W h e n s l o w i n g d o w n o r s t o p p i n g , r e l e a s e t h e to go straight. If the ATV doesn’t turn, stop it and prac- throttle and brake gradually. -
Page 31: Climbing Slope
. Neccessary practice is required. when climbing the Ensure the ATV not to slip when stop it on slope. hill, move your body gravity center forward and opera- The shift should be proper and speed shuld be stable tion manual. -
Page 32: Riding Downhill
Avoid to lose balance Whenever possible, ride your ATV straight, Turing to cause accident. may cause the ATV to tip over. Avoid too high speed so Don’t ,make a turn on a slope before grasping that you have time to deal with accident. -
Page 33: Riding Over Rough Terrain
Riding over rough terrain Be careful when riding on rough terrain. when rid- ing over terrain which may damage the ATV, lay your feets on the foot pedals to avoid jumping and loss of control. Practise safely control slipping at low speed. on Don’t try to ride over big obstacles such as rock... -
Page 34: Periodic Maintenance And Adjustment
PERIODIC MAINTENANCE AND ADJUSTMENT Periodic inspection, adjustment, and lubrication will keep your machine in the safety and most efficient condition. The points of machine inspection, adjustment, and lubrication are detailed in following. NOTE Turn off the engine when maintaining unless specified, Have a our dealer perform service if you are not familiar with maintenance. -
Page 35: Periodic Maintenance/Lubrication
PERIODIC MAINTENANCE/LUBRICATION INITAL EVERY ITEM ROUTINE 1month 3month 6month 6month 1Year Valves Check valve clearance, Adjust if necessary. Spark plug Check condition. Adjust gap and clean. Replace if necessary. Air fi lter Clean. Replce if necessary. Every 20-40 hours(more often in wet or dusty areas) Carburetor Check idle speed/Starter operation. -
Page 36: Periodic Maintenance/Lubrication
PERIODIC MAINTENANCE/LUBRICATION INITAL EVERY ITEM ROUTINE 1month 3month 6month 6month 1Year Brakes Check operation.Adjust if necessary. clutch Check operation.Adjust if necessary. Wheels Check balance/damage/runout. Replace if necessary. Check balance assembly for looseness/damage. Replace if dam Wheel bearings aged. Front and rear suspension* Check fuel hose for cracks or damage.Replaceif necessary. Steering system Replace(Warm engine before draining). -
Page 37: Engine Oil
Engine oil 1.Engine oil level measurement ④ ② ① ③ a. Place the machine on a flat surface wram up the engine for several minutes and turn off it. wait more than 10 minutes for the oil to drain back into the crank- case before checking the oil level. - Page 38 2. Engine oil replacement and oil fitter element Recommended oil:see page 11 cleaning Oil quantity: a.Place the machine in a flat suface, Warm up the Periodic oil change: engine for several minutes and turn off place a contain- 1.5L(1.3mp qt) er under the engine.
-
Page 39: Lubrication Oil Of Gear Case
b.Slightly loosen the oil gallery bolt in the cylinder If the level is too low, add oil to raise it to the proper head. level. c.Start the engine and keep it at idle speed unil b.Install the oil filler bolt and tighten to the speci- begins to seep fron the oil gallery bolt. -
Page 40: Spark Plug Inspection
SAE 80API”GL-4”Hypoid gear oil Spark plug inspection Oil quality You should periodically remove and check the Periodic oil change: spark plug because heat and deposits will cause slow 0.25L(0.21Imp qt,) damage and erosion of the spark plug if electrode ero- Total amount: sion is excessive, you should replace the spark plug 0.27(0.23Imp qt,) -
Page 41: Air Fi Lter Cleaning
Air fi llter cleaning There is a check hose at the bottom of the air fill- ter case.if there are dust or water collects in this hose, empty the hose and clean the air filter element and air filter case. ②... -
Page 42: Carburetor Adjustment
foam cover and let it dry. Do not twist the foam cover 2.Set the specified idle speed by adjusting the when squeezing it. throttle adjusting screw, Turn the screw into increase 8.Check the foam cover.if damaged, replace it. engine speed, and out to decrease engine speed. 9.reinstall the foam cover to the air filter element. -
Page 43: Front And Rear Brake Shoe Inspection
3.Tighten the locknut, Front brake lever free play adjustment Inspect the front brake shoes, before adjusting the brake. 1 . A d j u s t i n g b o l t The front brake lever free play should be adjusted 2.Locknut a.3-5mm(0.12-0.20in) to 5-7mm(0.2-03in) If the free play is incorrect, adjust... -
Page 44: Rear Brake Adjustment
Rear brake adjustment 1.Brake pedal a . F u l l y l o o s e n t h e a d j u s t i n g n u t o n t h e b r a k e cable. - Page 45 ① ↓ ↑ 1.Brake cable adjusting bolt a.0-1mm(0-0.4 in) a.20-30mm c.Rotate the adjusting nut until free play is 5-7mm. 2.Brake lever d.Tighten the locknut. a.Loosen the locknut and fully turn in the adjusting nut on the handlebar. b.Turn in the adjusting nut on brake cable to get a ①...
-
Page 46: Clutch Adjustment
fessional knowledge. These procedures should be done can cause corrosion, fray or kink of cable. Operation of by our Group dealer. cables could be strictly executed, which could cause an accident or injury. Clutch adjustment 1.Loosen the lock nut Inspect cable frequently and replace damaged 2.Slowly rotate the adjusting bolt counterclockwise cables. -
Page 47: Wheel Installation
1.The arrow mark “ ” on the tire must point to 2.If ATV is suspended from use for a month or the rotation direction of the wheel. much longer time, remove the battery and store in a 2.Tapered wheel nuts are used for both front and... -
Page 48: Fuse Replacement
t i o n e d t i m e , c h e c k t h e v o l t a g e a t l e a s t o n e m o n t h . 2.If the fuse is blown, switch off the main switch Charge the battery when the voltage is lower than 12V. -
Page 49: Spark Arrester Cleaning
4.Reinstalll the cover and headlight cover,Adjust the headlight beam if necessary. 1.Cover(x2) ① Spark arrester cleaning Select a well-ventilated area free of combustible materials and make sure the exhaust and silencer are cool. 1.Remove the bolt. 2.Start the engine, block the end of sillencer with a dowel, which will increase the speed about twenty times by momen- tarily producing exhaust system back pressure. -
Page 50: Cleaning And Storage
1.Before cleaning the ATV: 5.After cleaning ATV with clean water, immediately dry all a.Block off the exhaust pipe with plastic bag or strong surfaces with a chamois, clean towel or soft absorbent cloth. - Page 51 Long term storage(60 days or more) of your ATV will re- 7.Take out the battery and store it in a dry place. The bat- quire some protective procedures to prevent ATV from damage. tery should be stored in the place where the ambient tempera- After thoroughly cleaning the ATV, adopt the following protective true should be 30 ℃...
-
Page 52: Main Data And Specifi Cation
MAIN DATA AND SPECIFICATIONS Item specifi cation Item specifi cation Dimension: Engine oil: Periodic oil change 1.5L Overall length 1830mm With oil fi llter replacement 1.6L Overal width 1040mm Total amount 1.8L Overall height 1150mm Total amout of gear oil 0.27L Seat height 810mm... - Page 53 MAIN DATA AND SPECIFICATIONS Item specifi cation Item specifi cation Suspension Supporting rod Gear ratio: Front Rotary rod 34/12(2.833) Rear 34/19(1.789) Shock absorber: 29/22(1.318) Front Spring/Oil damper 26/25(1.040) Rear Spring/oil damper 23/28(0.281) Wheel travel: Reverse 73/22×34/12×19/18×46/11(41.5) Frame Front 135mm Rear 135mm Frame type Steel tube...
-
Page 54: Maintenance Record
MAINTENANCE RECORD Maintenance times, receipts of purchased componects and assembly will be required to be recorded, which should be done according to the warranty. The chart below only acts as maintenance record, not as maintenance proof: MAINTENACE DATE INTERVAL DRIVING MILEAGE SERVICING DEALER NAME AND ADDERSS REMARKS TIME... -
Page 55: Electric Wiring Diagram
ELECTRIC WIRING DIAGRAM(CHANGE PIC) 1.Emergency switch 9.Ignition switch 17.Rear light 25.Parking switch 33.Overtake light switch 2.Flameout switch 10.Stop relay 18.Rear left turning light 26.Reverse switch 34.Front right position light 3.Starter button 11.Ignition coil 19.Rear left taillight 27.Gear switch 35.Front right light 4.Flasher 12.CDI 20.Rear right taillight...
Need help?
Do you have a question about the 250 ATV and is the answer not in the manual?
Questions and answers
e possibile avere l'esploso del motore quad loncin desert storm 250? il motorino di accensione gira a vuoto e vorrei capire su quale ingranaggio agisce