Table of Contents
Advertisement
Quick Links
Advertisement
Table of Contents

Related Manuals for LEGRAND MS Series


Summary of Contents for LEGRAND MS Series
- Page 1 MS Training Manual Storage, installation and maintenance for MS busbar systems 1 ...
-
Page 2: Table Of Contents
MS Training Manual INDEX STORAGE INSTRUCTIONS ............ 4 HANDLING ................4 GOOD RECEPTION ..............5 NOTIFICATIONS ..............5 STORAGE ................6 INSTALLATION INSTRUCTIONS ........... 7 STRAIGHT LENGHTS & FLEXIBLE JOINT ........9 ELBOW ELEMENT ..............10 ... - Page 3 MS Training Manual WARNINGS These instructions are provided to ensure appropriate storage, correct installation, and efficient use of the system. Note: carefully read these instructions upon receipt of the material and before installing the system, and putting it into operation. The installation must be completed by competent and suitably trained personnel, as prescribed by CEI 11-27 and 50110-1:2004-11 (CEI 11-48) standards,...
-
Page 4: Storage Instructions
MS Training Manual STORAGE INSTRUCTIONS HANDLING When handling the material, comply with the regulations for safety in the workplace pursuant Leg. Decree No. 81 dated 09/04/2008 (Consolidated act on safety in the workplace). Follow the indications supplied to prevent damage to materials, or risks to personnel. -
Page 5: Good Reception
MS Training Manual GOOD RECEPTION Upon receipt of the goods check the following: 1 integrity of the packaging, and the goods, if delivered in a see-through package 2 consistency of the material with the Delivery Note and the packing list, if supplied 3 consistency of the material with the order acknowledgement details In case of any disclaims, please inform us in writing following the instructions... -
Page 6: Storage
MS Training Manual We recommend that upon receiving the goods, the integrity of the packaging is checked WITH THE FREIGHT FORWARDER PRESENT. If you find that the packaging has suffered damage and/or collisions of varying degree, please write MATERIAL RECEIVED DAMAGED on the Delivery Note, to enable us to initiate a complaint procedure against the freight forwarder. -
Page 7: Installation Instructions
MS Training Manual INSTALLATION INSTRUCTIONS Before the installation, all material should be inspected for damage. When installing the busbars comply with the following: 1 do not position the busbars near pipes containing liquids. 2 for the installation only use bracketing systems supplied by BTicino, and follow the instructions found in the catalogue or enclosed with the item. - Page 8 MS Training Manual 8 ...
-
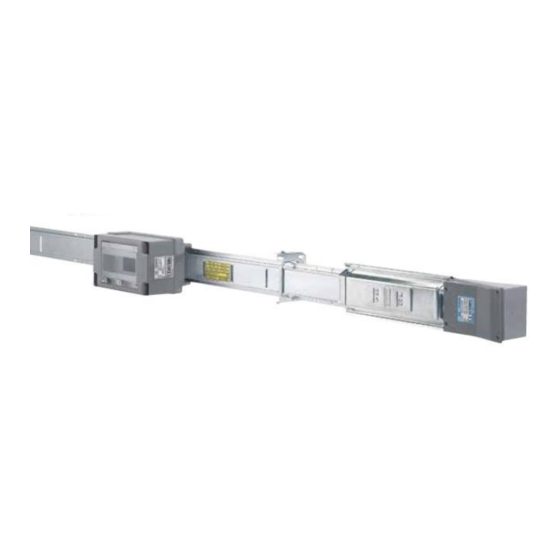
Page 9: Straight Lenghts & Flexible Joint
MS Training Manual 9 ... -
Page 10: Elbow Element
MS Training Manual 10 ... -
Page 11: Feed Units
MS Training Manual 11 ... -
Page 12: Intermediate Feed Unit
MS Training Manual 12 ... - Page 13 MS Training Manual ACCESSORIES 13 ...
-
Page 14: Fixing Accessories & Tap-Off Boxes
MS Training Manual 14 ... - Page 15 MS Training Manual 15 ...
- Page 16 MS Training Manual 16 ...
- Page 17 MS Training Manual 17 ...
- Page 18 MS Training Manual 18 ...
- Page 19 MS Training Manual BRACKETS FOR VERTICAL ELEMENTS 19 ...
-
Page 20: Preparation Of The End Feed Unit
MS Training Manual Preparation of the end feed unit A) PREPARATION OF THE END FEED UNIT A1) PREPARATION OF THE END FEED UNIT Open the feed unit cover. Ensure that it is the Prepare the LH or RH end feed unit required one , LH or RH according to the based on the neutral position. position of Neutral ”N” A2) PREPARATION OF THE END FEED UNIT WARNING Drill a hole to accommodate the type of Ensure that the cable to be cable fitting to be assembled. connected is not energized 20 ... - Page 21 MS Training Manual A3) PREPARATION OF THE END FEED UNIT A4) PREPARATION OF THE END FEED UNIT Allowing a suitable external tolerance, Connect the cable conductors insert the cable into the cable fitting according to the electrical scheme and (MS100 n°1 Pg36 – MS160 n°2 Pg48 tighten the terminals. not supplied) and into the end feed unit. A5) PREPARATION OF THE END FEED UNIT A6) PREPARATION OF THE END FEED UNIT Fasten the cable with the cable clamp Re‐fit the end fit cover. and tighten the dedicated screws. 21 ...
- Page 22 MS Training Manual A7) PREPARATION OF THE END FEED UNIT This completes the wiring of the end feed unit. 22 ...
-
Page 23: Assembly Of An Ip40 Installation
MS Training Manual Assembly of an IP40 installation B) ASSEMBLY OF AN IP40 INSTALLATION B1) ASSEMBLY OF AN IP40 INSTALLATION Ground set the straight lengths Overlap and join the two straight lengths according to the direction of the joints using a slight pressure as shown in the and neutral position. drawing. B2) ASSEMBLY OF AN IP40 INSTALLATION B3) ASSEMBLY OF AN IP40 INSTALLATION Fasten the lengths with the 6 screws Warning check that connection blades provided and tighten completely. are well in contact with each other. 23 ... - Page 24 MS Training Manual B4) ASSEMBLY OF AN IP40 INSTALLATION B5) ASSEMBLY OF AN IP40 INSTALLATION Join other corresponding components by Fasten the suspension clamps to the following the instructions given in points lengths and assemble them. B1,B2,B3. Based on the course to follow and the neutral position, choose the most suitable component. B6) ASSEMBLY OF AN IP40 INSTALLATION According to neutral “N” connect the previously prepared RH or LH end feed unit (see preparation of end feed unit) and act as per straight lengths tightening the 6 screws properly. WARNING :the mechanical casing joint screws must be properly tightened to ensure maximum continuity of the protective circuit (PE) 24 ...
-
Page 25: End Cover Assembly
MS Training Manual End cover assembly C) END COVER ASSEMBLY C1) END COVER ASSEMBLY Position and fasten the end cover by Insert the tap‐off unit (see single tightening the 6 mechanical joint screws. accessories preparation). WARNING DANGER OF ELETRIC SHOCK Before putting the line under voltage ensure that no cables or wires are exposed. Once the assembly has been completed ensure once again that the whole run has been properly aligned. At this stage the assembly of the IP40 installation is complete. 25 ... -
Page 26: Assembly Of An Ip55 Installation
MS Training Manual Assembly of an IP55 installation D) ASSEMBLY OF AN IP55 INSTALLATION D1) ASSEMBLY OF AN IP55 INSTALLATION Before installing the IP55 installation, Apply the transversal gaskets to the check that the feed unit and tap‐off units busbar as indicated in the drawing. are equipped with gaskets, then proceed in the same way as for the IP40 version, with the following additions. D3) ASSEMBLY OF AN IP55 INSTALLATION Assemble the joint rigidity sleeves, D2) ASSEMBLY OF AN IP55 INSTALLATION ensuring that the gasket is properly Stick the longitudinal gaskets as seated, then close them with the proper indicated in the drawing. sliders. 26 ... - Page 27 MS Training Manual D4) ASSEMBLY OF AN IP55 INSTALLATION D5) ASSEMBLY OF AN IP55 INSTALLATION Cover unused tap‐off outlets using the Sleeves with gaskets must also be added tap‐off outlet cover. to the end cover. After this, the IP55 installation is complete. 27 ...
-
Page 28: Preparation Of 16A Tap-Off Units
MS Training Manual Preparation of 16A tap‐off units E) PREPARATION OF 16A TAP‐OFF UNITS E1) PREPARATION OF 16A TAP‐OFF UNITS Make a hole according to the cable Unscrew the screw, open the cover and grommet to be assembled (Max 1+1 remove any remaining residue caused by Pg21). the drilling of the unit. E2) PREPARATION OF 16A TAP‐OFF UNITS E3) PREPARATION OF 16A TAP‐OFF UNITS Insert the cable into the cable grommet, Insert the fuses (CH 10X32) into the connect the cable conductors according correct holders. to the electrical scheme and tighten the clamps well. 28 ... - Page 29 MS Training Manual E5) PREPARATION OF 16A TAP‐OFF UNITS E4) PREPARATION OF 16A TAP‐OFF UNITS To fit the tap‐off unit insert the metal fittings into the tap‐off outlet. The tap‐ Rotate the hooking feet clockwise to 90°. off outlet shutters open automatically by plugging in the tap‐off unit. E7) PREPARATION OF 16A TAP‐OFF UNITS Please note that the cover is equipped E6) PREPARATION OF 16A TAP‐OFF UNITS with an safety device in order to avoid the cover closing involuntarily and the By pressing the tap‐off against the accidental activation of loads fed from busbar length rotate the feet 90° so that the tap‐off box. To close the lid apply both of them will hook to the length. slight pressure to the device. Close the lid and tighten the screws. ...
-
Page 30: Preparation Of 25/50A Tap-Off Units
MS Training Manual Preparation of 25/50A tap‐off unit F) PREPARATION OF 25/50A TAP‐OFF UNITS F1) PREPARATION OF 25/50A TAP‐OFF UNITS Make a hole according to the cable Unscrew the screw, open the cover and grommet which is to be assembled (Max remove any remaining residue caused by Pg29). the drilling of the unit. F2) PREPARATION OF 25/50A TAP‐OFF UNITS F3) PREPARATION OF 25/50A TAP‐OFF UNITS Insert the cable into the cable grommet, Insert the fuses (CH 14X51) into the connect the cable conductors according correct holders. to the electrical scheme and tighten the clamps well. 30 ... - Page 31 MS Training Manual F4) PREPARATION OF 25/50A TAP‐OFF UNITS F5) PREPARATION OF 25/50A TAP‐OFF UNITS Respecting the sense of assembling, The tap‐off outlet shutters open insert the metal fittings into the tap‐off automatically by plugging in the tap‐off outlet keeping the fixing arms pressed in. unit. F6) PREPARATION OF 25/50A TAP‐OFF UNITS Please note that the cover is equipped with an safety device in order to avoid the cover closing involuntarily and the accidental activation of loads fed from the tap‐off box. To close the lid apply slight pressure to the device. Close the lid and tighten the screws. 31 ...
-
Page 32: Preparation Of 63A Tap-Off Units
MS Training Manual Preparation of 63A tap‐off unit G) PREPARATION OF 63A TAP‐OFF UNITS G1) PREPARATION OF 63A TAP‐OFF UNITS (BASE & CIRCUIT BRAKER PREPARATION) (BASE & CIRCUIT BRAKER PREPARATION) Make a hole according to the cable Unscrew the screws, open the cover and grommet which is to be assembled(Max (only on the version with circuit Pg36). breakers) remove the accessories. Remove any remaining residue caused by the drilling of the unit. G2) PREPARATION OF 63A TAP‐OFF UNITS (BASE & CIRCUIT BRAKER PREPARATION) Insert the cable through the cable grommet, connect the cable conductors according to the G3) PREPARATION OF 63A TAP‐OFF UNITS (BASE & CIRCUIT BRAKER PREPARATION) electrical scheme and tighten the clamps well. (only on the version with circuit breakers The internal plate may also be used for assemble the Din rail according to the fixing auxiliary equipment as long as it is instructions found inside. After this, the of suitable dimensions. electric connection must be carried out on the circuit breaker and the unit terminals). - Page 33 MS Training Manual G4) PREPARATION OF 63A TAP‐OFF UNITS G5) PREPARATION OF 63A TAP‐OFF UNITS (BASE & CIRCUIT BRAKER PREPARATION) (BASE & CIRCUIT BRAKER PREPARATION) Rotate the hooking feet 90° (towards the Respecting the sense of assembling, label). Assemble the two fastened insert the metal fittings into the tap‐off metallic feet onto the tap‐off unit. outlet keeping the fixing arms pressed in. The tap‐off outlet shutters open automatically by plugging in the tap‐off unit. G6) PREPARATION OF 63A TAP‐OFF UNITS (BASE & CIRCUIT BRAKER PREPARATION) Rotate the feet 90° so that both of them will hook to the busbar length. 33 ...
- Page 34 MS Training Manual G7) PREPARATION OF 63A TAP‐OFF UNITS G8) PREPARATION OF 63A TAP‐OFF UNITS (BASE & CIRCUIT BRAKER PREPARATION) (BASE & CIRCUIT BRAKER PREPARATION) Please note that the cover is equipped Only for the circuit breaker version. To with an safety device in order to avoid operate the circuit breaker it is not the cover closing involuntarily and the necessary to open the cover, it will be accidental activation of loads fed from enough to enter from the service door. the tap‐off box. To close the lid apply slight pressure to the device. Close the lid and tighten the screws. 34 ...
-
Page 35: Fire Barrier
MS Training Manual FOR INSTALLATIONS REQUIRING FIRE BARRIERS OR THRUST SUPPORT UNIT PLEASE CONTACT OUR ENGINEERING DEPARTMENT TO CONFIRM THE POSITION 35 ... -
Page 36: Inspection, Control And Maintenance Instructions For Plants With Ms Bus Duct
MS Training Manual INSPECTION, CONTROL AND MAINTENANCE INSTRUCTIONS FOR PLANTS WITH MS BUS DUCT BUS DUCT INSPECTIONS AFTER INSTALLATION ELECTRICAL SAFETY TESTS Carry out all tests described in the applicable technical installation standards, such as the insulating test between phases and to earth at 500 V with a minimum value of 10 MΩ, for every line stretch. - Page 37 MS Training Manual BUS DUCT ANNUAL PERIODIC INSPECTIONS TO BE CARRIED OUT ONE YEAR AFTER ENERGIZING AND EVERY OTHER FOLLOWING YEAR THERMAL TESTS After having run the plant at the maximum working current for at least 6 hours, carry out a thermal test, taking in particular consideration the points where labels had been glued during installation (See previous point).
- Page 38 MS Training Manual THERMAL TESTS Carry out a thermal test on the cover near the lock, using contact temperature sensors, optical pyrometers or thermal cameras. The test has to be carried out with tap-off boxes that have been running at working current for at least 6 hours.
Need help?
Do you have a question about the MS Series and is the answer not in the manual?
Questions and answers