Festool DURADRIVE DWC 18-2500 Original Operating Manual
Hide thumbs
Also See for DURADRIVE DWC 18-2500:
- Original operating manual (102 pages) ,
- Operating manual (99 pages) ,
- Original instructions manual (97 pages)
Table of Contents
Advertisement
Available languages
Available languages
Quick Links
Advertisement
Table of Contents

Related Manuals for Festool DURADRIVE DWC 18-2500


Summary of Contents for Festool DURADRIVE DWC 18-2500
- Page 1 사용 설명서 원본 - 충전 드라이월 스크류 드라이버 Original operating manual - Cordless drywall screwdriver DWC 18-2500 DWC 18-4500 Festool GmbH Wertstraße 20 D-73240 Wendlingen +49 (0)7024/804-0 +49 (0)7024/804-20608 www.festool.com 719085_A / 2018-10-08...
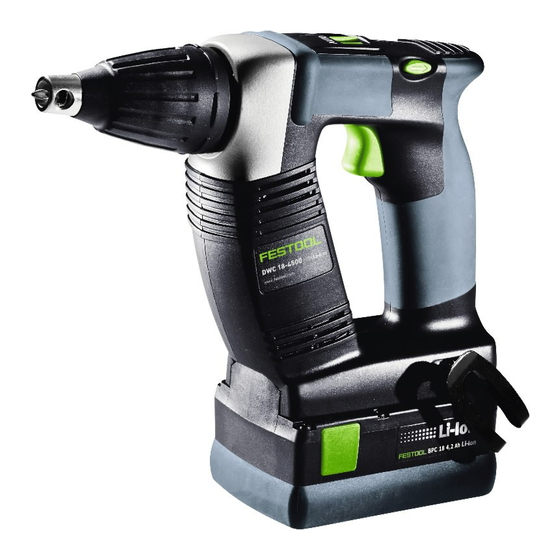
- Page 2 BP/C 18 klick...
- Page 5 11 a 12 a 11-1 11-2 12 b 11 b 12-1 12 c 11 c 12-3 12-2...
- Page 6 한국어 목차 안전 수칙 1 기호..............6 전동 공구 관련 일반 안전 수칙 2 안전 수칙............. 6 경고! 전동 공구에 해당되는 모든 안전 수 3 기본 용도............. 9 칙, 지침, 그림 및 기술 자료를 숙지하십시 4 기술 제원............. 9 오. 다음 지침을 준수하지 않으면 전기 쇼크, 화 5 공구...
- Page 7 한국어 습한 장소에서 전동 공구를 사용해야 하는 스위치가 제대로 작동하지 않는 전동 공구는 경우에는 누전 차단기를 사용하십시오.누전 사용하지 마십시오.정상적으로 켜거나 끌 수 차단기를 사용하면 감전 위험이 줄어듭니다. 없는 전동 공구는 위험하므로 수리해야 합니 다. 3 작업자 안전 전동 공구의 설정을 변경하거나, 액세서리를 전동...
- Page 8 한국어 터리액이 눈에 들어간 경우, 의사의 진료를 주의! 전동 공구가 걸려 갑작스런 반동을 받으십시오.배터리액이 신체에 묻으면 피부 유발할 수 있습니다. 즉시 전원을 끄십시 장애나 화상이 발생할 수 있습니다. 오! 손상되거나 변형된 배터리는 사용하지 마십 전동 공구를 손으로 꽉 잡으십시오. 스크류 –...
- Page 9 DWC 18-2500 결된 목재 구조물의 석고 플라스터 보드 – 밀링 립 포함 건식 벽체 스크류가 체결된 금 Festool BP 시리즈 동급 전압 배터리팩에 사용할 속 구조물 및 목재 구조물의 섬유 보강 플라 수 있는 전동 공구. 스터 보드 잘못된 사용으로 인한 책임은 사용자에게...
- Page 10 한국어 설정 공구를 이용한 작업 전원 켜기/끄기 [1-2] 주의 스위치 [1-2]를 누르기만 해서는 공구 부상 위험 가 시작되지 않습니다 – 공구 결함 없 ► 전동 공구가 꺼진 상태에서만 설정! 음! 회전 방향 변경 [1-3] 원하는 깊이까지 스크류를 체결하면 • 스위치 좌회전 = 정회전 공구가...
- Page 11 한국어 깊이 스톱 장착 ► 조정 휠 [9-1]을 이용하여 필요한 삽입 깊이 를 조절하십시오. ► 깊이 스톱 [3-1]을 기어 하우징 [3-5]에 설치 ► 우측으로 돌리면 스크류가 더 깊이 내려가고, 하십시오. 좌측으로 돌리면 스크류가 더 높이 올라갑니 ► 그리고 나서 깊이 스톱이 맞물려 잠기는 소리 다.
- Page 12 톱 [8-2]을 미십시오(그림 [11a]). 가까운 지점을 찾아보십시오. ► 잠금 버튼 [11-1]을 누르는 동시에 매거진에 서 슬라이드를 당기십시오(그림 [11b] 참조). ► 버튼 [8-1]을 누르면서 동시에 깊이 스톱을 Festool의 정품 스페어 부품만 사 EKAT 푸십시오(그림 [11c] 참조). 용하십시오. 주문 번호: 운반 레버 분리...
- Page 13 한국어 경기도 의왕시 맑은내길 67, 501-2호 Gyeonggi-do, Uiwang-si Clear No. 67, 501-2 (AM (오전동, 에이엘티지식산업센터) East, ADT Knowledge Industrial Center) (우) 16071 (R) 16071 전화: 02-6022-6740 phone: 02-6022-6740 팩스: 02-6022-6799 fax: 02-6022-6799 http://www.festool.co.kr http://www.festool.co.kr...
-
Page 14: Table Of Contents
English Contents den Leitung kann auch metallene Geräte teile unter Spannung setzen und zu einem 1 Symbols............. 14 elektrischen Schlag führen. 2 Safety instructions........14 Use appropriate detection devices to look – 3 Intended use..........15 for any hidden supply lines or consult your 4 Technical data........... -
Page 15: Intended Use
English Intended use CAUTION Drywall screwdriver suitable for the following Noise generated when working screwdriving tasks: Risk of damage to hearing DWC 18-2500 ► Use ear protection. – Screwdriving gypsum fibre board to metal Vibration emission level a (vector sum for or wooden constructions using drywall screws with milling ribs three directions) and uncertainty K measured in... -
Page 16: Operation
English The specified illustrations appear at the begin CAUTION ning of the Operating Instructions. Risk of injury from hot and sharp tool Operation ► Do not use any blunt or faulty tools. ► Wear protective gloves. Changing the battery pack Inserting the battery pack [2 A] Attaching the bit holder Removing the battery pack [2 B]... - Page 17 English ► To activate the tool, press on the screw with Magazine attachment the drill bit. The magazine attachment enables the operator It is not necessary to press the switch [1-2]. to work continuously without unnecessary pau The top speed is set automatically. ses.
-
Page 18: Working Instructions
English Removing collated screws Removing the transport lever ► Remove the collated screws by pulling up ► Push the button [12-1] and at the same wards once (figure [10] ) or by engaging time slide in the direction of the arrow – see the transport lever at the same time as figure [12a]. -
Page 19: Environment
Find the nearest address at: www.festool.co.uk/service Do not dispose of the device in the household waste!Recycle devices, ac cessories and packaging. Observe appli Always use original Festool EKAT cable national regulations. spare parts. Order no. at: www.festool.co.uk/service EU only: In accordance with European Directive...
Need help?
Do you have a question about the DURADRIVE DWC 18-2500 and is the answer not in the manual?
Questions and answers