VADDIO EasyIP 999-60210-000 Complete Manual
Hide thumbs
Also See for EasyIP 999-60210-000:
- Installation manual (30 pages) ,
- Complete manual (133 pages) ,
- Complete manual (95 pages)

Related Manuals for VADDIO EasyIP 999-60210-000


Summary of Contents for VADDIO EasyIP 999-60210-000
- Page 1 Complete Manual for EasyIP Systems Featuring the EasyIP Decoder, EasyIP Mixer, and EasyIP Cameras Document 411-0041-35 Rev D July 2020...
-
Page 2: Table Of Contents
Contents Overview What's in this Guide The EasyIP Ecosystem EasyIP Decoder EasyIP Mixer EasyIP Cameras EasyIP Switch EasyIP Decoder Features EasyIP Mixer Features EasyIP 10 Camera Features EasyIP 20 Camera Features Unpacking the EasyIP System Components EasyIP Decoder AV-over-IP Switching USB Endpoint EasyIP Mixer AV Switcher EasyIP 10 AV-over-IP PTZ Camera EasyIP 20 AV-over-IP PTZ Camera... - Page 3 Initial Device Set-up Process Overview About the Vaddio Device Controller About the Vaddio Deployment Tool Access and Initial Device Set-Up Using the Vaddio Device Controller Initial Device Set-Up and Access Using the Vaddio Deployment Tool Manual Access and Initial Device Set-Up...
- Page 4 Fine-Tuning Microphone Performance – EasyIP Decoder Fine-Tuning Microphone Performance – EasyIP Mixer Presentation Adjustments Performance Adjustments About the Vaddio Dante Interface Application Fine-Tuning EasyIP Microphone Performance Fine-Tuning Speaker Performance – EasyIP Decoder Fine-Tuning Speaker Performance – EasyIP Mixer Synchronizing Audio with Video in the USB Stream – EasyIP Mixer Routing Audio –...
- Page 5 Setting HDMI Video Output Resolution – EasyIP 20 Camera System Maintenance Saving (Exporting) or Restoring (Importing) a Configuration Installing a Firmware Update Installing a Firmware Update for a Connected Vaddio EasyMIC Series Microphone – EasyIP Decoder Installing a Firmware Update for an EasyIP Microphone Rebooting the Device...
- Page 6 Complete Manual for EasyIP Systems camera standby Camera Commands Direct to Cameras Only camera ptz-position camera led camera icr Video Management Commands video mute video pip video source video type Audio Management Commands Audio Channels Available on the EasyIP Decoder Audio Channels Available on the EasyIP Mixer audio mute audio volume...
- Page 7 System and Power issues Camera Audio Status Indicator Light Correct a Camera Motor Calibration Error Restoring Factory Default Settings Contacting Vaddio Technical Support Viewing Diagnostic Logs Operation, Storage, and Care Glossary Compliance and Conformity Statements FCC Part 15 Compliance ICES-003 Compliance...
-
Page 8: Overview
Overview This guide discusses the following products: EasyIP Decoder AV-over-IP switching USB endpoint, 999-60210-000 (worldwide) EasyIP Mixer AV switcher, 999-60320-000 (worldwide) EasyIP 10 AV-over-IP PTZ camera, 999-30200-000 (black, worldwide) EasyIP 10 AV-over-IP PTZ camera, 999-30200-000W (white, worldwide) EasyIP 20 AV-over-IP PTZ camera, 999-30230-000 (black, worldwide) EasyIP 20 AV-over-IP PTZ camera, 999-30230-000W (white, worldwide) -
Page 9: What's In This Guide
EasyIP products are designed to be used together, and have limited or no compatibility with other types of products. EasyIP cameras deliver video in Vaddio's proprietary EasyIP format. An EasyIP host device (EasyIP Decoder or EasyIP Mixer) is required to convert the cameras' output signal to an IP and/or USB stream. -
Page 10: Easyip Decoder Features
Uncompressed USB 3.0 streaming Streaming video resolutions up to 1080p/60 Full-duplex audio streaming Audio inputs for two Vaddio EasyMic microphones HDMI video output for local display ® Universal Video Class (UVC) and Universal Audio Class (UAC) drivers supported in Windows ®... -
Page 11: Unpacking The Easyip System Components
Complete Manual for EasyIP Systems Unpacking the EasyIP System Components Make sure you received all the items you expected. EasyIP Decoder AV-over-IP Switching USB Endpoint Worldwide: 999-60210-000 The box should contain these items: EasyIP Decoder USB 3.0 cable, type A to type B, 6 ft (1.8 m) Cat-5e cable, 3 ft. -
Page 12: Easyip 10 Av-Over-Ip Ptz Camera
EasyIP 10 AV-over-IP PTZ Camera Worldwide: 999-30200-000 (black), 999-30200-000W (white) The box should contain these items: Camera (black or white) Vaddio IR Remote Commander Thin Profile Wall Mount with mounting hardware Cat-5e cable, 10 ft. (3 m) Quick-Start Guide Caution When lifting or moving a camera, always support the camera's base. -
Page 13: Easyip 20 Av-Over-Ip Ptz Camera
EasyIP 20 AV-over-IP PTZ Camera Worldwide: 999-30230-000 (black), 999-30230-000W (white) The box should contain these items: Camera (black or white) Vaddio IR Remote Commander Thin Profile Wall Mount with mounting hardware Cat-5e cable, 10 ft. (3 m) Quick-Start Guide Caution When lifting or moving a camera, always support the camera's base. -
Page 14: A Quick Look At The Easyip Family
Complete Manual for EasyIP Systems A Quick Look at the EasyIP Family EasyIP Decoder – Decodes the AV-over-IP signal from the camera(s) and originates a USB stream. EasyIP Mixer – Pro A/V capabilities for the EasyIP environment. EasyIP 10 camera – Great video, 10x zoom, simple installation, minimal set-up. EasyIP 20 camera –... -
Page 15: Easyip Mixer
EasyIP Mixer Ideal for large classrooms and multi-camera applications, the EasyIP Mixer pairs to Dante audio inputs and outputs, and manages up to four Vaddio EasyIP cameras. It's the Art of Easy in a production switcher. Front View Swap button – Changes the selected input. If the PIP is turned on, this also exchanges the PIP and main image on the HDMI output. -
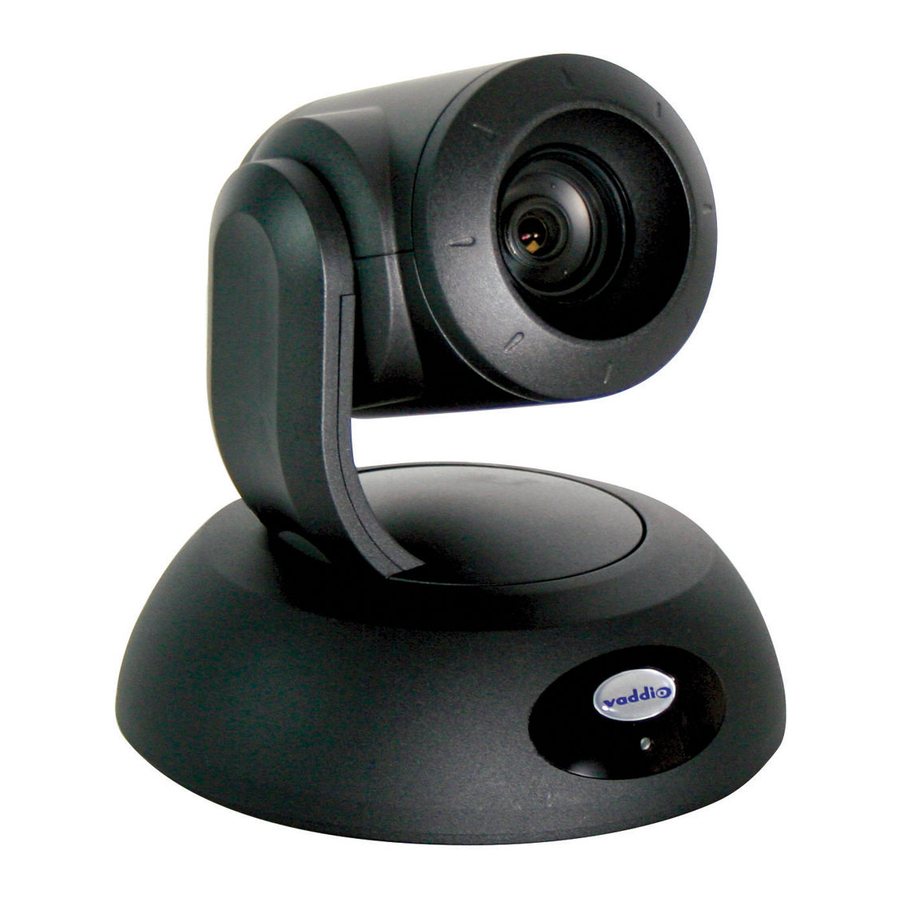
Page 16: Easyip 10 Camera
Complete Manual for EasyIP Systems EasyIP 10 Camera The EasyIP 10 camera delivers great video with simple installation and minimal set-up. Use it with an EasyIP Decoder or EasyIP Mixer. Front View Camera and zoom lens – 10X zoom lens. IR sensor –... -
Page 17: Easyip 20 Camera
Complete Manual for EasyIP Systems EasyIP 20 Camera The EasyIP 20 camera provides greater zoom and more sophisticated capabilities than the EasyIP 10 camera. Use it with an EasyIP Decoder or EasyIP Mixer. Front View Camera and zoom lens – 20X zoom lens. IR sensor –... -
Page 18: Installation
Cameras and network-connected audio peripherals must be paired to the host device after the installation is complete. Contact Vaddio Technical Support if you have questions or encounter any problems. Phone 800.572.2011 / +1.763.971.4400, email av.vaddio.support@legrand.com. Don’t Void Your Warranty! Caution When handling cameras, always support the camera's body when lifting or moving it. -
Page 19: Before Installing Cameras
The CeilingMIC is shipped with one Cat-5e cable to connect it to the interface box. Caution When building cables for Vaddio products, do not use pass-through RJ-45 connectors. Incorrectly crimped pass-through connectors can damage the connectors on the product, which will void your warranty. -
Page 20: Rs-232 Serial Communication Settings And Port Pin-Outs
Complete Manual for EasyIP Systems RS-232 Serial Communication Settings and Port Pin-outs The EasyIP Mixer and EasyIP 20 camera have RS-232 serial ports (color-coded blue) to connect to a third- party controller. Depending on the equipment connected to the RS-232 port, you may need a null-modem (crossover) cable. Caution Check your cables. -
Page 21: Easyip 20 Camera
Complete Manual for EasyIP Systems EasyIP 20 Camera RS-232 connector pin-out: Pin 1: Not used Pin 2: Not used Pin 3: Not used Pin 4: Not used Pin 5: Not used Pin 6: GND Pin 7: RXD (to TXD of host device) Pin 8: TXD (from RXD of host device) Communication parameters: Parameter... -
Page 22: Basic Connections - Easyip Decoder
EasyIP products. The EasyIP Decoder connects directly to a computer as a USB conferencing device. Vaddio recommends making all connections while the PoE+ switch is turned off. If no PoE+ switch is used, a mid-span PoE+ power injector (sold separately) is required for each EasyIP device. -
Page 23: Basic Connections - Easyip Mixer
A PoE+ switch provides power and network connectivity to the EasyIP products. If no PoE+ switch is used, a mid-span PoE+ power injector (sold separately) is required for each EasyIP device. Vaddio recommends making all connections while the PoE+ switch is turned off. Caution Do not connect the PoE+ switch to the network without guidance from an on-site network specialist. -
Page 24: Basic Connections - Easyip Mixer With Hdmi Input From Easyip 20 Camera
Complete Manual for EasyIP Systems Basic Connections – EasyIP Mixer with HDMI Input from EasyIP 20 Camera The EasyIP Mixer can only decode one EasyIP stream at a time. To allow the EasyIP Mixer to use an EasyIP 20 camera as the PIP source while another EasyIP camera provides the main video, connect the EasyIP 20 camera's HDMI output to the EasyIP Mixer's HDMI In port. -
Page 25: Installing The Wall Mount For The Camera
Complete Manual for EasyIP Systems Installing the Wall Mount for the Camera EasyIP cameras are shipped with wall mounts. Other mounting options are available as well. Contact us if you don’t have the camera mount you need. You can install the camera wall mount to a 2-gang wall box or directly to the drywall. If you mount it to drywall, use the wall anchors provided with the wall mount. -
Page 26: Installing The Camera
Complete Manual for EasyIP Systems Installing the Camera 1. Route the cable through the opening in the mounting shelf and connect it to the camera. 2. Place the camera on the mount. Image for illustration only; not to scale. Camera and mount details may differ. 3. -
Page 27: Powering Up The Easyip System
Complete Manual for EasyIP Systems Powering Up the EasyIP System Vaddio recommends making all connections while the PoE+ switch is turned off. To power the system, turn on the PoE+ switch. The EasyIP Decoder's status light turns blue when the device is ready. The connected computer recognizes it as a USB peripheral. -
Page 28: Initial Set-Up And Access To Administrative Controls
Complete Manual for EasyIP Systems Initial Set-Up and Access to Administrative Controls Like other Vaddio products, EasyIP cameras and host devices have a web interface for initial device set- up, administrative control, and operation. After initial device set-up, the web interface provides password- protected pages for administrative access to tasks such as configuring network and security settings, customizing device behaviors, and installing firmware updates. -
Page 29: Initial Device Set-Up Process Overview
Initial Device Set-up Process Overview Use the Vaddio Deployment Tool – Computer application. Use it to scan the subnet to locate Vaddio devices and identify those that have not been set up, then complete the initial device set-up and go to the device's web interface. -
Page 30: Access And Initial Device Set-Up Using The Vaddio Device Controller
1. Be sure the touch-panel is installed on the same subnet as the products you need to work with – for example, connect both to the same PoE+ switch. 2. Go to the touch-panel's Configuration page and select Scan. You will need to enter the Vaddio Device Controller's PIN to access the Configuration page. -
Page 31: Initial Device Set-Up And Access Using The Vaddio Deployment Tool
1. Power up the EasyIPsystem if you have not done so already. 2. On the Find Devices page of the Vaddio Deployment Tool, click Scan. If the scan does not locate the EasyIP devices, click Advanced and specify the appropriate portion of the network to scan – your computer may be on a different subnet from the EasyIPEasyIP equipment. -
Page 32: Manual Access And Initial Device Set-Up
Before the product is configured, HTTP access is disabled. This is also true after restoring factory defaults. The Vaddio Deployment Tool and the Vaddio Device Controller use HTTPS. If you browse to the web interface manually, you may encounter this message: Switch to HTTPS if you see this message. -
Page 33: Access The Web Interface Of An Easyip Decoder Or Easyip Mixer Manually
Complete Manual for EasyIP Systems Access the Web Interface of an EasyIP Decoder or EasyIP Mixer Manually You will need to discover the device's IP address so that you can browse to it. For this, you need a laptop with a media player application to view the USB stream from the device. To discover the device's IP address: 1. -
Page 34: Access The Web Interface Of An Easyip Camera Manually
Complete Manual for EasyIP Systems Access the Web Interface of an EasyIP Camera Manually After you have done the initial device set-up for the EasyIP Decoder or EasyIP Mixer, you will be able to use its web interface to locate and browse to your EasyIP cameras. To discover a camera's IP address from an EasyIP Decoder: 1. -
Page 35: Next Steps For New Deployments
Complete Manual for EasyIP Systems Next Steps for New Deployments After initial device set-up is complete, you will also need to complete system administration tasks to define how each device behaves as an element of your network. Security settings – In each device's administrative web interface, you can configure product security features to conform to the IT policies for your environment. -
Page 36: Web Interface Quick Reference
Complete Manual for EasyIP Systems Web Interface Quick Reference Where to find the controls you need right now for camera operation, administration, and configuration. If guest access is enabled, the web interface opens to the Controls page. You must log in as admin to gain access to the administrative pages. -
Page 37: System Behaviors And Operation
Reboot or reset to factory defaults Update microphone firmware System: Peripherals (EasyIP Decoder or EasyIP Mixer) Camera adjustment: Recalibrate pan and tilt System : Firmware (camera) motors Locate Vaddio Technical Support contact Help (all devices) information View diagnostic logs Diagnostics (each device) -
Page 38: System Administration
Caution Be sure you have a way to remember passwords after changing them. If you are not using the Vaddio Deployment Tool to manage the EasyIP devices, there is no way to reset a forgotten password on the EasyIP 10 camera. In this situation, you may need to return the camera to the factory. -
Page 39: Configuring Other Security Settings
Complete Manual for EasyIP Systems Configuring Other Security Settings ECURITY PAGE Depending on your environment, you may want to make these changes: Enable HTTP access – When selected, administrators and operators can access the product’s web interface using the less-secure HTTP protocol. Enable Telnet access –... -
Page 40: Changing Device Hostnames
Complete Manual for EasyIP Systems Changing Device Hostnames ETWORKING PAGE Do not change network settings without guidance from an on-site network specialist. If your network supports hostname resolution, you may find it convenient to change each device's hostname to something easy to remember. Work with your IT department to ensure that new hostnames conform to the organization's naming conventions. -
Page 41: Adding Room Information To The Device's Web Interface
Complete Manual for EasyIP Systems Adding Room Information to the Device's Web Interface ABELS PAGE The information you enter on this page is displayed on every page of the device's web interface. You may also wish to specify what appears on the device's browser tab. -
Page 42: Pairing Easyip Devices
Complete Manual for EasyIP Systems Pairing EasyIP Devices Because EasyIP products connect to each other over the IP network, they must be logically associated to each other to work together. This chapter covers Locating EasyIP devices Pairing cameras to the EasyIP Decoder Pairing cameras to the EasyIP Mixer Routing EasyIP microphones to the EasyIP Mixer Locating and Pairing to Cameras on the Network –... - Page 43 Complete Manual for EasyIP Systems To add a camera to the directory: 1. Select the Edit icon (pencil) for the input to pair. The Input Pairing dialog box opens. 2. To find the IP addresses of EasyIP cameras on the same subnet as the EasyIP Decoder, select Discover Devices.
-
Page 44: Locating And Pairing To Cameras On The Network - Easyip Mixer
Complete Manual for EasyIP Systems Locating and Pairing to Cameras on the Network – EasyIP Mixer IDEO NPUTS PAGE Cameras are paired to the EasyIP Mixer if the EasyIP input buttons on the Video Switching page are active. The cameras' information appears in the EasyIP Input tabs of the Video Inputs page. Cameras may be paired to two host devices. - Page 45 Complete Manual for EasyIP Systems To locate cameras on the network: 1. Select an EasyIP input tab. Then select Settings to open the Pairing box. 2. To find the IP addresses of EasyIP cameras on the same subnet as the EasyIP Decoder, select Discover Devices.
-
Page 46: Unpairing Cameras
Complete Manual for EasyIP Systems Unpairing Cameras IP D – D ECODER IRECTORY PAGE IP M – V IXER IDEO NPUTS PAGE If you replace or remove a camera from your EasyIP system, you can clear the pairing on the host device. The process is similar to pairing the camera. -
Page 47: Using Dante Devices With The Easyip Mixer
The EasyIP Mixer is compatible with Dante audio products. These products connect to the EasyIP Mixer over the network. To pair Dante devices to the EasyIP Mixer or other Dante-compatible Vaddio products, you will need to download and install the free Dante Controller application from Audinate Pty. Ltd.: www.audinate.com/products/software/dante-controller... -
Page 48: Locating And Pairing To Dante Devices
To stop the identifying behavior, select the Identify icon again. Other ways to access the Identify function: The EasyIP Mixer's Audio page provides an Identify button for EasyIP microphones. The Vaddio Dante Interface Application includes an Identify button. - Page 49 Complete Manual for EasyIP Systems To pair Dante audio devices to the EasyIP Mixer: 1. From the main Network View, select Routing. 2. Use the matrix to pair receivers (speakers) and transmitters (microphones) to the EasyIP Mixer, which is both a receiver and a transmitter. In this screen shot, the receiver "Speaker"...
-
Page 50: Pairing To More Than Two Easyip Or Other Dante Microphones
Complete Manual for EasyIP Systems Pairing to More than Two EasyIP or Other Dante Microphones ANTE ONTROLLER APPLICATION In the examples that follow, we're working with a system that uses four Dante-connected microphones and a Dante-connected speaker. The system in the screen shots used an AV Bridge 2x1; the way it's configured in the Dante Controller application is exactly the same as it would be for an EasyIP Mixer. -
Page 51: Creating A Multicast Flow
Complete Manual for EasyIP Systems Creating a Multicast Flow ANTE ONTROLLER APPLICATION To allow one audio channel from the host device to go to the speaker and also serve as the AEC reference signal that goes to the four microphones in our example set-up, define a multicast flow containing only that channel. -
Page 52: Combining Microphone Channels Into Flows
Complete Manual for EasyIP Systems Combining Microphone Channels into Flows ANTE ONTROLLER APPLICATION The EasyIP Mixer can only receive two Dante audio flows. Each EasyIP microphone provides a pass- through channel as well as its own audio channel, so one microphone can be routed to another, which creates a flow with two microphone channels that can be routed to the host device. - Page 53 Complete Manual for EasyIP Systems To route four microphones as two flows: 1. Decide which two microphones will be routed to the host device. In our example, it's EasyIP-1 and EasyIP-2. 2. In the Network View, look under Dante Receivers to find the passthrough row for each of these two microphones.
-
Page 54: Configuring System Behavior
Complete Manual for EasyIP Systems Configuring System Behavior This chapter covers settings on the EasyIP Decoder and EasyIP Mixer for defining how the system performs in your environment. Some configuration tasks apply to just one of the devices covered in this manual;... -
Page 55: Configuring Streaming Behavior
Complete Manual for EasyIP Systems Configuring Streaming Behavior The EasyIP Decoder and EasyIP Mixer convert video from the selected input to a USB stream, which can be viewed using the computer connected to the system. Viewing a Stream To view the USB stream: Connect your computer to the USB port on the EasyIP Decoder or EasyIP Mixer, and do one of these things: Start or join a conference. -
Page 56: Configuring The Usb Stream Format For Specific Applications
Complete Manual for EasyIP Systems Configuring the USB Stream Format for Specific Applications YSTEM PAGE Depending on the conferencing application that you use, you may need to change the USB stream format. The Client Custom enables far-end camera control when used with the Zoom soft client. Use the default UVC Compliant setting with most other conferencing applications. -
Page 57: Configuring Audio Settings
Use the Dante Controller application to pair Dante devices to the EasyIP Mixer. Use the Vaddio Dante Interface Application to access EasyIP microphone settings. HDMI – Left and right audio channels from the HDMI input device, and left and right audio channels to the HDMI output. -
Page 58: Muting And Controlling Volume Per Input Or Output
Because Dante audio components connect to the network, unexpected behavior can occur. This can be disruptive if the affected component is a speaker. Vaddio recommends muting Dante speakers or turning down their volume to the minimum setting when they are not in use. -
Page 59: Enabling Phantom Power To Microphones - Easyip Mixer
Complete Manual for EasyIP Systems Enabling Phantom Power to Microphones – EasyIP Mixer UDIO PAGE NALOG TAB To supply 48 VDC phantom power to a microphone connected to a Line/Mic input, check the Phantom Power checkbox below the controls for the appropriate input. About Echo Cancellation When a microphone picks up the audio from a speaker (far-end audio) during a conference, it sends the far- end audio back to the participants at the far end, creating an echo. -
Page 60: Fine-Tuning Microphone Performance - Easyip Decoder
Complete Manual for EasyIP Systems Fine-Tuning Microphone Performance – EasyIP Decoder UDIO PAGE NPUTS TAB To adjust microphones for best far-end audio performance: Check or clear the checkboxes for the desired adjustments: Echo Cancellation – Keeps microphones from feeding the speaker output back into the system. Under most circumstances, echo cancellation is desirable. -
Page 61: Fine-Tuning Microphone Performance - Easyip Mixer
Complete Manual for EasyIP Systems Fine-Tuning Microphone Performance – EasyIP Mixer UDIO PAGE NALOG AND ATRIX TABS EasyIP microphone settings are available through the Vaddio Dante Interface Application. See Fine-Tuning EasyIP Microphone Performance. Presentation Adjustments You may need to adjust the microphones for the participants. -
Page 62: Performance Adjustments
Complete Manual for EasyIP Systems Performance Adjustments You may need to adjust the microphones to suit the room. To accomplish this... Do this Specify which audio output to use as the Select a Master Output/AEC Reference. (Analog and reference for acoustic echo cancellation. Matrix tabs) Reduce hissing sounds that microphones Enable Lowpass Filter and specify the highest frequency... -
Page 63: About The Vaddio Dante Interface Application
EasyIP and Dante technologies use differing communication protocols. Because of this, EasyIP microphone controls are not available from the web interface of the EasyIP host device, and the Vaddio Deployment Tool does not recognize them as Vaddio devices. To work with EasyIP microphones, you will need to download the free Vaddio Dante Interface Application from the microphone's product page on legrandav.com. -
Page 64: Fine-Tuning Easyip Microphone Performance
You'll find it on the Resources tab of your microphone's product page on legrandav.com. When you open the Vaddio Dante Interface Application, it displays the IP addresses of the EasyIP microphones on the subnet. Select a microphone to enable its controls. - Page 65 Complete Manual for EasyIP Systems Performance Adjustments You may need to adjust the microphones to suit the room. Echo cancellation and noise cancellation are on by default; we recommend leaving them on. To correct this... Do this Reverberant room From the Easy PEQ menu, select Reverberant Room. Noisy environment From the Easy PEQ menu, select Ambient Noise to reduce gain in the frequencies above and below the normal speech range.
-
Page 66: Fine-Tuning Speaker Performance - Easyip Decoder
Complete Manual for EasyIP Systems Fine-Tuning Speaker Performance – EasyIP Decoder UDIO PAGE UTPUTS TAB To reduce the dynamic range from the connected speaker: If some people on the far end are inaudible while others are too loud, check the Compressor box. To adjust for more natural sound: Use the equalizer to adjust specific frequency ranges. -
Page 67: Fine-Tuning Speaker Performance - Easyip Mixer
Complete Manual for EasyIP Systems Fine-Tuning Speaker Performance – EasyIP Mixer UDIO PAGE NALOG TAB Adjust each speaker as needed. To accomplish this... Do this Compensate for differing speech Select Compressor to reduce the dynamic range from the volumes on the far end. connected speakers. -
Page 68: Synchronizing Audio With Video In The Usb Stream - Easyip Mixer
Complete Manual for EasyIP Systems Synchronizing Audio with Video in the USB Stream – EasyIP Mixer UDIO PAGE TREAMING AND NALOG TABS If the video lags noticeably behind the audio in the USB stream, check the Delay box for the appropriate channel and enter a delay value in milliseconds. -
Page 69: Routing Audio - Easyip Mixer
Complete Manual for EasyIP Systems Routing Audio – EasyIP Mixer UDIO PAGE ATRIX TAB The audio matrix defines where each audio output originates. Each column of the matrix shows one audio output, and each row shows one audio input. Table cells highlighted in blue mean that the input represented in that row is routed to the output represented in that column. - Page 70 Complete Manual for EasyIP Systems To set the gain between input and output (crosspoint gain) To adjust crosspoint gain between any input and the output to which it is routed, right-click the table cell in the matrix to open a gain control.
-
Page 71: Working With Video - Easyip Decoder
Complete Manual for EasyIP Systems Working with Video – EasyIP Decoder IP D – V ECODER IDEO WITCHING PAGE The EasyIP Decoder originates a USB stream with video from the input that is currently selected. When the Directory includes more than one camera or other video input, the Video Switching page lets you select which video input is active. -
Page 72: Working With Video - Easyip Mixer
Complete Manual for EasyIP Systems Working with Video – EasyIP Mixer The EasyIP Mixer brings the video capabilities of a presentation switcher to the EasyIP family. Video controls are available on these pages: Video Switching – Select the active video source, manage PIP and keying. This page is very similar to the operator's Home page in the non-administrative web interface. -
Page 73: Configuring The Easyip Mixer's Video Output
Complete Manual for EasyIP Systems Configuring the EasyIP Mixer's Video Output IDEO UTPUT PAGE The Video Output page provides controls to configure the video on the local HDMI output. Controls include: Resolution/frame rate Color space Keying control and sources PIP control and layout PIP control and layout is also available on the Video Switching page. - Page 74 Complete Manual for EasyIP Systems To place the graphic on the canvas and work with it: 1. Select the expand/collapse arrow associated with the filename to open the file information. 2. Select the View icon associated with the filename. Initially the image is placed at the top left corner of the canvas (coordinates 0,0).
- Page 75 Complete Manual for EasyIP Systems To work with keying layers: 1. On the Bus A tab, select Source to open the Layer Source box. 2. Select the desired mask type to view the graphics available. 3. Select the desired graphic. 4.
-
Page 76: Setting Up Macros And Triggers
Software triggers allow you to program custom functions for third-party control devices, such as defining the buttons on a conference room touch-screen. Hardware triggers (labeled One Touch in the web interface) allow you to define responses to connected Vaddio trigger devices such as TableMIC microphones. -
Page 77: Writing And Editing Macros
Complete Manual for EasyIP Systems Writing and Editing Macros ONTROL EVICES PAGE ACROS TAB To define a macro: 1. Enter a name in the Macro Editor's Name field. 2. Enter one or more Telnet commands in the editing area. Note that camera commands must specify which camera they apply to –... -
Page 78: Testing Macros
Complete Manual for EasyIP Systems Testing Macros ONTROL EVICES PAGE ACROS TAB The Macro Editor has a Test button. You can test the macro while you are editing it, or after saving it. The Macro Execution Log shows the result of each command as the test runs. When the test finishes, the execution log shows a pass message or a fail message and hides the line-by- line results. - Page 79 Complete Manual for EasyIP Systems To edit an existing macro: Select the Edit button associated with the macro, make your changes in the Macro Editor, and save your work. To create a new macro based on an existing one: Select the Edit button for the existing macro to open it, and use the Save As button to give it a new name. Then select its Edit button again, and make the desired changes.
-
Page 80: Assigning Macros To Triggers
Complete Manual for EasyIP Systems Assigning Macros to Triggers ONTROL EVICES PAGE RIGGERS TAB A trigger may be associated with a macro that runs when the trigger is on, one that runs when the trigger is off, or one of each. To assign a macro to a trigger: Do at least one of these things: Select a macro in the Execute Macro on Enter field. -
Page 81: Testing Triggers
Complete Manual for EasyIP Systems Testing Triggers ONTROL EVICES PAGE Just as it can be helpful to test macros when you write them, it can also be helpful to test triggers when you assign macros to them. The Trigger Testing section is available from both tabs of the Control Devices page. -
Page 82: Locking The Front Panel Controls - Easyip Mixer
Complete Manual for EasyIP Systems Locking the Front Panel Controls – EasyIP Mixer NTERFACE PAGE To disable the front panel controls, check the Front Panel Lock box in the System Configuration section of the User Interface page. The front panel message shows that the controls are locked, and displays the device's IP address. -
Page 83: Configuring And Adjusting Cameras
Home and other presets include pan, tilt, and zoom information and may optionally include color adjustments. Presets 1 - 6 are available using the Vaddio IR Remote Commander; all defined presets are available from the operator's (non-administrative) web interface. -
Page 84: Signal-Related Settings
Complete Manual for EasyIP Systems Signal-Related Settings AMERA PAGE ETTINGS IALOG , DIP S YSTEM PAGE WITCHES TAB Signal-related adjustments for the EasyIP 10 camera are Camera ID and Image Flip. -
Page 85: Inverting The Image For Ceiling-Mounted Cameras
If two or more cameras are in a room, you can use an IR remote to control them independently if you set them to respond to different frequencies. The Vaddio IR Remote Commander can control up to three cameras independently. -
Page 86: Selecting The Camera To Control With The Remote
Complete Manual for EasyIP Systems Selecting the Camera to Control with the Remote Press Camera Select button 1, 2, or 3 to select or change the IR command frequency. The camera using that frequency will recognize commands from the remote; the others will not. Indicator Light Behavior YSTEM PAGE ENERAL TAB... - Page 87 Complete Manual for EasyIP Systems 1. Set up the shot. 2. In the Presets area, select Store to open the Store Preset dialog. 3. Select the preset to store. The preset button changes color. Note The Store Preset dialog box does not indicate whether presets have already been defined, but the main display dims the preset buttons if they have no preset information stored.
-
Page 88: Renaming Presets
Complete Manual for EasyIP Systems 5. EasyIP 20 cameras have the option to save Tri-Synchronous Motion speed setting with each preset. When the camera uses Tri-Synchronous Motion, the pan, tilt, and zoom movements are simultaneous and end at the same time, producing smooth, natural-looking motion. Select Store with Tri-Sync to use this feature when moving to this preset. -
Page 89: Initial Lighting And Color Settings - Easyip 20
Initial Lighting and Color Settings – EasyIP 20 AMERA PAGE No two rooms are exactly alike – but a lot of rooms are a lot alike. The technical folks at Vaddio (Scott, to be specific) have already set up adjustments for common lighting scenarios (CCU scenes) – Incandescent Hi, Incandescent Lo, Fluorescent Hi, Fluorescent Lo, and Outdoor. -
Page 90: Color And Image Quality Adjustments
Complete Manual for EasyIP Systems Color and Image Quality Adjustments AMERA PAGE EasyIP cameras provide several color and lighting adjustments. Fine-tune the color and lighting as needed using the Color Settings controls. Auto Iris allows the camera to compensate automatically for the light level. Clear this box to adjust iris and gain manually. -
Page 91: Saving Color And Lighting Settings - Easyip 20
Complete Manual for EasyIP Systems Saving Color and Lighting Settings – EasyIP 20 AMERA PAGE If you are adjusting an EasyIP 20 camera for lighting conditions that are likely to recur, you can save your adjustments as a custom CCU scene. 1. -
Page 92: Lighting And Image Quality Quick Reference
Complete Manual for EasyIP Systems Lighting and Image Quality Quick Reference Here are some tips for using the color settings for lighting and image quality. What do you need to correct? Make this adjustment: The image is too dark Increase Iris (lower F-stop value) Increase Iris Gain The image looks washed out or faded Decrease Iris (higher F-stop value) -
Page 93: Color Adjustment Quick Reference
Complete Manual for EasyIP Systems Color Adjustment Quick Reference Here are some tips for using the color-related CCU settings. What do you need to correct? Make this adjustment: Colors look less vivid than they should Increase Chroma Colors look too vivid Decrease Chroma Colors look wrong;... -
Page 94: Setting The Speeds For Manual Camera Movements
Complete Manual for EasyIP Systems Setting the Speeds for Manual Camera Movements AMERA PAGE The Pan Speed, Tilt Speed, and Zoom Speed sliders control how fast the camera moves in response to the direction and zoom controls on the IR remote and in the web interface. To set speeds for movements using the arrow buttons: Use the speed sliders to adjust the speed of movements that you control with the buttons for pan, tilt, and zoom. -
Page 95: Setting The Speed For Tri-Synchronous Motion To Presets (Easyip 20 Only)
Complete Manual for EasyIP Systems Setting the Speed for Tri-Synchronous Motion to Presets (EasyIP 20 Only) EasyIP 20 cameras have the option to store a Tri-Synchronous Motion speed setting with each preset. When the camera uses Tri-Synchronous Motion, the pan, tilt, and zoom movements are simultaneous and end at the same time, producing smooth, natural-looking motion. -
Page 96: Adjusting The Focus
Complete Manual for EasyIP Systems Adjusting the Focus AMERA PAGE Open the Focus control to select Auto-focus, or set manual focus with the + (near) and – (far) buttons. The + and – buttons only work when Auto Focus is not selected. For users who are not logged in as admin, focus control is available via the IR Remote Commander. -
Page 97: Setting Hdmi Video Output Resolution - Easyip 20 Camera
Complete Manual for EasyIP Systems Setting HDMI Video Output Resolution – EasyIP 20 Camera YSTEM PAGE ENERAL TAB The EasyIP 20 camera provides an HDMI output for a connected display. You can set the HDMI output resolution and frame rate with the rotary switch on the back of the camera, or via the web interface. The camera ships with the rotary switch set for software control of the HDMI output resolution. -
Page 98: System Maintenance
Complete Manual for EasyIP Systems System Maintenance This chapter covers maintenance tasks for EasyIP cameras and host devices. Most of these are done from the affected device. What's in this chapter: Saving and restoring a device's configuration data Updating firmware Rebooting Note Some of the screen shots of these web interface pages are from the EasyIP Decoder and some are from... -
Page 99: Saving (Exporting) Or Restoring (Importing) A Configuration
Complete Manual for EasyIP Systems Saving (Exporting) or Restoring (Importing) a Configuration YSTEM PAGE IRMWARE TAB You can import a configuration to several devices of the same type if you need to configure them the same way. The devices must be of the same model and must have compatible firmware versions installed. If you need to restore a device's factory default settings, you may want to export the configuration beforehand so that you can restore customized information. -
Page 100: Installing A Firmware Update
If the update process presents warnings or error messages, read them carefully. The device reboots when the update is complete, and the web interface prompts you to log in again. Contact Vaddio Technical Support if you encounter any problems with the update. -
Page 101: Installing A Firmware Update For A Connected Vaddio Easymic Series Microphone - Easyip Decoder
EasyMic connector the data will flow through. 4. Select Begin Firmware Update. Note To update EasyIP microphones, you will need to download and install the free Vaddio Dante Interface Application from legrandav.com. You'll find it on the Resources tab of your microphone's product page. -
Page 102: Installing A Firmware Update For An Easyip Microphone
Resources tab of your microphone's product page. When you open the Vaddio Dante Interface Application, it displays the IP addresses of the EasyIP microphones on the subnet. To update EasyIP microphone firmware: 1. Download the firmware and release notes. Microphone firmware is available on the microphone product page. -
Page 103: Rebooting The Device
Complete Manual for EasyIP Systems Rebooting the Device YSTEM PAGE This can help if a camera or other device stops responding as you expect. In the device's System Utilities section, select Reboot. -
Page 104: Using The Camera's Remote Control
Complete Manual for EasyIP Systems Using the Camera's Remote Control The remote provides basic camera control. If two cameras are in the same room, set them to respond to different IR frequencies (IR1, IR2, or IR3 settings on the System page's DIP Switches tab) and use the Camera Select buttons on the remote to specify which camera receives the commands. -
Page 105: Ir Remote Details
Complete Manual for EasyIP Systems IR Remote Details The remote provides the following functions: Data Screen – Press and hold for 3 seconds to display the camera’s IP address and MAC address on the near-end display. Press momentarily to dismiss the information. Power indicator –... -
Page 106: Selecting The Camera To Control With The Remote
Complete Manual for EasyIP Systems Selecting the Camera to Control with the Remote Press Camera Select button 1, 2, or 3 to select or change the IR command frequency. The camera using that frequency will recognize commands from the remote; the others will not. -
Page 107: Using The Operator's Web Interface
Complete Manual for EasyIP Systems Using the Operator's Web Interface Although the cameras have their own web interfaces, operating them directly from the EasyIP Decoder or EasyIP Mixer puts the audio and video controls all in the same web interface. Note The operator's web interface is not available unless the user password has been set or guest access has been enabled. -
Page 108: Quick Steps: Muting And Standby
Complete Manual for EasyIP Systems The EasyIP Mixer brings pro A/V capabilities to the conferencing environment. Video switching and access to camera pan/tilt/zoom controls are available on all operator pages. Camera presets are on the Home page. PIP and keying controls are on the Home page. Speaker and microphone controls are on the Audio page. -
Page 109: Moving The Camera To A Preset Position
Complete Manual for EasyIP Systems Moving the Camera to a Preset Position OME PAGE ANY CAMERA OR HOST DEVICE The administrator can set up specific shots that are used often, and save them as presets on the camera. A preset specifies the camera's position and zoom level. It may also include color/lighting settings. Presets may also include motor speed information that differs from the speeds used in manually controlled movements. -
Page 110: Moving The Camera Manually
Complete Manual for EasyIP Systems Moving the Camera Manually LL PAGES ANY CAMERA OR HOST DEVICE The web interface provides pan, tilt, zoom, and focus controls similar to the ones on the IR Remote Commander. To access manual camera controls: Select Pan/Tilt Controls. -
Page 111: Working With Audio - Easyip Decoder
Complete Manual for EasyIP Systems Working with Audio – EasyIP Decoder OME PAGE Audio controls include mute/unmute buttons, volume read-outs, and volume slider controls for the audio output currently used as the master/AEC reference and for USB Record (the audio originating at your end of a conference). -
Page 112: Working With Audio - Easyip Mixer
Complete Manual for EasyIP Systems Working with Audio – EasyIP Mixer UDIO PAGE Audio controls include mute/unmute buttons, volume read-outs, and volume slider controls for the audio output currently used as the master/AEC reference and for USB Record (the audio originating at your end of a conference). -
Page 113: Selecting A Pip Source And Layout - Easyip Mixer
Complete Manual for EasyIP Systems Selecting a PIP Source and Layout – EasyIP Mixer OME PAGE In the web interface, the button for the active PIP source is highlighted. Either the main video or the PIP source must be the HDMI input; they can't both be EasyIP cameras. 1. -
Page 114: Working With On-Screen Graphics - Easyip Mixer
Complete Manual for EasyIP Systems Working with On-Screen Graphics – EasyIP Mixer OME PAGE To select a graphic: 1. Select Sources. The Keying > Sources (Bus A) box displays the graphics available for the layer you select. 2. To delete a graphic from a layer, select the X to the right of the filename. 3. - Page 115 Complete Manual for EasyIP Systems To use or hide the currently selected graphic: Select it in the Keying area.
-
Page 116: Serial Command Api
RS-232 Serial Commands for EasyIP 20 Cameras. By default, Telnet access is disabled on new Vaddio devices. Telnet access must be enabled on the device. Network connectivity and a Telnet client are also required. Telnet port 23 is used. In addition to the device-related commands, Telnet session management commands are available – help, history, and exit. -
Page 117: Camera Commands For Cameras And Host Devices
Complete Manual for EasyIP Systems Camera Commands for Cameras and Host Devices The following commands can be sent to the host device, which passes them to the camera; or they can be sent directly to a specific camera: camera home camera pan camera tilt camera zoom... -
Page 118: Camera Pan
Complete Manual for EasyIP Systems camera pan Moves the camera horizontally. When sending the command to a host device, you must specify the camera input. Synopsis (host camera <input> pan { left [<speed>] | right [<speed>] | stop | get | set <position> device) [<speed>] } Synopsis (camera) camera pan { left [<speed>] | right [<speed>] | stop | get | set <position> [<speed>] }... -
Page 119: Camera Tilt
Complete Manual for EasyIP Systems camera tilt Moves the camera vertically. When sending the command to a host device, you must specify the camera input. Synopsis (host camera <input> tilt { up [<speed>] | down [<speed>] | stop | get | set <position> device) [<speed>] } Synopsis (camera) camera tilt { up [<speed>] | down [<speed>] | stop | get | set <position> [<speed>] }... -
Page 120: Camera Zoom
Complete Manual for EasyIP Systems camera zoom Moves the camera in toward the subject or out away from the subject. When sending the command to a host device, you must specify the camera input. Synopsis (host camera <input> zoom { in [<speed>] | out [<speed>] | stop | get | set <position> } device) Synopsis (camera) camera zoom { in [<speed>] | out [<speed>] | stop | get | set <position> } Options... -
Page 121: Camera Focus
Complete Manual for EasyIP Systems camera focus Changes the camera focus. When sending the command to a host device, you must specify the camera input. Synopsis (host camera <input> focus { near [<speed>] | far [<speed> | stop | mode {get | auto | device) manual} } Synopsis (camera) camera focus { near [<speed>] | far [<speed>... -
Page 122: Camera Preset
Complete Manual for EasyIP Systems camera preset Moves the camera to the specified preset, or stores the current camera position. When sending the command to a host device, you must specify the camera input. Synopsis (host camera <input> preset { recall | store} [1 - 16] [save-ccu] device) Synopsis (camera) camera preset { recall | store} [1 - 16] [save-ccu] Options... -
Page 123: Camera Ccu Get
Complete Manual for EasyIP Systems camera ccu get Returns CCU (lighting and color) information. When sending the command to a host device, you must specify the camera input. Synopsis (host camera <input> ccu get <param> device) Synopsis (camera) camera ccu get <param> Options <input>... -
Page 124: Camera Ccu Set
Complete Manual for EasyIP Systems camera ccu set Sets the specified CCU (lighting) information. When sending the command to a host device, you must specify the camera input. Synopsis (host camera <input> ccu set <param> <value> device) Synopsis (camera) camera ccu set <param> <value> Options <input>... -
Page 125: Camera Ccu Scene
Complete Manual for EasyIP Systems camera ccu scene IP 20 CAMERA Stores the current CCU scene or recalls the specified ccu scene. When sending the command to a host device, you must specify the camera input. Synopsis (host camera <input> ccu scene {recall {factory <1 – 6> | custom <1 – 3>} | store custom device) <1 –... -
Page 126: Camera Standby
Complete Manual for EasyIP Systems camera standby Set or change camera standby status. When sending the command to a host device, you must specify the camera input. Synopsis (host camera <input> standby { get | off | on | toggle } device) Synopsis (camera) camera standby { get | off | on | toggle } Options... -
Page 127: Camera Commands Direct To Cameras Only
Complete Manual for EasyIP Systems Camera Commands Direct to Cameras Only The following camera control commands must be sent directly to the camera, as they are not supported on the other EasyIP devices: camera ptz-position camera led camera icr camera ptz-position AMERA ONLY Specifies multiple-axis movements to absolute positions. -
Page 128: Camera Led
Complete Manual for EasyIP Systems camera led AMERA ONLY Set or change the behavior of the indicator light. Synopsis camera led { get | off | on } Options Returns the indicator light's current state (on or off). Disables the indicator light. Enables the indicator light. -
Page 129: Video Management Commands
Complete Manual for EasyIP Systems Video Management Commands The following commands are valid for the EasyIP Decoder, EasyIP Mixer, or both. The video mute command is also available on EasyIP cameras. video mute video pip video source video type (EasyIP Decoder only) video mute Gets or sets the video mute status. -
Page 130: Video Pip
Complete Manual for EasyIP Systems video pip IP M IXER Get or set the state of the PIP. In a call, the PIP is near-end video (the selected input); the main image is far-end video. Synopsis video pip { get | on | off | toggle | layout } Options Returns the current state of the PIP. -
Page 131: Video Type
Complete Manual for EasyIP Systems video type IP D ECODER Gets or sets the type of video associated with the specified input device. Synopsis video <input> type { get | set { camera | video }} Options <input> Specifies the input device (1 to 4). Returns the input device's video type. -
Page 132: Audio Management Commands
Complete Manual for EasyIP Systems Audio Management Commands The following commands are valid for the EasyIP Decoder and EasyIP Mixer: audio mute audio volume The following commands are valid for the EasyIP Mixer only: audio route audio crosspoint-gain Audio Channels Available on the EasyIP Decoder The following channels can be specified when sending audio commands to the EasyIP Decoder. -
Page 133: Audio Channels Available On The Easyip Mixer
Complete Manual for EasyIP Systems Audio Channels Available on the EasyIP Mixer The following channels can be specified when sending audio commands to the EasyIP Mixer. master Applies the command to all audio channels. Inputs line_in_1 Applies the command to the external microphone or line-level input connected to line_in_2 the specified audio line in port. -
Page 134: Audio Mute
Complete Manual for EasyIP Systems audio mute IP D IP M ECODER IXER Gets or sets the mute status of the specified audio channel. Synopsis audio < channel > mute { get | on | off | toggle } Channels Refer to Audio Channels Available on the EasyIP Decoder Audio Channels Available on the EasyIP... -
Page 135: Audio Route
Complete Manual for EasyIP Systems audio route IP M IXER Gets or sets the input routed to the specified output. Synopsis audio <channel> route {get | set <inputs>} Channels Refer to Audio Channels Available on the EasyIP Mixer. Options Returns the routing for the specified output. Sets the routing for the specified output. -
Page 136: Communication And Network Commands
Complete Manual for EasyIP Systems Communication and Network Commands The EasyIP Decoder and EasyIP Mixer support commands to establish communication with cameras and to discover current streaming settings. Most Vaddio devices support the network settings get command. camera authenticate camera comm host... -
Page 137: Streaming Settings Get
Complete Manual for EasyIP Systems streaming settings get IP D IP M ECODER IXER Retrieves USB streaming settings. Most of these are automatically negotiated with the conferencing client. Synopsis streaming settings get Parameters USB Active True if a USB stream is present; false if not. USB Device The USB Device Name currently assigned. -
Page 138: Control And Power Commands
Complete Manual for EasyIP Systems Control and Power Commands These commands are device-specific: trigger (EasyIP Decoder or EasyIP Mixer) camera standby (may be sent directly to the camera or to the EasyIP Decoder or EasyIP Mixer, which will pass it to the camera) system standby (EasyIP Decoder or EasyIP Mixer) trigger IP D... -
Page 139: System Standby
Complete Manual for EasyIP Systems system standby IP D IP M ECODER IXER Gets, sets, or toggles the device's current standby status. Cameras currently paired to the device may also go to standby when you set system standby on. This depends on how the device is configured. -
Page 140: Maintenance And Troubleshooting Commands
Complete Manual for EasyIP Systems Maintenance and Troubleshooting Commands The following commands are valid for all Telnet-capable Vaddio devices: network ping system reboot system factory-reset version camera recalibrate IP 10 ONLY Recalibrates the pan and tilt motors. This is typically done in response to a motor fault indication or error message. -
Page 141: System Reboot
Complete Manual for EasyIP Systems system reboot Reboots the device either immediately or after the specified delay. Synopsis system reboot [<seconds>] Options <seconds> The number of seconds to delay the reboot. Examples >system reboot > The system is going down for reboot NOW!p-decoder-D8-80-39-62-A7-C5 Reboots the device immediately. -
Page 142: Version
Complete Manual for EasyIP Systems version Returns the current firmware version. Synopsis version Example >version Audio 1.04 Commit c867266822c63caa1fd2a6cec76f641068af509 System Version EasyIP Decoder 1.0.0 01.02.00 >... -
Page 143: Telnet Information And Session Management Commands
Complete Manual for EasyIP Systems Telnet Information and Session Management Commands The following commands are available on all Vaddio devices for Telnet help and session management: history help exit history Returns the most recently issued commands from the current Telnet session. Since many of the programs read user input a line at a time, the command history is used to keep track of these lines and recall historic information. -
Page 144: Rs-232 Serial Commands For Easyip 20 Cameras
RS-232 Serial Commands for EasyIP 20 Cameras ® The Vaddio Control Protocol for cameras is similar to the Sony VISCA command set in order to be compatible with several popular control devices. Not all VISCA commands are supported and there are Vaddio-specific commands in the following command and inquiry lists. - Page 145 Complete Manual for EasyIP Systems Command Set Command Command Packet Comments Pan-TiltDrive 8x 01 06 01 vv ww 03 01 FF vv= Pan speed (01h-18h) ww=Tilt speed (01h-14h) Down 8x 01 06 01 vv ww 03 02 FF Left 8x 01 06 01 vv ww 01 03 FF Right 8x 01 06 01 vv ww 02 03 FF UpLeft...
-
Page 146: Movement, Zoom, And Focus Inquiry Commands
Complete Manual for EasyIP Systems Command Set Command Command Packet Comments 8x 01 04 3F 01 0p FF Set with 8x 01 04 3F 21 0p FF ‘scene’ Recall 8x 01 04 3F 02 0p FF Corresponds to camera preset in Telnet API. CAM_PTZ_ 8x 01 7e 01 0b pp qq rr FF pp: pan speed (01h-18h) -
Page 147: Color And Light Management Commands
Complete Manual for EasyIP Systems Color and Light Management Commands Command Set Command Command Packet Comments CAM_WB Auto 8x 01 04 35 00 FF Normal auto Manual 8x 01 04 35 05 FF Manual control mode Corresponds to camera ccu set auto_white_balance in Telnet API. CAM_RGain Reset 8x 01 04 03 00 FF... -
Page 148: Color And Light Management Inquiry Commands
Complete Manual for EasyIP Systems Command Set Command Command Packet Comments CAM_WD 8x 01 04 3D 02 FF Wide Dynamic Range On 8x 01 04 3D 03 FF Wide Dynamic Range Off Corresponds to camera ccu set wide_dynamic_range in Telnet API. CAM_Aperture Reset 8x 01 04 02 00 FF... - Page 149 Complete Manual for EasyIP Systems Inquiry Command Command Response Packet Comments y0 50 03 FF CAM_ApertureInq 8x 09 04 42 FF y0 50 00 00 0p 0q FF pq: Aperture gain CAM_ChromaInq 8x 09 7E 55 FF y0 50 05 00 00 00 0p FF p: 0 –...
- Page 150 Complete Manual for EasyIP Systems Iris Values (CAM_Iris) Value Iris 0x11 F1.6 0x10 0x0F F2.4 0x0E F2.8 0x0D F3.4 0x0C 0x0B F4.8 0x0A F5.6 0x09 F6.8 0x08 0x07 F9.6 0x06 0x05 0x00 CLOSED Iris Gain and Gain Limit Values (CAM_Gain) Iris Gain Iris Gain Limit Value...
- Page 151 Complete Manual for EasyIP Systems Other Commands Command Set Command Command Packet Comments CommandCancel 8x 2p FF p= socket (1 or 2) CAM_Power 8x 01 04 00 02 FF Power on 8x 01 04 00 03 FF Power off Corresponds to camera standby in Telnet API. CAM_Tally 8x 01 7E 01 0A 00 02 FF 8x 01 7E 01 0A 00 03 FF...
- Page 152 Complete Manual for EasyIP Systems Specifications Specifications are subject to change without notice. EasyIP Decoder USB Streaming, Video, Audio, and Control USB Stream Video and audio Input Power PoE+ Up to 1080p/60 resolution (Full Video Inputs Pair with up to 4 EasyIP cameras USB Audio 2 channel (UAC) EasyMic Inputs...
- Page 153 Complete Manual for EasyIP Systems EasyIP Mixer USB Streaming, Video, Audio, and Control USB Stream Video and audio Video Inputs HDMI In, up to 1080p/60 Up to 1080p/60 resolution (Full resolution (Full HD) Pair with up to 4 EasyIP cameras Audio Inputs Stereo USB Audio Outputs...
- Page 154 Complete Manual for EasyIP Systems Camera Specifications Camera and Image ® Image device EasyIP 10 1/2.8-type Exmor CMOS sensor ® EasyIP 20 1/2.5-type Exmor R backlit CMOS sensor Pixels EasyIP 10 2.14 megapixels (effective) EasyIP 20 8.5 megapixels (effective) EasyIP 10 Zoom EasyIP 20 Resolution...
- Page 155 Complete Manual for EasyIP Systems Environmental Operating temperature 32° F to 104° F (0° C to 40° C) Operating humidity (relative) 20% to 80% non-condensing Storage temperature 23° F to 140° F (-5° C to 60° C) Storage humidity (relative) 20% to 80% non-condensing...
- Page 156 Complete Manual for EasyIP Systems Troubleshooting and Care When the system doesn't behave as you expect, use this table to determine whether it's time to call Vaddio Technical Support. System and Power issues What is it doing? Possible causes Check and correct...
- Page 157 Complete Manual for EasyIP Systems Camera What is it doing? Possible causes Check and correct The light on the front of the The status light is turned off. You can turn the light on again using the camera is off but it responds to LED On setting on the General tab of This is normal.
- Page 158 Complete Manual for EasyIP Systems Audio What is it doing? Possible causes Check and correct No audio from the speaker (far- Far-end microphone is muted Ask the participants at that site to end audio) (the conferencing window may unmute their microphone. show a mute icon for that site's microphone) Speaker is not connected.
- Page 159 Complete Manual for EasyIP Systems To reset the pan and tilt motors from the web interface: IP 10 – C FFECTED CAMERA AMERA PAGE IP 10 – S FFECTED CAMERA YSTEM PAGE 1. On the Camera Controls page, select Settings to open the pan and tilt settings box; On the System page, go to the Firmware tab if you are on a different tab.
- Page 160 From the web interface: Log on using the admin account, go to the System page's Firmware tab, and select Restore Factory Settings. From the Vaddio Deployment Tool: Locate the device, select it in the Name column to open its detail page, and select Restore Factory Defaults from the Controls list.
- Page 161 IAGNOSTICS PAGE EACH DEVICE If you encounter a problem that you can’t solve, your Vaddio technical support representative may ask you to download and email the event log file available from the Diagnostics screen. Note The log may include large numbers of internal events even when no errors have occurred. Rebooting...
- Page 162 Complete Manual for EasyIP Systems Operation, Storage, and Care For smears or smudges on the product, wipe with a clean, soft cloth. Use a lens cleaner on the lens. Do not use any abrasive chemicals. Keep this device away from food and liquids. Do not operate or store the device under any of the following conditions: Temperatures above 104°...
- Page 163 – the people at the other end of the call. Field of View (FOV) How wide the video image is. Vaddio measures horizontal field of view. Some manufacturers use diagonal field of view, which yields a bigger number for the same actual image area. Tilt your head to one side and diagonal FOV will make sense.
- Page 164 Complete Manual for EasyIP Systems frame rate The number of output video frames per second. Different outputs (such as the IP stream and the USB stream) may use different frame rates. For streaming, higher frame rates use more bandwidth. full-duplex Simultaneous two-way (or multi-way) audio;...
- Page 165 A stored camera position. Contains pan, tilt, and zoom position; may also include color settings. RCLB Really Cool Logo Badge. A visual cue that the device is a genuine Vaddio product. Accept no substitutes! resolution 1. The image size. For Vaddio cameras, resolution is expressed in terms of digital TV standards, with 1080p being the default in most cases.
- Page 166 Audio from your site (near-end audio) in a conference call. UVC drivers (Universal Video Class) Standard USB video drivers used by Vaddio cameras. They're the reason your computer doesn't have to stop and download a driver when you connect your new Vaddio USB camera to it. UVC extensions Controls in UVC drivers to allow participants at the far end of a conference to control your camera, if it processes UVC commands.
- Page 167 (2) This device must accept any interference including interference that may cause undesired operation of the device. Changes or modifications not expressly approved by Vaddio can affect emission compliance and could void the user’s authority to operate this equipment.
- Page 168 Complete Manual for EasyIP Systems European Compliance This product has been evaluated for Electromagnetic Compatibility under the EMC Directive for Emissions and Immunity and meets the requirements for a Class A digital device. In a domestic environment this product may cause radio interference in which case the user may be required to take adequate measures. Standard(s) To Which Conformity Is Declared: EMC Directive 2014/30/EU EN 55032: 2015 –...
- Page 169 Complete Manual for EasyIP Systems Photo Credits This guide may include some or all of these photos. European Space Agency (ESA) astronaut Samantha Cristoforetti, a Flight Engineer with Expedition 42, photographs the Earth through a window in the Cupola on the International Space Station By NASA - https://blogs.nasa.gov/ISS_Science_Blog/2015/03/06/women-in-space-part-two-whats- gender-got-to-do-with-it/, Public Domain, https://commons.wikimedia.org/w/index.php?curid=38834990 Carl Sagan, Bruce Murray, Louis Friedman (founders) and Harry Ashmore (advisor), on the occasion of...
- Page 170 RS-232 pin-out 13-14 calibration fault, correcting 133, 151 Index Camera ID (setting) 77 camera mount 18-19 Camera page (web) 82 camera select 97-98 access 75 camera selection (remote) 79, 99 front panel 75 cameras 12, 35, 37, 39, 64-65, 102-103, 145, admin password 31 changing 31 accessing from the EasyIP Decoder 35,...
- Page 171 135 color scheme 79 flow (Dante) 43-46 enabling/disabling 79 multi-channel 45-46 meaning of colors 7, 9-10, 151 multicast 43-44 information, conference room 34 unicast 43 initial device set-up 21-24 focus 89, 97-98, 114 using Vaddio Deployment Tool 24...
- Page 172 Complete Manual for EasyIP Systems installation 15-19 testing 71 camera 19 manual focus 89, 97-98, 114 camera mount 18 matrix, audio routing 62-63 inverted 19 media player 26, 48 typical 15-17 mic boost 53-55 inverted installation 19, 78 Mic Boost (audio setting) 53, 57-58 IP address 7-8, 24, 26-27, 41, 97-98, 100 microphone pass-through (Dante) 45-46 camera, discovering 24, 100...
- Page 173 28 Room Labels 34 remote control 97 Security 31-32 system behaviors 47 Streaming 48 Vaddio IR Remote Commander 98 System 49, 75 web interface 29 User Interface 75 Video Inputs 37, 39, 65 Video Outputs 66...
- Page 174 Streaming page (web) 48 changing 31 supported web browsers 21 switch settings 19 synchronizing audio with video 61 Vaddio Dante Interface Application 22, 56-57, syntax help, Telnet commands 136 94-95 System page (web) 49, 75 Vaddio Deployment Tool 22, 24...
- Page 175 Complete Manual for EasyIP Systems Vaddio Device Controller 22-23 features 22 Vaddio IR Remote Commander 97-98 zoom 87, 97-98, 103, 113 version, firmware 135 speed 87, 97-98, 113 video 65, 101, 106, 123-124 input source selection 123 input type 124...
- Page 176 ©2020 Legrand AV Inc. Vaddio is a registered trademark of Legrand AV Inc. Audinate®, the Audinate logo and Dante® are registered trademarks of Audinate Pty Ltd. All other brand names or marks are used for identification purposes and are trademarks of their respective owners. All patents are protected under existing designations.
Need help?
Do you have a question about the EasyIP 999-60210-000 and is the answer not in the manual?
Questions and answers