MELAG Vacuklav 41 B+ Evolution User Manual
Steam sterilizer
Hide thumbs
Also See for Vacuklav 41 B+ Evolution:
- User manual (82 pages) ,
- Technical manual (27 pages) ,
- Technical manual (34 pages)
Table of Contents
Advertisement
Quick Links
User Manual
Vacuklav
Vacuklav
Steam sterilizer
from software version 3.240
EN
Dear customer,
We thank you for your confidence demonstrated by the purchase of this MELAG product. As an owner-run and operated
family concern founded in 1951, we have a long history of successful specialization in hygiene products for practice-
based use. Our focus on innovation, quality and the highest standards of operational reliability has established MELAG
as the world's leading manufacturer in the instrument treatment and hygiene field.
You, our customer are justified in your demand for the best products, quality and reliability. Providing
hygiene"
and
"Quality – made in
agement system is subject to close monitoring: one instrument to this end is our annual multi-day audit conducted in ac-
cordance with EN ISO 13485. This guarantees that all MELAG products are manufactured and tested in accordance with
strict quality criteria.
The MELAG management and team.
®
41 B+ Evolution
®
43 B+ Evolution
Germany", we guarantee that these demands will be met. Our certified quality man-
"competence in
Advertisement
Table of Contents

Related Manuals for MELAG Vacuklav 41 B+ Evolution


Summary of Contents for MELAG Vacuklav 41 B+ Evolution
- Page 1 3.240 Dear customer, We thank you for your confidence demonstrated by the purchase of this MELAG product. As an owner-run and operated family concern founded in 1951, we have a long history of successful specialization in hygiene products for practice- based use.
-
Page 3: Table Of Contents
Contents Contents 1 General guidelines ................................ 5 Symbols used.................................. 5 Formatting rules ................................... 5 MELAconnect App ................................ 5 2 Safety..................................... 6 3 Performance specifications .............................. 8 Intended use .................................. 8 Sterilization procedure ................................. 8 Type of the feed water supply .............................. 8 Safety equipment ................................. 8 Overview of sterilization programs (type B) ......................... 9 Program sequences ................................ 10 4 Description of the device.............................. 11 Scope of delivery................................ 11... - Page 4 Contents Subsequent log output ............................... 37 Finding a log.................................. 40 9 Function tests .................................. 42 Vacuum test .................................. 42 Bowie & Dick test ................................ 42 10 Settings ..................................... 44 Logging .................................... 44 User administration ................................ 50 Formatting the CF card .............................. 53 Additional drying................................. 54 Intelligent drying ................................. 54 Water supply .................................. 55 Date and time.................................. 56 Brightness .................................. 56 Volume .................................... 57 View .................................... 57...
-
Page 5: General Guidelines
Store this user manual carefully and in close proximity to your device. It represents a component of the product. Should the user manual no longer be legible, damaged or lost, obtain a new copy from MELAG. State the device type and your address in an e-mail. -
Page 6: Safety
Check the device for any damage suffered during transport after unpacking. The device should only be set-up, installed and commissioned by MELAG authorized technicians. The connections for electrical provision and water supply and discharge must be set-up by trained per- sonnel. - Page 7 (MELAG) and the relevant authority of the member state, in which the user and/or patient resides.
-
Page 8: Performance Specifications
3 Performance specifications 3 Performance specifications Intended use This steam sterilizer is designed for application in a medical context, e.g. general practitioners and dental practices. According to EN 13060, this steam sterilizer is considered as a steam sterilizer with type B cy- cles. -
Page 9: Overview Of Sterilization Programs (Type B)
3 Performance specifications whilst it opens. Pressure compensation will have been performed by the time that the door is completely open, even following pressure differences. Quantity and quality of the feed water The quantity and quality of the feed water is automatically checked before every program start. Overview of sterilization programs (type B) The results in this table show which inspections were performed on the steam sterilizer. -
Page 10: Program Sequences
3 Performance specifications Program sequences A program runs in three main phases: the air removal and heating up phase, the sterilization phase and the drying phase. After program start, you can follow the program run on the display. It shows the chamber temperature and pressure as well as the time until the end of sterilization / drying. -
Page 11: Description Of The Device
4 Description of the device 4 Description of the device Scope of delivery Please check the scope of delivery before setting up and connecting the device. Standard scope of delivery ▪ Vacuklav 41 B+ or Vacuklav 43 B+ ▪ User Manual ▪... -
Page 12: Views Of The Device
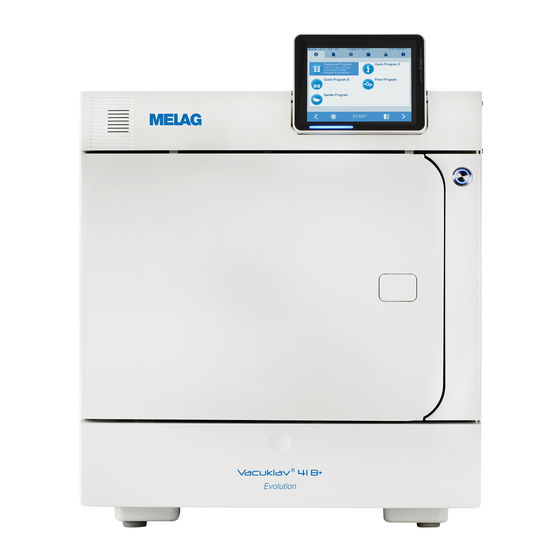
4 Description of the device Views of the device Tank lid of the internal storage tank CF card slot Colour touch display LED status bar Energy-saving key Door (swings open to the left) Opening for door opening in an emergency* Power switch (covered, accessible from the side) Ethernet connection... -
Page 13: Service Hatch
4 Description of the device Mount for the water treatment unit MELAdem Spring clip for fixing the mount “Plus” Door spindle Sterilization chamber Chamber sealing face Door seal Round blank Bushing Fig. 3: View from front, door open Service hatch The service hatch is opened by pressing on the recess. The service hatch is closed again by closing and pressing on the recess. -
Page 14: Load Mounts
- it must be delivered to the vendor to be disposed of. MELAG devices are synonymous for long-term quality. When you eventually need to decommission your MELAG device, we offer a special disposal service. Simply contact your stockist. -
Page 15: Colour-Touch Display
4 Description of the device PLEASE NOTE The energy-saving mode can not be activated during a program run. State Meaning Lighted The energy-saving mode can be activated. Not lighted The energy-saving mode can not be activated. Colour-touch display The operating panel consists of a colour 5 inch touch display. Status bar Menu bar Main area... -
Page 16: Led Status Bar
4 Description of the device Symbol in the menu bar Meaning Program/tests Lists all sterilization programs and tests e. g. vacuum test, Bowie & Dick test etc. Log output Here you can display the entire log list or the list of logs from a restricted time e. g. -
Page 17: First Steps
The record of installation and setting up is to be completed by the responsible stockist and a copy sent to MELAG as proof of the correct set-up, installation and initial commissioning. This is a constituent part of any guarantee claim. -
Page 18: Switching On The Steam Sterilizer
5 First steps Switching on the steam sterilizer Video tutorial See also "Operation". The following requirements must be fulfilled: ü The steam sterilizer is connected to the electricity supply. ü The feed water supply is secure. The steam sterilizer requires approx. 3 litres feed water for the first filling of the steam generator. - Page 19 5 First steps PLEASE NOTE The door is to be left open only whilst loading and unloading the steam sterilizer. Keeping the door closed saves energy. Closing the door To close the door, press it firmly inwards until the automatic door lock engages. After the door has been closed, the display returns to the program menu.
- Page 20 5 First steps Remove the cover cap in order to facilitate emergency door-opening (pos. b) by pushing out (e.g. with a small narrow slotted screwdriver). Insert the 5 mm Allen key included in the scope of delivery in the opening. The Allen key can be stored in the bracket behind the service hatch intended for this purpose.
-
Page 21: Loading The Steam Sterilizer
6 Loading the steam sterilizer 6 Loading the steam sterilizer Preparing the sterilization material Cleaning and disinfection must always have been performed correctly and appropriately before steriliza- tion. Only in this way is it possible to guarantee the subsequent sterilization of the sterilization material. The materials used, cleaning agents and reprocessing procedure are of decisive significance. -
Page 22: Loading The Steam Sterilizer
Insert trays or cassettes in the chamber only with their appropriate mount. Use perforated trays such as those from MELAG. Only in this way can condensate drain off. The use a non-perforated base or half-shell to accommodate the sterilization material can result in poor drying results. - Page 23 6 Loading the steam sterilizer Soft sterilization packaging Soft sterilization packaging can be used in both sterilization containers and on trays. Please comply with the following when using soft sterilization packaging e.g. MELAfol: Arrange soft sterilization packaging in a perpendicular position and at narrow intervals. Place transparent sterilization packages on their edge wherever possible and with the paper side facing downwards.
-
Page 24: Sterilization
MELAcontrol/MELAcontrol PRO (see above). The use of another test system in accordance with DIN EN 867-5 is possible. The number of the available test systems means that MELAG is not able to provide technical support when using a different system. PLEASE NOTE The results of the tests must be documented. -
Page 25: Selecting The Program
7 Sterilization Selecting the program Video tutorial See also "Program selection". Now select the sterilization program according to how and whether the sterilization material is packed. It is also necessary to take into account the temperature resistance of the sterilization material. All sterilization and additional programs are displayed in the Programs &... -
Page 26: Additional Program Options
NOTICE Unsupervised operation of electrical devices, including this steam sterilizer at the operator’s risk. MELAG accepts no liability what so ever for any damage resulting from unsupervised operation. This function enables you to select any program and start it at a time of your choice. The start time pre-se- lection is only active for the unique time and program selection. -
Page 27: Starting The Program
7 Sterilization For example, to change the time, tap directly on the parameters Hour or Minutes. The selected field is highlighted light blue. Change e.g. the hour by pressing the pushbuttons Then press START. The display remains in the start time pre-selection window. Ê... -
Page 28: Program Run
7 Sterilization Program run A program runs in three main phases: the air removal and heating up phase, the sterilization phase and the drying phase. After program start, you can follow the program run on the display. It shows the chamber temperature and pressure as well as the time until the end of sterilization / drying. -
Page 29: Manual Program Abort
7 Sterilization Confirm with [ENTER]. Now you can display the program run or information about your steam sterilizer (e. g. serial number, device software version and selected values). Manual program abort You can abort a current program in all phases. If you end a program before drying begins, the sterilization material remains unsterile. - Page 30 7 Sterilization Confirm the security query with YES. After a short time, you can open the door by pressing symbol. The display shows a warning; the log records the sterilization as NOT successful. Program abort after the start of drying Should you abort a program after drying has started, the sterilization is having been completed successful- ly.
-
Page 31: Program End
7 Sterilization Confirm the security query with YES. After a short time, you can open the door by pressing the door symbol. Program end When the program has ended successfully, the corresponding message will be issued on the display. Be- fore opening the door, you can view further values on the display from the program which has just com- pleted, e. g. -
Page 32: Removing The Sterilized Equipment
7 Sterilization PLEASE NOTE Skipping user authentication means that the batch is not approved. Only ever use the “Skip user authentication” function in an emergency. Batch indication comprises the checking of the indicators used in the sterilization program e. g. MELAcontrol/MELAcontrol PRO. Approval of the indicator strip is possible only if it changes colour entirely. Batch approval comprises the checking of the process parameters using the sterilization results on the steam sterilizer and the sterilization log as well as checking of the individual packaging for damage and re- sidual moisture. -
Page 33: Storing Sterilized Equipment
7 Sterilization Storing sterilized equipment The maximum storage time is dependent on the packaging and the storage conditions. For standard-con- form packaged sterilized equipment – (if protected from dust) it can amount to up to six months. Comply with the provisions of DIN 58953, part 8 and the criteria specified below for the storage of sterilized equip- ment: Comply with the maximum storage duration in accordance with the packaging type. -
Page 34: Logging
8 Logging 8 Logging Batch documentation Video tutorial See also „Process documentation“. The batch documentation serves as proof of the successful conclusion of the program and represents an obligatory part of quality assurance. The device internal log memory saves such data as the program type, batch and process parameters of all the programs completed. - Page 35 8 Logging Proceed as follows in order to insert the CF card in the slot. ü The CF card is set as the output medium in the Settings > Logging menu. Insert the CF card in the card slot fully with the raised finger edge pointing rightwards and to the rear.
-
Page 36: Outputting Text Logs Automatically After Program End (Immediate Output)
PLEASE NOTE To facilitate easy assignation of a package marked with a label to a specific batch, the sterilization log file name must not be changed. Type, serial number MELAG 41 B+ 201741-B0112 05.04.2018 / 04.10.2018 Sterilization date/Storage duration Batch 03/00019 Daily batches/no. -
Page 37: Subsequent Log Output
8 Logging The following points must be fulfilled for immediate output: The date and time have been set correctly. The output medium must have been selected and connected. Immediate output must be activated in Menu Settings > Logging. Information regarding the setting of immediate output and the desired output medium is provided in the chapter Settings, logging [} page 44]. - Page 38 8 Logging Navigate to Menu Log output and select Logging list. A list is displayed with all text logs that have been saved in the internal memory. To facilitate the search, you can filter the log sorting sequence by date, program or outcome by selecting the top line. Select a log and press CONTINUE.
- Page 39 8 Logging Select an output medium if required and press OUTPUT. Proceed in a similar fashion to output the last log or all the logs of that day or month or all logs.
-
Page 40: Finding A Log
When transferring the logs to a CF card, they will be stored in a separate folder in the main directory. Di- rect transfer of the logs to a computer via the network and using the MELAG FTP server allows you to work directly in the FTP server to determine directly where on your computer the device directory with log files is to be saved. - Page 41 << 010041D8BE14B1319E55772A0DF975054F7EBF32 Proof of authenticity (electronic signature) Should never EE1372767ED3B3801EB10F3FB01A3212D41D7144 be altered; decoding the code (by MELAG) indicates 1C3B8B6474777962766F018680B68C56C219074F whether the data was generated on a MELAG steam D6E7814D506F0A2F3077782541CC2CD05C425DA1 sterilizer and has been changed. 9A5EF5192C68174C868556542F7B8B05E97C6E46 16CDCFFA811E126FD67363FB74128A5F83AE6F37 F45A9E240C88615F1618D340060C1027205C83C2 >>Authentication of batch log<<...
-
Page 42: Function Tests
9 Function tests 9 Function tests Manual functional checks You can follow the program run on the display via the values displayed there. You can also use the logs recorded for every program to determine the success of a program. The test programs enable you to per- form an additional function check at any time. - Page 43 9 Function tests Working in Menu Programs & Tests select Bowie & Dick test and press START. Evaluation of the indicator following the colour change Depending on the manufacturer batch, treatment indicator strips often exhibit differing intensities in the col- our change resulting from different lengths of storage or other influences. Of crucial importance for evalu- ating the Bowie & Dick test is not the strength of contrast in the colour change on the test sheet, but its even nature.
-
Page 44: Settings
10 Settings 10 Settings Logging All settings pertaining to the output of text and graphic logs i. e. output medium, log format, immediate out- put etc. are performed in Menu Settings > Logging. To this end, you are led through a settings wizard. Immediate log output In its delivery state, the immediate output of the text and graphic logs via the CF is activated. - Page 45 10 Settings If you wish to output a graphic log (optional) in addition to a text log, proceed as follows: ü You are in Menu Settings > Logging. ü Immediate issue is activated. Set a checkmark next to Graphic logs and check whether the checkmark is also set next to Immediate output.
- Page 46 10 Settings Explanation of the possible settings for graphic recording: Interval Explanation CF card (CFC) recording interval in seconds – Indicates the time intervals in which the program curve is recorded on the CF card. The smaller the time interval, the more exact the curve.
- Page 47 10 Settings Press CONTINUE until you navigate the the output media selection window. Select the computer as an output medium and press CONTINUE. Ê The selection window opens and asks whether the connection to the computer should be effected via FTP or TCP.
- Page 48 10 Settings Connection via TCP ü A suitable documentation software e.g. MELAtrace is installed. Select Connection via TCP. The TCP port currently set is displayed on the lower pushbutton (Standard TCP port: 65001). Press on this pushbutton to change the pre-set TCP port.
- Page 49 10 Settings If a device is to be integrated in a pre-existing (practice) network, observe and comply with the following: ü The IP addresses listed in the table have not yet been assigned in the (practice) network. ü The device cannot be automatically administered in a dynamic (practice) network (i. e. a DHCP network).
-
Page 50: User Administration
10 Settings You can choose between the following formats. Format Description Format 0 Short form - only the log header is outputted. Format 1 The log header and the program steps are outputted. Format 2 Standard format - in addition to the log header and the program steps, a key is displayed explaining the individual program steps. - Page 51 10 Settings Select a free ID and select EDIT in order to create a new user. The first ID is reserved for the Admin PIN. Enter a 4-digit PIN in the right-hand key pad for the selected user ID. Accept all the settings with SAVE, then leave the menu.
- Page 52 10 Settings Changing the Admin PIN PLEASE NOTE If you forget the Admin PIN, consult your stockist/MELAG customer services provider. The Admin PIN (standard: 1000) can be edited like every other User PIN and should be changed after de- livery.
-
Page 53: Formatting The Cf Card
10 Settings Set a checkmark next to Batch approval with user PIN, to perform user authentication upon every program end. The device door will open following program end only after the user PIN has been entered. Set a checkmark next to PIN entry can be skipped, to enable the user PIN query to be skipped. -
Page 54: Additional Drying
10 Settings To start formatting, press the OK button. Confirm the security query with YES. You can remove the CF card as soon as formatting has been completed. Additional drying Selecting additional drying extends the drying time of conventional drying by 50 %. Activating intelligent drying restricts the criteria for ending the drying phase. -
Page 55: Water Supply
10 Settings Intelligent drying is activated in the delivery state. Should you wish to deactivate intelligent drying, proceed as follows: Select the Settings > Device settings > Intelligent drying. The display switches to the corresponding window. If you wish to deactivate intelligent drying, select NO. Confirm with SAVE. -
Page 56: Date And Time
10 Settings Date and time Correct batch documentation requires the correct date and time setting on the steam sterilizer. Ensure that you take into account the clock change in autumn and summer, as this is not adjusted automatically. Once the time has been set on the steam sterilizer, it is very accurate. Set the date and time as follows: Select menu Settings > Date &... -
Page 57: Volume
10 Settings Volume Select Settings > Volume. The display switches to the settings window. Press the pushbutton to adjust the volume. Accept all the settings with SAVE and then leave the menu. View You can choose between classic and modern view. Switching from MODERN to CLASSIC Select the Settings > View menu. - Page 58 10 Settings Tap on a colour box to change the background colour, e.g. blue. The background colour changes immediately and the white frame around the colour box shows which colour has just been selected. Confirm the settings with SAVE. The display changes automatically to the Settings menu.
-
Page 59: Melaconnect
10 Settings MELAconnect MELAconnect serves the monitoring of the decontamination process deployed in your MELAG steam steri- lizer on your mobile end device (e. g. smartphone, tablet). The following requirements must be fulfilled: ü MELAconnect is installed on your mobile end device. -
Page 60: Screensaver
10 Settings Accept all the settings with SAVE and then leave the menu. Screensaver A screensaver can be activated to protect the display in standby operation. This displays a continuous slide show of any pictures. Select images for the slide show Select Settings > Screensaver. -
Page 61: Log Printer Melaprint 42/44
10 Settings Explanation of the slide show options Display duration per Indicates the time in seconds between the display of two separate pictures. image Waiting time Indicates how long the display remains in normal mode before the slide show starts. Activated Setting/unsetting the checkmark activates/deactivates the screensaver. - Page 62 10 Settings Select the Settings > Energy saving mode menu. The display switches to the settings window. Select waiting time 1 directly by touching the minute. The area is displayed light blue. Change the minutes using the pushbuttons. Repeat the step for waiting time 2. Press CONTINUE.
-
Page 63: Maintenance
11 Maintenance 11 Maintenance Servicing intervals Interval Measure Device components Daily Check for soiling, deposits or Chamber inc. door seal and chamber damage sealing face, door lock, mount for the load With every filling of the Check the storage tank for Internal storage tank storage tank soiling and clean it if necessary... - Page 64 11 Maintenance Insert the new door seal into the groove at four points that are evenly distributed over the round blank. Press the seal into the groove in each of the four quadrants. Ensure even distribution. Housing parts Where necessary, clean the housing parts with a neutral fluid cleaner or spirit. Internal storage tank Should you use the internal storage tank for the feed water supply, perform regular checks and cleaning as follows:...
-
Page 65: Avoiding Staining
11 Maintenance Open the water drain tap by turning the knob 1/4 in an anti-clockwise direction. To remove the drain hose, turn the hose connection into the vertical position. Cleaning the feed and waste water side You can remove the cover of the storage tank completely to clean the chambers of the internal storage tank. -
Page 66: Oiling The Door Spindle
11 Maintenance The extent of stain accretion on the instruments is also dependant on the feed water used for steam gen- eration. Oiling the door spindle Oil the door spindle every two months as follows: Clean the spindle with a non-fuzzing cloth. Place two drops of oil in the bushing on the door from the oil can included in the scope of delivery (art. -
Page 67: Pause Times
12 Pause times 12 Pause times Frequency of sterilization Pause times between the individual programs are not necessary, as the sterilization chamber is main- tained permanently at the same temperature. After the end/abort of the drying time and removal of the sterilized equipment, you can load the steam sterilizer again and start a new program. -
Page 68: Transport
12 Pause times Working in Menu Programs & Tests select program Drain and press START. Following notification Draining successful switch off the steam sterilizer, so that water is not fed into the double jacket. Transport CAUTION Danger of injury from incorrect carrying. Lifting and carrying too heavy a load can result in spinal injury. -
Page 69: Malfunctions
Should you be unable to find the relevant event in the table below, or your efforts do not redress the prob- lem, you can contact your nearest stockist or an authorized MELAG customer service provider. To enable us to give the best possible service, please have your steam sterilizer serial number and a detailed de- scription of the malfunction to hand. -
Page 70: Messages
(feed water side from below in the tank) up and down repeatedly to restore its free-movement. When using a MELAG water treatment unit: When using a MELAG water treatment unit: c) The feed water supply in the device has to c) Set the feed water supply in been set to INTERNAL. - Page 71 1. Remove the tank lid from the storage tank. 2. Remove the filling funnel if present. When using a MELAG water treatment unit: 3. Move the float in the right-hand chamber c) The water supply is set to INTERNAL"...
- Page 72 (feed water side from below in the tank) up and down repeatedly to restore its free-movement. When using a MELAG water treatment unit: When using a MELAG water treatment unit: c) The water supply is set to INTERNAL...
- Page 73 13 Malfunctions Incident Possible causes What you can do a) The door was not pushed closed for long a) Close and hold the door with force for c. 3 enough with sufficient force; as a result, the seconds until the spindle engages in the thread has become caught.
- Page 74 13 Malfunctions Incident Possible causes What you can do The sterile filter is soiled/blocked. 1. Check whether the sterile filter suction aperture (centre aperture) on the rear panel of the steam sterilizer is blocked. If yes, replace the sterile filter. 2.
- Page 75 13 Malfunctions Incident Possible causes What you can do a) The outlet hose is kinked or installed a) Check the installation of the outlet hose. sagging. This must be installed without kinking or b) The siphon is blocked or the waste water sagging and at a constant decline.
- Page 76 6. Transfer the log files on the CF card to a computer and re-format the CF card in the steam sterilizer. 7. The CF card is defective or incompatible. It is possible that a non-MELAG CF card has been used. Please note: We recommend using only original MELAG CF cards.
- Page 77 Attempt to format the CF card on the c) The CF card is write-protected. computer. The CF card is defective or incompatible. It is possible that a non-MELAG CF card has been used. Please note: We recommend using only original MELAG CF cards.
- Page 78 13 Malfunctions Incident Possible causes What you can do The connection cable behind the display is Remove the display from the bracket and loose or has a loose contact. check whether the connection cable has been connected to the display correctly and has not suffered damage.
- Page 79 13 Malfunctions Incident Possible causes What you can do see event 102 see event 214 see event 397 see event 102 Overheat on temperature sensor 2 1. Switch off the steam sterilizer and allow it to cool for 15 min. 2.
-
Page 80: Technical Data
14 Technical data 14 Technical data Device type Vacuklav 41 B+ Vacuklav 43 B+ Device dimensions (H x W x D) 56.5 x 46 x 58 cm 56.5 x 46 x 69 cm Empty weight 60 kg 69 kg Operating weight 81 kg 91 kg Sterilization chamber... -
Page 81: Accessories And Spare Parts
15 Accessories and spare parts 15 Accessories and spare parts You can obtain the specified articles and an overview of further accessories from your stockist. Category Article Art. no. Chamber Chamber depth depth 35 cm 45 cm Mounts Mount C "Plus" 81370 81380 for 6 trays or 3 MELAstore-Boxes 100 Mount D "Plus"... - Page 82 15 Accessories and spare parts Category Article Art. no. Spare Parts Oil for door lock bushing 27515...
-
Page 83: Glossary
(German Society German Society for ployee of a customer service provider or stockist Sterile Supply). The DSGV training centres are who has been trained and authorized by MELAG specified in DIN 58946, part 6 as "Requirements of to perform maintenance and installation work on personnel". - Page 84 Glossary maintained in comparison to the temperatures set. a hub/switch. This type of connection corresponds [see EN 13060] with the network connection of the steam sterilizer in the practice network. The crossover cable does not run in parallel between the connectors, rather EN 13060 certain skinners are crossed.
- Page 85 Glossary struments designed for sterilization in a sterilizer in accordance with EN 13060. [see also EN 13060] Sterile barrier system A closed minimum packaging which prevents the entrance of micro-organisms e.g. through sealing bags, sealed and re-usable containers and folded sterilization towels etc.
- Page 86 MELAG Medizintechnik GmbH & Co. KG Geneststraße 6-10 10829 Berlin Germany Email: info@melag.com Web: www.melag.com Original instructions Responsible for content: MELAG Medizintechnik GmbH & Co. KG We reserve the right to technical alterations Your stockist...
Need help?
Do you have a question about the Vacuklav 41 B+ Evolution and is the answer not in the manual?
Questions and answers