Table of Contents
Advertisement
INSTALLATION,
OPERATION
AND MAINTENANCE
MANUAL
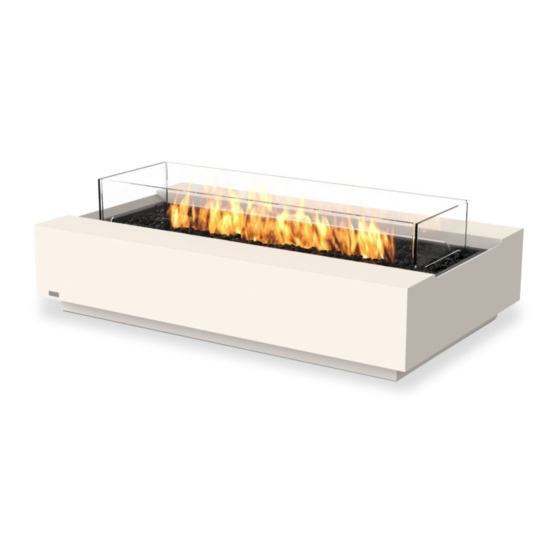
LINEAR GAS BURNER: G37T
ESF.2.B.G37 7.5lbs/3.4kg
INSTALLER: Leave manual with the appliance. CONSUMER: Retain this manual for future reference.
CAUTION
DO NOT DISCARD THIS MANUAL
• Important operating and maintenance instructions
included.
• Read, understand, and follow these instructions for
safe installation and operation.
DANGER
If you smell gas:
• Shut off gas to the appliance.
• Extinguish any open flame.
• If odor continues, keep away from the appliance
and immediately call your gas supplier or fire
department.
• After leaving the area, call your gas supplier or fire
department.
• Failure to follow these instructions could result
in fire, or explosion, which could cause property
damage, personal injury or death.
WARNING
Do not store or use gasoline, or other flammable
vapors and liquids, in the vicinity of this or any
other appliance.
An LP-cylinder not connected for use shall not be
stored in the vicinity of this or any other appliance.
ROUND GAS BURNER: G16T
ESF.2.B.G16 5.5lbs/2.5kg
Improper installation, adjustment, alteration, service,
or maintenance can cause injury or property damage.
Read the installation and maintenance instructions
thoroughly before installing or servicing this equipment.
If the information in these instructions is not followed
exactly, a fire or explosion may result causing
property damage, personal injury, or loss of life.
For outdoor use only. Installation and service must be
performed by a qualified installer, service agency, or
the gas supplier.
WARNING
DANGER
CARBON MONOXIDE HAZARD
This appliance can produce carbon
monoxide which has no odor.
Using it in an enclosed space can kill
you.
Never use this appliance in an
enclosed space such as a camper,
tent, car or home.
WARNING
WARNING
Advertisement
Table of Contents

Related Manuals for EcoSmart G37T

Summary of Contents for EcoSmart G37T
- Page 1 INSTALLATION, OPERATION AND MAINTENANCE MANUAL LINEAR GAS BURNER: G37T ROUND GAS BURNER: G16T ESF.2.B.G37 7.5lbs/3.4kg ESF.2.B.G16 5.5lbs/2.5kg INSTALLER: Leave manual with the appliance. CONSUMER: Retain this manual for future reference. CAUTION WARNING DO NOT DISCARD THIS MANUAL Improper installation, adjustment, alteration, service, •...
- Page 2 DANGER: FLAMMABLE GAS UNDER PRESSURE. LEAKING LP-GAS MAY CAUSE A FIRE OR EXPLOSION IF IGNITED CAUSING SERIOUS BODILY INJURY OR DEATH. CONTACT LP GAS SUPPLIER FOR REPAIRS, OR DISPOSAL OF A CYLINDER OR UNUSED LP-GAS. WARNING: FOR OUTDOOR USE ONLY.* DO NOT USE OR STORE CYLINDER IN A BUILDING, GARAGE, OR ENCLOSED AREA.
- Page 3 7 in. WC (1.74 kPa) PRESSURE MAXIMUM INLET 14 in. WC (3.48 kPa) 10.5 in. WC (2.61 kPa) PRESSURE MINIMUM INLET 8 in. WC (2.00 kPa) 3.5 in. WC (0.87 kPa) PRESSURE © Copyright 2004 - 2020 EcoSmart Inc. All rights reserved. V0120...
-
Page 4: Table Of Contents
ENGLISH Contents Markings Important Safety Information 3 - 4 Clearances Before You Start Gas Hookup 7 - 8 Standard Equipment Received 9 - 10 Burner Assembly - Propane 11 - 13 Burner Assembly - Natural Gas 14 - 17 Installation - Natural Gas Lighting and Operating Troubleshooting 20 - 21... -
Page 5: Markings
This list, which must be updated at least once a year, has grown to include approximately 900 chemicals since it was first published in 1987. © Copyright 2004 - 2020 EcoSmart Inc. All rights reserved. V0120... - Page 6 ENGLISH Important Safety Information Congratulations on your purchase of this decorative gas 1. EXPLOSION/FIRE HAZARD appliance. The appliance you have selected is designed to provide i. Do not operate in an area with oxygen tanks in use or if safe operation, reliability and efficiency. flammable vapors are present.
-
Page 7: Clearances
Clearance measurements are distances from the edge of the flame, a minimum of 24in (610mm) away from the flame at all times. not from the centre. © Copyright 2004 - 2020 EcoSmart Inc. All rights reserved. V0120... -
Page 8: Before You Start
ENGLISH Before You Start Tools and Supplies WARNING Before beginning the installation, be sure that the following tools and supplies are at hand: Asphyxiation Risk • Gloves • This gas appliance is for outdoor use in a well-ventilated space. • Safety Glasses •... -
Page 9: Gas Hookup
(9.5mm) control valve inlet. If substituting for these components, please consult local codes for compliance. Incoming gas line should be piped to the in (9.5mm) connection on the manual shutoff valve. © Copyright 2004 - 2020 EcoSmart Inc. All rights reserved. V0120... - Page 10 ENGLISH Gas Hookup LP Gas Supply • The pressure regulator and hose assembly supplied with LP models must be used. Replacement pressure regulators and hose assemblies must be those specified in this manual. • The LP gas supply cylinder used with LP models must be constructed and marked in accordance with the specifications for LP gas cylinders of the U.S.
-
Page 11: Standard Equipment Received
(ships connected to burner) (to connect to the control panel plate) Locating supplied parts 1. Flex hose 2. Grounding Wire 3. Ignition Wire 4. Thermocouple Wire 5. Silicone Grommet © Copyright 2004 - 2020 EcoSmart Inc. All rights reserved. V0120... - Page 12 4.Place the sparker behind the control panel and insert the sparker box into the control panel plate. 2.Keep the four screws and screw caps; the gas control plate should be directly behind the Ecosmart cover plate. The cover plate is no longer needed.
-
Page 13: Burner Assembly - Propane
Install the grommet by sliding it into the slot, place the burner into its nal position. 9.Pull all hoses and wires from inside the unit out through the control plate cutout. © Copyright 2004 - 2020 EcoSmart Inc. All rights reserved. V0120... - Page 14 ENGLISH Burner Assembly - Propane 10. Ensure you have assembled the control panel, as outlined 14. Plug the Ignitor wire and grounding wire into the back side of the on page 10. sparker. These wires can be plugged into either port on the back side of the sparker box.
- Page 15 25. If no leaks are present on outlet side of gas system, the burner is ready for normal operation. If leaks are present, turn control valve to the OFF position and close main gas supply shut-off valve. Re-tighten all fittings and repeat 24. © Copyright 2004 - 2020 EcoSmart Inc. All rights reserved. V0120...
-
Page 16: Burner Assembly - Natural Gas
ENGLISH Burner Assembly - Natural Gas NATURAL GAS 6. Re-install the low-rate bypass tube. VERY IMPORTANT: Connection of this product to Natural Gas must be completed by a licensed gas plumber / installer only. Do not attempt to install this product with Natural Gas without a licensed installer present. - Page 17 14. Install a flexible gas hose to your natural gas line (supplied by the licensed plumber). 16. Round burners only: (this step does not apply to linear burners) Same as propane edit Same as propane edit © Copyright 2004 - 2020 EcoSmart Inc. All rights reserved. V0120...
- Page 18 ENGLISH Burner Assembly - Natural Gas 17. Pull all hoses and wires from inside the unit out through the control 22. Plug the ignitor wire and grounding wire into the back side of the plate cutout. sparker. These wires can be plugged into either port on the back side of the sparker box.
- Page 19 33. If no leaks are present on outlet side of gas system, the burner is ready for normal operation. If leaks are present, turn control valve to the OFF position and close main gas supply shut-off valve. Re-tighten all fittings and repeat 32. © Copyright 2004 - 2020 EcoSmart Inc. All rights reserved. V0120...
-
Page 20: Installation - Natural Gas
ENGLISH Installation - Natural Gas Natural Gas Supply Installation Guidelines 1. The gas supply line must have enough capacity to supply the burner with its rated gas output. 2. The flame output may be too low if the gas line is too small. 3. -
Page 21: Lighting And Operating
DO NOT ATTEMPT TO LIGHT BURNER IF YOU SMELL GAS. 6. With burner lit and operating, the flame height can be adjusted between low and high at any time. © Copyright 2004 - 2020 EcoSmart Inc. All rights reserved. V0120... -
Page 22: Troubleshooting
ENGLISH Troubleshooting - General Symptom Possible Causes Corrective Actions Check the LP (propane) tank. You may be out of No LP in tank, or NG main not turned on. gas. Or check Natural Gas valve at main. Check the burner orifice for stoppage. Plugged burner orifice. - Page 23 There are various sizes and lengths of whistle- free flex lines available. The licensed plumber doing the installation can help recommend one. © Copyright 2004 - 2020 EcoSmart Inc. All rights reserved. V0120...
-
Page 24: Service And Maintenance
ENGLISH Service and maintenance Although the frequency of appliance servicing and maintenance will WARNING depend on use and the type of installation, a qualified service technician should perform an appliance check-up annually. Annual inspection by qualified technician recommended. Storage of an appliance indoors is permissible only if the cylinder is disconnected and removed from the appliance. -
Page 25: Reference Materials
LP Hose & Regulator (10’) ESF.1.P.H10 LP Low Rate Valve Orifice #52 ESF.2.P.LR.O52 LP Burner Orifice #40 ESF.2.P.O40 NG Low Rate Valve Orifice #43 ESF.2.P.LR.O43 NG Burner Orifice #29 ESF.2.P.O29 Sparker Box ESF.1.P.GSB © Copyright 2004 - 2020 EcoSmart Inc. All rights reserved. V0120... -
Page 26: Warranty
ENGLISH Warranty Limited One Year Warranty MAD Design USA extends the following warranty for GB Series This warranty is limited to the replacement or repair of defective decorative outdoor gas fire products used in the United States of components or workmanship and MAD Design USA may fully discharge America or Canada. - Page 28 MAD Design USA 5875 Green Valley Circle, Suite 100 Culver City CA 90230 T + 1 (888) 590.3335 E info@mad-usa.com V0120 This product is distributed by EcoSmart Inc DBA MAD Design USA.
Need help?
Do you have a question about the G37T and is the answer not in the manual?
Questions and answers