Table of Contents
Advertisement
Quick Links
li nda b | we sim pli fy c onst ru ction
LindabPremum / Premax
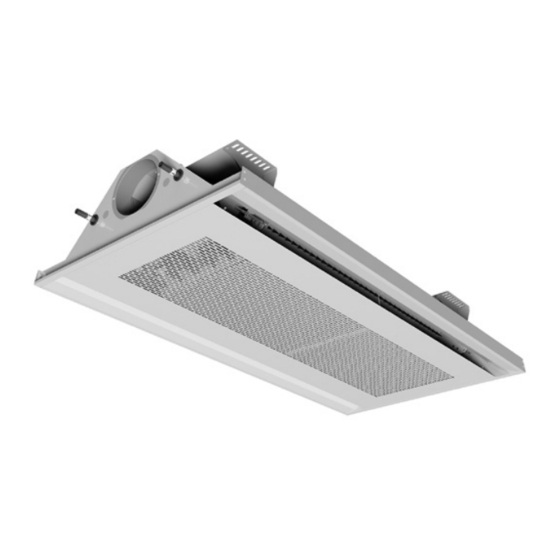
Active chilled beam
Installation instructions
© 04.2020 Lindab Ventilation. All forms of reproduction without written permission are forbidden.
is the registered trademark of Lindab AB.
Lindab's products, systems, product and product group designations are protected by intellectual property rights (IPR).
Advertisement
Table of Contents

Subscribe to Our Youtube Channel
Related Manuals for Lindab Premum Series


Summary of Contents for Lindab Premum Series
- Page 1 Active chilled beam Installation instructions © 04.2020 Lindab Ventilation. All forms of reproduction without written permission are forbidden. is the registered trademark of Lindab AB. Lindab's products, systems, product and product group designations are protected by intellectual property rights (IPR).
-
Page 2: Table Of Contents
7.3 Opening inspection hatch ........33 4.1.7 Possible connections water cooling and 7.4 Lower battery ............33 heating (4-pipe, plus feature) ........ 15 8 Accessories ............34 4.2. Air connections ............16 Lindab reserves the right to make changes without prior notice 2020-04-21... -
Page 3: Symbols
Never use piping connections or edges to lift them, neither when you unpack them nor when you carry them towards Lindab is a supplier of complete water products, but we the construction site. offer also a wide range of accessories which suit perfectly to our water products simplifying your installation work, e.g. -
Page 4: Tools
Lindab should be used If so you will easily find it with our Lindab Quick Selection to ensure, that they are intended for the purpose and are Tool: www.lindqst.com... -
Page 5: Packing, Unpacking Guideline
| we si m pli fy co nstr uct io n Installation instruction Premum/Premax 2.10 Packing, unpacking guideline 10-25 kg ! Lindab reserves the right to make changes without prior notice 2020-04-21... -
Page 6: Product Labelling
Lenhgt 1,2m -2,3m Premum / Premax 1,2m < L ≤ 2,0m Position of JetCone adjustment pins Position JetCones [Pa] 7 8 9 Date [Pa] [l/s] Signature stat Pos. Rev.Premum/Premax-04032016 [l/s] 2011-09-30 Lindab reserves the right to make changes without prior notice 2020-04-21... -
Page 7: Order Code
Project: Project name Product ID : xxxxxxx • Mark: Marking noted on order • Product ID: Product number • Sign: To be signed when checked and commissioned on site Lindab reserves the right to make changes without prior notice 2020-04-21... -
Page 8: Contents Of Order
Condensation sensor and Regula Secura Transformer Order no: Accessories Regula Multi connect card Tectite fittings Presence sensor Go to Regula for details. Order no: 647690, 884050 and 884014 (12mm) Accessories Lindab reserves the right to make changes without prior notice 2020-04-21... -
Page 9: Product Specification
1174 - 3574 (Steps of 100 mm) 9, 11 Z-60 1200 - 3600 (Steps of 100 mm) 1184 - 3584 (Steps of 100 mm) L* = Nominal length ( Order length ). Lindab reserves the right to make changes without prior notice 2020-04-21... -
Page 10: Premum / Premax
(strips and panels) are produced according to pressure class PN10 according to EN 1333: 2006. This means the maximal working pressure for the products at a water temperature of 20°C must not exceed 10 bar. Lindab reserves the right to make changes without prior notice 2020-04-21... -
Page 11: Connections
• Notice! The connection pipes are internally soft-welded, therefore it is not allowed to solder the beam to the pipes. For other than Lindab fittings and valves, please consult the installation guide for the specific fitting for further details on proper installation. -
Page 12: Push On Fitting
• Please refer to the suppliers manual. 4.1.4 Flexible hoses • Our flexible hoses can be used with both push-on and compression fitting. • We recommend to use Tectite fittings, for easier and faster mounting. Lindab reserves the right to make changes without prior notice 2020-04-21... -
Page 13: Additional Lindab Accessories For Water Connections
Lindab TTR and TTV water valves The actuator and valve is taped to the side of the Premum/ The Lindab TTR and TTV valves must be used with all Premax and has to be connected to the correct water- standard application chilled beams, radiant panels and pipe, turning the right way. -
Page 14: Possible Connections Water Cooling (2-Pipe, Standard)
The dimension for all water pipe connections are 12 mm. Besides, the Premax can also be configured with 15 mm pipe connections. Premum/Premax I-60, I-62, X-60 cooling (standard), Y-60, Z-60 (plus features). 1, 2, 3, 4, 7, 8 Lindab reserves the right to make changes without prior notice 2020-04-21... -
Page 15: Possible Connections Water Cooling And Heating (4-Pipe, Plus Feature)
Conn. 1 or 3 Conn. 1 or 3 Conn. 7 or 8 (I-60, I-62, Y-60, Z-60) BACK (I-60, I-62, Y-60, Z-60) Conn. 2 or 4 Conn. 7 or 8 Lindab reserves the right to make changes without prior notice 2020-04-21... -
Page 16: Air Connections
Installation instruction Premum/Premax 4.2 Air connections 4.2.1 Air connection installation The primary air supply must be connected with instructions from a ventilation specialist. Lindab’s chilled beams can beneficially be used together with Lindab’s Safe duct systems. ® We recommend a flexible duct connection, like Lindab DRATMFU-125, to balance out different installation heights or directions between connection and duct and avoid sound will be diverted from piping system to the ceiling. -
Page 17: Electrical Connections
Heating link - S Cooling link - S Supply link - N Supply link - L Supply in - N Supply in 24V - L LINDAB (with protection covers, optional). Lindab reserves the right to make changes without prior notice 2020-04-21... -
Page 18: Example 1: Wiring Scheme With Regula Connect Multi
To other Regula Connect Basic Actuator on/off Heating link_S 24V cooling Cooling link_S Supply link - N Supply link - L Supply in - N Supply in - 24V - L LINDAB Lindab reserves the right to make changes without prior notice 2020-04-21... -
Page 19: Regula Connect On The Beam
4.4.5 Regula Secura on the beam Regula Secura is pre-installed when the beam is ordered with PLUS-features. See Regula Secura for more details. Condensation sensor and Regula Secura Cable to Regula Secura Condensation sensor Lindab reserves the right to make changes without prior notice 2020-04-21... -
Page 20: Installation Of Product
T24/T15 Lay-in-625 ( I-62 ) Water T24/T15 Lay-in-675 ( I-67 ) Water T24/T15 Lay-in- ( I-62 ) Water T24/T15 Lay-in- ( I-67 ) Water not cleanable not cleanable 619x619 669x669 Lindab reserves the right to make changes without prior notice 2020-04-21... -
Page 21: General Installation Principles
5.3.1 Recessed in suspended T-bar ceiling 5.3.5 Recessed in suspended (permanent) 5.3.2 Exposed, sealed to the ceiling ceiling 5.3.6 Recessed in suspended (permanent) 5.3.3 Exposed, free hanging ceiling without cover flanges Lindab reserves the right to make changes without prior notice 2020-04-21... -
Page 22: Preparation For Installation On The Product
1174 - 3574 (Steps of 100 mm) L - 325 Z-60 1200 - 3600 (Steps of 100 mm) 1184 - 3584 (Steps of 100 mm) L* = Nominal length ( Order length ). Lindab reserves the right to make changes without prior notice 2020-04-21... - Page 23 | we si m pli fy co nstr uct io n Installation instruction Premum/Premax Lindab reserves the right to make changes without prior notice 2020-04-21...
-
Page 24: Basics Steps Of Installing The Product
Use professional lifting equipment. Note that this installation procedure shows installation in an existing T-bar ceiling. In a completely new building the beams will often be installed before the ceiling system. Lindab reserves the right to make changes without prior notice 2020-04-21... -
Page 25: Adjustment And Commissioning
Premum seen from below with faceplate open, showing location of the 2 Nozzles with JetCone units and the 4 adjustment pins. Pos. 2 Pos. 7 Pos. 9 Pos. 1 Example showing asymmetrical adjustment pin settings Lindab reserves the right to make changes without prior notice 2020-04-21... - Page 26 MAX. closed nozzle setting - ( 20% air flow. ) MAX. open nozzle setting - ( 100% air flow. ) Example of different air patterns that can be obtained using different pin positions. Lindab reserves the right to make changes without prior notice 2020-04-21...
-
Page 27: Finding Values For Jetcone Pins
6.1.3 Adjusting air flow and pressure with JetCone pins 2011-09-30 Symmetric adjustment Asymmetric adjustment All pins as read in diagram. (=4) Keep average value as read in diagram. (=4) Lindab reserves the right to make changes without prior notice 2020-04-21... - Page 28 [l/s] 2011-09-30 Adjusting air flow and pressure with JetCone pins Symmetric adjustment Asymmetric adjustment All pins as read in diagram. (=3) Keep average value as read in diagram. (=3) Lindab reserves the right to make changes without prior notice 2020-04-21...
-
Page 29: Adjustment Of Air Distribution Profile
Premum/Premax' come as standard with fixed angled JetCone Nozzles. As a plus feature the inlet faceplate comes with the Lindab Airguide system pre-installed and pre-adjusted from factory, offering a readjustable air spread pattern control. The Faceplate include 4 seperate adjustable deflectors. -
Page 30: Measuring Air Pressure And Calculating The Air Flow
6.3.1 Measuring static nozzle pressure and air pressure • To measure the air pressure, a manometer, (analogue or digital) will be needed. Lindab recommends PC410. • Insert the measuring tube onto the specialized measuring nozzle. -
Page 31: Calculating The Actual Air Flow
7 8 9 [l/s] Lenhgt 2,4m -3,0m PREMUM / PREMAX 2,0 m < L < 3,6 m Premum/Premax 2 m < L < 3,6 m Position of JetCone adjustment pins Position [Pa] [l/s] Lindab reserves the right to make changes without prior notice 2020-04-21... -
Page 32: Water Flow Rate
“Water Calculator on www. lindQST.com). Lindab refers to the proportional method, where all beams (panels or facade units) are balanced to the same proportion of the requested water flow rate (for example Broen, www.ballorex.com). Lindab reserves the right to make changes without prior notice... -
Page 33: Maintenance
7.2 Open inlet faceplate 7.3. 7.3 Open inspection hatch Take out end-cap with Lindab safe to get acces to air duct for cleaning. Note that this air duct end-cap can be situated different places on the beam depending on which model and which plus features are chosen. -
Page 34: Accessories
| w e si mp l i fy c on st r u ct i on Installation instruction Premum/Premax 8 Accessories Ask Lindab for the accessories mentioned in this document. Additional accessories (or additional dimensions) are available on request.** Order code Order number... - Page 35 It’s one of few materials that can be recy- cled an infinite number of times without losing any of its properties. That means less carbon emissions in nature and less energy wasted. We simplify construction www.lindab.com Lindab reserves the right to make changes without prior notice 2020-04-21...
Need help?
Do you have a question about the Premum Series and is the answer not in the manual?
Questions and answers