
Related Manuals for ICP DAS USA SI-002

Summary of Contents for ICP DAS USA SI-002
- Page 1 SI-002 User Manual Version 1.1 , Jul 2018 Service and usage information for SI-002...
- Page 2 If you have any problem, please feel free to contact us. You can count on us for quick response. Email: service@icpdas.com Author: Raiden Lan Editor: Janice Hong SI-002 User Manual, version 1.1 Page: 2 Copyright © 2018 ICP DAS Co., Ltd. All Rights Reserved. E-mail: service@icpdas.com...
-
Page 3: Table Of Contents
2.1. Connecting to the Network, PC and Power ............13 2.2. Installing the MicroSIP Utility ................14 2.3. Using SI-002 connects to MicroSIP Utility ............15 3. Web Applications ....................18 3.1. Connect to the SI-002 web site ................18 3.1.1. - Page 4 3.2.6. RFID Config ....................26 3.2.7. SIP Config ....................28 3.2.8. FTP Config ....................29 3.2.9. Information ....................30 SI-002 User Manual, version 1.1 Page: 4 Copyright © 2018 ICP DAS Co., Ltd. All Rights Reserved. E-mail: service@icpdas.com...
-
Page 5: Introduction
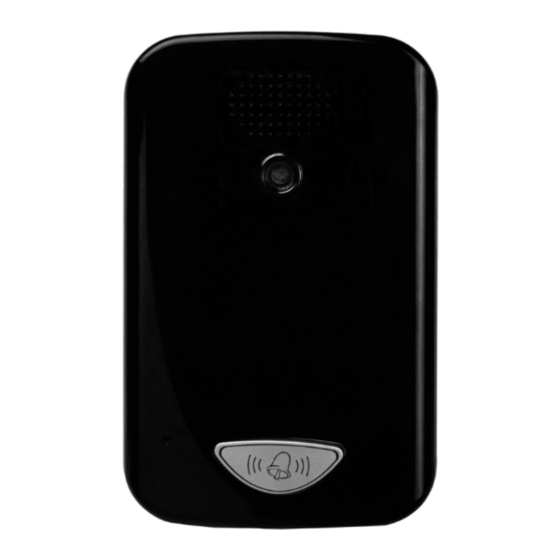
1. Introduction SI-002 is a video intercom door station that supports VoIP technology, SIP communication protocol and RFID induction. With the HA-401 product, households can see visitors' image and have a video conversation with them when the doorbell ringing. After the identity confirmation, they can open the door remotely. -
Page 6: Features
Digital Input Channels Input Type Dry contact (Source) Off Voltage Level: Open Dry Contact Level On Voltage Level: Close to GND SI-002 User Manual, version 1.1 Page: 6 Copyright © 2018 ICP DAS Co., Ltd. All Rights Reserved. E-mail: service@icpdas.com... - Page 7 Power Supply Input Range 12 VDC ~ 48 VDC Power Consumption 1.68 W (70 mA @ 24 VDC) Protection Reverse Polarity Protection SI-002 User Manual, version 1.1 Page: 7 Copyright © 2018 ICP DAS Co., Ltd. All Rights Reserved. E-mail: service@icpdas.com...
-
Page 8: Dio Wiring Connection
1.3. DIO Wiring Connection SI-002 User Manual, version 1.1 Page: 8 Copyright © 2018 ICP DAS Co., Ltd. All Rights Reserved. E-mail: service@icpdas.com... -
Page 9: Overview
LED Indicator is used to display the dialing status as shown below. LED Action Current status High brightness Online Low brightness Offline SI-002 User Manual, version 1.1 Page: 9 Copyright © 2018 ICP DAS Co., Ltd. All Rights Reserved. E-mail: service@icpdas.com... -
Page 10: Back Panel
Set network interface to DHCP mode Set network interface to static IP mode. IP: 192.168.72.30 Mask: 255.255.0.0 Gateway: 192.168.1.1 FW Update Mode Recover system settings Other SI-002 User Manual, version 1.1 Page: 10 Copyright © 2018 ICP DAS Co., Ltd. All Rights Reserved. E-mail: service@icpdas.com... - Page 11 GND of Power Supply Digital Input CH0 Digital Input CH1 DI.GND Digital Input GND RL.NO Relay Normally-Open RL.COM Relay Common RL.NC Relay Normally-Closed SI-002 User Manual, version 1.1 Page: 11 Copyright © 2018 ICP DAS Co., Ltd. All Rights Reserved. E-mail: service@icpdas.com...
-
Page 12: Dimensions
1.5. Dimensions All dimensions are in millimeters. SI-002 User Manual, version 1.1 Page: 12 Copyright © 2018 ICP DAS Co., Ltd. All Rights Reserved. E-mail: service@icpdas.com... -
Page 13: Getting Started
SI-002. 2.1. Connecting to the Network, PC and Power The SI-002 is equipped with an RJ-45 Ethernet port for connection to an Ethernet hub/switch and PC. Please set RSW of SI-002 and PC Network as below. -
Page 14: Installing The Microsip Utility
2.2. Installing the MicroSIP Utility The MicroSIP Utility is an open source portable SIP softphone based on PJSIP stack for Windows OS. Users can use this Utility to to test the network connection status of SI-002. Step 1: Get the MicroSIP Utility tool The MicroSIP Utility can be obtained from below link: http://www.microsip.org/downloads... -
Page 15: Using Si-002 Connects To Microsip Utility
2.3. Using SI-002 connects to MicroSIP Utility When RSW of SI-002 set to “B”, SI-002 will use a default IP settings to connect PC. The default IP settings are as follows: SI-002 IP Address 192.168.72.30 Subnet Mask 255.255.0.0 PC side IP Address 192.168.255.1 (See... - Page 16 Click the Menu button, and click Settings. b. Select the Audio Codec such as PCMA (G.711A), PCMU (G.711U), and GSM. c. Select the Video Codec (i.e., H.263). SI-002 support the following audio codec: SI-002 Audio Codec: G.711 A-law, G.711 u-law, G.722 16 kHz, GSM 8 kHz,...
- Page 17 Step 3: Making a Phone call by SI-002 Press the call button of SI-002 to call MicroSIP and then the MicroSIP will display the Incoming Call dialog box. Click the "Answer with video" button of MicroSIP to answer a call.
-
Page 18: Web Applications
3. Web Applications The SI-002 contains an advanced web configuring system that provides users to configure SI-002 through a standard web browser, e.g., Google Chrome, Mozilla Firefox, IE, and so on. 3.1. Connect to the SI-002 web site 3.1.1. Installing the eSearch Utility Users can get the current IP address of SI-002 by eSearch (or VxComm) Utility. - Page 19 Step 3: Click the “Search Servers” button After clicking the "Search Servers” button, all the searched SI-002 will be displayed on the list. Next, users can view the IP settings of SI-002. SI-002 User Manual, version 1.1 Page: 19 Copyright © 2018 ICP DAS Co., Ltd. All Rights Reserved. E-mail: service@icpdas.com...
-
Page 20: Connecting
Users can log in to the SI-002 web site from any computer by web browser. Before configuring SI-002 with a web browser, make sure the IP addresses of the SI-002 and the PC are in the same sub network, as shown below. - Page 21 Step 3: Connect to SI-002 After PC connect to SI-002, it will display the login screen and it means communication has been established. SI-002 User Manual, version 1.1 Page: 21 Copyright © 2018 ICP DAS Co., Ltd. All Rights Reserved. E-mail: service@icpdas.com...
-
Page 22: Web Configuration
3.2. Web Configuration When the browser connects with the SI-002, the first page will display, as shown below. The left side is the function menu and the other side is the setup page. Function Menu Setup Page 3.2.1. Function menu The function menu has below function. -
Page 23: Login
The user login and logout interface. Login Enter the username and password (defaults: root/icpdas) to log in. Logout Click the “Exit” button to log out. SI-002 User Manual, version 1.1 Page: 23 Copyright © 2018 ICP DAS Co., Ltd. All Rights Reserved. E-mail: service@icpdas.com... -
Page 24: User Account
3.2.3. User Account The User Account setting is used to limit which user can configure the SI-002. Only the Super User (i.e., Account 1, User Name = "root", Password = "icpdas") can edit this page. All the default user name and password are shown in the diagram below. Users can click the “Save Setting”... -
Page 25: Standard Config
3.2.4. Standard Config Users can set the network settings for SI-002. Click the “Save Setting” button to save the changes. Remember to click the “Reboot” button to apply the new settings. Network a. Intercom number (IP): Users can set the Intercom number that the SI-002 wants to connect to. The format can be an IP address (e.g., 192.168.255.1) or an Intercom number with PBX IP (e.g.,... -
Page 26: Audio Config
3.2.5. Audio Config Users can set the output or input volume for SI-002. Click the “Save Setting” button to save the changes. Remember to click the “Reboot” button to apply the new settings. Output Volume: 0 ~ 10, the maximum output volume is 10. - Page 27 Users can enter Tag ID of RFID in the RFID White list and click the “Save” button to save the settings. When SI-002 detects the correct Tag ID, the status of the Relay will be triggered from OFF to ON.
-
Page 28: Sip Config
3.2.7. SIP Config Users can turn on the camera to take a photo or configure the dialing settings for SI-002, and click the “Save” button to save the settings.. Remember to click the “Reboot” button to apply the new settings. -
Page 29: Ftp Config
Users can upload the photo to WISE-5231 via FTP. Remember to click the “Reboot” button to apply the new settings. Function Description To enable the FTP functions. After tapping the RFID card on SI-002, it will Publish to FTP upload an image shot to WISE-5231. OFF:... -
Page 30: Information
Show OS version of SI-002. Firmware Version: Show application program version. Current IP: Show the current IP address of SI-002. Subnet Mask: Show the current subnet mask of SI-002. Mac Address: Show the current Mac address of SI-002.
Need help?
Do you have a question about the SI-002 and is the answer not in the manual?
Questions and answers