Table of Contents

Subscribe to Our Youtube Channel
Related Manuals for Kalorik GR 45386


Summary of Contents for Kalorik GR 45386
- Page 1 INDOOR SMOKELESS GRILL PARRILLA SIN HUMO PARA INTERIORES GRILL D'INTÉRIEUR SANS FUMÉE EN……..2 ES……...15 FR……...29 GR 45386 120V~60Hz 1500W (12.5A) www.KALORIK.com GR 45386 – 191217...
-
Page 2: Parts And Accessories
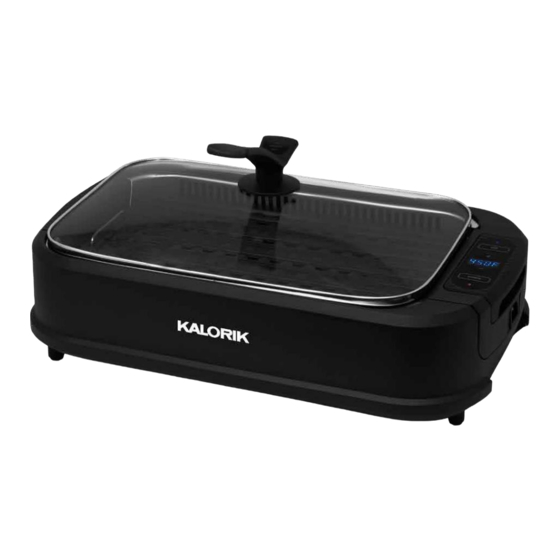
PARTS & ACCESSORIES 1. Glass lid 6. Base unit 2. Nonstick grill plate 7. Electric fan (removable) 3. Heating element with Snap-off fan cover detachable cord 4. Drip tray 5. Collection pan / water tray www.KALORIK.com GR 45386 – 191217... -
Page 3: Lid Handle Assembly
LID HANDLE ASSEMBLY A. Handle E. Plastic washer B. Handle base F. Spring washer C. Silicone gasket G. Metal washer D. Glass lid H. Screw 1. Attach the Silicone Gasket under the Handle Base, as shown below. www.KALORIK.com GR 45386 – 191217... -
Page 4: Important Safeguards
When cooking, do not place the appliance against a wall or against other appliances. Leave at least 5 inches free space on the back, sides and above the smokeless grill. Do not place anything on top of the appliance. www.KALORIK.com GR 45386 – 191217... - Page 5 26. The glass lid and handle get very hot. Always use oven mitts. NOTE: This unit has been designed and engineered to reduce the smoke and visible vapors usually associated with grilling to a minimum. Delivers outdoor results indoors. SAVE THESE INSTRUCTIONS www.KALORIK.com GR 45386 – 191217...
-
Page 6: Short Cord Instructions
460°F, while the removable drip tray collects excess grease for healthier grilling. The removable parts allow for easy cleaning: simply place the grill plate, drip tray, collection plate or glass lid in the dishwasher! www.KALORIK.com GR 45386 – 191217... -
Page 7: Using The Control Panel
5. Once the temperature is reached, the LED light below the Power button becomes a solid red. 6. When you are finished grilling, press the Power and Fan Buttons to shut down the Unit. Unplug the Power www.KALORIK.com GR 45386 – 191217... - Page 8 Turn the food as needed. Note: Cooking with the lid on the smokeless grill is recommended because it maintains the cooking temperature, seals in flavor, and prevents splatter. www.KALORIK.com GR 45386 – 191217...
- Page 9 When returning the fan to the base, make sure to insert the two-prong connection into the receptacle. CAUTION: Unplug appliance before removing fan. www.KALORIK.com GR 45386 – 191217...
-
Page 10: Tips For Use
Food Time Food Time Vegetables 8 -15 min Fish Fillet 12 -18 min Corn on the 14 -16 min Whole Fish 15 -16 min www.KALORIK.com GR 45386 – 191217... -
Page 11: Cleaning And Maintenance
For more thorough cleaning of the base unit, remove the electric fan. • Always be sure to wash the smokeless grill surface after each use to remove any grease that may have accumulated. To keep grease www.KALORIK.com GR 45386 – 191217... -
Page 12: Troubleshooting
• Disassemble the appliance and reattach the fan component. Electric fan is not Assembly may not be Follow instructions in the working fully connected removing the electric fan section. www.KALORIK.com GR 45386 – 191217... -
Page 13: Warranty
You can also fill out this warranty card online, at the following address: www.KALORIK.com This KALORIK product is warranted in the U.S.A. and in Canada for 1 year from the date of purchase against defects in material and workmanship. - Page 14 If this is the case, bring the product, or send it, postage prepaid by the user (all Kalorik customers are responsible for the initial shipment back to the warranty center), along with proof of purchase and a return authorization number indicated on the outer package, given by our Customer Service Representatives.
-
Page 15: Partes Y Accesorios
2. Placa antiadherente de la colector/bandeja para parrilla agua 3. Elemento calentador con 6. Base de la unidad cable de alimentación 7. Ventilador eléctrico desmontable (extraíble) 4. Bandeja de goteo 8. Cubierta del ventilator extraíble www.KALORIK.com GR 45386 – 191217... - Page 16 F. Arandela de resorte C. Junta de silicona G. Arandela de metal D. Tapa de vidrio H. Tornillo 1. Coloque la junta de silicona debajo de la base del mango, como se muestra a continuación. www.KALORIK.com GR 45386 – 191217...
-
Page 17: Salvaguardias Importantes
Los niños no deben utilizar este aparato. Al cocinar, no coloque el aparato contra una pared o contra otros aparatos. Deje al menos 5 pulgadas de espacio libre en la parte www.KALORIK.com GR 45386 – 191217... - Page 18 26. La tapa de vidrio y el mango se calientan mucho. Siempre use guantes para horno. NOTA: Esta unidad ha sido ideada y diseñada para reducir al mínimo el humo y los vapores que generalmente se asocian al uso de la parrilla. www.KALORIK.com GR 45386 – 191217...
- Page 19 460°F. Las piezas extraíbles permiten una fácil limpieza: simplemente coloque la placa de la parrilla, la bandeja de goteo, el recipiente colector o la tapa de vidrio en el lavavajillas. www.KALORIK.com GR 45386 – 191217...
-
Page 20: Uso Del Panel De Control
180°F a 460°F. NOTA: Puede aumentar o disminuir la temperatura de cocción en cualquier momento durante el proceso de cocción. Para mantener los alimentos calientes, fije la temperatura entre 220°F y 250°F. www.KALORIK.com GR 45386 – 191217... -
Page 21: Antes Del Primer Uso
4. Asegúrese de que la bandeja de goteo se deslice en la base del aparato. 5. Deje un amplio espacio de aire alrededor del aparato para facilitar el flujo de aire. 6. Enchufe el cable de alimentación a una toma de corriente dedicado. www.KALORIK.com GR 45386 – 191217... - Page 22 Parrilla Sin Humo. Cuando vuelva a colocar el ventilador en la base, inserte la conexión de dos clavijas en el receptáculo. PRECAUCIÓN: Desenchufe el aparato antes de quitar el ventilador. www.KALORIK.com GR 45386 – 191217...
-
Page 23: Consejos De Uso
Proteja la encimera según sea necesario. • Para evitar que se raye el revestimiento, use solo utensilios no metálicos. No corte alimentos en la placa de la parrilla con www.KALORIK.com GR 45386 – 191217... -
Page 24: Sugerencias Para Asar A La Parrilla
• mejores resultados, no intente asar los alimentos cuando aún están congelados y asegúrese de que la carne preparada no sea demasiado gruesa (aproximadamente 0.5 pulg./1.5 cm), lo que ayuda a mantener la carne jugosa. www.KALORIK.com GR 45386 – 191217... -
Page 25: Limpieza Y Mantenimiento
(4 partes de agua, 1 parte de vinagre). Los residuos de alimentos persistentes y apelmazados se pueden eliminar con un raspador de cerámica en la superficie del vidrio. www.KALORIK.com GR 45386 – 191217... -
Page 26: Solución De Problemas
• Desmonte el aparato y vuelva El ensamblaje a colocar el componente del El ventilador puede no estar ventilador. Siga las eléctrico no completamente instrucciones en la sección de funciona. conectado extracción del ventilador eléctrico. www.KALORIK.com GR 45386 – 191217... - Page 27 KALORIK, o por un uso con fines comerciales. No existe garantía por las partes de cristal, jarras de cristal, filtros, cestos, cuchillas y accesorios en general.
- Page 28 Team International Group of America Inc. 16175 NW 49th Avenue Miami Gardens, FL 33014 USA O llame gratuitamente (U.S.A.) al +1 888-521-TEAM / +1 888-KALORIK Las cartas se aceptan solamente en la dirección anteriormente mencionada. Los envíos y paquetes que no tengan número de autorización de devolución serán rechazados.
-
Page 29: Pièces Et Accessoires
PIÈCES ET ACCESSOIRES 1. Couvercle en verre 2. Plaque de cuisson antiadhésive 3. Élément chauffant avec cordon détachable 4. Bac égouttoir 5. Bac récupérateur / bac à eau 6. Base Ventilateur électrique (amovible) Couvercle du ventilateur www.KALORIK.com GR 45386 – 191217... - Page 30 B. Base de la poignée F. Rondelle ressort C. Joint silicone G. Rondelle en métal D. Couvercle en verre H. Vis 1. Attacher le joint silicone sous la base de la poignée, comme illustré ci-dessous. www.KALORIK.com GR 45386 – 191217...
-
Page 31: Précautions Importantes
Laisser un espace libre de 5 pouces minimum à l'arrière de l'appareil, sur les côtés et au-dessus du gril sans fumée. Ne rien mettre sur l'appareil. Ne pas utiliser cet appareil si la fiche, le câble d'alimentation ou l'appareil lui-même sont endommagés. www.KALORIK.com GR 45386 – 191217... - Page 32 REMARQUE : Ce produit a été conçu pour réduire au maximum les émissions de fumée et de vapeurs visibles normalement associées à la cuisson au gril. Pour des résultats de cuisson en extérieur à l'intérieur. CONSERVER CES INSTRUCTIONS www.KALORIK.com GR 45386 – 191217...
- Page 33 égouttoir recueille l'excès de graisse pour une cuisson plus saine. Les pièces amovibles permettent un nettoyage facile : il suffit de mettre au lave-vaisselle la plaque de cuisson, le bac égouttoir, le bac récupérateur ou le couvercle en verre ! www.KALORIK.com GR 45386 – 191217...
-
Page 34: Utiliser Le Panneau De Commande
80°C à 240°C. REMARQUE : La température de cuisson peut être augmentée ou réduite à tout moment pendant le processus de cuisson. Pour garder les aliments au chaud, régler la température entre 105°C et 120°C. www.KALORIK.com GR 45386 – 191217... -
Page 35: Avant La Première Utilisation
7. Pour un démarrage avec un gril froid, préchauffer le gril pendant 4 - 6 min. sur le réglage moyen ou très chaud. 8. Préparer et assaisonner les aliments selon votre recette préférée. Vaporiser ou badigeonner la surface de cuisson de la plaque avec de l'huile de cuisson. www.KALORIK.com GR 45386 – 191217... - Page 36 à 2 broches dans la base du gril sans fumée. En remettant le ventilateur dans la base, s'assurer d'insérer la connexion à 2 broches dans le réceptacle. ATTENTION : Débrancher l'appareil avant de retirer le ventilateur. www.KALORIK.com GR 45386 – 191217...
-
Page 37: Conseils D'utilisation
Le tableau ci-dessous répertorie quelques aliments pouvant être cuits sur le gril, ainsi que des suggestions de temps de cuisson pour chaque aliment. Ne pas oublier que les temps de cuisson peuvent varier selon le www.KALORIK.com GR 45386 – 191217... - Page 38 éviter cela, faire quelques incisions longitudinales dans la peau. • Lors de la préparation de brochettes, faire tremper dans l'eau les brochettes en bambou ou en bois afin d'éviter qu'elles brûlent lors de la cuisson. Ne pas utiliser de brochettes en métal. www.KALORIK.com GR 45386 – 191217...
-
Page 39: Nettoyage Et Entretien
Des résidus alimentaires tenaces, incrustés peuvent être éliminés en utilisant un grattoir en céramique sur la surface en verre. • Remonter l'appareil. REMARQUE : Tout autre entretien doit être effectué par un représentant d'entretien agréé. www.KALORIK.com GR 45386 – 191217... -
Page 40: Dépannage
être être ajustés cuits L'assemblage n'est • Démonter l'appareil et fixer à Le ventilateur peut-être pas nouveau le ventilateur. Suivre électrique ne complètement les instructions à la section fonctionne pas connecté retirer le ventilateur électrique. www.KALORIK.com GR 45386 – 191217... -
Page 41: Garantie
Vous pouvez aussi remplir cette carte de garantie en ligne à l’adresse suivante : www.KALORIK.com. A compter de la date d’achat, ce produit KALORIK est garanti un an, sur les territoires des Etats-Unis et du Canada, contre les défauts matériels et de fabrication. - Page 42 KALORIK agrée (visitez notre site internet www.KALORIK.com ou appelez notre département Service Clientèle pour obtenir l’adresse du service après-vente KALORIK agréé).
- Page 43 NOTES www.KALORIK.com GR 45386 – 191217...
- Page 44 16175 NW 49th Avenue Miami Gardens, FL 33014 USA Model GR 45386 Toll Free: +1 888-521-TEAM / +1 888-KALORIK www.KALORIK.com User manual content and recipes courtesy of Team International Group – Do not reproduce without consent of the authors - All rights reserved.
Need help?
Do you have a question about the GR 45386 and is the answer not in the manual?
Questions and answers
WHERE can I get a replacement handle for the lid?
You can get a replacement lid handle for the Kalorik GR 45386 by emailing service@kalorik.com for assistance with the purchase.
This answer is automatically generated