HellermannTyton AT2000 CPK bench mount kit Operating Instructions Manual
Hide thumbs
Also See for AT2000 CPK bench mount kit:
- Operating instructions manual (32 pages) ,
- Automation instructions (72 pages)

Related Manuals for HellermannTyton AT2000 CPK bench mount kit


Summary of Contents for HellermannTyton AT2000 CPK bench mount kit
- Page 1 B e n c h M o u n t K i t A T 2 0 0 0 C P K O pe r a t in g In s tru c ti on s Be tr i e b s a n l e it u n g...
- Page 2 English Translation of the original instructions Deutsch Originalanleitung...
-
Page 3: Table Of Contents
Translation of the original operating instructions Installation instructions Inhaltsverzeichnis Installation and initial operation . . . . . . . . .7 Required installation tools ..8 User information . -
Page 4: User Information
No part of this manual may be reproduced in any form without the written consent of HellermannTyton GmbH 1 .8 Applicable documents (called HellermannTyton in the following), nor may it be f The operating instructions for the Autotool 2000 CPK processed, duplicated or distributed using must be observed. -
Page 5: Safety Instructions
Check replaced components for proper function. CAUTION f Only use accessories that are approved by Possible slight injuries. HellermannTyton. NOTE Possible damage to the bench mount, the tool, the cable bundle, or the surroundings. Operating Instructions • Bench Mount Kit AT2000 CPK • 03/2020 • 106-29020... -
Page 6: Intended Use
Use of spare parts and accessories that were not tested and approved by HellermannTyton Repairs and safety inspections may only be performed by a service technician from HellermannTyton or a service • Installation on an unsuitable base. technician authorised by HellermannTyton. -
Page 7: Layout And Function
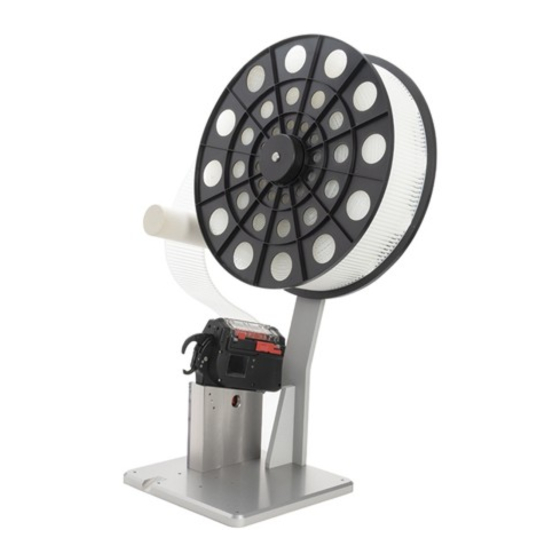
Layout and function 3 Layout and function 3 .3 Function The AT2000 CPK bench mount kit makes it possible to 3 .1 Layout fasten the Autotool 2000 CPK tool in an upright position. The upright position enables flexible and trouble-free work with the Autotool 2000 CPK tool at the workplace. The operator can feed the cable bundle into the tool and trigger the tying procedure with the foot switch supplied, without holding the tool in their hand and therefore... -
Page 8: Required Installation Tools
Installation and initial operation 5 .1 Required installation tools 1 Install the column f Perform the necessary installation work with the f Put the column on the base plate following installation tools: f Insert the three fixing screws through the base •... -
Page 9: Installing The Bench Mount Kit At The Workplace
Installation and initial operation 5 .4 Installing the bench mount kit at the workplace 5 .5 Using the tool The screws for fastening the base plate to the base surface are not included in the scope of delivery. The operator must use screws that are suitable for the base surface. -
Page 10: Connecting The Tool
Installation and initial operation 5 .6 Connecting the tool 5 .9 Commissioning before every use 1 Connect the tool to the power supply unit. Commissioning before every use is important for safety and comprises a check before and after operation. f Observe the operating instructions for the Autotool 2000 CPK. -
Page 11: Operation
Operation 6 Operation 7 Troubleshooting The AT2000 CPK bench mount kit can only be operated The following overview helps find possible faults and their with the Autotool 2000 CPK tool. causes and perform measures to rectify the faults. 6 .1 Switching the tool on and off Fault Cause Remedy... -
Page 12: Maintenance
Taking out of operation 8 .2 Maintenance 9 .1 Taking the bench mount kit out of operation 1 Disconnect the power supply unit. 8 .2 .1 Important information 2 Remove the cabling. The bench mount must be regularly maintained to ensure 3 Remove the tool from the tool bracket. -
Page 13: Technical Data
Technical data 11 Technical data 11 .1 Bench mount kit Dimensions of the bench mount (all specifications in mm) Operating Instructions • Bench Mount Kit AT2000 CPK • 03/2020 • 106-29020... -
Page 14: Tool Mount
12 Customer service and spare parts If you have any questions or suggestions, please contact HellermannTyton. The contact data is listed at the end of this documentation. Dimensions of the base plate (all specifications in mm) Operating Instructions • Bench Mount Kit AT2000 CPK • 03/2020 • 106-29020... - Page 15 Originalbetriebsanleitung Montageanleitung Inhaltsverzeichnis Werkzeug einsetzen ... . . 26 Werkzeug anschließen ... 27 Benutzerhinweise . . . . . . . . . . . . . . . . . . . .21 Abfallbehälter montieren .
-
Page 16: Benutzerhinweise
• Störungsbeseitigung irgendeiner Form ohne die schriftliche Genehmigung der HellermannTyton GmbH (nachfolgend 1 .8 Mitgeltende Unterlagen HellermannTyton genannt) reproduziert oder unter f Die Betriebsanleitung des Autotool 2000 CPK ist zu Verwendung elektronischer Systeme verarbeitet, beachten. vervielfältigt oder verbreitet werden. 1 .9 Allgemeine Angaben Handlungen, die den o. -
Page 17: Sicherheitshinweise
VORSICHT f Ersetzte Bauteile auf deren Funktion überprüfen. f Ausschließlich Zubehör verwenden, dass von Mögliche leichte Verletzungen. HellermannTyton freigegeben ist. HINWEIS Mögliche Schäden an der Tischvorrichtung, dem Werkzeug, dem Bündelgut oder in der Umgebung. Betriebsanleitung • Tischvorrichtung AT2000 CPK • 03/2020 • 106-29020... -
Page 18: Bestimmungsgemäße Verwendung
Einsatz von Ersatzteilen und Zubehör, welche nicht Reparaturen und sicherheitstechnische von HellermannTyton geprüft und freigegeben Überprüfungen dürfen nur durch einen wurden Servicetechniker von HellermannTyton oder einem von HellermannTyton autorisierten Servicetechniker • Montage auf einen nicht geeigneten Untergrund. durchgeführt werden. 2 .7 Pflichten des Betreibers Der Betreiber muss: •... -
Page 19: Aufbau Und Funktion
Aufbau und Funktion 3 Aufbau und Funktion 3 .3 Funktion Die Tischvorrichtung AT2000 CPK ermöglicht eine 3 .1 Aufbau Fixierung des Werkzeugs Autotool 2000 CPK in aufrechter Position. Die aufrechte Position ermöglicht ein störungsfreies Arbeiten mit dem Werkzeug Autotool 2000 CPK am Arbeitsplatz. Der Bediener kann das Bündelgut dem Werkzeug zuführen und den Abbindevorgang mit dem mitgelieferten Fußschalter auslösen, ohne das Werkzeug in der Hand halten und damit das Gewicht... -
Page 20: Montage Und Inbetriebnahme
Montage und Inbetriebnahme 5 .1 Benötigtes Montagewerkzeug 1 Die Säule montieren. f Nötige Montagearbeiten mit den folgenden f Die Säule auf die Grundplatte setzen. Montagewerkzeugen durchführen: f Die drei Befestigungsschrauben durch die • Gabelschlüssel (SW 13) Grundplatte in die Säule stecken und handfest anziehen. -
Page 21: Tischvorrichtung Am Arbeitsplatz
Montage und Inbetriebnahme 5 .4 Tischvorrichtung am Arbeitsplatz installieren 5 .5 Werkzeug einsetzen Die Schrauben zur Befestigung der Grundplatte auf dem Untergrund sind nicht Teil des Lieferumfangs. Der Betreiber muss je nach Untergrund passende Schrauben verwenden. Tischvorrichtung am Untergrund fixieren 1 Schrauben 2 Grundplatte Werkzeug einsetzen... -
Page 22: Werkzeug Anschließen
Montage und Inbetriebnahme 5 .6 Werkzeug anschließen 4 Die Bandkette über die Umlenkrolle Werkzeug führen. 1 Das Werkzeug an das Netzgerät anschließen. f Darauf achten, dass die Bandkette nicht verdreht. f Die Betriebsanleitung des Autotool 2000 CPK beachten. ; Die Kabelbinderspule ist eingesetzt. 2 Den Fußschalter an das Netzgerät anschließen. -
Page 23: Bedienung
Bedienung 6 Bedienung 7 Fehlerbehebung Die Tischvorrichtung AT2000 CPK kann nur zusammen Die nachfolgende Übersicht hilft, mögliche Störungen mit dem Werkzeug Autotool 2000 CPK bedient werden. und deren Ursachen zu ermitteln und Maßnahmen zur Fehlerbeseitigung durchzuführen. 6 .1 Werkzeug ein- und ausschalten Störung Ursache Behebung f Die Betriebsanleitung des Werkzeuges Autotool 2000 CPK beachten. -
Page 24: Wartung
Außerbetriebnahme 8 .2 Wartung 9 .1 Tischvorrichtung außer Betrieb nehmen 1 Das Netzgerät stromlos schalten. 8 .2 .1 Wichtige Hinweise 2 Die Verkabelung entfernen. Um die sichere Funktion der Tischvorrichtung zu 3 Das Werkzeug aus dem Werkzeughalter entnehmen. gewährleisten, muss diese einer regelmäßigen Wartung unterzogen werden. -
Page 25: Technische Daten
Technische Daten 11 Technische Daten 11 .1 Tischvorrichtung Maße der Tischvorrichtung (Alle Angaben in mm) Betriebsanleitung • Tischvorrichtung AT2000 CPK • 03/2020 • 106-29020... -
Page 26: Werkzeugaufnahme
Werkzeug 12 Kundenservice und Ersatzteile Bei Fragen oder Anregungen wenden Sie sich bitte an HellermannTyton. Die Kontaktdaten sind am Ende dieser Dokumentation aufgeführt. Maße der Grundplatte (Alle Angaben in mm) Betriebsanleitung • Tischvorrichtung AT2000 CPK • 03/2020 • 106-29020... - Page 28 HellermannTyton operates globally in 36 countries Europe Asia-Pacifi c HellermannTyton B.V. – HellermannTyton Ltd – UK Belgium/Netherlands Sharston Green Business Park HellermannTyton GmbH – Austria HellermannTyton – Australia Vanadiumweg 11-C 1 Robeson Way Rennbahnweg 65 Tel: +61 2 9525 2133...
Need help?
Do you have a question about the AT2000 CPK bench mount kit and is the answer not in the manual?
Questions and answers